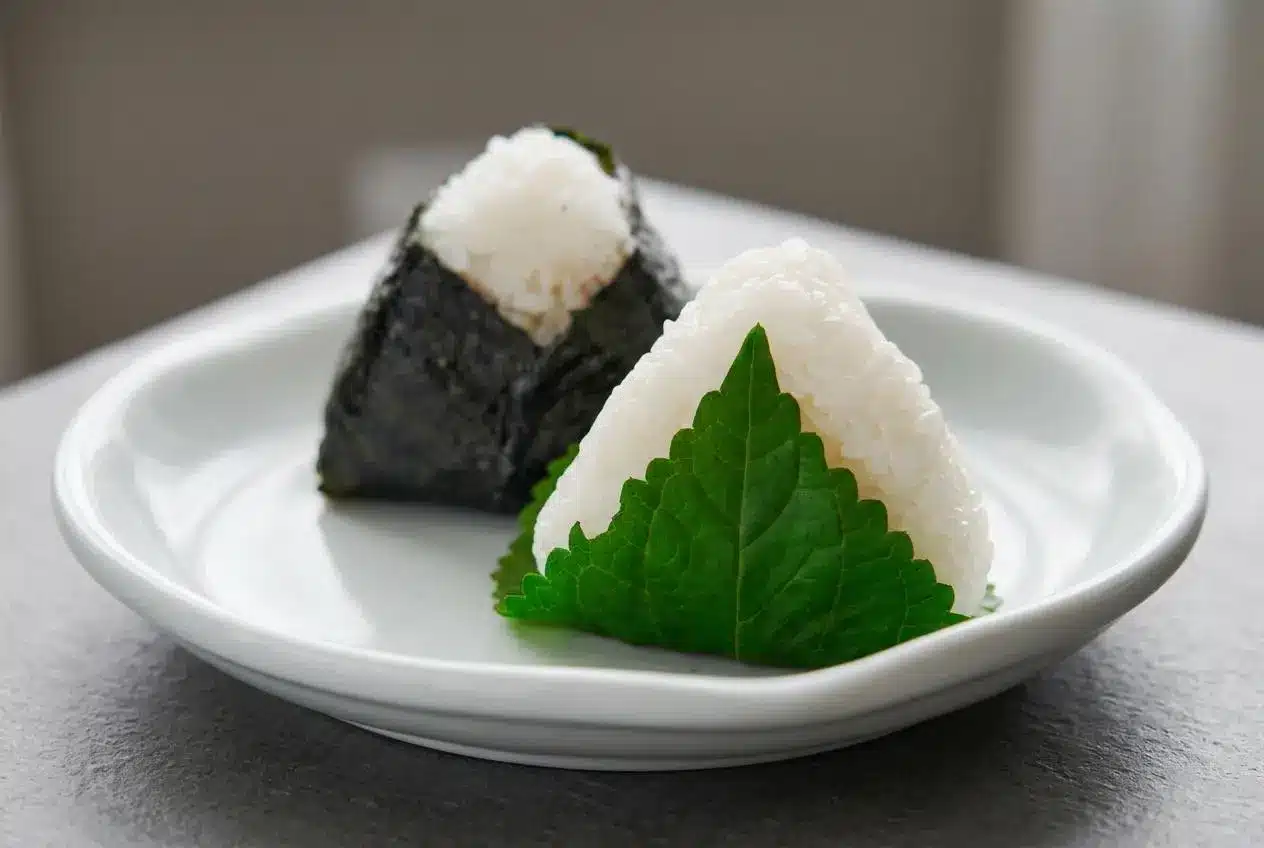
Tuna mayo onigiri are Japanese rice balls with fluffy short-grain rice surrounding creamy, savory tuna filling. Mix drained canned tuna with Japanese mayonnaise and soy sauce, enclose it in warm rice, and gently shape with damp, salted hands before wrapping in leaves or nori.
Each bite of tuna mayo onigiri balances tender rice with a rich center. Also called tsunamayo, this filling gets its savory depth from soy sauce and its creamy texture from Japanese mayonnaise.
The triangles don’t need perfect corners to taste good. What matters is keeping the rice supple and closing it around the filling without squeezing out all the air. A light touch makes the difference.
Set a damp towel beside your rice bowl before shaping so the waiting rice stays covered.
Ingredients and Why Each One Matters
Rice and water build the tender outer shell, while tuna, mayonnaise, and soy sauce create a creamy, savory center. Salt balances the exterior, and the leaf or seaweed wrapper adds aroma, flavor, and a convenient place to hold each rice ball.
- 1 1/2 cups Japanese short-grain rice (2 rice cooker cups)
- 1 2/3 cups cold water
- 85 grams chunk tuna in oil (1 small US can)
- 3 tablespoons Japanese mayonnaise (such as Kewpie)
- 1 teaspoon soy sauce
- 6 wild sesame leaves (green shiso or nori will work too)
- Salt
I’d rather spend an extra moment draining the tuna than have loose oil seep into the rice seam.
Choosing the Right Rice
Japanese short-grain rice cooks into tender grains that cling together. Its amylopectin-rich starch helps you form a stable triangle with gentle pressure rather than a tight squeeze.
- Japanese short-grain rice: The preferred choice for a cohesive rice ball with distinct, tender grains.
- Calrose medium-grain rice: A possible alternative, but its texture differs and the finished rice balls may feel less delicate.
- Long-grain rice: More likely to separate and crumble during shaping.
Measure carefully: the listed 1 1/2 cups refers to standard US measuring cups, while 2 rice cooker cups refers to the smaller cup supplied with the appliance. Use either listed rice measurement, not two standard cups.
Keep the rice plain. These rice balls get salt on the outside and seasoning from the filling, rather than the vinegar seasoning used for sushi rice.
Tuna, Kewpie Mayo, and Soy Sauce
Oil-packed chunk tuna gives the filling richness and flakes that break down easily. Drain it thoroughly before mixing; the finished filling should resemble a thick, cohesive paste without oil pooling underneath.
Japanese mayonnaise, such as Kewpie, brings richness and tang. Soy sauce adds salt and savory depth, helping the filling stand up to the surrounding unseasoned rice.
Water-packed tuna can work as an optional substitution, but it tends to taste leaner and can carry excess water. Drain it carefully, then judge the mixed filling by texture rather than automatically adding more mayonnaise. Can sizes vary, so check the listed tuna weight instead of assuming every small can holds the same amount.
Wild Sesame, Shiso, or Nori Wrappers
Your wrapper changes the aroma and the first bite:
- Wild sesame or perilla leaves: Fresh, herbal, and flexible enough to fold around the rice.
- Green shiso: An aromatic leaf option with a bright flavor that contrasts with the creamy center.
- Roasted nori: Savory seaweed that starts crisp and becomes softer as it touches moist rice.
Use the six leaves across the whole batch, one per rice ball. For crisp nori, keep it separate until you’re ready to eat.
How to Make Tuna Mayo Onigiri Step by Step
Shape the rice while it’s still warm and comfortable to handle. Warm grains cling readily, so you can close the filling pocket without crushing the rice.
Prep: 10 minutes. Cook: 20 minutes. Total: 30 minutes. Yield: 6 rice balls, or 3 servings of 2 rice balls each. Rice cooker cycle lengths may vary.
Gather a rice cooker, mixing bowls, a flexible spatula or spoon, and a rice paddle. The measured cooking water below goes into the cooker after you rinse and drain the rice.
- Rinse the 1 1/2 cups Japanese short-grain rice in several changes of water, drain thoroughly, then cook it with 1 2/3 cups cold water using your rice cooker’s white-rice setting.
The rinse water should become less cloudy, and the cooked grains should feel tender and cling together without a hard center. - During the rice cooking cycle, drain the 85 grams tuna thoroughly and blend it in a bowl with 3 tablespoons Japanese mayonnaise and 1 teaspoon soy sauce, breaking up the chunks as you mix.
A cohesive filling holds together on the spoon with no loose liquid collecting beneath it. - Arrange a bowl of water and a separate small bowl of salt beside the shaping area.
This setup lets you moisten and season your palms without leaving the warm rice uncovered for long. - Lift and turn the cooked rice gently with a paddle, move it into a bowl, and drape a damp towel over the top as it cools slightly.
The grains should look fluffy, while the towel keeps their exposed surfaces from drying. - Once the rice feels comfortably hot rather than painful to touch, dampen your hands and spread a fingertip dab of salt over both palms.
Your hands should feel moist and lightly salted, with no water dripping from them. - Place one-sixth of the rice in your non-dominant palm and press a shallow hollow into its center without lingering.
Leave enough rice underneath and around the hollow to enclose the filling. - Place about 2 teaspoons of tuna filling in the hollow, then bring the surrounding rice over it to close the opening.
The creamy center should disappear beneath a continuous covering of rice. - Curve your supporting palm into a trough and use two or three fingers of the other hand to gently define a triangular outline.
The sides should hold together while individual grains remain visible. - Turn the rice ball onto a different side and repeat the light shaping motions until the triangle looks even.
Aim for three roughly equal sides rather than sharply compressed corners. - Fold one wild sesame leaf around the shaped rice ball, then moisten and salt your hands again before filling, shaping, and wrapping the remaining portions with the remaining leaves.
The completed batch should contain six rice balls with enclosed centers and gently formed edges.
Estimated nutrition per two-ball serving: 487 kcal; carbohydrates 74 g; protein 14 g; fat 13 g; saturated fat 2 g; cholesterol 15 mg; sodium 324 mg; potassium 201 mg; fiber 1 g; sugar 1 g; calcium 30 mg; iron 1 mg.
Essential Tips and Troubleshooting for Fluffy Rice Balls
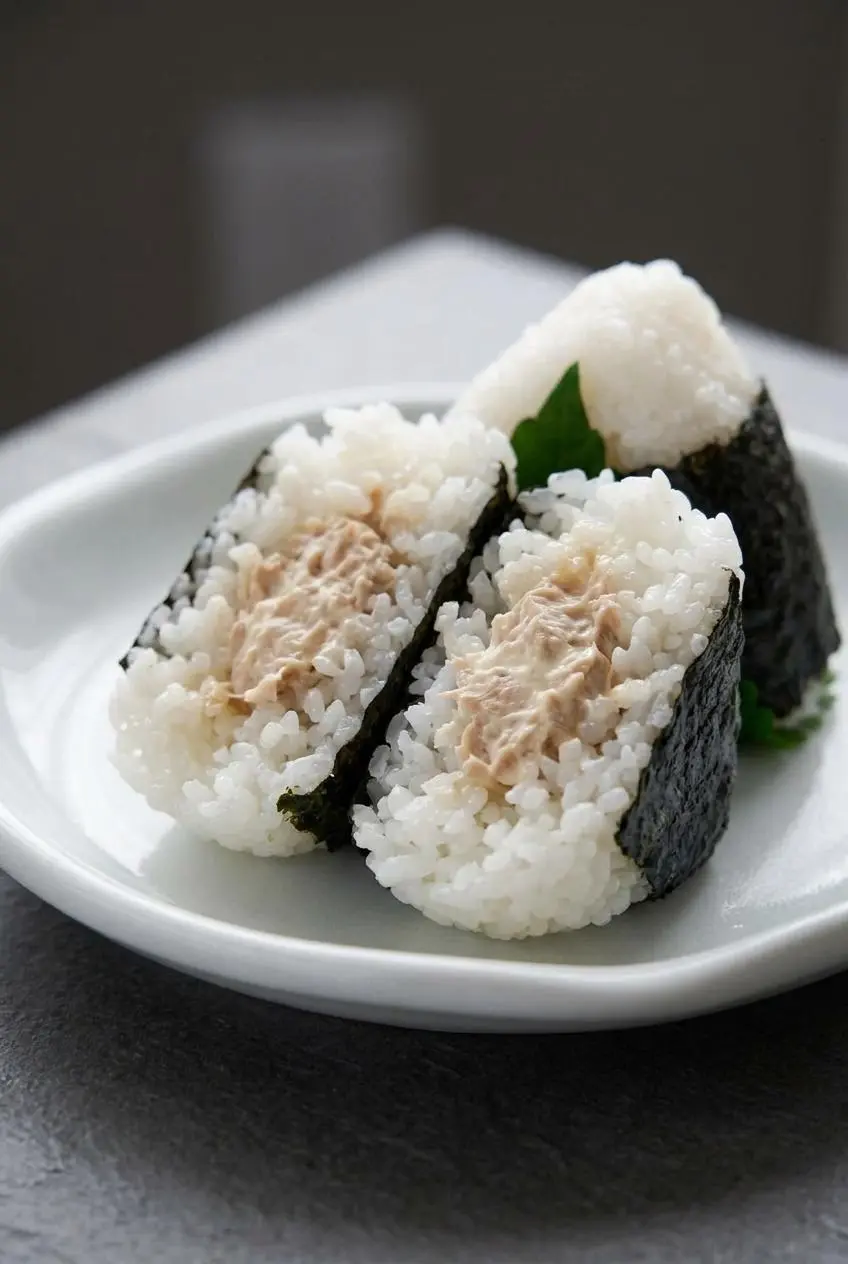
Most shaping problems come from rice temperature, surface moisture, or too much pressure. Check those before trying to squeeze a stubborn triangle into submission.
- The rice crumbles: Long-grain rice, overly cooled grains, or a dried surface can prevent good contact. Use warm short-grain rice, keep the waiting bowl covered, and gently bring the grains together.
- The rice slides around: Dripping hands can make the surface slippery. Shake off excess water before picking up the next portion.
- The center feels dense or gummy: Heavy compression packs the grains tightly. Use the pressure you’d use to hold a ripe peach, stopping once the rice ball holds its shape.
- The filling leaks: Excess liquid, overfilling, or an open seam can break the shell. Drain the tuna well, stay near the listed filling portion, and cover the center before shaping.
- The nori turns chewy: Moisture contact softens seaweed even when you’ve shaped the rice correctly. Attach it just before eating if you want crunch.
For an optional beginner aid, place the rice on clean plastic wrap, add the filling, and use the wrap to help bring the rice around it. Shape lightly through the wrap instead of pulling it tightly into a dense bundle.
An onigiri mold can also help define the edges. Keep the same rice and filling portions, and avoid forcing everything down with the lid. A mold provides the outline; it doesn’t need to act as a press.
Easy Flavor Variations and Substitutions for Onigiri
Keep these optional changes separate from the main recipe. Whichever direction you choose, preserve a thick filling that stays tucked inside the rice.
7-Eleven and Lawson Konbini Style
For a convenience-store-inspired version, optionally mix a little dashi powder into the filling for added savory depth, or a little toasted sesame oil for a nutty aroma. Taste as you go because these flavors can quickly dominate.
This isn’t an exact commercial formula. The most useful konbini-style detail is the wrapper: keep roasted nori dry and separate, then fold it around the rice immediately before eating.
Spicy Tuna Mayo Onigiri
Optionally stir sriracha or chili oil into the tuna mixture for heat. Start lightly and taste before adding more, especially if the chili oil is strongly seasoned.
Extra liquid can loosen the filling, so stop while it still holds together on a spoon. Spicy filling should remain creamy, not pourable.
How to Substitute Regular Mayonnaise
Regular American mayonnaise can replace Japanese mayonnaise, though the filling’s richness and tang will differ. If desired, a touch of rice vinegar and sugar can move the flavor in a similar direction without making an identical substitute.
There’s no fixed adjustment needed here: taste and avoid thinning the paste. Unlike a spoonable classic tuna salad, this filling needs to stay neatly enclosed in rice.
How to Pack, Store, and Keep Onigiri Soft
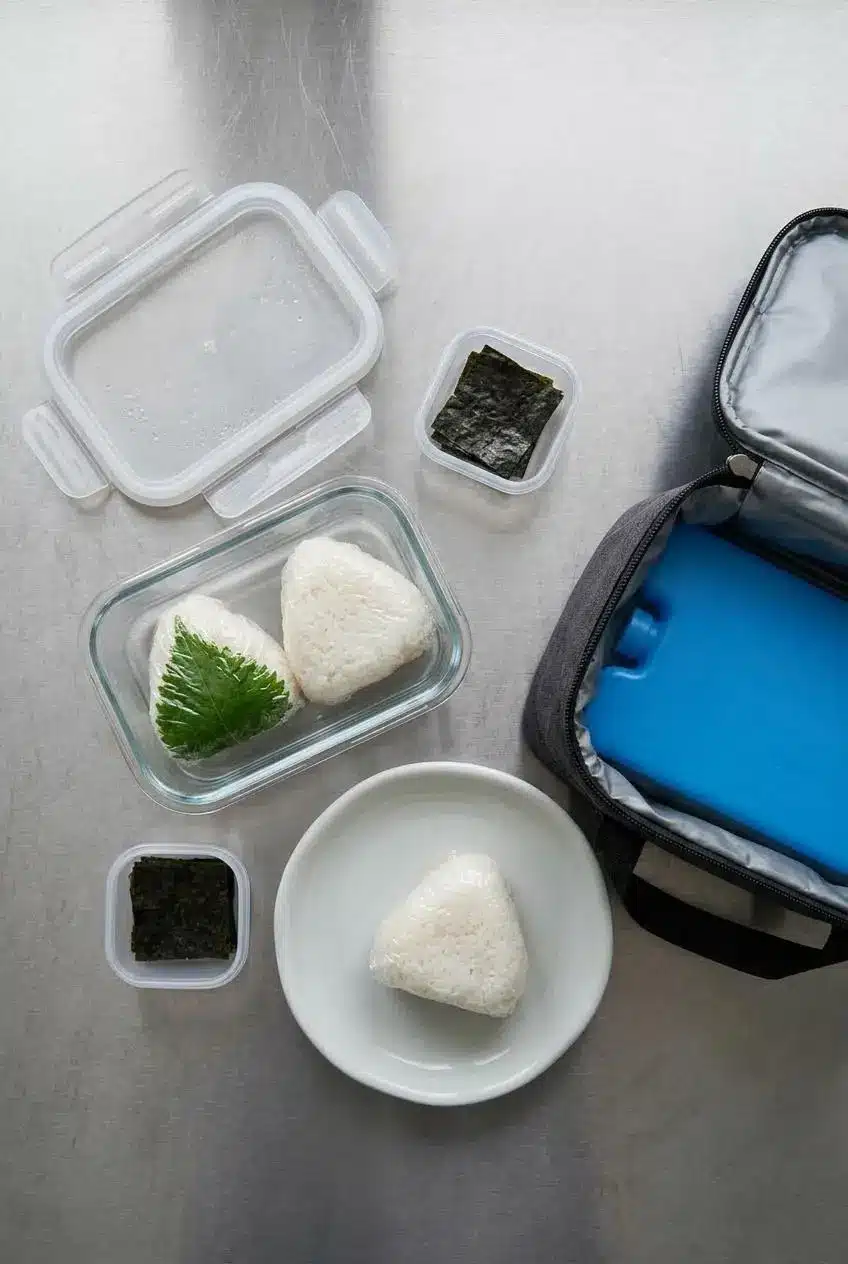
Tight wrapping limits drying, but refrigeration can still firm the rice. Protect the texture without keeping the tuna-filled rice balls warm for the sake of softness.
For storage, refrigerate promptly rather than leaving the batch out to preserve its warm texture. Wrap the rice balls individually and keep them in a closed container. Both the cooked rice and tuna filling need careful handling; mayonnaise isn’t the only consideration.
For a lunchbox, follow this sequence:
- Chill the wrapped rice balls before packing.
- Put dry nori in its own sealed packet, separate from moist foods.
- Pack the cold rice balls with an ice pack and keep the lunchbox chilled.
- Add the nori immediately before eating.
Expect chilled rice to feel firmer than freshly shaped rice. Wrapping helps prevent a dry exterior, but it cannot completely preserve the fresh-made texture.
If you prefer to warm a properly chilled leftover, remove unsuitable packaging and use a microwave-safe dish, checking the rice as you warm it. Add nori afterward. Warming is a texture option, not a way to rescue food that hasn’t been handled properly.
If you have extra plain cooked rice that’s already too firm for easy shaping, save that portion for easy fried rice instead of forcing it into fragile triangles.
What to Serve with Tuna Mayo Onigiri
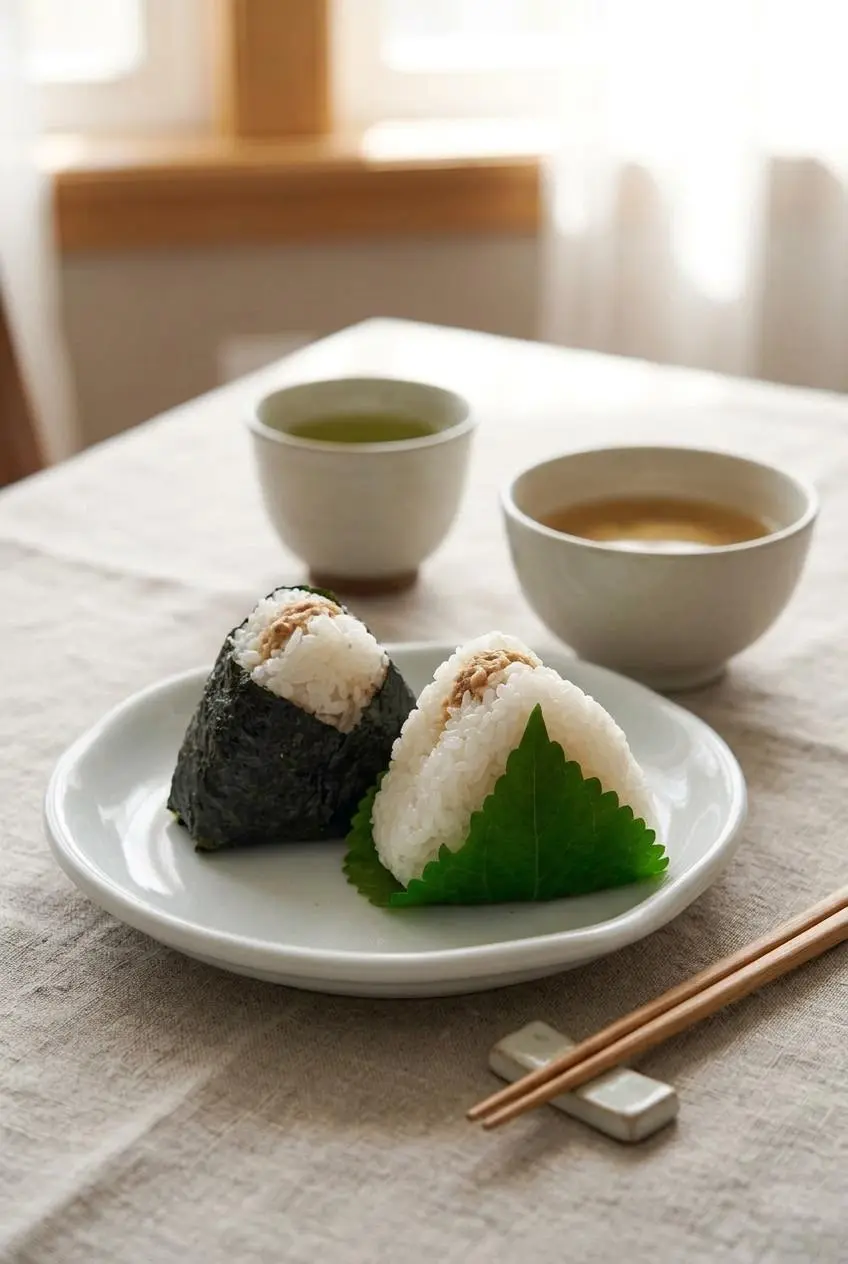
Crisp vegetables and warm broth balance the creamy filling without competing with it.
For a bento lunch, pair the rice balls with tamagoyaki, edamame, and crisp pickled vegetables. Keep the pickles in a separate compartment so their liquid doesn’t wet the rice or seaweed.
For a sit-down meal, serve them with miso soup and green tea. The broth offers a warm contrast, while the pickles provide a bright bite between mouthfuls of rice and tuna.
Conclusion
Creamy tuna filling and tender rice make these onigiri satisfying without elaborate shaping. A slightly uneven triangle still delivers the same savory center.
Keep the waiting rice covered, shape while it’s comfortably warm, and use gentle pressure. Give the grains room to stay tender.
Frequently Asked Questions
What to Put in Tuna Mayo Onigiri?
The filling contains thoroughly drained chunk tuna, Japanese mayonnaise, and soy sauce. Plain steamed short-grain rice surrounds the filling, with a leaf or nori wrapper outside. Sriracha or chili oil are optional spicy variations, not required ingredients.
Is Canned Tuna Good for Onigiri?
Yes. Cooked, flaky canned tuna mixes readily with mayonnaise into a cohesive filling. This recipe uses oil-packed chunk tuna; drain it thoroughly to keep excess liquid out of the rice. Check the listed weight because US can sizes vary.
How Many Calories Are in 1 Tuna Mayo Onigiri?
The estimated nutrition is 487 kcal per two-ball serving. Dividing that serving estimate by two gives approximately 244 kcal per rice ball. The single-ball number is a calculation, not a separate nutritional analysis, and actual values vary with ingredients and portioning.
Is Tuna Mayo Onigiri a Type of Sushi?
No. Onigiri uses plain steamed rice with salt applied during shaping. Sushi uses vinegar-seasoned rice; sharing ingredients such as tuna or nori doesn’t make the dishes the same.
How Do I Store Tuna Mayo Onigiri Without the Rice Getting Hard?
Wrap individually and refrigerate in a closed container to limit drying. Keep nori separate, and expect some rice firming despite careful wrapping. Optional microwave warming may soften properly chilled rice, using the packaging and handling precautions above.
Tuna Mayo Onigiri

Equipment
- 2 Small Glass Bowl
- 1 Medium Glass Bowl
- 1 Large Glass Bowl
- 1 Spoonula
- 1 rice paddle
Ingredients
- 1 1/2 cups Japanese short-grain rice 2 rice cooker cups
- 1 2/3 cups cold water
- 85 grams chunk tuna in oil 1 small US can
- 3 tablespoons Japanese mayonnaise such as Kewpie
- 1 teaspoon soy sauce
- 6 wild sesame leaves green shiso or nori will work too
- Salt
Instructions
- Rinse the 1 1/2 cups Japanese short-grain rice in several changes of water, drain thoroughly, then cook it with 1 2/3 cups cold water using your rice cooker’s white-rice setting. The rinse water should become less cloudy, and the cooked grains should feel tender and cling together without a hard center.
- During the rice cooking cycle, drain the 85 grams tuna thoroughly and blend it in a bowl with 3 tablespoons Japanese mayonnaise and 1 teaspoon soy sauce, breaking up the chunks as you mix. A cohesive filling holds together on the spoon with no loose liquid collecting beneath it.
- Arrange a bowl of water and a separate small bowl of salt beside the shaping area. This setup lets you moisten and season your palms without leaving the warm rice uncovered for long.
- Lift and turn the cooked rice gently with a paddle, move it into a bowl, and drape a damp towel over the top as it cools slightly. The grains should look fluffy, while the towel keeps their exposed surfaces from drying.
- Once the rice feels comfortably hot rather than painful to touch, dampen your hands and spread a fingertip dab of salt over both palms. Your hands should feel moist and lightly salted, with no water dripping from them.
- Place one-sixth of the rice in your non-dominant palm and press a shallow hollow into its center without lingering. Leave enough rice underneath and around the hollow to enclose the filling.
- Place about 2 teaspoons of tuna filling in the hollow, then bring the surrounding rice over it to close the opening. The creamy center should disappear beneath a continuous covering of rice.
- Curve your supporting palm into a trough and use two or three fingers of the other hand to gently define a triangular outline. The sides should hold together while individual grains remain visible.
- Turn the rice ball onto a different side and repeat the light shaping motions until the triangle looks even. Aim for three roughly equal sides rather than sharply compressed corners.
- Fold one wild sesame leaf around the shaped rice ball, then moisten and salt your hands again before filling, shaping, and wrapping the remaining portions with the remaining leaves. The completed batch should contain six rice balls with enclosed centers and gently formed edges.