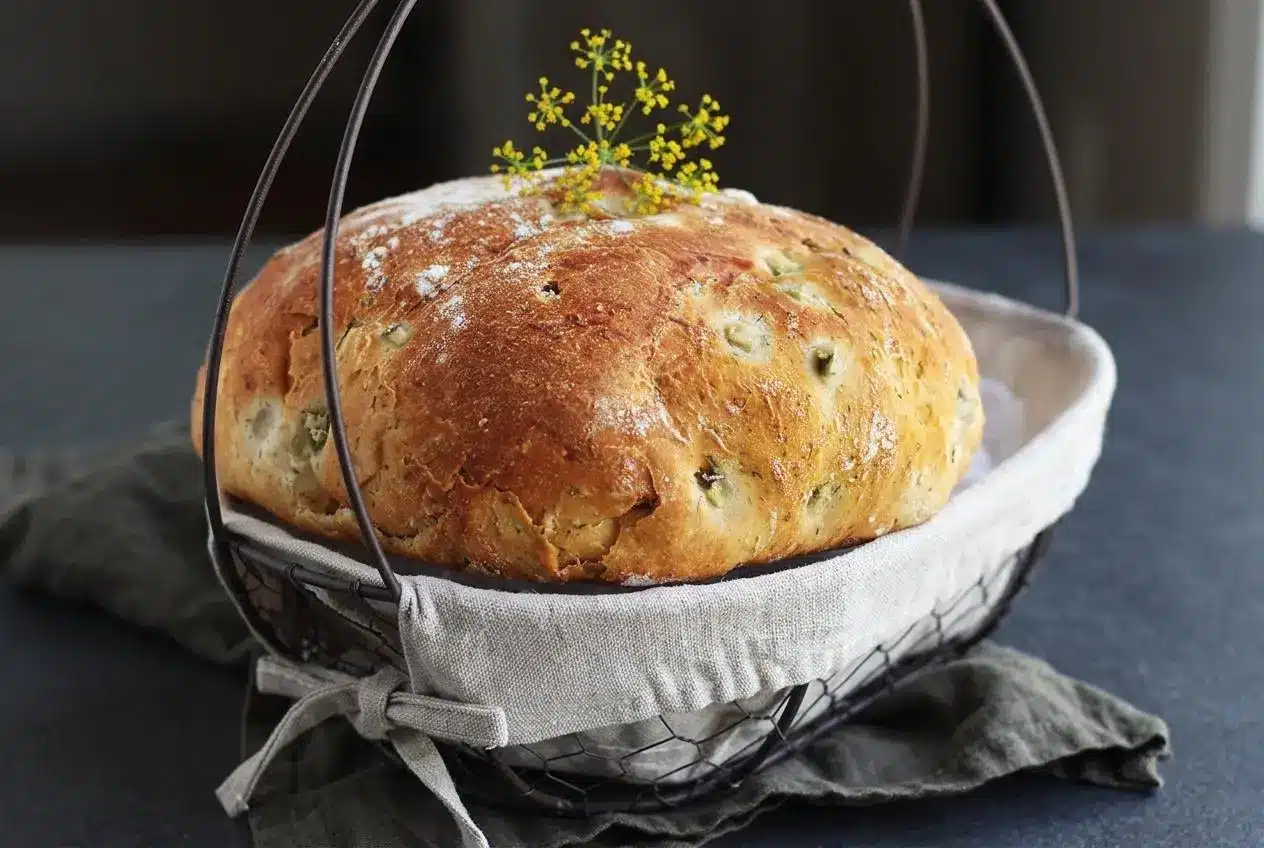
Dill pickle bread is a savory yeast loaf made with warm pickle juice, diced dill pickles, and dried dill. Blot the pickles, knead a supple dough, let it rise twice, then bake in a covered Dutch oven for a golden crust and tender, tangy crumb.
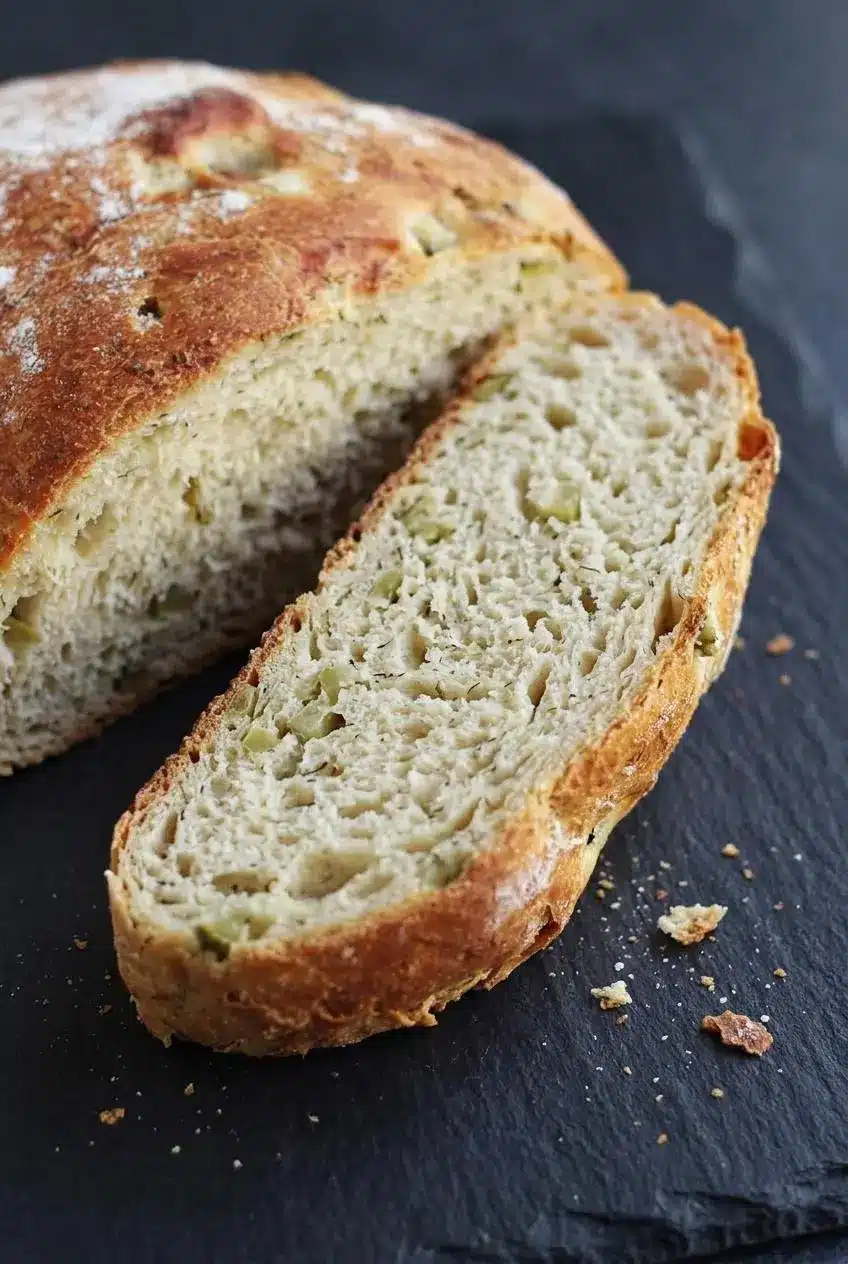
This dill pickle bread brings the flavor of a favorite deli pickle into homemade bread without turning the loaf into a sour snack. The crumb has soft pickle flecks, while dried dill carries its aroma through every slice.
The Dutch oven gives it a golden crust, and the bread machine option handles the mixing when you’d rather keep your hands free. During baking, warm dill and briny aromas fill the kitchen. Save a slice for grilled cheese.
Set out paper towels before chopping the pickle so you can blot away extra brine immediately.
Ingredients You Need and Why Each One Matters
Pickle juice supplies moisture and tang, flour builds structure, and yeast lifts the dough. Sugar balances the brine, oil softens the crumb, and the pickle and dried dill give the loaf its distinctive savory flavor.
- 3 teaspoons instant active dry yeast
- 1 Tablespoon + 1 teaspoon sugar (divided)
- 1 cup lukewarm dill pickle juice (110 degrees F)
- 1 tablespoon extra-virgin olive oil
- 3 cups bread flour or unbleached all-purpose flour
- 1/4 teaspoon salt
- 1 large dill pickle (diced)
- 1 tablespoon dried dill weed
Pickle juice: Use brine from dill pickles you enjoy eating. Taste it before measuring, since saltiness and vinegar strength vary by brand. Warm it to the temperature listed above rather than pouring it straight from the refrigerator; a thermometer is more dependable than guessing by touch.
Yeast and divided sugar: The yeast provides the rise. A teaspoon of sugar goes into the proofing mixture, while the remaining tablespoon rounds out the loaf’s acidic flavor. Froth in the proofing cup gives you an early sign that the yeast is active.
Salt: The added amount stays at 1/4 teaspoon because pickle juice already contributes salt. Don’t replace that amount with the larger quantity you might use in another bread dough.
Pickle and dill: Kosher dill pickles suit this savory loaf well. Sweet pickles would shift its flavor toward sweetness rather than the intended dill tang. Refrigerated pickles are another option, but their brine isn’t automatically milder; taste yours first. Dice the pickle finely so the pieces distribute evenly.
Flour and oil: Bread flour gives the loaf more chew and support around the moist pickle pieces. Unbleached all-purpose flour also works, with a slightly softer result. Olive oil helps keep the crumb tender.
I’d press the diced pickle between fresh paper towels until no beads of brine remain; that’s more useful than trying to fix all that moisture with extra flour later.
How to Make the Dill Pickle Bread Step by Step
The dough’s texture matters more than a perfectly clean mixer bowl. Aim for a smooth, stretchy mass with slight tackiness, then give both rises the time they need.
Prep the Pickles and Proof the Yeast
- Cut the dill pickle into fine pieces, press them between paper towels, and reserve them for kneading.
The pieces should feel damp rather than drippy, with no loose brine collecting underneath. - Measure 1/2 cup of the lukewarm pickle juice into a cup and scatter the yeast and 1 teaspoon sugar over it, allowing about 10 minutes for proofing.
A frothy surface indicates activity before the mixture goes into the dough.
Mix, Knead, and Check Dough Hydration
- Use the mixer’s paddle on low speed to blend the proofed mixture with the oil, remaining tablespoon of sugar, 2 cups flour, remaining pickle juice, and salt, then incorporate the last cup of flour in 1/4-cup additions.
The mixture should gather into dough as the flour absorbs the liquid. - Fit the dough hook, work at medium speed, and knead in the dried dill and blotted pickle for 6 to 10 minutes.
Look for an elastic dough that catches slightly at the bowl’s bottom while repeatedly pulling away from its sides. - Correct a wet dough with flour or a dry dough with warm water, using one tablespoon per adjustment.
The target is a supple mass that slaps the bowl’s sides without leaving a thick smear.
Let each adjustment mix in before deciding whether the dough needs more. Pickle pieces interrupt an otherwise smooth surface, so judge the dough around them rather than expecting a perfectly uniform ball.
Rise and Bake in a Dutch Oven
- Put the dough in a greased bowl and allow about 1 hour for it to double, then press out the gas, shape a round loaf, and transfer it to a greased Dutch oven.
A noticeable increase in volume matters more than reaching the end of the timer. - Cover the pot with its lid for a second rise of about 30 minutes and heat the oven to 450°F during this interval.
The round should look puffier before baking, rather than tight and freshly shaped. - Bake with the lid on for 20 minutes, then uncover and continue for 10 to 15 minutes, checking for a center temperature of about 200°F.
The crust should turn golden during the uncovered stage as the dill aroma becomes more pronounced. - Ease the loaf out of the pot onto a wire rack and allow about 30 minutes of cooling before cutting.
The crumb will firm as steam escapes, making the slices less likely to compress.
The covered pot holds moisture around the expanding loaf. Removing the lid lets the crust brown. Use a Dutch oven and lid rated for the baking temperature, and handle both with dry oven mitts.
Alternate method
- Load the bread machine according to its manufacturer’s ingredient order, reserving the blotted pickle for the add-in signal, and start the dough cycle.
During mixing, the dough should gather into a smooth ball rather than spread across the pan. - Add the pickle when the machine signals and correct the dough with flour or warm water, one tablespoon at a time, if needed.
A moist dough needs more structure, while a stiff, dry-looking ball needs a little liquid. - After the cycle ends, lift the dough onto a lightly oiled work surface, shape an oval, and cover it for a 10-minute rest.
The rested dough should feel less resistant when you begin flattening it. - Turn the oval underside up, flatten it, fold the upper third down and lower third over it, then press a lengthwise groove with your palm, fold the upper edge to the lower edge, and seal the seam.
The finished envelope-shaped loaf should hold together without an open seam. - Set the loaf on a cornmeal-dusted baking pan or one lined with a silicone baking mat, cover it for approximately 20 minutes in a warm spot, and preheat the oven to 400°F.
The dough should become visibly fuller during this final rise. - Bake the shaped loaf for 20 to 25 minutes.
A nicely browned surface signals the end of the sheet-pan bake.
Essential Tips and Troubleshooting for Perfect Texture
Pickle brine brings both flavor and variability. These fixes address the problems most likely to show up while mixing, rising, or slicing.
- Dough smears around the bowl: Excess brine on the pickle can push the dough too wet. Add flour one tablespoon at a time during kneading, letting it absorb before adding more; stop when the dough pulls away from the sides.
- Dough feels stiff or tears: Too much flour can make it difficult to stretch. Add warm water one tablespoon at a time and continue kneading until the dough becomes supple.
- Wet pockets appear during shaping: Large or poorly blotted pickle pieces can release concentrated moisture. Finely dice and blot them before mixing so they disperse instead of creating slippery patches.
- The rise takes longer than expected: Cold brine, a cool kitchen, and differences in brine acidity or saltiness can affect progress. Start with lukewarm juice, confirm froth during proofing, and wait for the dough’s visible expansion rather than rushing it into the oven.
- The loaf tastes too salty: Keep the measured salt low and taste the brine before baking. If your chosen brand tastes intensely salty, the optional half-water version offers a gentler result.
- Slices look gummy: A browned crust doesn’t tell the whole story, so check the center during baking. Afterward, respect the cooling rest; cutting a steaming loaf can compress its moist crumb even when it has baked through.
A little tackiness is normal. Adding flour until nothing sticks anywhere can leave you with a dry, heavy loaf. Watch how the dough moves under the hook, not just how it feels on one fingertip.
Baking Options and Tasty Variations
Choose the shape that suits your meal, and keep flavor changes separate from the main dough instructions.
- Dutch oven round: The covered-then-uncovered bake favors a pronounced golden crust and a rounded loaf for thick slices.
- Bread machine plus sheet pan: The machine mixes, kneads, and manages its dough cycle; the oven still does the baking at 400°F for 20 to 25 minutes.
- 9×5-inch loaf pan: The pan supports a rectangular shape that makes sandwich slices easier to portion evenly.
Bread Machine Dough Cycle Method
Use the dough setting, not a complete bake program. Add the blotted pickle at the machine’s add-in signal and check the dough while it mixes. Once the cycle finishes, follow the resting, envelope-folding, and sheet-pan baking steps above.
Baking in a 9×5 Loaf Pan or Shaping into Buns
For a sandwich loaf, place the envelope-shaped dough in a greased 9×5-inch loaf pan instead of on the sheet pan. Bake at 400°F and begin checking after 20 to 25 minutes; the deeper shape may need longer, so use the same center-temperature cue as the Dutch oven loaf.
For burger buns or dinner rolls, divide the dough into portions and shape smooth rounds. Allow them to become puffy before baking at 400°F, beginning your check around 15 to 18 minutes. Size affects baking time, so treat that range as a checking point rather than a promise.
Flavor Variations With Milder Brine, Garlic-Dill Butter, and Deli Rye
- Milder brine: Optionally replace half the pickle juice with warm water, keeping the combined liquid amount unchanged for a gentler tang.
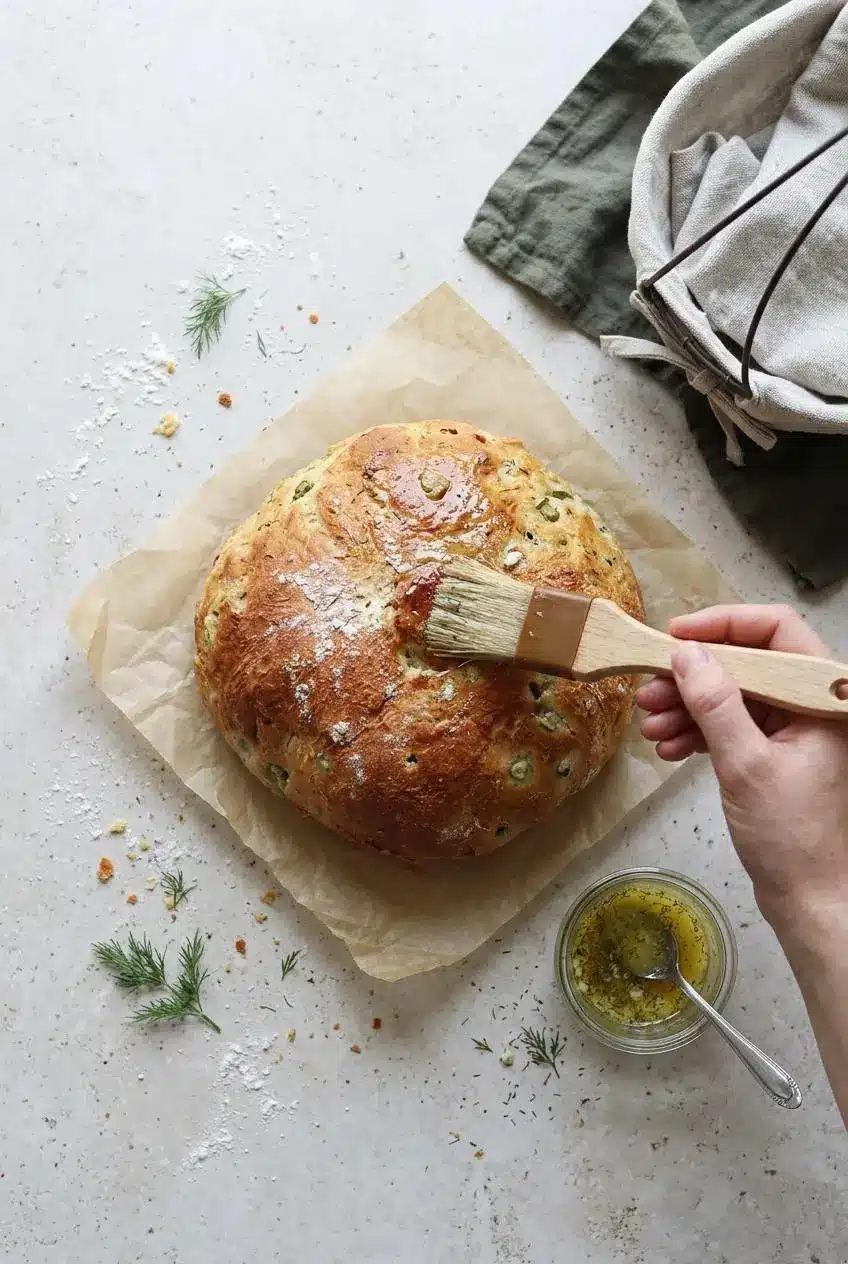
- Garlic-dill butter: Brush the warm crust with melted garlic-dill butter for a softer finish and extra aroma; skip extra salt if the loaf already tastes well seasoned.
- Deli rye flavor: Optional caraway seeds add a familiar deli aroma, while replacing some wheat flour with rye changes the dough’s structure and requires closer attention to hydration.
- Cheddar dill: Shredded sharp cheddar is an optional savory addition, though it changes the dough from the loaf described above.
- Buttermilk: Treat buttermilk as a separate recipe adjustment rather than pouring extra liquid into this dough; it changes both moisture and acidity.
For a loaf built around deeper rye flavor, try homemade pumpernickel bread rather than making a large flour substitution here.
Best Ways to Serve and Store Dill Pickle Bread
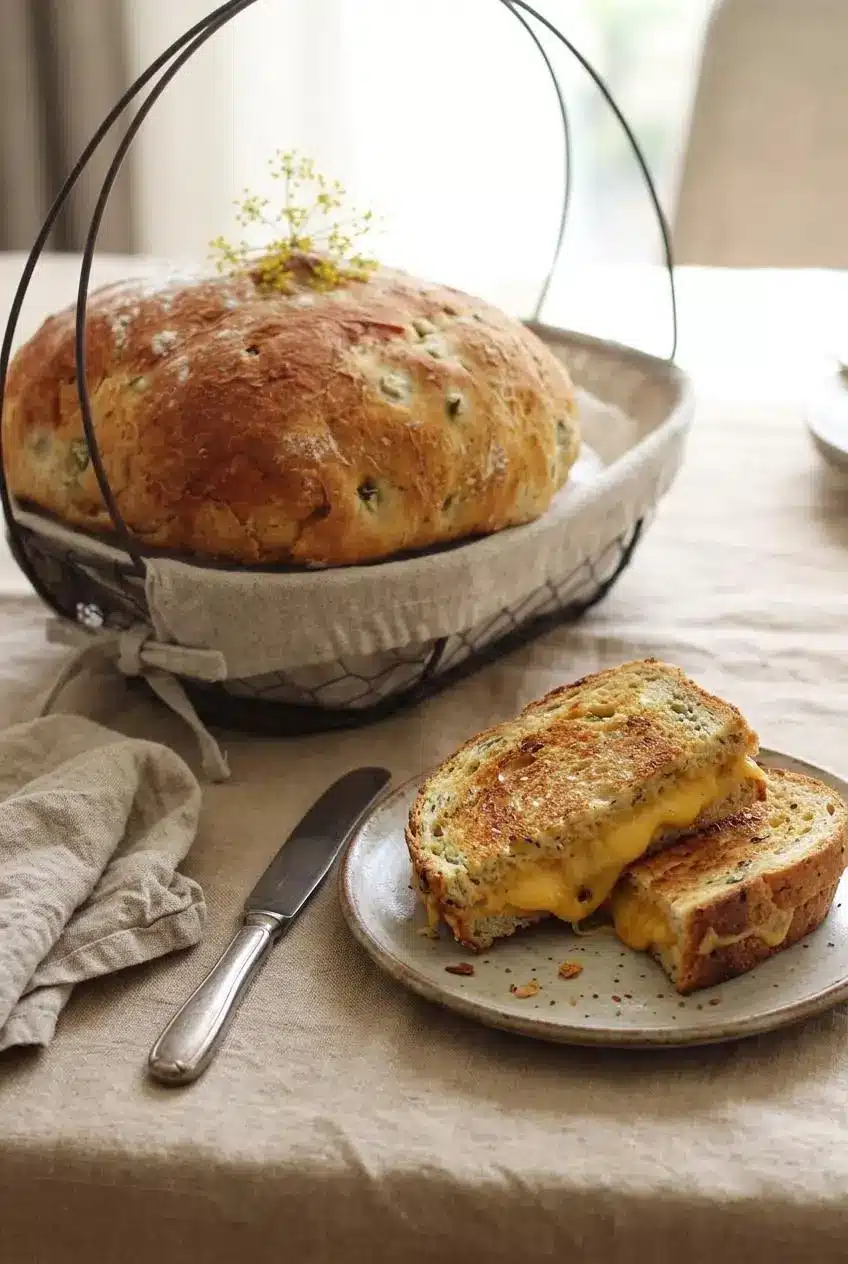
This loaf shines with fillings that welcome a little dill and tang.
- Grilled cheese: Use thick slices with sharp cheddar or Havarti for a crisp exterior and creamy center.
- Deli sandwiches: Pair it with roast beef, pastrami, or Reuben fillings for a pickle-forward lunch.
- Creamy salads: Egg salad and dill chicken salad complement the bread’s savory crumb.
- Toast: Spread toasted slices with salted butter or herbed cream cheese alongside burgers.
For an appetizer, cut cooled slices into smaller pieces, toast them, and serve with creamy dill pickle dip.
Let the loaf cool completely before putting it in a bread bag. Sealing warm bread in plastic traps condensation, which softens the crust and leaves the surface damp. Keep the plain loaf covered in a clean, dry bread bag, away from heat and moisture.
Slice only what you need to limit exposed crumb. Store meat, cheese, egg salad, and creamy spreads separately from the bread, and assemble sandwiches close to serving so the fillings don’t soak into the slices.
Conclusion
A golden crust, tender dill-flecked crumb, and savory pickle tang make this loaf worth baking for sandwiches or toast. Blot the pickle thoroughly and check the loaf’s center rather than relying on crust color alone.
Keep the dough supple and let the bread cool before slicing. An optional garlic-dill butter finish adds another layer of aroma, but a well-baked slice needs very little.
Frequently Asked Questions
What Does Dill Pickle Bread Taste Like?
It tastes savory and tangy, with aromatic dill and tender pickle flecks. The bread softens the impression of sharp vinegar, though the intensity depends on your brine.
Does the Vinegar in Pickle Juice Keep Yeast From Rising?
Not necessarily; this dough uses pickle juice successfully, but acidity and saltiness can affect its progress. Warm the juice as directed, look for froth during proofing, and allow the dough to expand rather than following the clock alone.
Can I Bake Dill Pickle Bread in a 9×5 Loaf Pan or as Buns?
Yes. Use a greased loaf pan for the envelope-shaped dough, or divide it into rounds for buns. Follow the optional baking guidance above and judge doneness by the loaf’s center and the shape’s size.
How Do You Store Homemade Dill Pickle Bread?
Cool it completely, then keep the plain loaf covered in a clean, dry bread bag away from heat and moisture. Don’t bag it while warm, and keep sandwich fillings separate until serving.
How Do You Keep Homemade Pickle Bread Dough From Getting Soggy?
Finely dice and thoroughly blot the pickle, then add the final cup of flour gradually. During kneading, aim for dough that catches slightly at the bowl’s bottom but pulls cleanly from the sides without smearing.
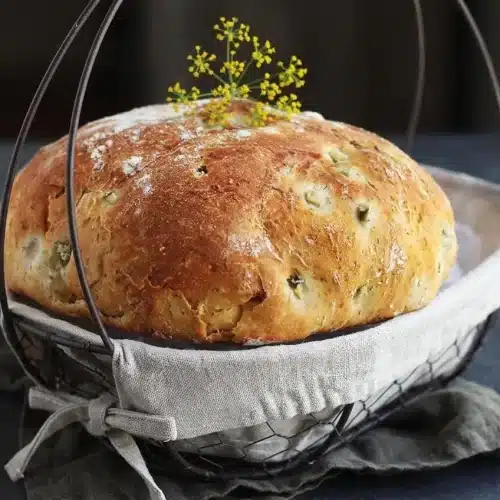
Dill Pickle Bread

Equipment
- Paper towel
- Mixing Bowl
- Mixer
- flat paddle attachment
- Dough hook
- Dutch oven
- Cooling Rack
- bread machine
- Baking pan
- Silicone Baking Mat
Ingredients
- 3 teaspoons instant active dry yeast
- 1 Tablespoon + 1 teaspoon sugar (divided)
- 1 cup lukewarm dill pickle juice (110 degrees F)
- 1 tablespoon extra-virgin olive oil
- 3 cups bread flour or unbleached all-purpose flour
- 1/4 teaspoon salt
- 1 large dill pickle (diced)
- 1 tablespoon dried dill weed
Instructions
- Cut the dill pickle into fine pieces, press them between paper towels, and reserve them for kneading. The pieces should feel damp rather than drippy, with no loose brine collecting underneath.
- Measure 1/2 cup of the lukewarm pickle juice into a cup and scatter the yeast and 1 teaspoon sugar over it, allowing about 10 minutes for proofing. A frothy surface indicates activity before the mixture goes into the dough.
- Use the mixer’s paddle on low speed to blend the proofed mixture with the oil, remaining tablespoon of sugar, 2 cups flour, remaining pickle juice, and salt, then incorporate the last cup of flour in 1/4-cup additions. The mixture should gather into dough as the flour absorbs the liquid.
- Fit the dough hook, work at medium speed, and knead in the dried dill and blotted pickle for 6 to 10 minutes. Look for an elastic dough that catches slightly at the bowl’s bottom while repeatedly pulling away from its sides.
- Correct a wet dough with flour or a dry dough with warm water, using one tablespoon per adjustment. The target is a supple mass that slaps the bowl’s sides without leaving a thick smear.
- Put the dough in a greased bowl and allow about 1 hour for it to double, then press out the gas, shape a round loaf, and transfer it to a greased Dutch oven. A noticeable increase in volume matters more than reaching the end of the timer.
- Cover the pot with its lid for a second rise of about 30 minutes and heat the oven to 450°F during this interval. The round should look puffier before baking, rather than tight and freshly shaped.
- Bake with the lid on for 20 minutes, then uncover and continue for 10 to 15 minutes, checking for a center temperature of about 200°F. The crust should turn golden during the uncovered stage as the dill aroma becomes more pronounced.
- Ease the loaf out of the pot onto a wire rack and allow about 30 minutes of cooling before cutting. The crumb will firm as steam escapes, making the slices less likely to compress.
Alternate method
- Load the bread machine according to its manufacturer’s ingredient order, reserving the blotted pickle for the add-in signal, and start the dough cycle. During mixing, the dough should gather into a smooth ball rather than spread across the pan.
- Add the pickle when the machine signals and correct the dough with flour or warm water, one tablespoon at a time, if needed. A moist dough needs more structure, while a stiff, dry-looking ball needs a little liquid.
- After the cycle ends, lift the dough onto a lightly oiled work surface, shape an oval, and cover it for a 10-minute rest. The rested dough should feel less resistant when you begin flattening it.
- Turn the oval underside up, flatten it, fold the upper third down and lower third over it, then press a lengthwise groove with your palm, fold the upper edge to the lower edge, and seal the seam. The finished envelope-shaped loaf should hold together without an open seam.
- Set the loaf on a cornmeal-dusted baking pan or one lined with a silicone baking mat, cover it for approximately 20 minutes in a warm spot, and preheat the oven to 400°F. The dough should become visibly fuller during this final rise.
- Bake the shaped loaf for 20 to 25 minutes. A nicely browned surface signals the end of the sheet-pan bake.