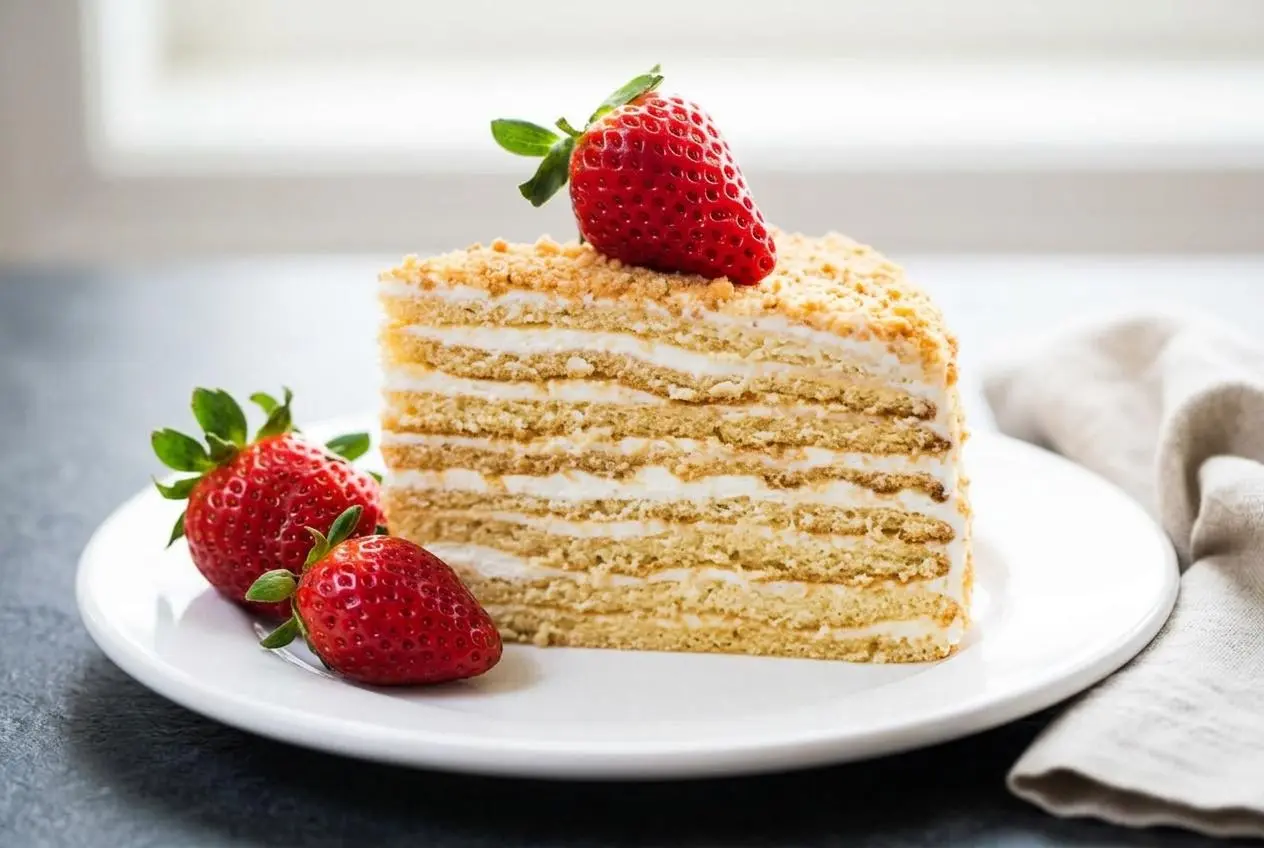
Russian Honey Cake Medovik is an eight-layer honey cake filled with tangy sour cream frosting. The freshly baked layers start crisp, then absorb moisture from the cream during overnight refrigeration, becoming a tender cake with a velvety bite.
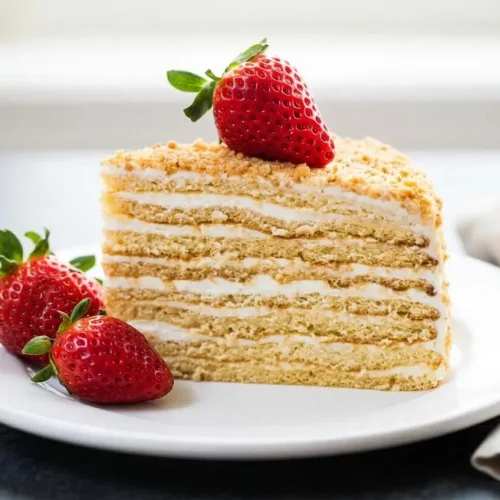
Each slice reveals thin golden layers separated by pale cream, with baked honey-cake crumbs coating the outside. The contrast between toasted biscuit flavor and cool, tangy filling makes this dessert especially satisfying.
This recipe makes 12 slices using a saucepan dough, without a double boiler. Allow 2 hours for preparation and 25 minutes for cooking, plus overnight chilling beyond the listed 2 hours 25 minutes. The cream does the softening.
Set out your rolling pin, parchment, and 9-inch cutting guide before cooking the dough so you can roll it while warm.
Key Ingredients and Smart Substitutions
Honey gives the layers their defining aroma, flour and eggs provide structure, and butter adds richness. Sour cream supplies tang and softening moisture, while whipped cream gives the filling body; the optional strawberries add a fresh contrast.
Cake Layers Ingredients
- 4 Tbsp honey, (1/4 cup)
- 3/4 cup granulated sugar
- 2 Tbsp unsalted butter
- 3 large eggs, room temperature, beaten with a fork
- 1 tsp baking soda
- 3 cups all-purpose flour, I used unbleached, organic
Sour Cream Frosting Ingredients
- 32 oz sour cream
- 2 cups powdered sugar
- 1 cup heavy whipping cream
For the topping
- 1/2 lb strawberries, optional
All-purpose flour gives the warm dough enough structure to roll thinly, while eggs bind it together. Granulated sugar sweetens the honey layers; powdered sugar blends into the frosting without leaving a gritty texture. The whipped cream makes the filling lighter without turning it into buttercream.
I prefer a hand whisk for the sour cream so I can stop as soon as the powdered sugar disappears.
Choosing Honey for a Deeper Flavor
Choose buckwheat or a darker wildflower honey for a more pronounced honey flavor. These varieties can bring earthy, floral, or almost molasses-like notes. A mild honey gives a gentler result, especially if you prefer the tangy cream to stand out.
Baking soda contributes lift and browning, but it isn’t a separate caramel-making step. Keep the saucepan over moderate heat rather than trying to darken the honey aggressively. For another way to enjoy honey alongside bolder aromatics, try orange ginger honey cake.
What 32 oz of Sour Cream Means
- Sour cream uses weight ounces here: 32 oz means the package’s net weight, equal to 2 lb or approximately 907 g.
- Cups are approximate: that amount is commonly about 4 cups, but the product and measuring method affect the volume. Use the package weight when possible.
- Heavy cream uses volume: 1 cup is 8 US fluid ounces, which is not an interchangeable weight measurement.
Choose full-fat sour cream for richness and a less watery starting texture. Fat content helps, but temperature and handling matter too. Even full-fat sour cream can loosen under vigorous mixing, and whipped cream loses body if you work it too much.
How to Make Russian Honey Cake Medovik Step-by-Step
The dough comes together in one saucepan. Work steadily through rolling and baking, then cool the layers completely before bringing in the dairy frosting.
Cooking the Caramelized Honey Dough
How to Make The Cake Layers
- Heat the sugar, honey, and butter in a medium saucepan over medium-low heat for 5 to 7 minutes, whisking occasionally.
Look for dissolved sugar and a uniform mixture, keeping the heat low enough to prevent scorching. - Take the saucepan off the burner and vigorously whisk the hot mixture while pouring in the beaten eggs in a thin, steady stream.
The eggs should blend smoothly throughout rather than forming cooked flecks. - Whisk the baking soda into the mixture until smooth, then use a spatula to incorporate the flour in 1/2-cup additions.
With all 3 cups incorporated, the warm dough should feel pliable and clay-like rather than sticking to your hands.
Rolling and Baking the 8 Thin Layers
- Divide the warm dough into eight equal portions and begin rolling immediately.
The pieces are easiest to flatten while they still feel warm and flexible. - Roll each portion on a well-floured surface to about 1/8 inch thick, dusting the top as needed, then trace a 9-inch plate or springform base with a pizza cutter and reserve the trimmings.
The cut rounds should have even edges and a similar thickness throughout. - Transfer the rounds to a large sheet of parchment and bake two at a time at 350°F for 4 to 5 minutes, repeating with the remaining dough.
Remove each batch when golden and let the rounds cool completely on a wire rack before stacking. - Spread the reserved trimmings evenly over a reused sheet of parchment and bake them, then cool and crush them with a rolling pin or food processor.
The baked scraps should feel firm before crushing and become fine crumbs for coating the cake.
Roll the next pair while the current pair bakes, but keep an eye on the oven: thin layers color quickly. Complete cooling keeps the rounds from trapping steam when stacked and protects the frosting from warm cake.
Folding the Sour Cream Frosting and Assembling
How to make the frosting
- Whip the heavy cream on high speed for 1 to 2 minutes, stopping when it holds stiff peaks.
The cream should look fluffy, with peaks that remain upright when you lift the beaters. - Gently hand-whisk the sour cream and powdered sugar in a separate bowl, fold in the whipped cream, and refrigerate until needed.
The finished frosting should look smooth and airy, with a softer consistency than American buttercream.
Assembling your Cake
- Stack the cake rounds with about 1/3 cup frosting on each layer, pressing gently as you build, then spread the remaining frosting over the top and sides.
The filling should settle between the layers without large air gaps, providing the moisture that softens the cake. - Coat the top and sides with the baked dough-scrap crumbs, cover with plastic wrap, and refrigerate overnight.
The crisp rounds will absorb cream and become tender enough to slice as a cohesive cake.
The crumb coating comes from the honey dough trimmings, not bread crumbs. Keep the frosting generous even though it feels softer than a decorating frosting; those dry layers need moisture.
Expert Tips and Troubleshooting for Perfect Medovik
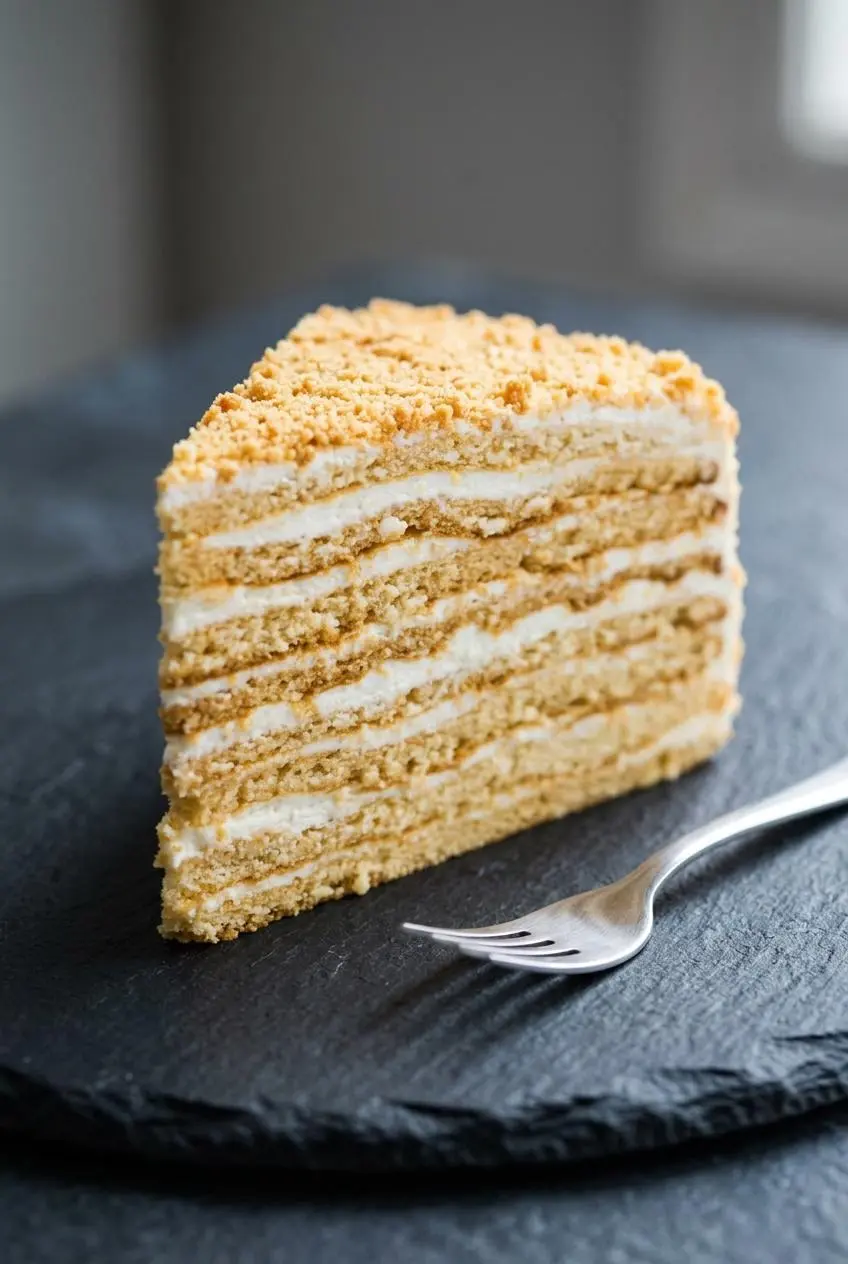
Most problems begin with one of three things: warm dairy, cooling dough, or uneven stacking. Check the texture before moving to the next stage rather than trying to correct everything after assembly.
How to Prevent Runny Sour Cream Frosting
- Soft but spreadable: filling that slowly settles is expected. Watery liquid that immediately runs off the rounds is not the goal.
- Thin after mixing: vigorous beating can loosen sour cream and deflate whipped cream. Hand-whisk the sour cream mixture, then fold rather than electrically beating the combined filling.
- Little body: check that the heavy cream reached stiff peaks before folding. Softly whipped cream gives less support.
- Too warm: stop mixing and refrigerate the frosting before reassessing. Chilling may help a warm mixture, but it may not restore severe separation or lost aeration.
Don’t keep beating a loose filling in the hope that it will behave like buttercream. More mixing isn’t a dependable rescue, and adding extra sugar changes the sweetness without necessarily fixing the structure.
Why Honey Cake Dough Sticks or Tears
- Dough resists rolling: it becomes firmer as it cools. Keep waiting portions under a clean towel as an optional way to limit cooling while you work.
- Dough grabs the rolling pin: use the floured surface and light top dusting described in the method. Avoid automatically kneading more flour into the dough.
- Rounds vary in size: divide the dough with a kitchen scale if helpful. Equal portions make consistent thickness easier.
- Cooked egg flecks appear: the eggs met too much concentrated heat. Remove the saucepan from the burner, pour slowly, and whisk continuously; a badly curdled mixture may need restarting.
Measure the flour with a level cup rather than a rounded mound. Too much flour can make the dough stiff and difficult to thin out, even while warm.
How to Get Neat, Straight Cake Edges
- Uneven outlines: trace the same 9-inch guide before baking. Trimming baked rounds is an alternative, but their brittle edges can crack.
- Leaning layers: center each round over the one below and apply gentle, even pressure. Don’t push hard enough to force the filling out.
- Slippery assembly: an adjustable springform ring or food-safe acetate collar can provide optional support while stacking and chilling.
A ring helps alignment, not frosting consistency. Keep the regular assembly order: fill, frost the exterior, apply crumbs, cover, and chill. Uneven rounds or watery filling won’t become level just because a collar surrounds them.
Delicious Medovik Variations and Serving Suggestions
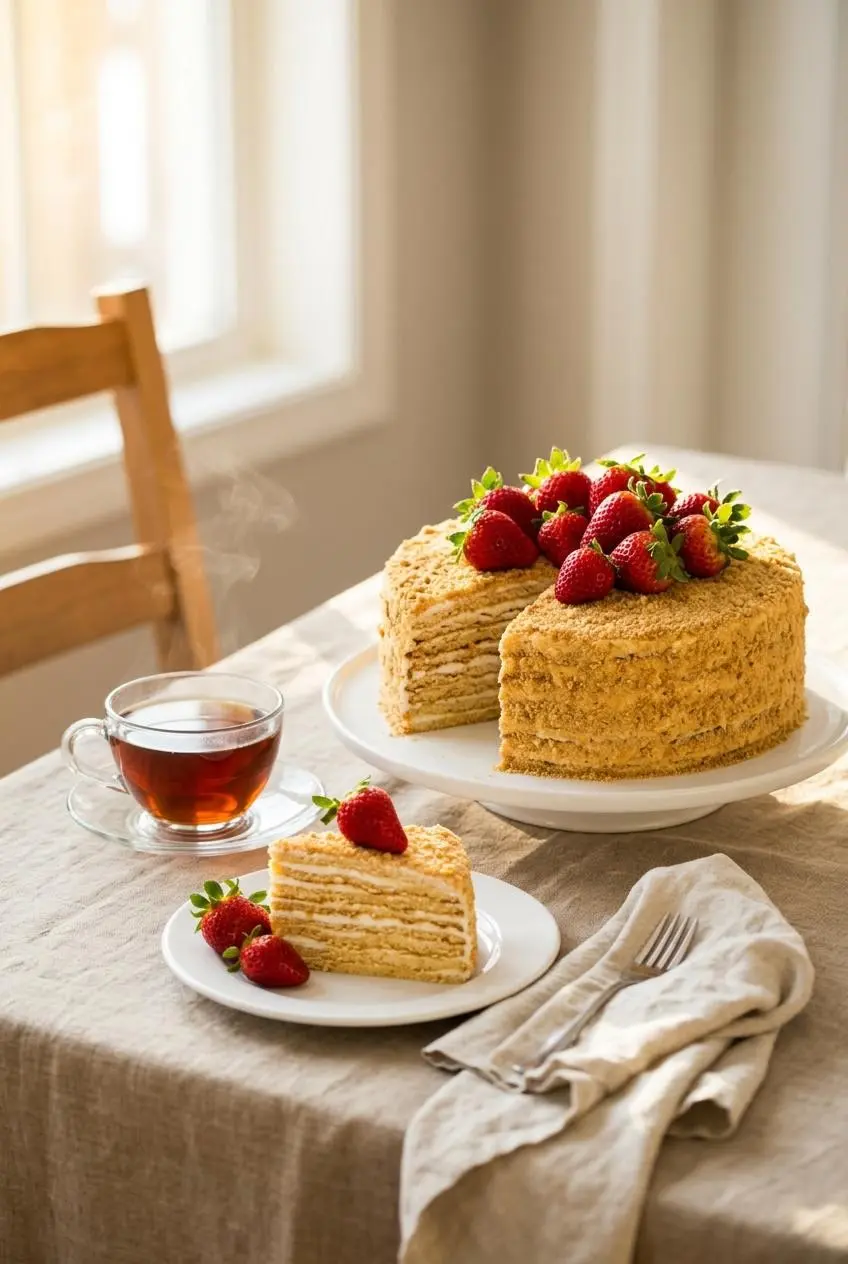
Keep the eight-layer sour cream version as your starting point. These optional changes offer different finishes and flavors without belonging to the ingredient list or method above.
Mascarpone and Creme Fraiche Frosting Upgrades
- Mascarpone exterior: chilled mascarpone whipped with cream and powdered sugar offers a firmer decorating option for the outside. Treat it as a separate frosting preparation rather than changing the sour cream filling instructions.
- Creme fraiche filling: this can give a richer, usually less acidic result. Thickness varies by product, so don’t assume every container will produce a stiffer filling.
Neither adaptation is a tested substitution formula here. The main filling’s job is to moisten the layers, while a decorative exterior needs more structure; those are different goals.
4-Layer Rectangular Shortcut and Berry Toppings
A rectangular version reduces separate rolling tasks by using larger sheets, then dividing the baked sheets to build four layers. It’s a different format, not a revised baking schedule for this recipe, which remains eight round layers. Watch thickness and color rather than assuming larger sheets behave identically.
- Strawberries: use the optional topping for fresh flavor against the rich filling.
- Raspberries: offer them separately as another tart berry option.
- Hot drinks: serve chilled slices with black tea or espresso for a pleasant temperature contrast.
If the honey-and-berry pairing appeals to you but you want a different baking project, strawberry honey bun cake is another option.
Optional Browned Butter and Salt
For an untested flavor experiment, gently brown the existing unsalted butter before adding the honey and sugar. Toasted milk solids add nutty depth, but browning also changes the butter’s moisture, so identical dough behavior isn’t guaranteed.
Fine sea salt is another optional flavor adjustment for the frosting. Keep either change separate from the method above, especially when making Medovik for the first time.
Make-Ahead and Storage Guide for Medovik
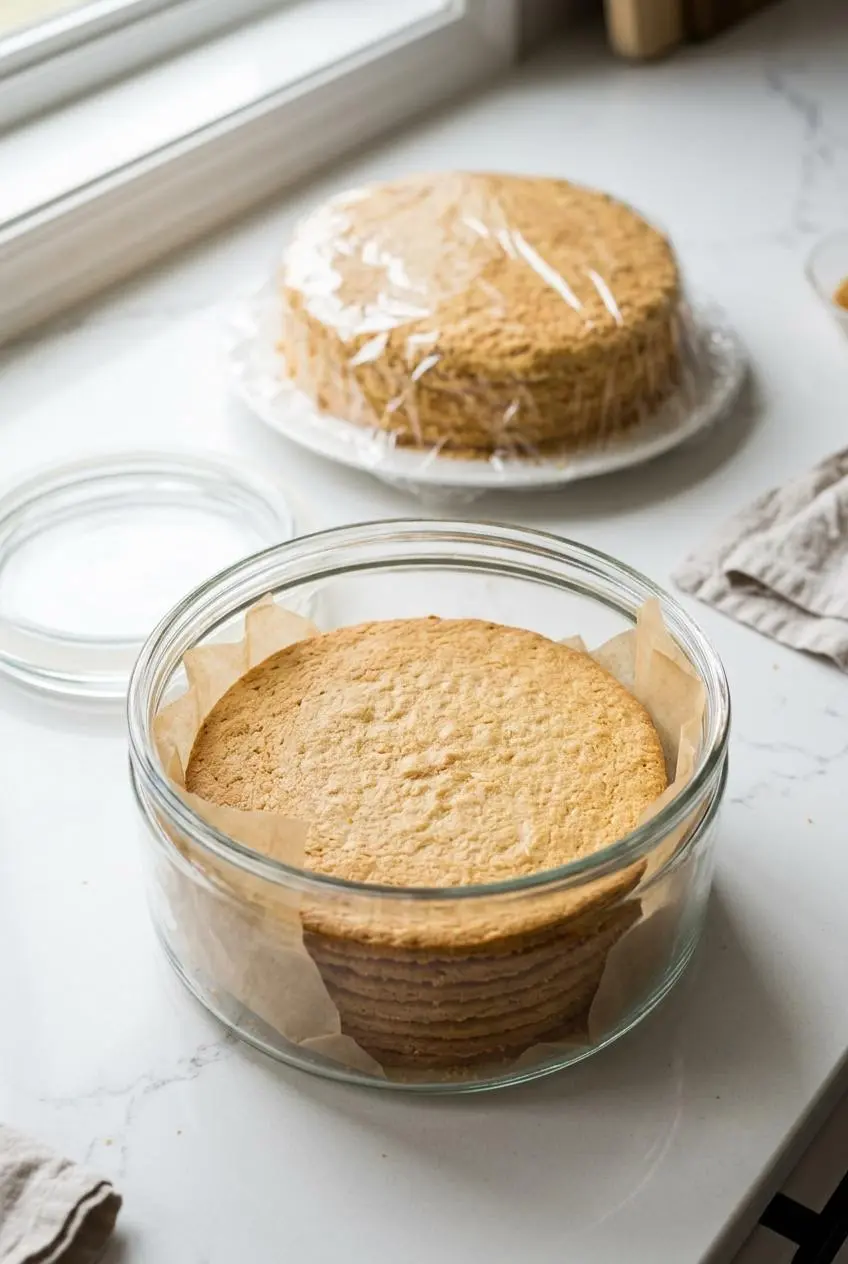
Plan backward from serving: bake, cool completely, assemble, and allow the required overnight refrigeration. That softening stage is part of making the cake, not simply a way to hold it until dessert.
Baking the Honey Layers Before Assembly
Keep completely cooled, unfrosted rounds in airtight packaging, protected from humidity and breakage. Place them flat rather than balancing them against one another, and avoid stacking while warm, which traps moisture.
Dry-layer storage differs from storing the dairy-filled cake. An extended room-temperature holding period isn’t established here, so keep advance baking close to assembly rather than planning an unsupported multi-day schedule.
Keeping the Finished Cake Covered and Chilled
Cover and refrigerate the assembled cake, and return leftover slices to a covered container in the refrigerator. Protect exposed cut surfaces from drying and avoid pressing wrapping into the soft frosting.
No specific refrigerated shelf life is established for this recipe. Keep the cake chilled between servings, remove portions as needed, and add fresh berries when serving rather than trapping them beneath the storage wrapping.
Conclusion
Medovik rewards patient assembly with tender honey layers, tangy cream, and a delicate crumb coating. The finished texture is much softer than the freshly baked rounds suggest.
Roll while the dough is warm, handle the frosting gently, and leave room for overnight chilling. Give the cream time to do its work before cutting that first slice.
Frequently Asked Questions
Why Is My Medovik Sour Cream Frosting Runny and How Can I Fix It?
A softly settling filling is normal; watery separation isn’t. Use full-fat sour cream, gently hand-whisk it, and fold in cream whipped to stiff peaks. Stop beating and chill before reassessing, knowing that chilling may not repair a severely deflated or separated mixture.
What Does Russian Honey Cake Medovik Taste Like?
It has pronounced honey flavor and a toasted biscuit character balanced by lightly sweet, tangy cream. Overnight refrigeration transforms the crisp layers into a tender, velvety cake. The dough contains no added spices or graham crackers.
Can I Substitute Almond Flour or Gluten-Free Flour for the Wheat Flour?
Almond flour alone isn’t a reliable direct swap because it doesn’t provide the same structure for rolling thin sheets. A gluten-free all-purpose baking blend would be an untested adaptation, not a guaranteed one-to-one replacement. Keep the stated all-purpose flour for the most predictable result.
How Far in Advance Should I Make Russian Honey Cake?
Plan assembly the day before serving so the cake receives its required overnight chill. Advance baking of dry rounds is separate from refrigerated storage after filling; keep cooled rounds airtight and the assembled cake covered and chilled.
How Do I Protect Honey Cake Layers and Slices From Drying Out?
Package completely cooled dry rounds airtight and keep them flat to protect their brittle edges. Cover finished slices in the refrigerator, protecting exposed cut surfaces without crushing the frosting.
Russian Honey Cake Medovik

Equipment
- medium sauce pan
- Spatula
- Rolling Pin
- 9″ plate or base from a springform mold
- Pizza Cutter
- Wire rack
- Food processor
Ingredients
Cake Layers Ingredients
- 4 Tbsp honey (1/4 cup)
- 3/4 cup granulated sugar
- 2 Tbsp unsalted butter
- 3 large eggs room temperature, beaten with a fork
- 1 tsp baking soda
- 3 cups all-purpose flour I used unbleached, organic
Sour Cream Frosting Ingredients
- 32 oz sour cream
- 2 cups powdered sugar
- 1 cup heavy whipping cream
For the topping
- 1/2 lb strawberries optional
Instructions
How to Make The Cake Layers
- Heat the sugar, honey, and butter in a medium saucepan over medium-low heat for 5 to 7 minutes, whisking occasionally. Look for dissolved sugar and a uniform mixture, keeping the heat low enough to prevent scorching.
- Take the saucepan off the burner and vigorously whisk the hot mixture while pouring in the beaten eggs in a thin, steady stream. The eggs should blend smoothly throughout rather than forming cooked flecks.
- Whisk the baking soda into the mixture until smooth, then use a spatula to incorporate the flour in 1/2-cup additions. With all 3 cups incorporated, the warm dough should feel pliable and clay-like rather than sticking to your hands.
- Divide the warm dough into eight equal portions and begin rolling immediately. The pieces are easiest to flatten while they still feel warm and flexible.
- Roll each portion on a well-floured surface to about 1/8 inch thick, dusting the top as needed, then trace a 9-inch plate or springform base with a pizza cutter and reserve the trimmings. The cut rounds should have even edges and a similar thickness throughout.
- Transfer the rounds to a large sheet of parchment and bake two at a time at 350°F for 4 to 5 minutes, repeating with the remaining dough. Remove each batch when golden and let the rounds cool completely on a wire rack before stacking.
- Spread the reserved trimmings evenly over a reused sheet of parchment and bake them, then cool and crush them with a rolling pin or food processor. The baked scraps should feel firm before crushing and become fine crumbs for coating the cake.
How to make the frosting
- Whip the heavy cream on high speed for 1 to 2 minutes, stopping when it holds stiff peaks. The cream should look fluffy, with peaks that remain upright when you lift the beaters.
- Gently hand-whisk the sour cream and powdered sugar in a separate bowl, fold in the whipped cream, and refrigerate until needed. The finished frosting should look smooth and airy, with a softer consistency than American buttercream.
Assembling your Cake
- Stack the cake rounds with about 1/3 cup frosting on each layer, pressing gently as you build, then spread the remaining frosting over the top and sides. The filling should settle between the layers without large air gaps, providing the moisture that softens the cake.
- Coat the top and sides with the baked dough-scrap crumbs, cover with plastic wrap, and refrigerate overnight. The crisp rounds will absorb cream and become tender enough to slice as a cohesive cake.