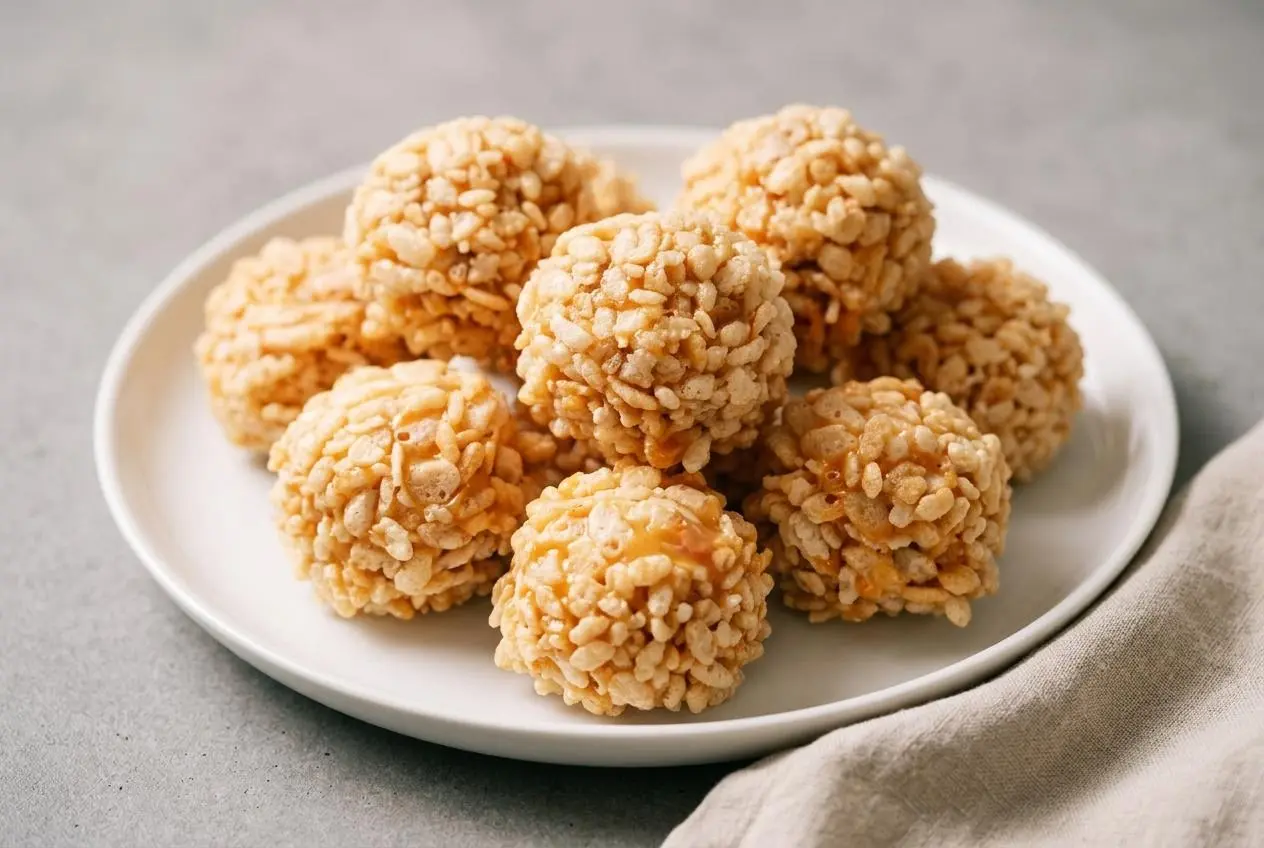
Caramel marshmallow rice krispie balls are no-bake treats made by dipping large marshmallows in melted caramel, sweetened condensed milk, and butter, then rolling them in crisp rice cereal. Let the caramel cool briefly before dipping so the marshmallows hold their shape.
The buttery caramel smells wonderful as it melts, but the contrast is what makes these treats fun: a soft, stretchy marshmallow center beneath a crunchy cereal shell. They fit right in on a holiday dessert platter.
You don’t need an oven, just a saucepan and a place to set the coated marshmallows. The little pause before dipping makes all the difference.
Set the cereal bowl beside the saucepan so you can coat each marshmallow while its caramel is still tacky.
Ingredients for Caramel Marshmallow Rice Krispie Balls
Each ingredient shapes the bite: caramels bring flavor, condensed milk and butter keep the coating pliable, marshmallows provide the soft center, and cereal adds crunch.
- 14 ounces caramels (about 50 wrapped Kraft caramels)
- 14 ounces sweetened condensed milk
- 2 Tablespoon butter
- 12 ounces marshmallows (large)
- 7 cups Rice Krispies Cereal
Large marshmallows are easier to hold on a toothpick or skewer than small ones, and their springy texture gives the finished candy its soft pull. Keep the cereal dry and away from steam while you melt the caramel.
I reach for marshmallows that spring back when gently pressed; dry, stiff ones are harder to dip neatly.
Wrapped Caramels Versus Caramel Baking Bits
The wrapped caramels in the ingredient list give the coating its familiar buttery flavor and chewy texture. Unwrapping them takes a little time, so doing that before heating the saucepan makes the rest of the assembly smoother.
Unwrapped caramel baking bits are a convenient alternative if you prefer to skip the wrappers. Choose a product meant to melt and measure by the caramel weight in the ingredient list rather than by the number of pieces. Either type needs gentle heat and steady stirring with the condensed milk and butter.
The Role of Sweetened Condensed Milk and Butter
Sweetened condensed milk loosens the melted caramels into a coating that stays pleasant to bite after it sets. Butter adds richness and helps the mixture stir into a smooth, glossy caramel instead of a stiff mass.
Watch the mixture rather than the clock alone. At first, you may see separate pieces and streaks of milk. When it is ready, the caramel looks uniform and shiny and falls from the spoon in a thick ribbon. Keep stirring so the milk sugars at the bottom of the pan do not scorch.
How to Make Caramel Marshmallow Rice Krispie Balls
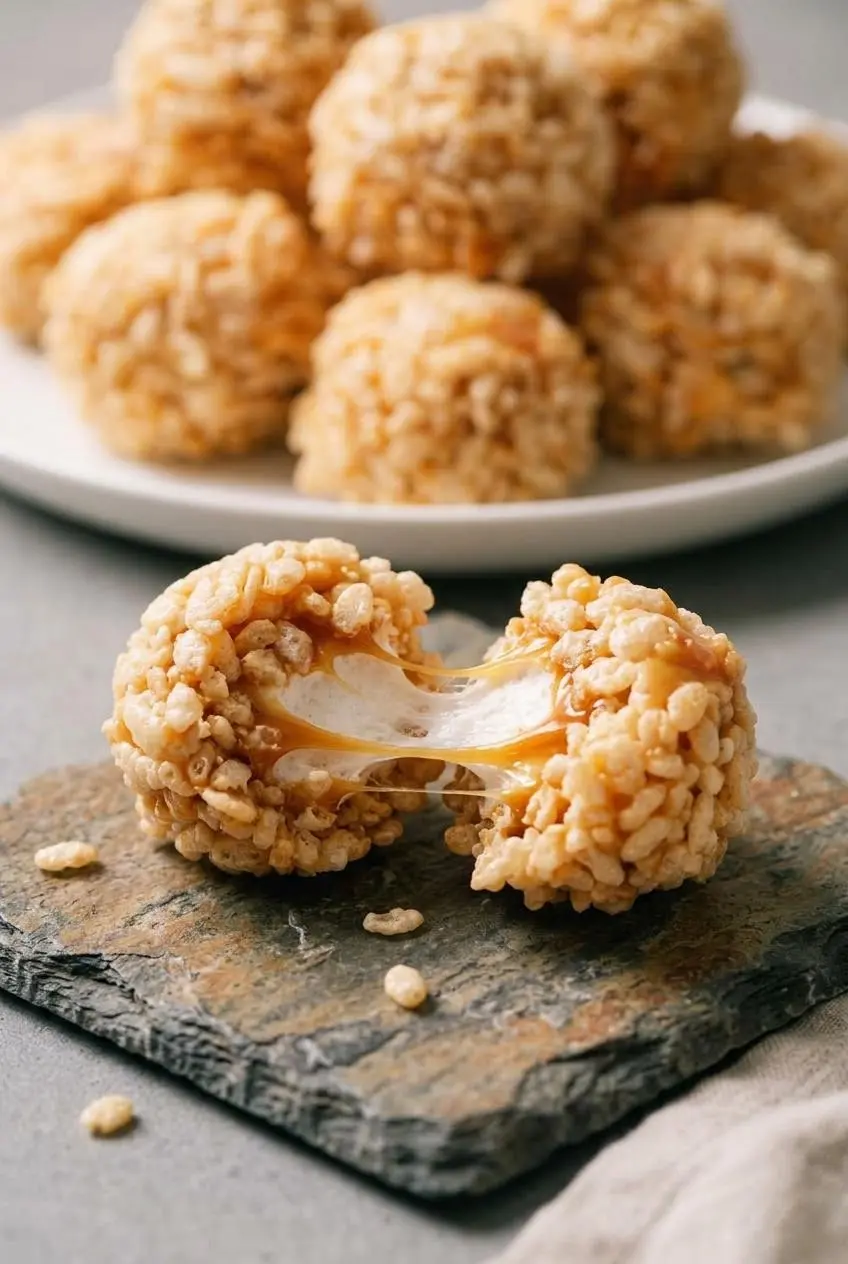
Plan on about 40 minutes of preparation and 8 to 10 minutes at the stove, followed by about 30 minutes for the coated balls to set. The recipe yields about 40 balls, though the count depends on the size of the large marshmallows.
- Prepare a baking sheet with parchment paper or a silicone mat, put the cereal in a large bowl, unwrap the caramels, and secure a toothpick or skewer in each marshmallow.
The sheet and cereal will be ready as soon as the coating becomes sticky. - Combine the caramels, sweetened condensed milk, and butter in a medium saucepan over medium heat, stirring constantly for about 8 to 10 minutes.
The mixture is ready when no caramel pieces remain and it looks smooth, creamy, and glossy. - Take the saucepan off the heat and leave the caramel undisturbed for about 2 to 3 minutes.
It should still coat a marshmallow easily without being hot enough to make the center soften and slip. - Dip one marshmallow, turn it to cover the surface, tap off the extra caramel, and roll it in the cereal immediately.
The cereal should cling to the tacky coating before a skin forms. - Transfer the coated marshmallow to the prepared sheet and gently rotate the toothpick as you pull it free.
The ball should keep its shape without the coating lifting away. - Leave the balls at room temperature for about 30 minutes before serving or putting them away.
The caramel should feel set enough to handle without sticking heavily to your fingers.
Coat one marshmallow all the way through before dipping the next. If several sit in caramel while you reach for the cereal, their coating can begin to firm up, making it harder for the puffed rice to stick.
Stovetop Versus Microwave Melting Guidelines
The stovetop gives you the clearest control over this dairy-rich caramel. Use the medium heat called for in the method, stir constantly, and pull the pan off the burner once the last pieces melt. A glossy, even coating matters more than getting the mixture especially hot.
A microwave can heat caramel unevenly, particularly around the edges of a bowl. If you use one as an alternative, choose reduced power, heat in short bursts, and stir thoroughly between them. Stop as soon as the mixture is smooth, then allow it to cool before dipping. The saucepan method remains the most straightforward way to follow the recipe.
The Critical Three-Minute Cooling Window
Freshly melted caramel is too hot for a marshmallow to hold up well. Give it the full 2 to 3 minutes off the heat before the first dip. That brief rest helps protect the marshmallow’s shape while leaving the caramel fluid enough to coat it.
The first marshmallow is a useful check. If it droops or starts slipping from the toothpick, pause and let the caramel cool a little more. If the coating clings in a thick, smooth layer and the marshmallow stays springy, continue with the rest.
Mastering the Dipping Technique Without Melting
A tidy setup makes the coating go faster: keep the saucepan next to the cereal bowl, with the lined baking sheet close by. Dip, drain, roll, and set down each marshmallow before starting another. Working in a steady sequence also keeps caramel from collecting in a sticky puddle beneath the finished balls.
- Marshmallow slips off: The caramel may still be too hot, or the toothpick may not be secure. Let the coating cool slightly and insert the pick firmly before trying again.
- Cereal will not cling: The caramel has started to set before rolling. Move a freshly dipped marshmallow straight into the cereal bowl.
- Coating gathers at the bottom: Too much caramel remained after dipping. Tap it gently against the saucepan rim before adding cereal.
The Three-Fork Technique for Mess-Free Coating
Toothpicks work well for the main method, but forks offer an alternative if a marshmallow keeps pulling loose. Use one fork to lower it into the caramel and another to turn it. Lift it on the tines and tap the fork lightly against the saucepan rim so the excess coating drops back into the pan.
A third clean fork can guide the marshmallow into the cereal without carrying extra caramel along. Roll gently rather than pressing hard; the goal is an even cereal layer over an intact, pillowy center. With toothpicks, a small twisting motion releases each finished ball more cleanly than pulling straight up.
How to Reheat Caramel That Thickens Too Fast
Caramel can become harder to dip as the batch progresses. If it stops flowing smoothly from the spoon, return the saucepan to low heat and stir just until the coating loosens. Take it off the heat again before dipping, checking that it is no longer hot enough to soften the marshmallows.
Avoid turning up the burner to hurry it along. High heat can scorch the condensed milk and leave the caramel unevenly thick. If the coating is flowing but seems heavy on the marshmallow, drain more of it at the rim rather than reheating it.
Storage and Make-Ahead Recommendations
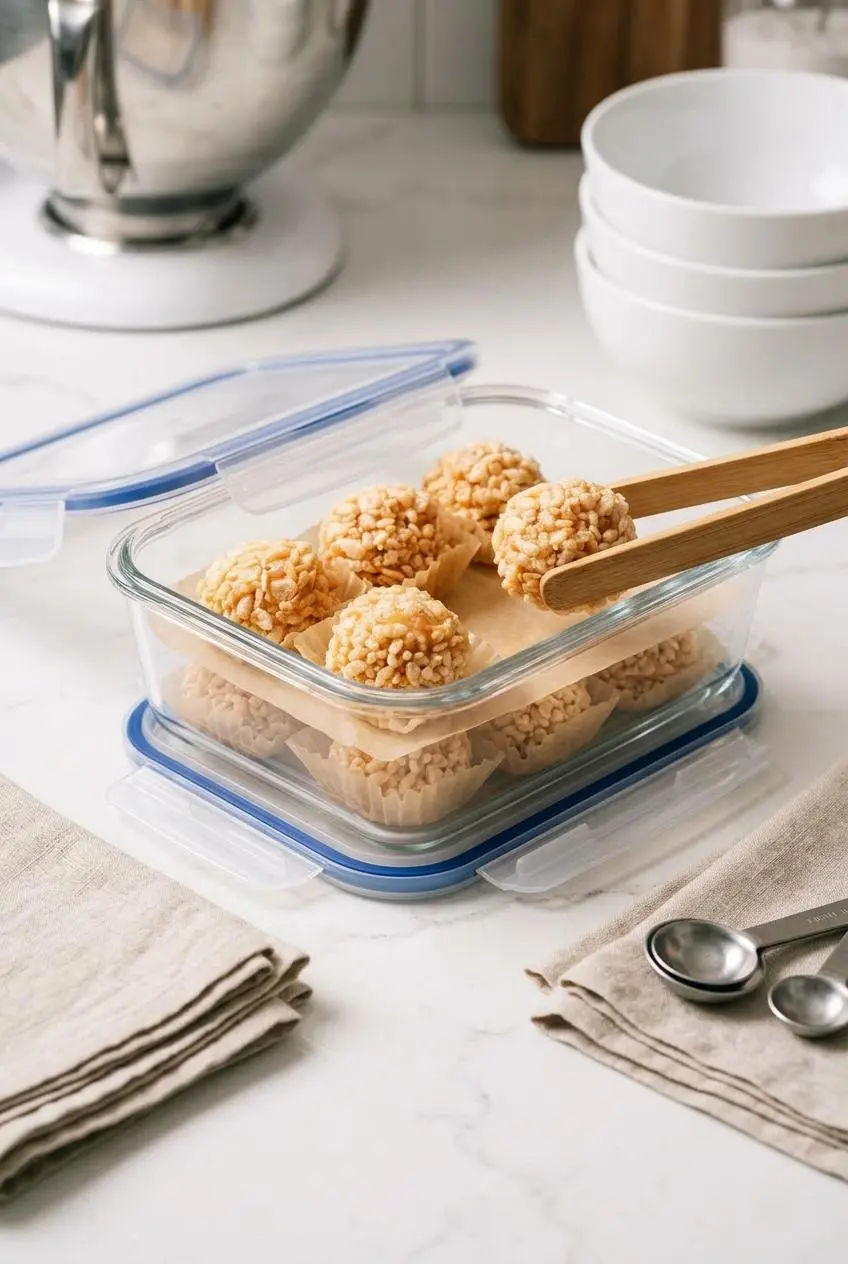
Moisture is the enemy of a crisp cereal coating. Let the balls finish setting at room temperature before closing them in a container; sealing them while warm can trap moisture against the puffed rice.
Protecting Cereal Crispness at Room Temperature
For serving later, arrange the fully set balls in an airtight container with wax paper or parchment between layers. Keep the container away from kitchen steam and humidity, and close it promptly after taking out what you need. The paper helps prevent sticking, while the lid limits the cereal’s exposure to damp air.
Tapping away excess caramel during assembly helps here, too. A heavy coating can seep through the cereal and soften the crunch. The same moisture-conscious approach is useful for classic rice krispie treats, where cereal texture also matters.
Keeping the Coating Crisp When Chilled
If you prefer a firmer, chewier bite, chill the finished balls in a covered container with paper between layers. Keep the lid on as they come back toward room temperature so moisture does not settle directly on the cereal. Serve them while the coating still has the texture you like.
For a dessert platter, arrange only what you plan to serve and keep the remaining balls covered. If packaging them as gifts, wait until the caramel has set completely so the cereal does not press into a damp coating.
Flavor Variations and Creative Toppings
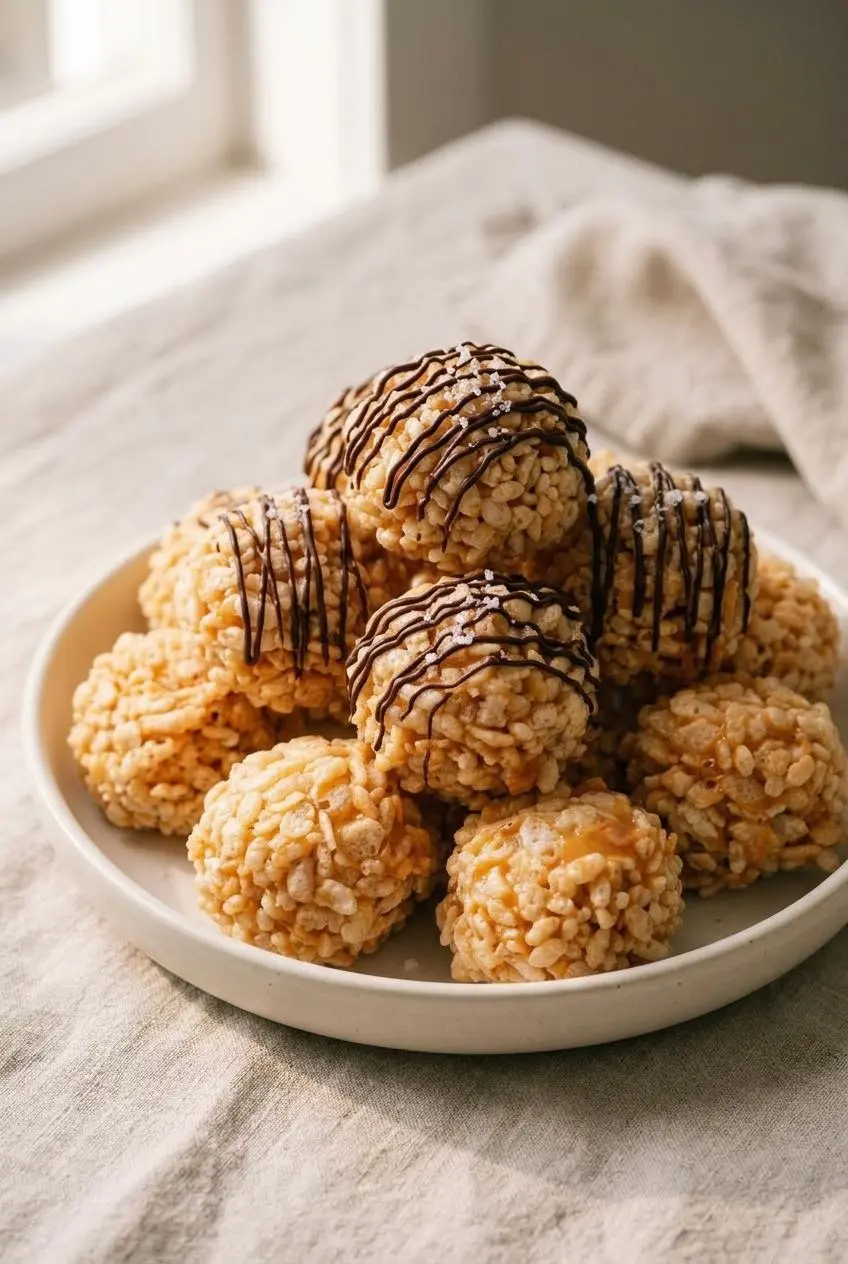
The caramel and marshmallow are sweet, so a little chocolate or salty crunch can bring welcome contrast. Treat these as optional changes; the ingredient list and method above make the classic version.
Gluten-Free Adaptations and Malt Warnings
These treats are not automatically gluten-free. Check the cereal label for barley malt and other gluten-containing ingredients, since crisp rice cereals differ. For a gluten-free version, choose a certified gluten-free puffed rice cereal and check the labels on the caramels and other packaged ingredients as well.
A cereal swap should still be crisp and dry so it can cling to the caramel. If it has a different shape or texture from Rice Krispies, roll a coated marshmallow first to see how evenly it covers before continuing with the batch.
Sweet and Salty Pretzel and Chocolate Additions
- Dark chocolate and flaky salt: Drizzle melted dark chocolate over the set cereal coating, then add a light sprinkle of flaky sea salt for contrast.
- Cocoa crisp rice: Use cocoa-flavored crisp rice cereal in place of the plain cereal for a chocolate note in every crunchy bite.
- Salted pretzel crunch: Replace some of the cereal with finely crushed salted pretzels. Keep the pieces small enough to cling to the caramel.
If the sweet-and-salty combination is your favorite part, peanut butter rice krispies offer another nutty take on a crisp cereal treat.
Conclusion
These no-bake balls deliver buttery caramel, a soft marshmallow center, and crisp cereal in one bite. For the neatest coating, give the melted caramel its brief rest before dipping and roll each marshmallow as soon as it comes out of the pan.
Serve them as they are, or finish a platter with a little flaky sea salt for balance. That first chewy, crunchy bite is worth the careful dip.
Frequently Asked Questions
Why Do My Marshmallows Melt or Slide off the Stick?
The caramel is likely too hot. Let it rest off the heat for 2 to 3 minutes before dipping, and make sure the toothpick or skewer is firmly inserted. If the first marshmallow droops, give the caramel a little longer to cool.
How Do I Prevent the Cereal Coating from Getting Soggy?
Tap off excess caramel before rolling, then let the finished balls set completely before covering them. Store them in an airtight container with wax paper or parchment between layers, away from steam and humidity.
Can Caramel Marshmallow Balls Be Made Ahead?
Yes. Let them set fully, then keep them covered with paper between layers until serving. For the strongest cereal crunch, protect them from moisture and avoid sealing them while warm.
Are Caramel Marshmallow Rice Krispie Balls Gluten-Free?
Not automatically. Check the cereal label for barley malt or other gluten-containing ingredients. Choose certified gluten-free puffed rice cereal and verify the labels of the other packaged ingredients if you need a gluten-free treat.

Caramel Marshmallow Rice Krispie Balls

Equipment
- Mixing Bowl (Large)
- Saucepan (Medium)
Ingredients
- 14 ounces caramels (about 50 wrapped Kraft caramels)
- 14 ounces sweetened condensed milk
- 2 Tablespoon butter
- 12 ounces marshmallows (large)
- 7 cups Rice Krispies Cereal
Instructions
- Prepare a baking sheet with parchment paper or a silicone mat, put the cereal in a large bowl, unwrap the caramels, and secure a toothpick or skewer in each marshmallow. The sheet and cereal will be ready as soon as the coating becomes sticky.
- Combine the caramels, sweetened condensed milk, and butter in a medium saucepan over medium heat, stirring constantly for about 8 to 10 minutes. The mixture is ready when no caramel pieces remain and it looks smooth, creamy, and glossy.
- Take the saucepan off the heat and leave the caramel undisturbed for about 2 to 3 minutes. It should still coat a marshmallow easily without being hot enough to make the center soften and slip.
- Dip one marshmallow, turn it to cover the surface, tap off the extra caramel, and roll it in the cereal immediately. The cereal should cling to the tacky coating before a skin forms.
- Transfer the coated marshmallow to the prepared sheet and gently rotate the toothpick as you pull it free. The ball should keep its shape without the coating lifting away.
- Leave the balls at room temperature for about 30 minutes before serving or putting them away. The caramel should feel set enough to handle without sticking heavily to your fingers.