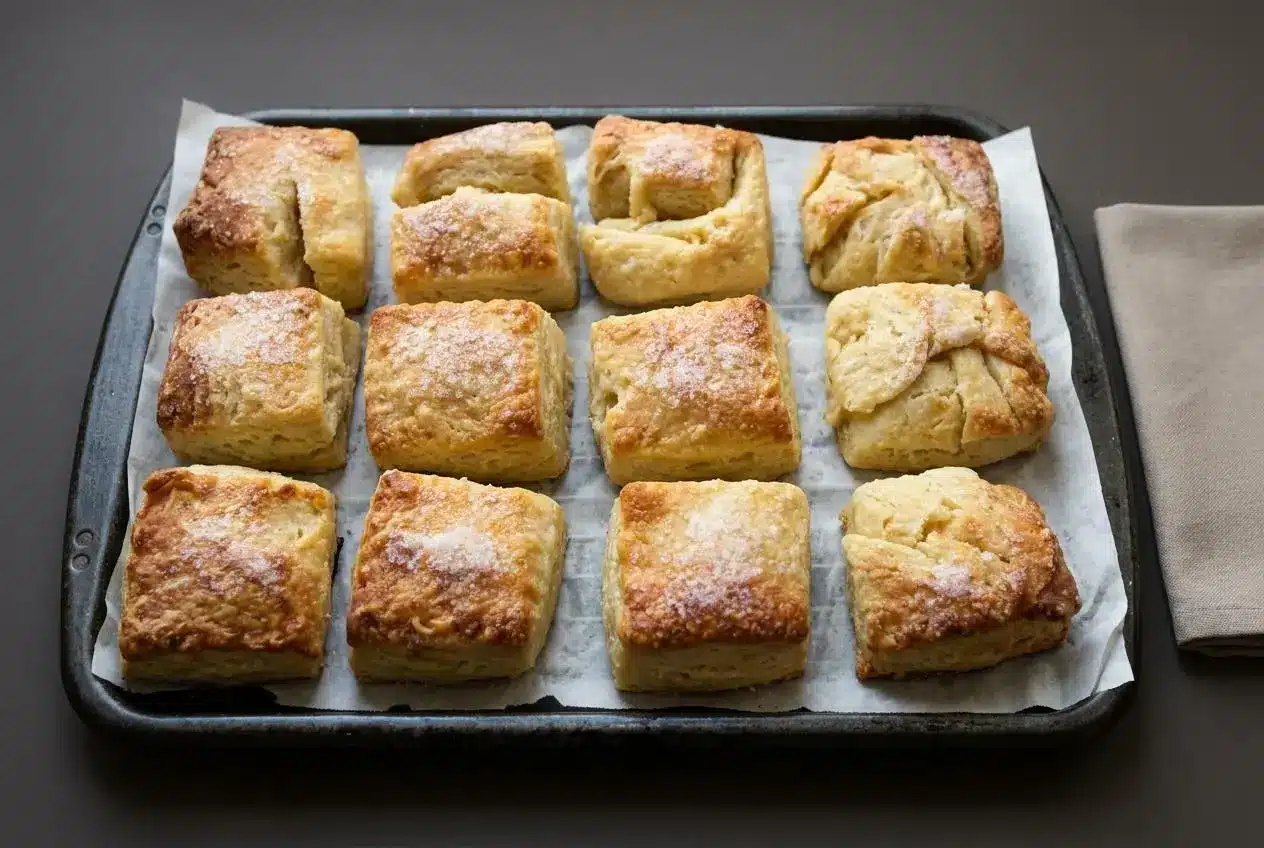
Irish Butter Scones are rich, buttery, and extra flaky because frozen butter is grated into the flour, the dough is folded for layers, and the shaped scones are chilled before baking.
Irish Butter Scones bake up with crisp edges, a golden crumb, and that deep butter aroma that makes the kitchen smell like a proper bakery. They lean more pastry-like than cakey, which is exactly the point.
If you like scones that split into layers instead of crumbling into dry bits, this method is worth the extra folding. The freezer step is the quiet hero.
Keep the milk cold and grate the butter at the last possible minute so the dough stays chilly from start to finish.
Why Irish Butter Makes Better Scones
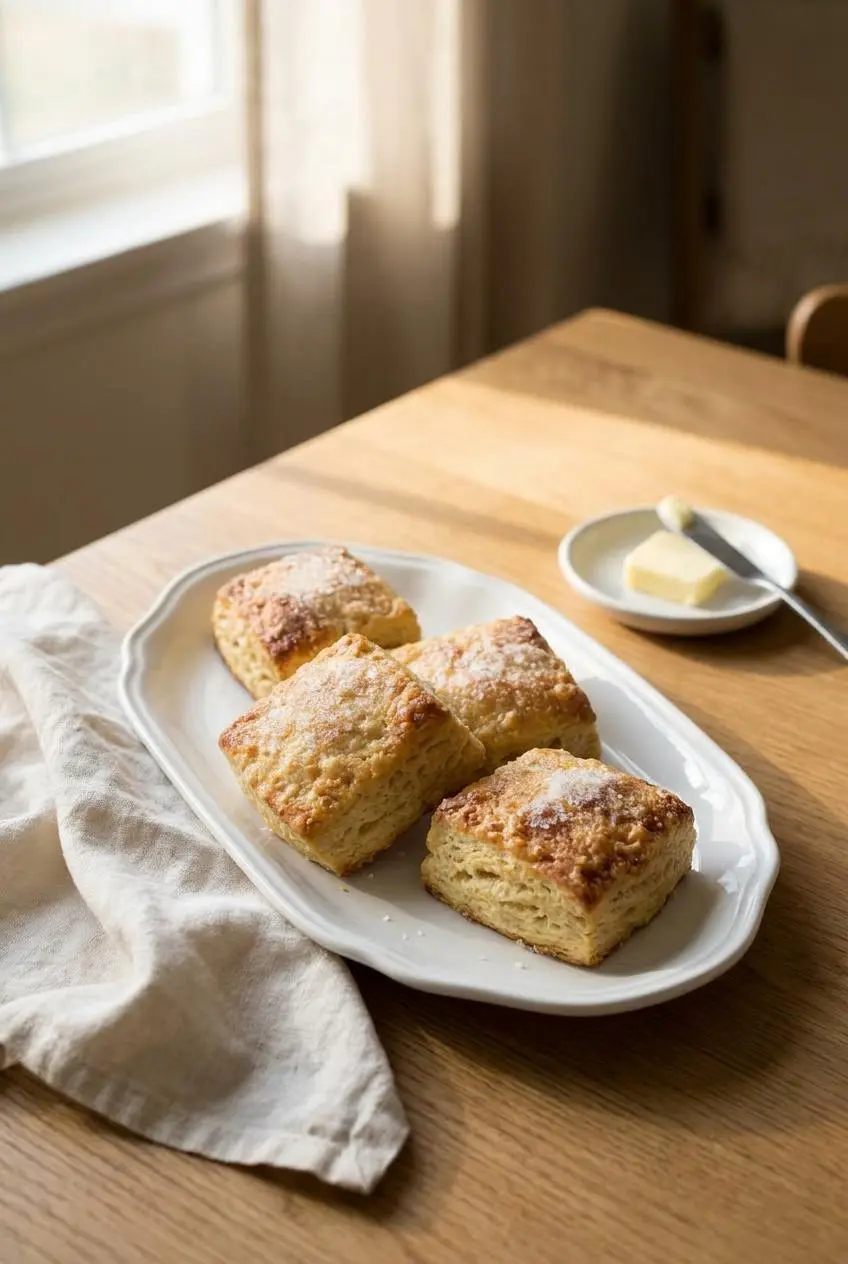
This recipe works because the butter does real structural work, not just flavor work. Irish butter and other European-style butters usually contain more fat and less water than standard American butter, so they tend to bake up richer and flakier without encouraging as much gluten development.
That matters in scones. When flour meets liquid and gets worked too much, gluten builds and the crumb turns chewy or tough. A higher-fat butter coats some of the flour first, which helps limit that problem. You still need a light hand, but the butter gives you a head start toward tenderness.
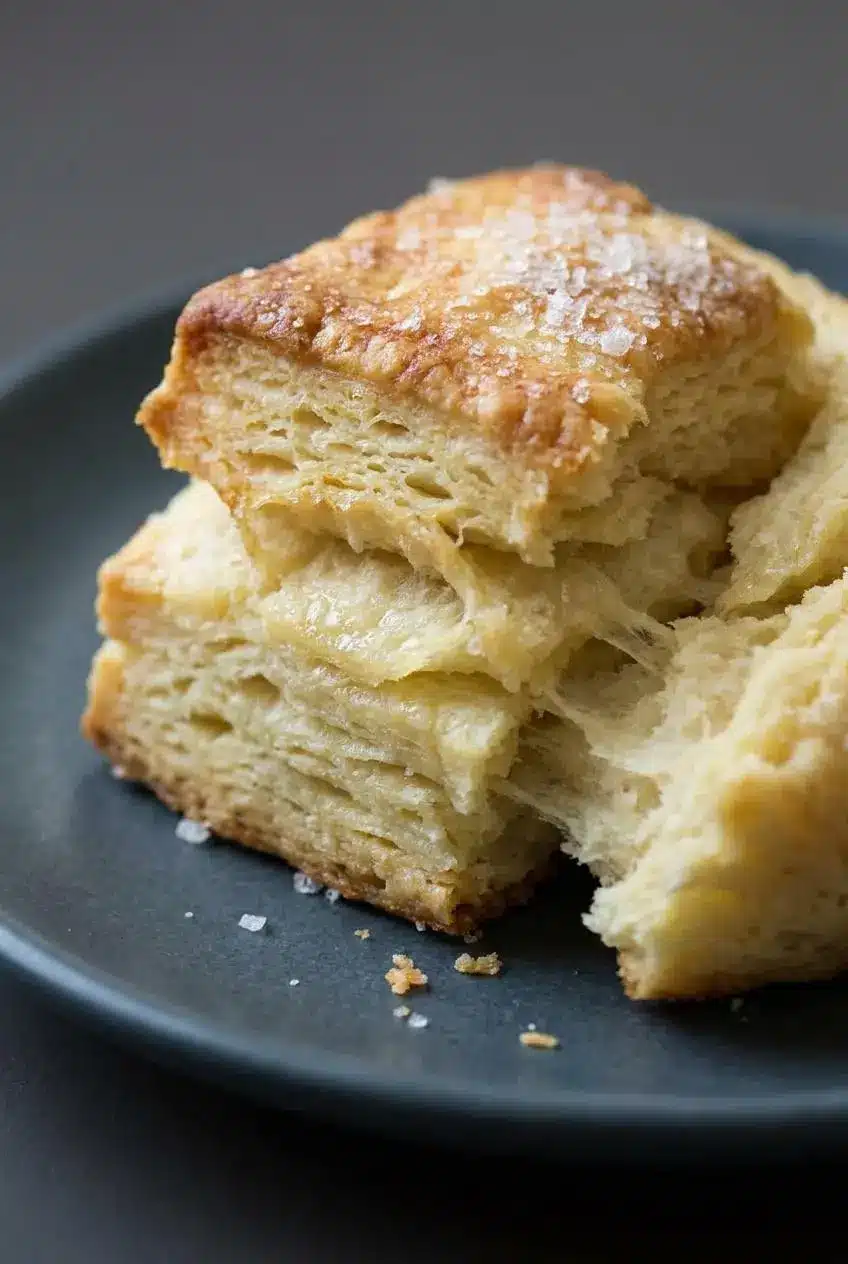
The cold butter also creates the layers. As the frozen shreds melt in the oven, they leave behind thin pockets in the dough. That is what gives you those flaky layers instead of a uniform, breadier interior.
Kerrygold is a classic choice here, but any high-fat Irish or European-style butter will give you a similar rich result. For serving, these are excellent warm with jam, clotted cream, or a swipe of homemade honey butter.
If Irish baking is your lane, these scones sit beautifully beside traditional Irish soda bread on a brunch table.
Ingredients for Ultra-Flaky Scones
Each ingredient pulls its weight here, from butter for flaky layers to milk for moisture, flour for structure, and sugar and salt for balance and browning.
- 2 cups whole milk
- 1/2 cup white granulated sugar, plus more for sprinkling
- 2 teaspoons kosher salt
- 6 cups all purpose flour, plus more for dusting
- 5 teaspoons baking powder
- 2 cups (4 sticks) unsalted butter, frozen
- Flaky sea salt, for sprinkling
The whole milk gives the dough enough moisture to come together while keeping the crumb rich instead of lean. Sugar adds sweetness, of course, but it also helps the tops color nicely in the oven.
Flour and baking powder build the body of the scone. The flour provides structure, while the baking powder helps lift those folded layers so the centers stay tender rather than dense.
Frozen butter is the star. Grating it into the dry ingredients spreads the fat through the dough in tiny cold pieces, which creates steam pockets and flaky layers once the scones hit the heat.
Flaky sea salt on top adds contrast. That light crunch on the crust makes the buttery interior taste even richer.
I always leave the butter in the freezer until the bowl of flour is fully ready, because even a few warm minutes can soften those shreds too much.
How to Bake Golden Irish Butter Scones
- Stir the flour and baking powder together in a large bowl, then grate the frozen butter through the large holes of a box grater straight into the bowl and toss it through with a fork.
The mixture should look loose and shaggy, with visible butter threads lightly coated in flour. - Whisk the whole milk, white granulated sugar, and kosher salt together in a medium bowl until the sugar is mostly dissolved.
The liquid should look smooth and evenly mixed, with no heavy layer of sugar sitting at the bottom. - Make a well in the center of the flour mixture and pour in the milk mixture, then stir with a fork just until the dough forms large clumps and barely comes together, adjusting with a little more flour or milk if needed.
You are looking for a rough, shaggy dough, not a smooth one. - Flour a pastry mat, wooden cutting board, or wax paper and turn the dough out onto it, then pat it with your hands just enough to help it hold together.
The dough should feel cool and slightly messy, but it should stop falling completely apart. - Cut the dough in half with a bench scraper or a large knife, stack one portion over the other, and roll it into a rectangle, adding a little flour to the surface if it starts sticking; repeat that stacking and rolling process two to three more times before shaping a final rectangle.
With each fold, the dough should look more organized while still showing bits of butter throughout. - Wrap the dough in plastic wrap and refrigerate it for at least 2 hours and up to overnight.
After chilling, the dough should feel firm and cold, which helps the layers hold their shape in the oven. - Heat the oven to 400 °F, line a baking sheet with parchment paper, and place a shallow pan of water on the bottom rack for steam.
That added steam helps the scones lift better early in baking and supports a taller, lighter rise. - Lightly flour the work surface again and set the chilled dough on it.
The dough should still feel cool and solid enough to cut cleanly. - Trim the outer edges with a bench scraper or very sharp knife, then cut the remaining rectangle into about 2-inch squares with a square cutter or knife.
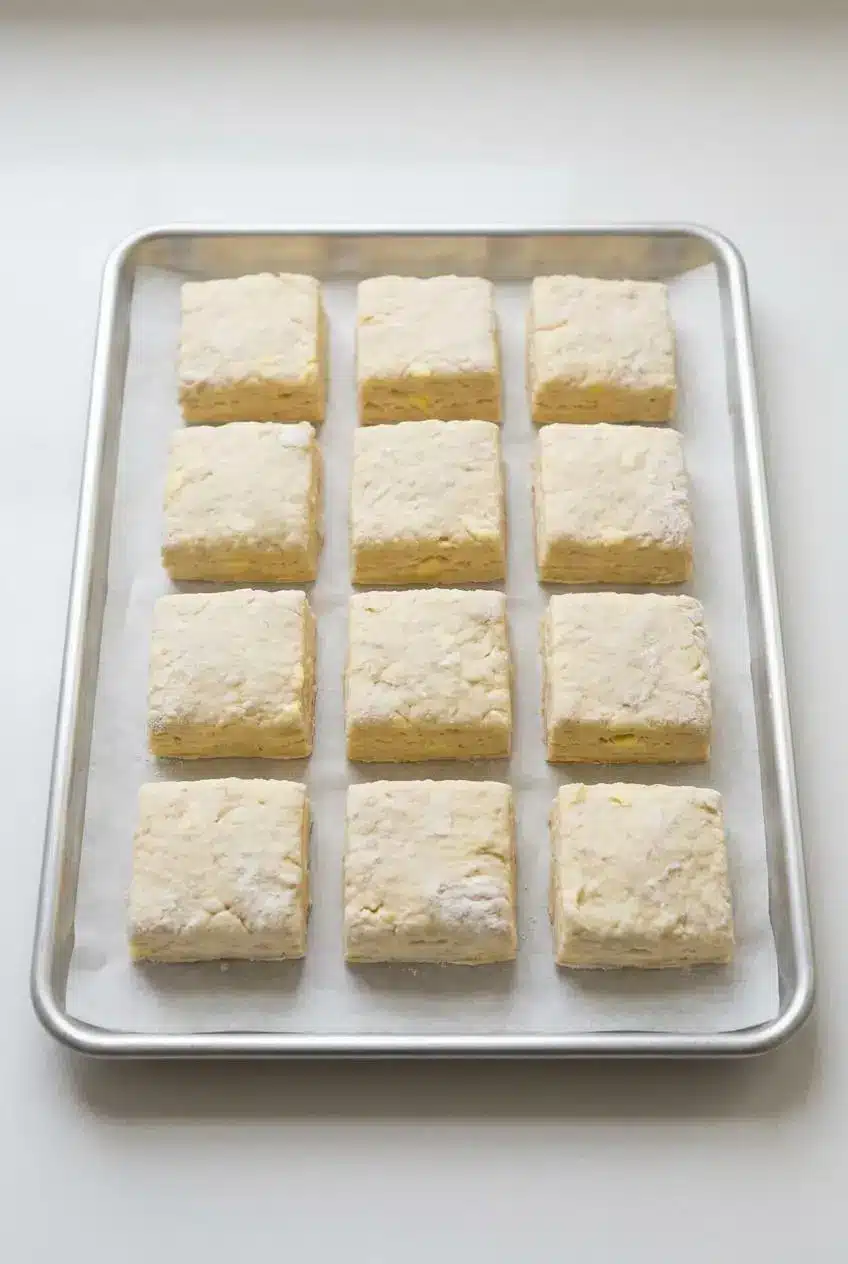
Clean edges help the layers rise neatly instead of sealing themselves shut. - Transfer the cut scones to the lined baking sheet, placing them close together, and freeze them until very cold, about 15 min.
Their surfaces should feel firm to the touch, which helps keep the butter from melting too soon. - Coat the tops lightly with cooking spray or brush them with melted butter, then sprinkle with extra sugar and flaky sea salt before baking.
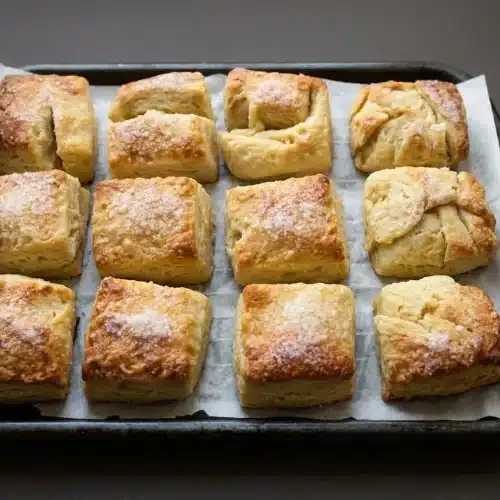
The tops should look lightly glossy and evenly covered so they brown beautifully. - Bake for 25-30 min.
The scones are done when the tops are golden brown, the buttery aroma is strong, and a pulled-apart edge looks baked all the way through with dry sides.
Step-by-Step Lamination Guide
If you want bakery-style layers, this is the section that matters most. Lamination sounds fancy, but for scones it simply means building thin layers of dough and butter by stacking and rolling without warming everything up.
The grated frozen butter gives you a head start because it spreads quickly through the flour without needing to be cut in by hand for long. Once the liquid goes in, the dough will look shaggy and uneven. That is right where you want it. A smooth dough at this stage usually means the butter has softened too much or the flour has been overworked.
When you divide the dough and stack one half over the other, you create a thicker block with butter and flour layers already forming. Rolling that block into a rectangle stretches those layers. Repeating the process a few times multiplies them, much like a rough puff pastry method, but simpler and sturdier.
Try to touch the dough as little as possible during this part. Warm hands soften the butter fast. A bench scraper helps you lift, stack, and straighten the dough without pressing heat into it.
- Grate the butter while it is fully frozen so the shreds stay distinct in the flour.
- Mix the dough only until it clumps. A ragged dough bakes better than an overmixed one.
- Pat the dough together gently before the first fold so it holds without becoming smooth.
- Split the dough, stack it, and roll it into a rectangle to start building layers.
- Repeat the stacking and rolling two to three more times for clearer flaky layers.
- Dust lightly with flour only when the surface sticks too much.
- Chill the dough before cutting so the butter firms back up.
- Freeze the shaped scones for 15 min before baking so they rise up instead of spreading out.
The steam pan in the oven helps here too. Early steam keeps the exterior from setting too fast, which gives the layers a better chance to lift before the crust fully firms.
Scone Texture Troubleshooting
Most scone problems come down to temperature, handling, or dough moisture. The good news is that each one has a pretty clear fix.
- Scones spread too much: The butter likely got too warm, or the pre-bake freeze was skipped. Keep the dough cold at every stage and do not miss the 15-minute freeze once the scones are cut.
- The dough feels too crumbly to hold: It needs a touch more moisture, or the dry ingredients were not fully drawn into the center. Add a little more milk only until the dough forms large clumps and can be patted together.
- The scones turn tough: The dough was probably mixed or handled too much. Stop stirring as soon as it comes together and rely on folding, not kneading, to shape it.
- The layers are weak: The dough may not have been stacked and rolled enough times, or the butter may have blended into the flour too completely. Visible butter pieces are a good sign here.
- The bottoms brown before the centers finish: Your baking sheet may be too dark or the oven may run hot. Parchment helps, and pulling one scone slightly away from the group is the easiest doneness check.
- The rise looks flat: Cold dough and oven steam make the biggest difference. The shallow pan of water on the lower rack gives the scones a better lift right at the start.
Variations to Try
The base dough stays beautifully buttery, so it can handle a few changes without losing its character. Keep these as optional paths rather than changes to the main recipe.
Traditional Buttermilk Scones
For a more classic tangy flavor, swap the whole milk for buttermilk and add a pinch of baking soda. The acidity in buttermilk reacts with the baking soda, which can give the scones a slightly livelier rise and a more traditional flavor.
This version tends to taste a little less sweet and a little more old-fashioned. If that is the profile you want, it is a very natural variation.
Aged Cheddar and Herb Scones
For a savory spin, fold grated aged Irish cheddar and chopped chives or dill into the dry mixture before adding the liquid. The cheese adds salty richness, and the herbs brighten the butter-heavy dough so it does not feel too rich.
If you want to keep exploring, fruit-based versions like fresh blueberry scones or citrusy sweet orange scones follow the same cozy scone spirit with a different finish.
Storage and Freezing Guidelines
These scones are at their best the day they are baked, when the edges are crisp and the centers still feel tender. Once fully cooled, store baked scones in an airtight container at room temperature for a short period if your kitchen is cool and dry, or refrigerate them if you want to be more cautious with the dairy. For chilled ingredients and dairy-based foods, keeping the refrigerator at 40 °F or below helps with proper storage.
To refresh baked scones, warm them briefly in the oven until the edges perk back up and the centers are no longer cool. A microwave will soften them, but it will not bring back the same crust.
You can freeze the raw cut scones before baking. Arrange the shaped pieces on a baking sheet, freeze until solid, then transfer them to a freezer bag. Bake them straight from frozen and add 2 to 3 minutes to the baking time.
Conclusion
These scones are all about butter, cold dough, and a few smart handling tricks that create real flaky layers. The folding and chilling take a little patience, but the texture pays you back fast.
Keep everything cold, trust the shaggy dough, and bake until the tops are deeply golden. Warm scones and good butter are never a bad idea.
Frequently Asked Questions
How are Irish scones different from English scones?
Irish scones are usually richer and more buttery. They often use buttermilk or a generous amount of butter, which gives them a denser, flakier crumb. English scones are often a bit lighter, taller, and less rich in texture.
What is the 15 minute rule for scones?
It means chilling the shaped scones in the freezer for 15 min before baking. That short freeze firms the butter so the scones spread less and rise better. It is one of the easiest ways to improve flaky layers.
Does Irish butter bake differently than regular butter?
Yes, usually it does. Irish butter tends to be richer and lower in water than regular butter, which helps create a more tender, flaky result. It also gives the finished scones a deeper butter flavor.
Can you freeze raw scone dough before baking?
Yes. Freeze the cut scones on a baking sheet first, then move them to a freezer bag once they are firm. Bake them directly from frozen so the dough stays cold and the layers lift properly. Add 2 to 3 minutes to the baking time.
Irish Butter Scones

Equipment
- Box grater
- Bench scraper
- Baking Sheet
- Parchment Paper
- large bowl
Ingredients
- 2 cups whole milk
- 1/2 cup white granulated sugar plus more for sprinkling
- 2 teaspoons kosher salt
- 6 cups all purpose flour plus more for dusting
- 5 teaspoons baking powder
- 2 cups unsalted butter (4 sticks), frozen
- Flaky sea salt for sprinkling
Instructions
- In a large bowl, combine the flour and baking powder and stir together with a large fork. Use the large holes on a box grater to grate the frozen butter directly into the dry ingredients. Stir together with a fork and set aside.
- Combine the milk, the white sugar and the salt in a medium bowl and whisk together.
- Make a well in the center of the dry-butter ingredients and add the milk mixture. Stir together with a fork, adding enough flour or milk as needed until large clumps form and the dough just comes together.
- Sprinkle a pastry mat, wooden cutting board or wax paper with flour. Turn the dough out onto the surface and pat a few times with your hands until it loosely holds together.
- Use a bench scraper or a large knife to divide dough in half. Stack one half on top of each other, then roll into another rectangle, sprinkling the surface with flour if it gets too sticky. Repeat the process two to three more times before patting it into one final rectangle.
- Wrap the dough in plastic wrap and refrigerate for at least 2 hours and up to overnight.
- Preheat oven to 400F. Line a baking sheet with parchment paper. Place a shallow pan of water on the bottom rack of the oven for steam.
- Sprinkle a pastry mat, wooden cutting board or wax paper with flour. Turn the dough out onto the surface.
- Use a bench scraper or very sharp knife to trim the edges of the rectangle. Use a square cookie cutter or a knife to cut the remaining dough into squares, about 2 inches each.
- Remove the cut scones to the baking sheet lined with parchment paper, placing them close to each other. Freeze until cold, about 15 minutes.
- Spray the tops of the scones with cooking spray, or brush with melted butter, sprinkle the tops with sugar and flakey salt, and place in oven.
- Bake for 25-30 minutes, until golden brown. When pulled away from others, the edge should look baked all the way through.