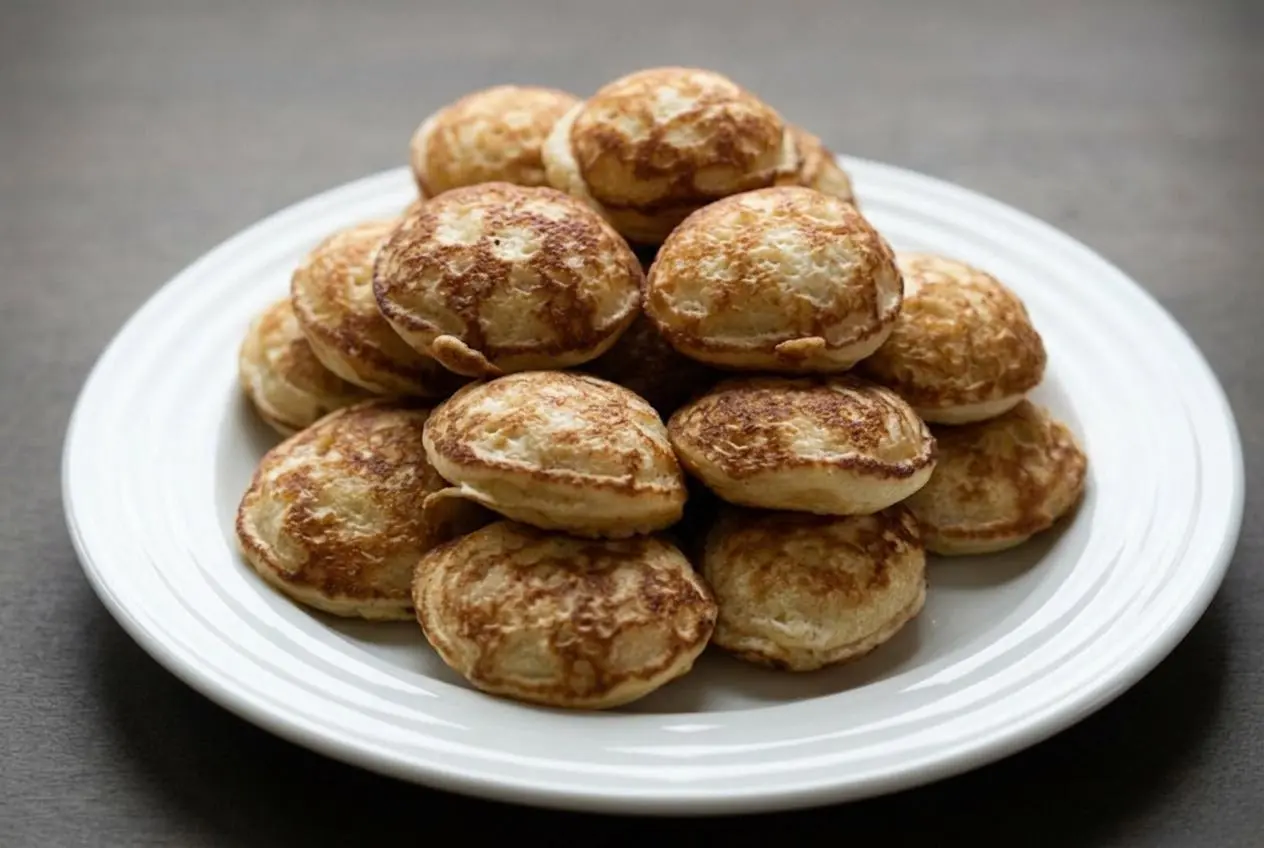
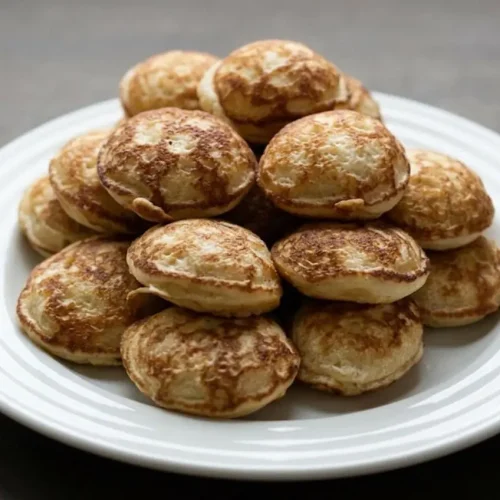
This poffertjes recipe makes tiny Dutch yeast pancakes with golden, buttery edges and pillowy centers. Let the batter rise until bubbly, cook it in buttered pan cavities, and turn each pancake with a wooden skewer before the top sets completely.
Warm poffertjes are especially good when a pat of butter melts into their powdered sugar topping. Unlike typical American pancakes, these little rounds use yeast for an airy texture and a lightly fermented flavor.
The batch yields 40 poffertjes and takes about 1 hour 30 minutes, including the preferred 1-hour rise and 30 minutes of cooking. A specialty pan helps shape them, but you have other options. The flip makes the difference.
Set a wooden skewer and a small cookie scoop beside the stove before heating the pan.
Key Ingredients for This Poffertjes Recipe and Why They Matter
Yeast supplies lift, flour gives the pancakes structure, and milk hydrates the batter. Egg adds richness and binding, sugar softens the flavor, salt balances it, and butter helps the pancakes release with golden edges.
- 1 tbsp SAF Instant Yeast
- 1 1/2 cup warm milk (90 to 100 degrees F)
- 1 3/4 cup white flour (All Purpose Flour)
- 1 tbsp sugar
- 1/2 tsp salt
- 1 large egg
- 4 tbsp Butter (for generously greasing the pan)
Instant yeast creates the bubbles that give poffertjes their spongy, tender structure. Active dry yeast is a different format and may need different handling, so follow its package directions if adapting. Instant yeast remains the choice for this method.
Aim for the supplied milk temperature of 90 to 100°F. It should be lukewarm rather than hot, since excessive heat can harm yeast. The flour holds the expanding bubbles, while milk and egg keep the cooked crumb tender rather than breadlike.
The sugar adds mild sweetness without making these dessert-sweet on their own. Salt keeps the flavor balanced. Reserve the measured butter for greasing the pan, not mixing into the batter: that generous coating helps prevent tearing during the turn and encourages browned edges.
I check the milk with a thermometer before adding yeast rather than guessing from the warmth of the cup.
How to Make Authentic Dutch Poffertjes Step by Step
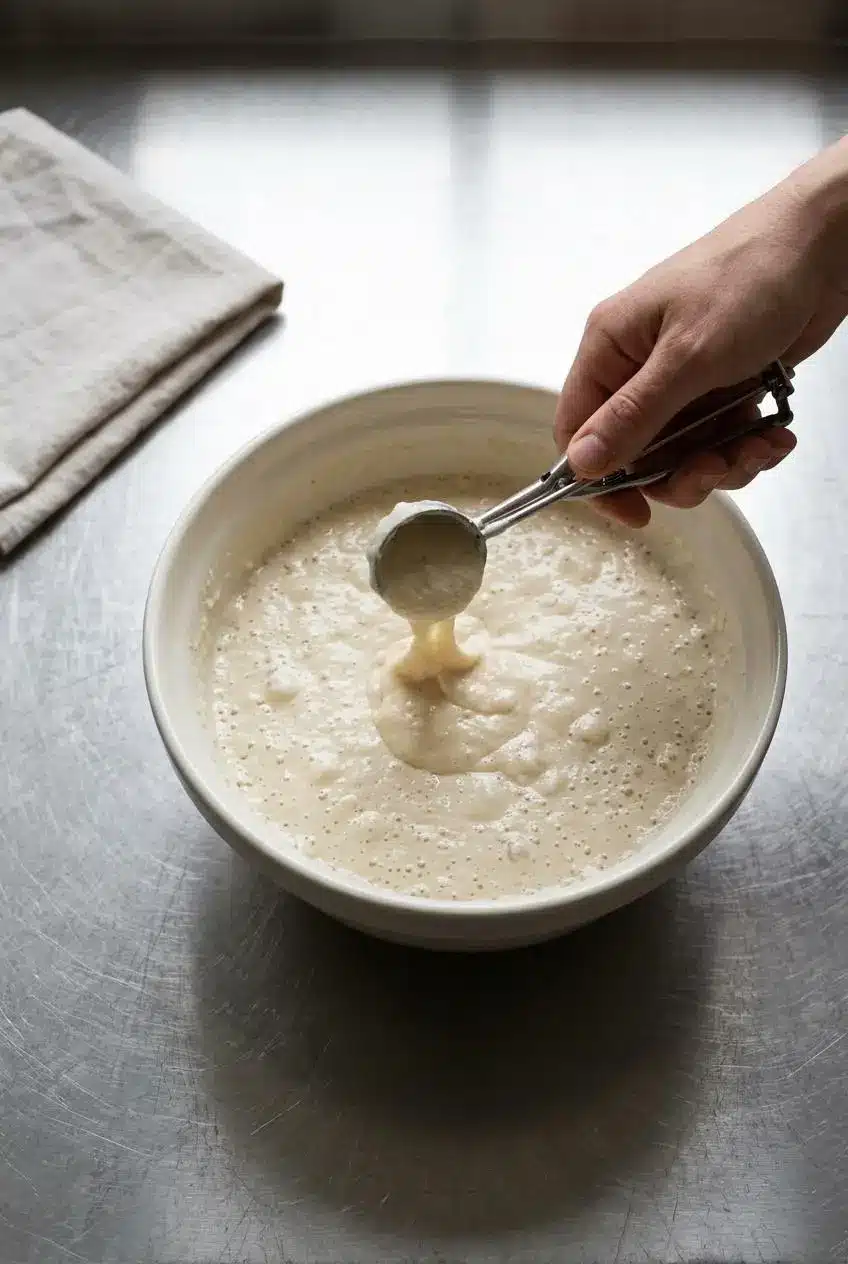
Watch the batter as well as the clock. Visible expansion and bubbles tell you that the yeast has supplied the lift these little pancakes need.
- Bring the milk to 90 to 100°F, mix in the yeast, and leave it for 5 minutes while measuring the dry ingredients.
Keep the milk lukewarm, not steaming hot, to give the yeast suitable conditions. - Combine the flour, sugar, and salt with a whisk in a large bowl.
An evenly blended dry mixture distributes sweetness and seasoning throughout the batter. - Add the yeast-milk mixture and the egg to the bowl, then stir only until no dry flour remains.
Leave small lumps alone rather than working the batter until perfectly smooth. - Drape a clean kitchen towel over the bowl and allow a 1-hour rise at room temperature.
Look for roughly twice the starting volume and a bubbly surface; a 30-minute rise is a compromise when pressed for time, but the full hour develops more flavor. - Preheat a poffertjes or aebleskiver pan for 3 minutes over medium to medium-high heat, then coat every cavity generously with butter.
The butter should melt readily and cover the surfaces where the batter will touch. - Portion batter with a small cookie scoop until each cavity is about halfway full, adding warm milk to the bowl one tablespoon at a time only if needed.
The mixture should fall from the scoop without needing to be scraped out as a firm lump. - Give the first side 1 to 2 minutes, then catch the edge with a wooden skewer and roll each pancake over within its cavity.
Bubbles across the top and a golden underside signal the turn while the upper center remains soft. - Allow another 1 to 2 minutes for the second side to cook.
Both faces should develop a golden-brown color, with a cooked, tender center rather than wet batter. - Remove the pancakes using the skewer or a small fork, then butter the empty cavities before adding the next batch.
A fresh coating helps the next round release without tearing its delicate edges.
Serve the poffertjes warm with powdered sugar and a small pat of butter, or choose maple syrup, jam, or fresh berries.
Best Pan Options and How to Make Poffertjes Without a Special Pan
You don’t need to buy a dedicated pan to enjoy the batter. The main difference is shape: cavities support rounded pancakes, while a flat cooking surface lets the batter spread.
Cast Iron Poffertjes Pan vs Aebleskiver Pan
- Poffertjes pan: Shallow cavities create the small, slightly flattened puffs associated with Dutch mini pancakes.
- Aebleskiver pan: Deeper wells also work with this method, but keep the halfway filling level rather than filling them to the rim.
- Electric poffertjes maker: The shaped cooking surface serves a similar purpose, but heat controls vary, so follow the appliance instructions and watch the browning cues.
Use a small lever-release cookie scoop for the thick yeast batter. A squeeze bottle works better with a thinner batter that flows freely; risen batter can clog its opening. Don’t dilute this mixture simply to make it fit a bottle.
Flat Skillet and Mini Muffin Tin Workarounds
- Buttered flat skillet: Scoop small rounds onto the cooking surface and turn them once the undersides are golden and the tops bubble. Pipe them only if the batter already flows easily. Expect flatter mini pancakes, not rounded puffs.
- Buttered mini muffin tin: Bake at 350°F for 12 to 15 minutes as an optional oven approach. This produces a different shape and texture from stovetop poffertjes, so don’t expect the same browned surfaces or soft-center effect.
The skillet keeps the familiar pancake-cooking rhythm. The muffin tin avoids individual turning, but it is an alternative preparation rather than an identical substitute.
Pro Tips and Troubleshooting for Fluffy, Creamy Centers
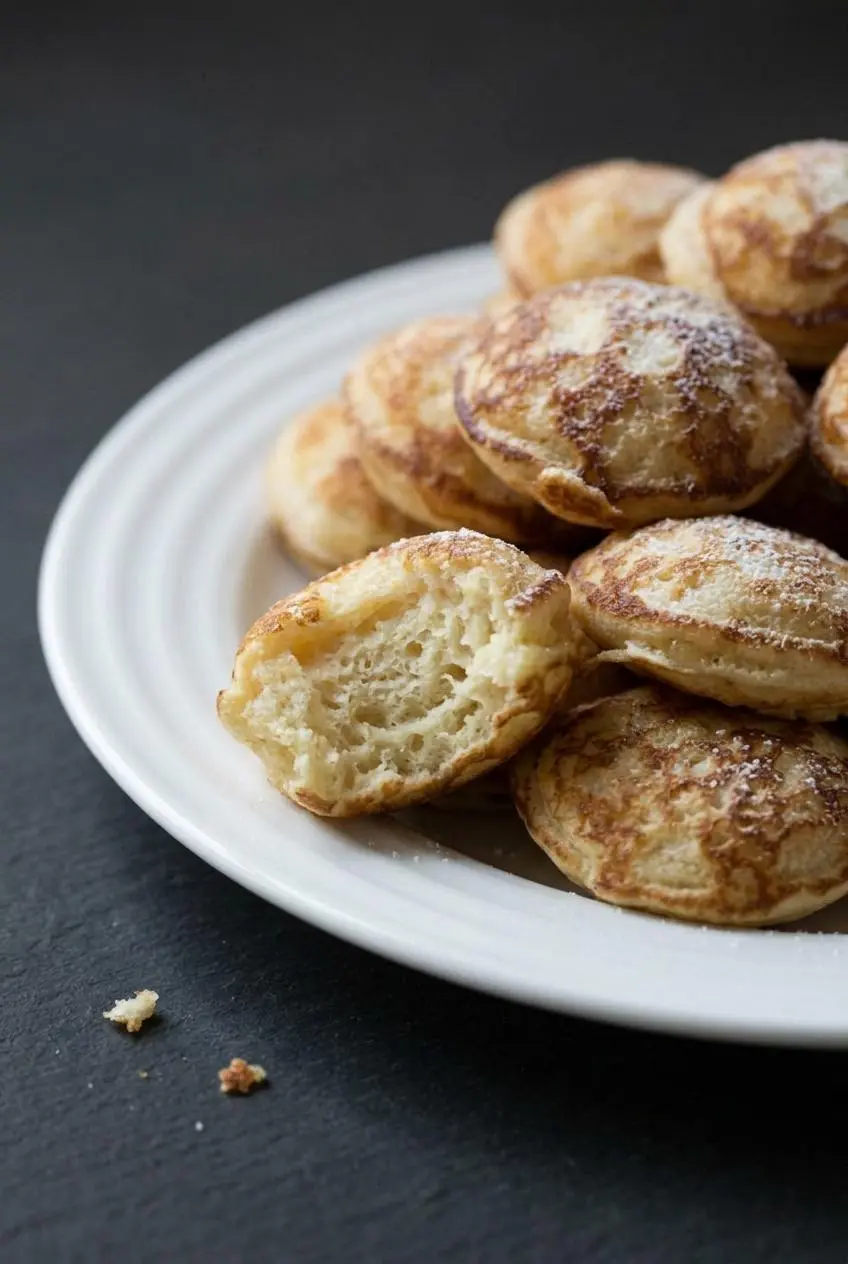
Heat control and the timing of the first turn matter more than getting every pancake perfectly round. Start with only half the cavities filled while you learn the pace.
- Dry centers: Waiting until the entire top looks dry lets the first side cook too far. Turn when the underside is golden and the top bubbles but the center still looks soft. Complete the second-side cooking; a creamy texture means tender cooked crumb, not raw egg-and-flour batter.
- Sticking or torn edges: Check the preheat and butter coverage before blaming the batter. A browned underside should release when gently nudged with the skewer. Re-butter between rounds instead of relying on what remains from the previous batch.
- Butter smokes or batter darkens immediately: The pan is too hot. Adjust the burner and let the heat settle before continuing. Butter melting with a gentle sizzle is a more useful cue than smoke.
- Batter stays lodged in the scoop: It needs a little more hydration. Add warm milk one tablespoon at a time until portions drop off readily, stopping before the batter becomes thin and pourable.
- Dense pancakes: Check whether the milk was excessively hot and whether the batter visibly doubled. Cooking a barely risen mixture won’t produce the same airy interior.
- Uneven browning: Cast iron retains heat, and cavities may cook differently over your burner. Adjust the heat between batches and turn the faster-browning pancakes first rather than treating the whole pan as one timer.
For greasing, use a heatproof brush or hold a cold piece of butter securely on a fork and pass it through the cavities. Keep fingers clear of the hot pan and work carefully around splattering butter.
Authentic Buckwheat, No-Yeast, and Dietary Variations
These optional directions change flavor, lift, or structure. Keep them separate from the measured yeast recipe, since they aren’t interchangeable without adjustment.
Traditional Dutch Buckwheat Flour Blend
Some traditional poffertjes combine buckwheat and all-purpose flour. Buckwheat brings an earthy, nutty flavor that contrasts nicely with butter and powdered sugar.
Partial replacement is one direction to explore, but no measured conversion is established here. Buckwheat changes how the batter absorbs liquid and holds together, so watch consistency rather than assuming every flour blend behaves alike.
Quick No-Yeast Option Using Baking Powder
A separately formulated baking powder batter skips the yeast-rise wait and generally has a milder flavor. Its texture is more like a quick pancake than the lightly fermented, spongy version made here.
Choose a complete baking powder formula rather than replacing yeast tablespoon for tablespoon or simply omitting the rise. No tested baking powder replacement amount is provided for these measurements.
A thinner quick batter can flow neatly through a squeeze bottle. The thicker yeast batter belongs in a scoop, so match the dispenser to the mixture instead of forcing the mixture through the dispenser.
Gluten-Free and Dairy-Free Swaps
- Gluten-free direction: A batter made entirely with buckwheat flour may need hydration and structure adjustments; it isn’t an established cup-for-cup swap here. Choose certified gluten-free ingredients and avoid cross-contact when needed.
- Dairy-free direction: Plant milk, such as oat or almond milk, and plant butter offer an adaptation path, though flavor and browning may differ. The egg remains, so this change does not make the recipe vegan.
Traditional Dutch Serving Ideas, Storage, and Reheating
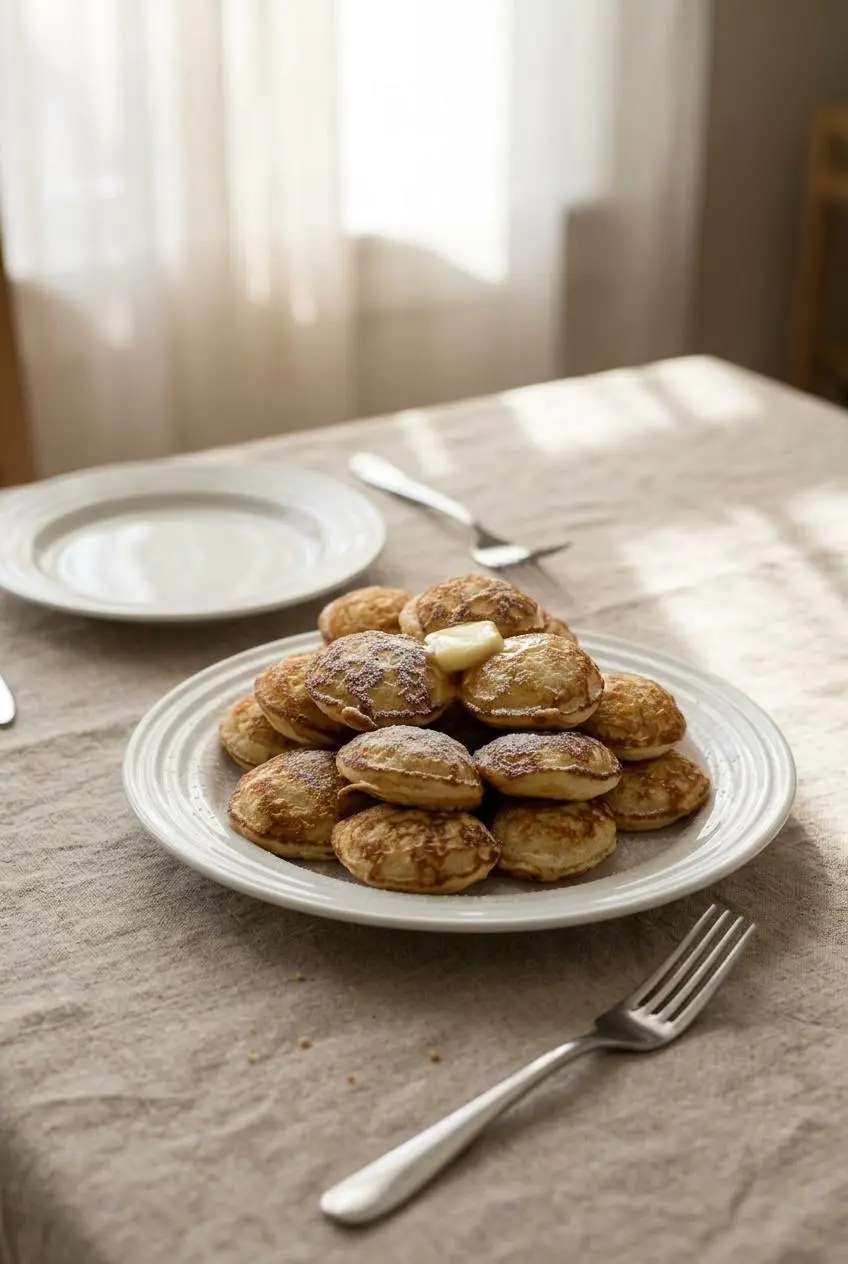
Bring warm batches to the table as they finish when possible. Their lightly browned edges are at their best before a covering traps too much moisture.
Powdered Sugar, Butter, and Brunch Toppings
- Classic plate: Finish warm poffertjes with powdered sugar and a small pat of butter, using salted butter if you enjoy a sweet-salty contrast.
- Fruit and syrup: Offer maple syrup, fresh berries, or homemade peach jam alongside the pancakes.
- Dessert-style serving: Try Dutch stroop, lemon curd, or skewers alternating poffertjes with strawberries and banana slices.
For an optional cinnamon-vanilla variation, brown half of the measured pan-greasing butter, then stir in a pinch of cinnamon and vanilla bean paste before brushing the cavities. Keep the remaining butter for greasing as needed. The browned butter adds a nutty aroma, but it can darken further against hot cast iron, so watch closely.
Keeping Small Batches Warm Without Steaming the Edges
Loosely cover cooked batches with foil or an inverted plate while you finish cooking. Leave room for steam to escape rather than sealing the pancakes tightly. A snug covering retains warmth but also traps condensation that softens the edges.
Cooked Leftovers and Gentle Reheating
Cook the prepared batter rather than planning to refrigerate it for another cooking session. Fermentation continues and can change its flavor and lift. That doesn’t mean all refrigerated yeast batters fail; formulas designed for cold fermentation follow different instructions.
Refrigerate cooked leftovers promptly in a covered container and keep the refrigerator at 40°F or below for chilled egg-containing foods.
For reheating, arrange the cooked poffertjes in an oven-safe dish and warm them gently in the oven until heated through. Avoid leaving them uncovered longer than necessary, which dries the edges. Add powdered sugar and butter after warming; reheated pancakes may be less delicate than freshly cooked ones.
Conclusion
Golden edges and fluffy centers start with visibly risen batter and a well-buttered pan. Turn at bubbly tops and golden bottoms rather than waiting for the entire surface to dry.
Choose the pan approach that fits your kitchen, and give yourself a little room to learn the flipping rhythm. Serve them warm while the butter melts.
Frequently Asked Questions
Can You Make Poffertjes Without a Poffertjes Pan?
Yes. An aebleskiver pan works with the supplied halfway filling method. A buttered skillet makes flatter mini pancakes, while a buttered mini muffin tin offers an oven alternative at 350°F for 12 to 15 minutes.
What Is the Difference Between Poffertjes and Aebleskiver?
Poffertjes are smaller, slightly flatter Dutch pancakes, often associated with yeast and buckwheat flour. Danish aebleskiver are larger and rounder, with recipes commonly using baking powder or beaten egg whites. Sharing a pan doesn’t make the dishes identical.
Why Don’t My Poffertjes Have a Creamy Center Like the Ones in Amsterdam?
You may be waiting too long before turning. Look for a golden underside and bubbly top while the upper center remains soft. Finish cooking the second side as directed. The goal is a tender, cooked interior, not wet batter.
Can I Store Leftover Poffertjes Batter in the Refrigerator?
For this preparation, cook the remaining batter and refrigerate the cooked pancakes instead. Continuing fermentation changes the batter’s lift and flavor; this method isn’t designed around refrigerated fermentation.
What Is the Difference Between Yeasted and No-Yeast Poffertjes?
This yeast batter uses a preferred 1-hour rise for an airy texture and lightly fermented flavor. A baking powder formula skips that rise and tastes milder. Use a scoop for thick yeast batter and a squeeze bottle only for batter that flows freely. Baking powder needs its own formula, not an equal-volume yeast substitution.
Poffertjes Recipe

Equipment
- Aebleskiver Pan/Ebelskiver Pan
Ingredients
- 1 tbsp SAF Instant Yeast
- 1 1/2 cup warm milk (90 to 100 degrees F)
- 1 3/4 cup white flour (All Purpose Flour)
- 1 tbsp sugar
- 1/2 tsp salt
- 1 large egg
- 4 tbsp Butter (for generously greasing the pan)
Instructions
- Bring the milk to 90 to 100°F, mix in the yeast, and leave it for 5 minutes while measuring the dry ingredients. Keep the milk lukewarm, not steaming hot, to give the yeast suitable conditions.
- Combine the flour, sugar, and salt with a whisk in a large bowl. An evenly blended dry mixture distributes sweetness and seasoning throughout the batter.
- Add the yeast-milk mixture and the egg to the bowl, then stir only until no dry flour remains. Leave small lumps alone rather than working the batter until perfectly smooth.
- Drape a clean kitchen towel over the bowl and allow a 1-hour rise at room temperature. Look for roughly twice the starting volume and a bubbly surface; a 30-minute rise is a compromise when pressed for time, but the full hour develops more flavor.
- Preheat a poffertjes or aebleskiver pan for 3 minutes over medium to medium-high heat, then coat every cavity generously with butter. The butter should melt readily and cover the surfaces where the batter will touch.
- Portion batter with a small cookie scoop until each cavity is about halfway full, adding warm milk to the bowl one tablespoon at a time only if needed. The mixture should fall from the scoop without needing to be scraped out as a firm lump.
- Give the first side 1 to 2 minutes, then catch the edge with a wooden skewer and roll each pancake over within its cavity. Bubbles across the top and a golden underside signal the turn while the upper center remains soft.
- Allow another 1 to 2 minutes for the second side to cook. Both faces should develop a golden-brown color, with a cooked, tender center rather than wet batter.
- Remove the pancakes using the skewer or a small fork, then butter the empty cavities before adding the next batch. A fresh coating helps the next round release without tearing its delicate edges.