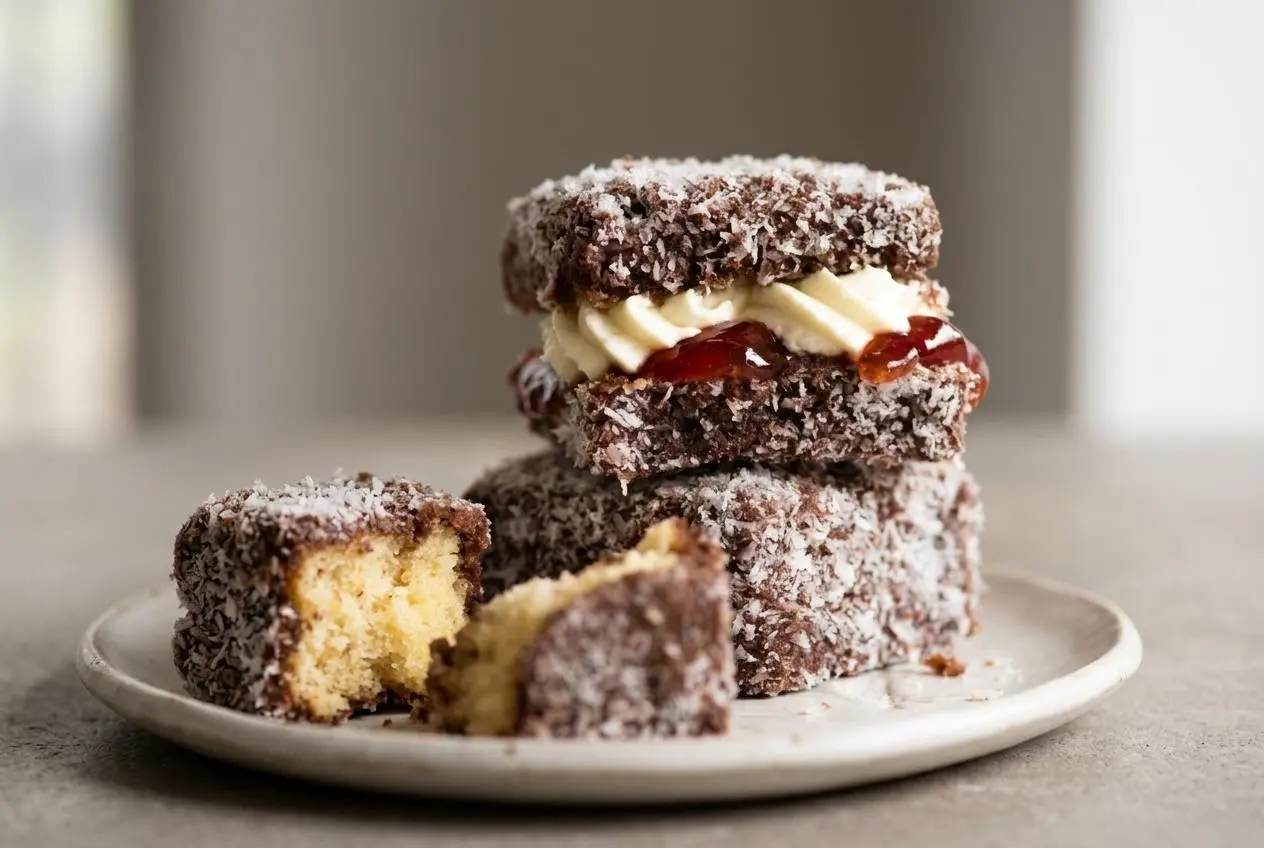
This lamingtons recipe makes soft Australian butter sponge squares coated in thin chocolate icing and fine coconut. Freezing the cut cake before dipping firms the crumb, making the pieces easier to handle with less crumbling.
Lamingtons bring together buttery vanilla cake, rich cocoa, and a snowy coconut coating. Expect a little coconut on the counter, but a firm sponge and a well-arranged dipping station keep the mess manageable.
The cake bakes in one rectangular pan, then gets its chocolate coating on every side. Serve the squares plain or split them for jam and whipped cream. The freezer does the heavy lifting.
Clear space for a cake tray in the freezer before you start mixing.
What Makes These Lamingtons a Classic?
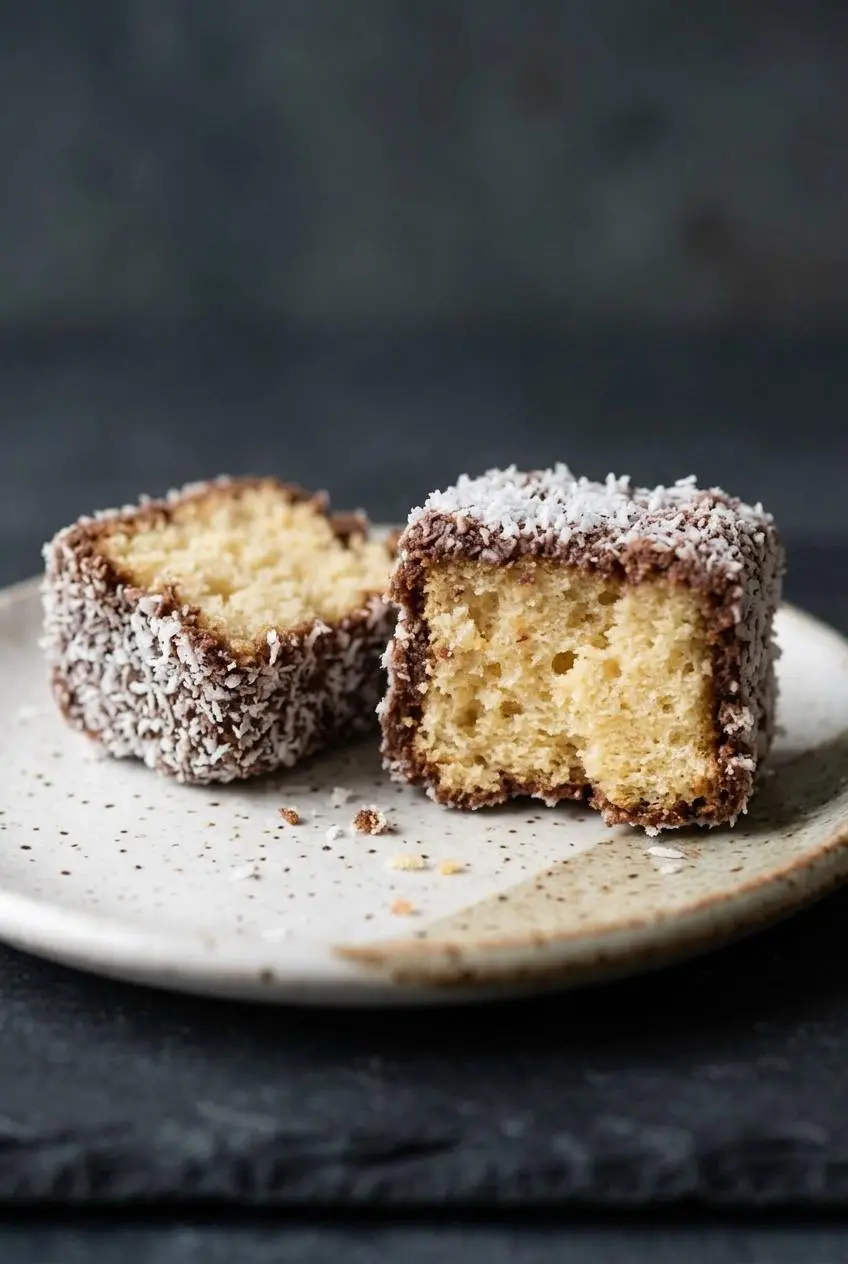
The defining combination is sponge cake, a thin chocolate coating, and coconut covering every face. The icing moistens the outside of the cake without becoming a thick layer of frosting.
This butter sponge has a familiar richness if you enjoy classic yellow cake, with enough structure to cut and coat. Jam and cream make a lovely filling, but neither is necessary for a lamington.
What You Need to Make Classic Lamingtons
Butter and vanilla bring richness and aroma, eggs and flour build the crumb, and milk supplies moisture. Cocoa balances the sweet icing, while coconut adds texture and a distinctive finish. The optional jam and cream bring fruitiness and a cool, soft filling.
Butter Sponge
- 125 g / 4.5 oz unsalted butter, softened
- 1 cup (220g) caster sugar
- 1/2 tsp vanilla extract
- 3 eggs, room temperature
- 1 3/4 cups (260g) flour, plain/all purpose, sifted
- 3.5 tsp baking powder
- 1/2 cup (125 ml) milk (low or full fat)
Icing
- 4 cups (480g) icing sugar (confectionary sugar), sifted
- 1/3 cup (22g) cocoa powder
- 1 tbsp (15g) unsalted butter
- 150ml (1/2 cup + 2 tbsp) boiling water
Coating
- 3 – 4 cups desiccated coconut
Optional: Jam and Cream
- Strawberry jam
- 1 cup (250 ml) cream
- 1 tbsp white sugar
Butter Sponge Staples and US Swaps
Use softened butter that yields to gentle pressure but isn’t melted or oily. Creaming it with sugar traps air, which helps the cake rise. Room-temperature eggs blend more readily into that mixture; cold eggs can make it separate.
Caster sugar means superfine granulated sugar, not powdered sugar. Look for superfine sugar in US baking aisles. Alternatively, briefly pulse granulated sugar to make the crystals finer, retaining the listed weight and stopping before it becomes powdery.
Plain flour means all-purpose flour. Sifting helps disperse the baking powder and reduces lumps, so you can mix gently. Keep the all-purpose flour and separate baking powder in this formula rather than substituting cornstarch or self-rising flour. Milk loosens the batter and contributes moisture.
Chocolate Icing and Desiccated Coconut
Icing sugar is powdered or confectioners’ sugar. It provides the body of the coating, cocoa gives chocolate flavor, and butter adds richness. Boiling water helps bring everything together into a fluid glaze that coats the cake rather than spreading like frosting.
Fine, unsweetened desiccated coconut gives the most even finish. If you can only find unsweetened shredded coconut, briefly pulse it into smaller pieces. This changes the size, not the moisture content, so the result won’t be identical. Sweetened coconut makes a sweeter, often softer and chewier coating.
I’d sift the powdered sugar before mixing the icing, since lumps are much harder to chase around a bowl of chocolate glaze.
How to Make Lamingtons Step by Step
Plan for cooling and setting as well as hands-on work. Preparation takes about 40 minutes and baking takes 25 minutes, but that does not include complete cooling, the freezing stage, or the coating’s setting period. The standard yield is 15 pieces.
Butter Sponge
- Set the oven to 180°C/350°F, or 160°C/320°F for a fan-forced oven.
Let it reach temperature before the batter goes in. - Pass the flour and baking powder through a sieve into a bowl.
The dry mixture should look even and free of visible lumps. - Grease a 20 cm x 30 cm / 8 inch x 12 inch cake pan and fit it with parchment extending above all four sides.
The exposed paper will provide handles for lifting the baked cake. - Work the butter, sugar, and vanilla with an electric mixer at medium-high speed for about 1 1/2 to 2 minutes.
Stop when the mixture looks paler, aerated, and fluffy. - Beat in each egg separately, fully incorporating it before adding the next.
A smooth mixture, rather than a grainy or separated one, is the target. - Fold in half the flour mixture, stir in half the milk, then repeat with the remaining flour and milk.
Finish with an evenly combined batter and avoid unnecessary mixing. - Transfer the batter to the lined pan and bake for 25 minutes.
A skewer pushed into the center should emerge clean. - Leave the cake in its pan for 5 minutes, then lift it by the parchment handles and transfer it to a wire rack.
Allow it to cool completely before cutting.
Prepare Cake to Coat
- Divide the cooled cake into a 5-by-3 grid for 15 squares, or cut 18 rectangles, and freeze the pieces for 1 to 1.5 hours.
The cut sponge should feel firm enough to maneuver without compressing.
Icing
- Stir the powdered sugar, cocoa, butter, and boiling water together in a heatproof bowl.
A smooth, syrupy glaze is ready for dipping; it should not flow like plain water.
Coating
- Spread the coconut across a broad, shallow bowl or pan.
Leave enough exposed surface to turn each cake piece comfortably. - Turn a sponge piece through the icing with two forks, then move it into the coconut, coat every face promptly, and place it on a tray.
The finished piece should have an even coconut covering with no large bare patches. - Coat the remaining cake pieces in the same sequence.
Use the forks to support the sponge rather than squeeze it. - Leave the coated cakes undisturbed for 1 to 2 hours, until the icing sets.
The coating should cling to the cake instead of smearing readily.
Optional: Jam and Cream
- Whip the cream with the white sugar until it holds firm peaks.
The peaks should keep their shape when the beaters lift away. - Slice each set lamington horizontally, spread jam over the bottom, pipe or spoon on cream, replace the top, and refrigerate.
The filling should hold between the layers without flowing out.
Baking a Light Butter Sponge
The creaming stage builds the cake’s starting air pockets. Watch for a pale, fluffy mixture rather than relying entirely on the clock. After each egg, check that the batter has become smooth before continuing.
Once flour goes in, switch to gentle folding. Scrape through the bottom of the bowl so dry pockets don’t hide beneath the batter. The initial five-minute stand helps the baked cake settle; it doesn’t replace complete cooling on the rack.
For a flatter top, you can optionally cool the cake upside down on the rack after removing it from the pan. Handle it carefully while warm.
The One-Hour Freezer Trick
Use the full 1 to 1.5-hour range in the method. The goal is firm cut pieces that forks can support easily, not warm sponge that bends and sheds crumbs into the icing.
A brief freeze firms the cake without deliberately drying it out on the counter. That makes it a useful alternative to letting sponge stale before coating. It won’t restore moisture to a cake that was already overbaked.
Dipping in Chocolate and Rolling in Coconut
Arrange the cake, icing bowl, coconut bowl, and receiving tray in that order. Keep the tray close so each coated square has somewhere to land immediately.
Use the forks as supports: turn the cake gently, lift it, and let excess icing drain before transferring it. The glaze should leave a thin chocolate layer on every side without running straight off.
For a cleaner coconut bowl, optionally start with about 1 cup from the listed total and replenish as needed. Stray chocolate droplets then clump a working portion instead of the entire supply.
Tips for Success and Avoiding Common Mistakes
Match the fix to the stage where the problem begins. A separated batter, tough crumb, and thick glaze need different responses.
- Curdled batter: Cold ingredients or rapid egg additions can disrupt the mixture. Use the listed ingredient temperatures and add eggs individually. If separation starts, pause and gently warm the outside of the bowl; improvement is possible, but full recovery isn’t assured.
- Dense or tough sponge: Inadequate creaming can limit lift, while vigorous mixing after adding flour can toughen the crumb. Watch the creaming cue and fold gently afterward. A baked dense cake cannot be made airy again.
- Cake breaking in the icing: Warm or insufficiently firm sponge is difficult to handle. Complete the cooling and freezing stages, then support each piece with forks rather than gripping it.
- Watery icing: A glaze that runs off won’t build an even coating. Check the measured ingredients and let hot icing cool slightly before assessing its consistency; don’t add water casually.
- Icing becoming too thick: Cooling makes the glaze less fluid. Warm it gently over a hot-water bath or microwave it for 20 seconds, then stir and check before dipping again.
- Chocolate clumps in the coconut: Replenish the shallow bowl in portions and let excess icing drain first. Replace a heavily clumped working portion rather than pressing lumps onto the cake.
- Uneven edges: Optionally shave away thin browned crusts with a serrated knife before cutting. This can make absorption more uniform, but it’s a presentation preference, not a required step.
Save usable sponge trimmings or broken pieces for homemade cake pops rather than forcing fragile scraps through the dipping process.
Lamington Fillings, Flavor Variations, and Serving Ideas
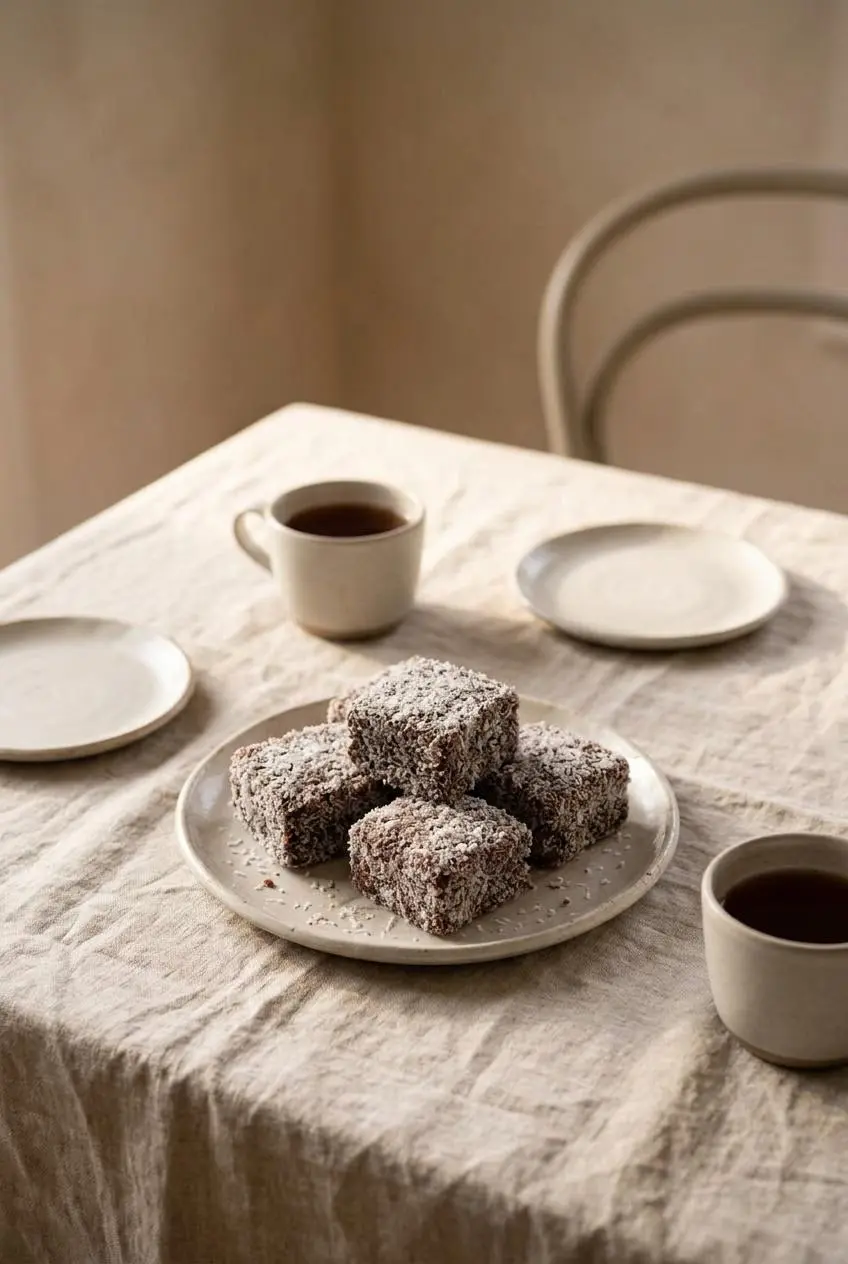
Keep the classic sponge and coating as written, then choose an optional filling or a separately formulated coating when you want something different.
Classic Jam and Whipped Cream Lamingtons
Let the chocolate coating set before splitting each square horizontally. Spread strawberry jam on the lower half, add the sweetened whipped cream, and replace the top gently. Firm cream peaks help the filling hold its shape.
Raspberry jam is an optional alternative. Keep cream-filled cakes refrigerated and bring them out for serving. Filling before dipping is more awkward because the layers can slide apart; coating first keeps assembly easier.
Raspberry Lamingtons and Flavor Variations
Pink raspberry lamingtons use raspberry jelly or berry icing in place of chocolate. That style needs its own coating formula, so don’t substitute jelly directly into this cocoa icing and expect the same consistency or setting behavior.
- Dark chocolate glaze: A separately formulated melted dark chocolate and milk glaze gives a thicker, more fudge-like coating than this thin cocoa icing.
- Coffee icing: Optionally use hot brewed espresso or strong coffee for part of the boiling water, keeping the total liquid unchanged, for a deeper cocoa flavor.
- Toasted coconut: Mix a small toasted portion of the listed coconut into the remaining white coconut for a nuttier finish and subtle crunch.
Serve plain lamingtons at room temperature with tea or coffee, and serve cream-filled ones chilled. For an Australia Day platter, pair them with classic fairy bread. Smaller pieces also suit bake-sale assortments, though the stated recipe yield remains 15 squares.
Making Lamingtons Ahead, From Plain Squares to Cream-Filled Cakes
Separate the work into baking, coating, and filling rather than trying to finish everything while the sponge is still warm. Complete cooling is essential before cutting, and the dipping freeze is a preparation stage rather than a storage deadline.
For finished plain lamingtons, let the coating set before packing them in an airtight container. Keep them in a cool place, away from heat and humidity, and separate layers with parchment to protect the coconut finish. Avoid sealing warm cake into a container, where trapped condensation can dampen the surface.
Keep cream-filled lamingtons covered and refrigerated. Maintain a refrigerator temperature at or below 40°F (4°C) for perishable dairy fillings. Plain-cake handling advice does not extend to whipped-cream fillings.
If you’re dividing the work, leave the filling until the coated cakes have set and you’re ready to assemble them. Store unfilled pieces separately from the cream, and return filled cakes to the refrigerator rather than leaving the whole batch on the serving table.
Conclusion
Soft butter sponge, a thin cocoa icing, and fine coconut give these lamingtons their familiar contrast of tender cake and textured coating. Careful mixing matters more than complicated equipment.
Cool the cake fully, firm the cut pieces in the freezer, and keep the icing syrupy as you dip. Set out the bowls in order, and the coconut mess stays a manageable part of the baking.
Frequently Asked Questions
What Makes a Lamington a Lamington?
A lamington is a piece of butter or vanilla sponge cake coated on every side in thin chocolate icing and coconut. Jam and whipped cream are optional fillings, not defining requirements.
What Is Lamington Sauce Made Of?
This coating combines sifted powdered sugar, cocoa powder, butter, and boiling water. “Sauce” and “icing” describe the same thin dipping glaze here, rather than a thick frosting spread over the cake.
Why Do You Freeze Lamington Sponge Before Dipping in Chocolate?
Freezing firms the delicate crumb so the forks can support each piece with less breakage. Follow the method’s brief freezing stage after complete cooling; it firms the sponge rather than deliberately drying it out.
Can I Use Shredded Coconut Instead of Desiccated Coconut for Lamingtons?
Yes, unsweetened shredded coconut can work as an alternative when briefly pulsed into finer pieces. Pulsing doesn’t remove moisture, so it won’t exactly duplicate desiccated coconut. Sweetened shredded coconut also changes the sweetness and texture.
Lamingtons Recipe

Equipment
- 20 cm x 30 cm / 8 inch x 12 inch cake pan
- Electric Mixer
- Wire rack
- Heat-proof bowl
Ingredients
Butter Sponge
- 125 g / 4.5 oz unsalted butter softened
- 1 cup (220g) caster sugar
- 1/2 tsp vanilla extract
- 3 eggs room temperature
- 1 3/4 cups (260g) flour plain/all purpose, sifted
- 3.5 tsp baking powder
- 1/2 cup (125 ml) milk (low or full fat)
Icing
- 4 cups (480g) icing sugar (confectionary sugar), sifted
- 1/3 cup (22g) cocoa powder
- 1 tbsp (15g) unsalted butter
- 150 ml (1/2 cup + 2 tbsp) boiling water
Coating
- 3 – 4 cups desiccated coconut
Optional: Jam and Cream
- Strawberry jam
- 1 cup (250 ml) cream
- 1 tbsp white sugar
Instructions
Butter Sponge
- Set the oven to 180°C/350°F, or 160°C/320°F for a fan-forced oven. Let it reach temperature before the batter goes in.
- Pass the flour and baking powder through a sieve into a bowl. The dry mixture should look even and free of visible lumps.
- Grease a 20 cm x 30 cm / 8 inch x 12 inch cake pan and fit it with parchment extending above all four sides. The exposed paper will provide handles for lifting the baked cake.
- Work the butter, sugar, and vanilla with an electric mixer at medium-high speed for about 1 1/2 to 2 minutes. Stop when the mixture looks paler, aerated, and fluffy.
- Beat in each egg separately, fully incorporating it before adding the next. A smooth mixture, rather than a grainy or separated one, is the target.
- Fold in half the flour mixture, stir in half the milk, then repeat with the remaining flour and milk. Finish with an evenly combined batter and avoid unnecessary mixing.
- Transfer the batter to the lined pan and bake for 25 minutes. A skewer pushed into the center should emerge clean.
- Leave the cake in its pan for 5 minutes, then lift it by the parchment handles and transfer it to a wire rack. Allow it to cool completely before cutting.
Prepare Cake to Coat
- Divide the cooled cake into a 5-by-3 grid for 15 squares, or cut 18 rectangles, and freeze the pieces for 1 to 1.5 hours. The cut sponge should feel firm enough to maneuver without compressing.
Icing
- Stir the powdered sugar, cocoa, butter, and boiling water together in a heatproof bowl. A smooth, syrupy glaze is ready for dipping; it should not flow like plain water.
Coating
- Spread the coconut across a broad, shallow bowl or pan. Leave enough exposed surface to turn each cake piece comfortably.
- Turn a sponge piece through the icing with two forks, then move it into the coconut, coat every face promptly, and place it on a tray. The finished piece should have an even coconut covering with no large bare patches.
- Coat the remaining cake pieces in the same sequence. Use the forks to support the sponge rather than squeeze it.
- Leave the coated cakes undisturbed for 1 to 2 hours, until the icing sets. The coating should cling to the cake instead of smearing readily.
Optional: Jam and Cream
- Whip the cream with the white sugar until it holds firm peaks. The peaks should keep their shape when the beaters lift away.
- Slice each set lamington horizontally, spread jam over the bottom, pipe or spoon on cream, replace the top, and refrigerate. The filling should hold between the layers without flowing out.