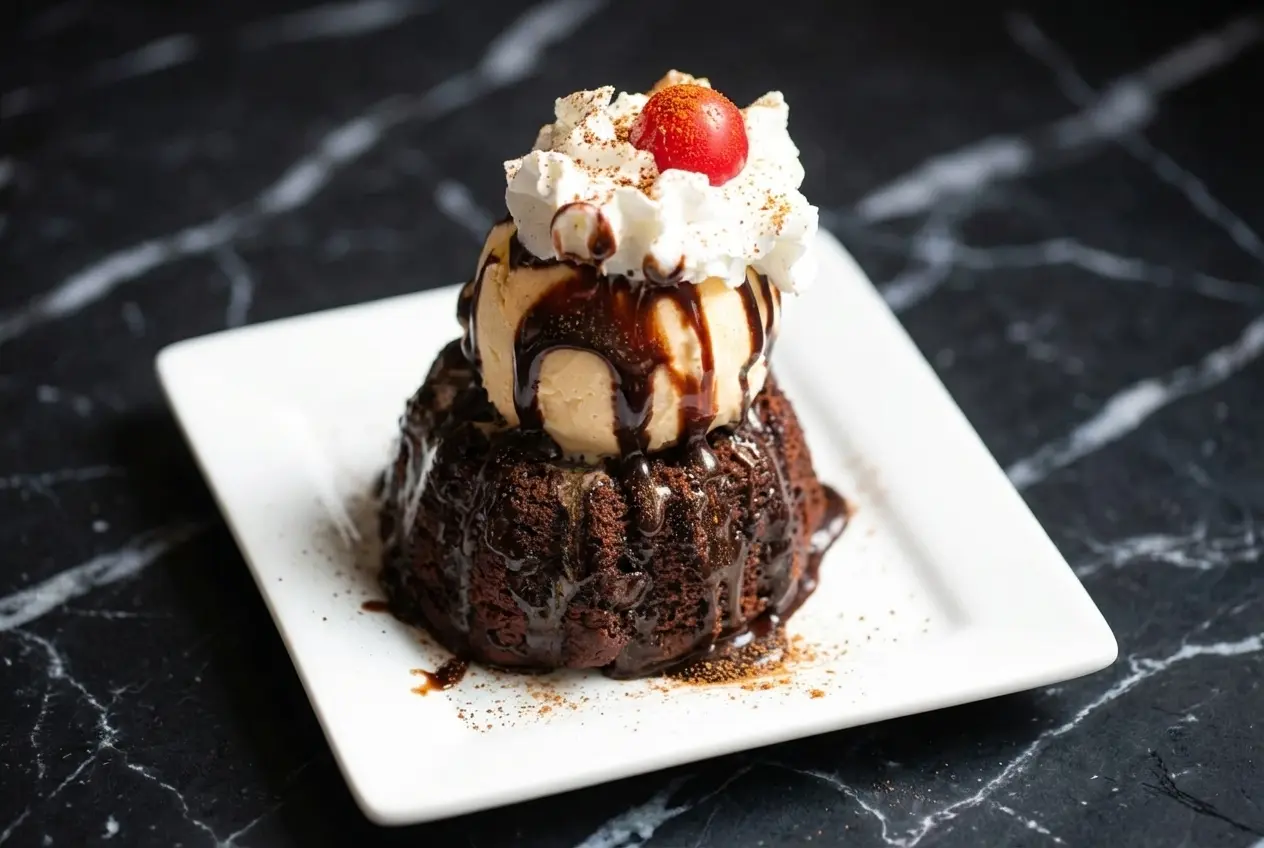
Whenever I want that restaurant-style “spoon breaks the top, chocolate floods the plate” moment, I go straight for Chilli chocolate lava cake. It’s rich, gooey, warm, decadent, and fudgy, the kind of dessert that makes the whole kitchen smell like a chocolate shop.
This version is built for home ovens and real life, with a little science to guarantee that molten chocolate center. If you’ve ever pulled out a cake that turned into a fully baked muffin, I’ll show you exactly what to look for, and when to stop baking.
Why You’ll Love This Recipe
Mayan-style warmth, not fire: I bloom 1/2 teaspoon espresso powder, 1/2 teaspoon ground cinnamon, and a pinch of cayenne pepper right into the hot butter and molten chocolate, so the spice reads as grown-up and fragrant, not “spicy dessert dare.”
Deeper chocolate, less sweetness: Espresso powder doesn’t make it taste like coffee, it sharpens the cocoa notes and keeps powdered sugar from feeling cloying. It’s the little trick that bridges that Chili’s restaurant vibe with actual chilli spice.
Fast enough for weeknights: From bowl to oven-safe cups in minutes, then a short bake. You get the drama of a molten chocolate dessert without a whole afternoon of mixing and chilling.
More reliable texture: When the spices bloom in hot fat, they dissolve and perfume the batter evenly. The result is a smoother interior, especially when you’re baking in ramekins where every minute matters.
Ingredients and Substitutions
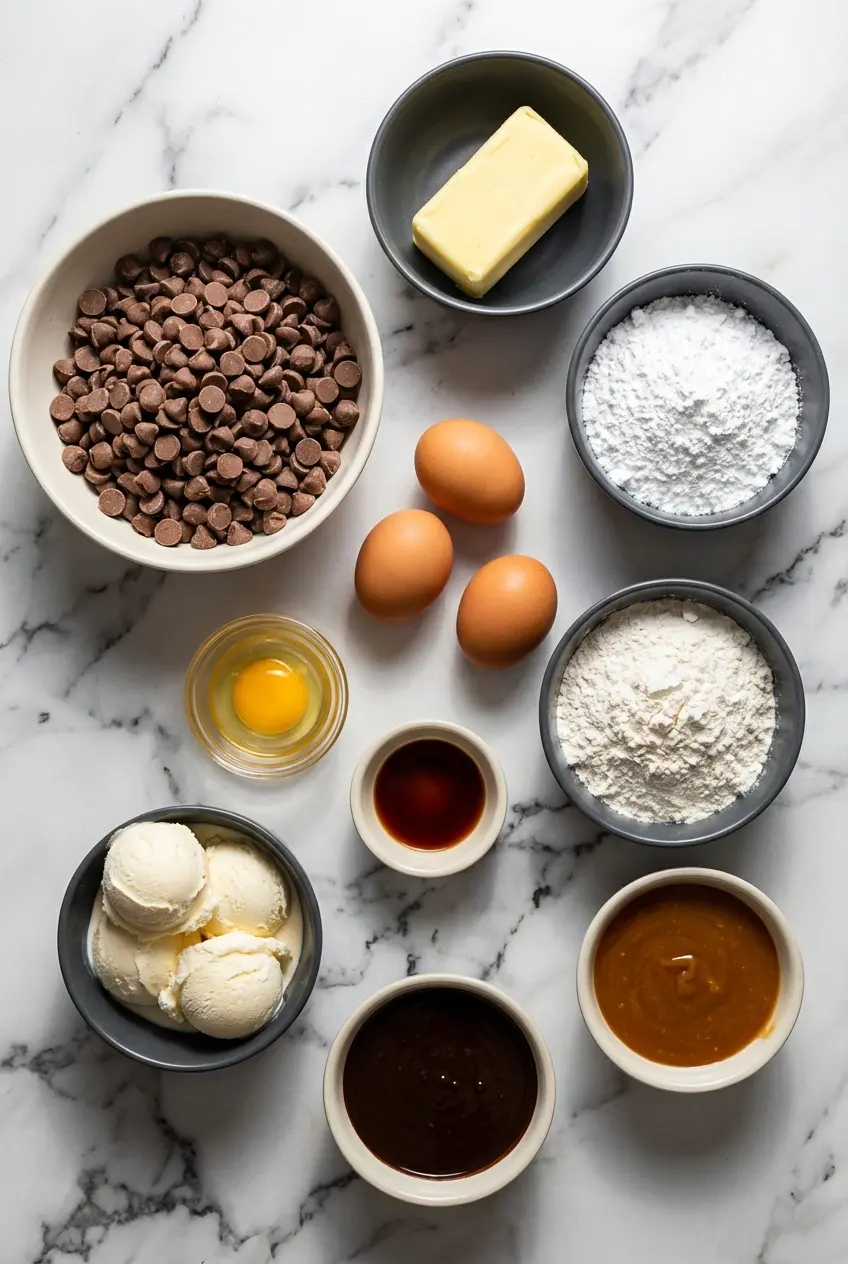
This is a short list, and every piece counts, chocolate for the molten center, eggs for structure, and a small amount of flour for that tender “set edges, soft middle” texture.
Ingredients
Cake Batter:
- 1 cup Milk chocolate chips or semi-sweet
- 0.5 cup Butter
- 1 cup Powdered sugar
- 3 Eggs
- 1 Egg yolk
- 0.5 teaspoon Vanilla extract
- 6 Tablespoon Flour
Toppings:
- 4 scoop Vanilla ice cream
- 4 Tablespoon Magic Shell chocolate topping
- 2 Tablespoon Caramel sauce
Ingredient Notes & Substitutions
Semi-sweet chocolate chips: Higher-quality chips melt smoother and taste rounder, which matters when the batter is basically molten chocolate. If your chips are very waxy, the center can set up a little thick instead of flowing.
Flour: A 1:1 gluten-free baking blend swaps in beautifully here because the flour amount is low and the structure comes mostly from eggs and chocolate. The cakes still bake up with set edges and a glossy center.
Ramekins and dusting: Grease well, then dust with cocoa powder instead of flour so you don’t get pale “white spot” patches on the outside. Cocoa powder also helps the cakes release cleanly, which is everything when you’re inverting warm cakes.
Eggs: Room-temperature eggs blend into the butter and chocolate without shocking it, which helps keep a smooth emulsion. Cold eggs can make the mixture tighten and look grainy before you even add flour.
How to make Chilli chocolate lava cake
Heat the Oven and Set Up the Cups
- Heat your oven to 400℉, and give it a few minutes to fully stabilize so the cakes start baking the moment they go in. This recipe lives and dies by consistent heat.
- Generously spray four 1 cup oven-safe cups with cooking spray, getting into every corner. Place them on a baking sheet now, because moving filled cups one by one is how spills happen.
Melt, Bloom, and Build the Batter
- In a microwave-safe bowl, combine the chocolate chips and butter, then microwave for 2 minutes. The bowl should feel hot and the chocolate should look slumpy, even if a few chips still hold their shape.
- Whisk right away, and while the mixture is still hot, whisk in 1/2 teaspoon espresso powder, 1/2 teaspoon ground cinnamon, and a pinch of cayenne pepper. This “blooming” moment wakes up fat-soluble aromas, and you’ll smell the cinnamon and chocolate turn almost perfumey.
- Whisk in the powdered sugar until the batter looks glossy and thick like warm fudge. If it looks sandy at first, keep whisking, it smooths out as the sugar hydrates.
- Add the 3 eggs and 1 egg yolk, then whisk until fully blended and silky, no streaks. You’re creating a smooth emulsion, and the batter should look unified and shiny, not oily.
- Whisk in the vanilla extract and flour just until the last dry traces disappear. At this stage I stop fussing, because over-mixing can make the edges a little tougher.
Bake for the Molten Center
- Evenly fill the prepared cups with batter, then keep them on the baking sheet to protect the bottoms from harsh heat. Slide the tray into the oven and bake for 13-15 minutes.
- Look for set, matte edges and a center that still looks soft and slightly glossy. The middle should have a gentle jiggle, like it’s whispering “one more minute” but not actually collapsing.
Rest, Invert, and Finish Like a Restaurant
- Let the cakes cool for 2-3 minutes, just long enough for the outer crumb to firm up so it doesn’t tear. You want them warm, not settled.
- Drizzle caramel sauce onto each plate, then invert a cake onto the caramel with a confident flip. Top with a scoop of vanilla ice cream and drizzle Magic Shell chocolate topping so it snaps into a thin, glossy shell.
Chef’s Secrets for Baking Perfection
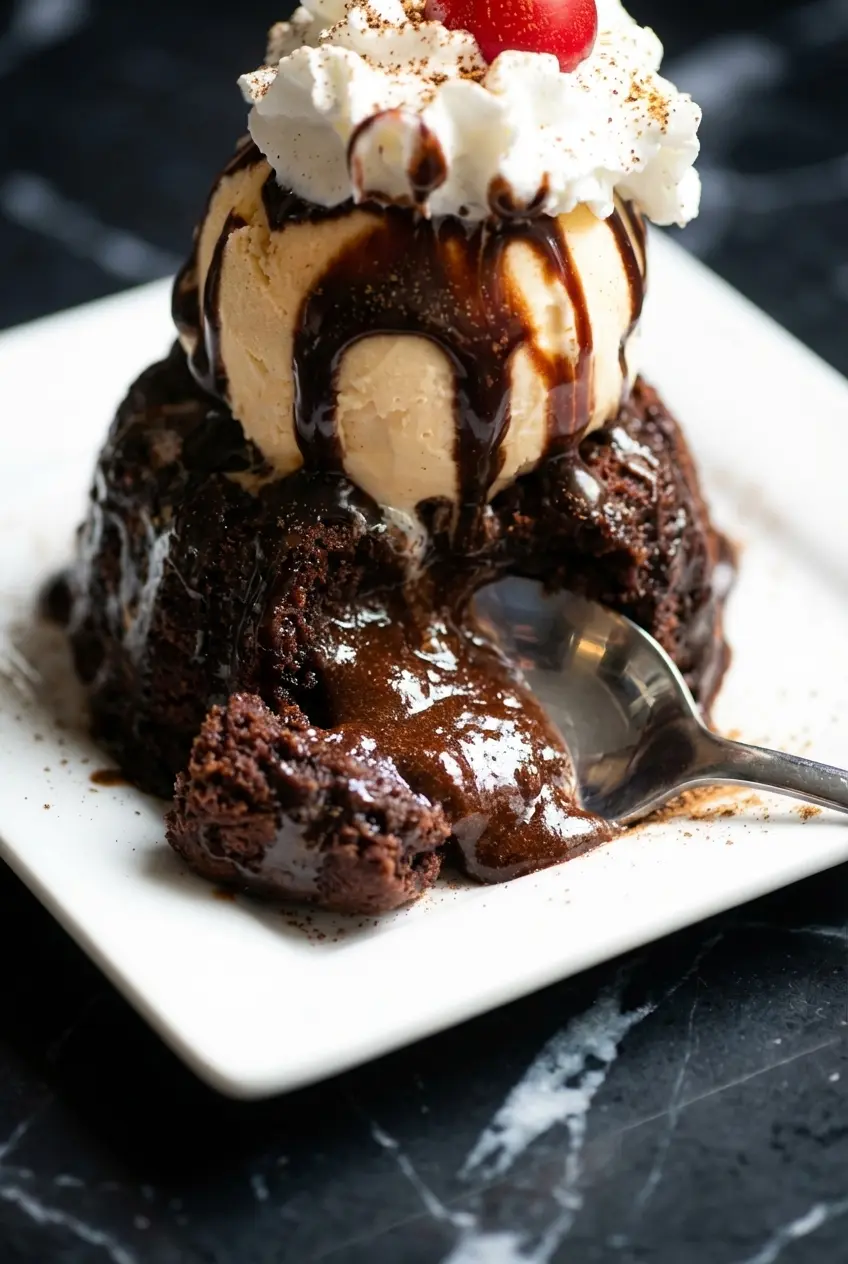
The best visual cue is this: the edges should look matte and cakey, while the center inch remains slightly jiggly and glossy. If the entire top goes matte and firm, you’ve moved from molten chocolate into fully set cake.
Baking creates flavor as well as structure, and that gentle browning on the rim is where magic happens. The science behind that browning is the Maillard reaction.
If you want to make the batter ahead, you can refrigerate it in the prepared oven-safe cups. Baking straight from the refrigerator still works, but the cold start usually needs a small time nudge within the same 13-15 minute window, so watch the jiggle, not the clock.
No ramekins, no problem. A standard muffin tin works well, grease each well generously and dust with cocoa powder, then fill evenly and keep the tin on a baking sheet for insulation.
For muffin tins, start checking early at 13 minutes, because the metal conducts heat faster than ceramic ramekins. The goal stays the same, set edges and a soft center, even if the shape is smaller.
This recipe is the “underbaked batter” style lava cake, where the center is molten because it’s intentionally less baked. A ganache-stuffed, truffle-center version is different, it’s fully baked cake around a pre-made core that melts as it heats, which can be more foolproof but tastes a bit more like a filled cupcake.
Pro Tips & Troubleshooting
Pro Tips
- Dust greased ramekins with cocoa powder instead of flour, it keeps the outside dark and pretty, and it adds flavor right where your spoon hits first.
- Bake the ramekins on a baking sheet, it insulates the bottoms and makes it much easier to pull everything out quickly and safely.
- Let the cakes rest for exactly 1 to 2 minutes when you can, because that brief pause helps the crumb set for a clean inversion without cooking away the molten center.
- Whisk the eggs in until the batter looks uniform and glossy, that smooth emulsion is what gives you a fudgy interior instead of greasy separation.
Common Mistakes to Avoid
- Overbaking, which turns lava cake into a solid chocolate muffin with no molten chocolate payoff.
- Not greasing generously, because warm cakes cling and tear when you flip them out.
- Using cold eggs, which can seize the chocolate and butter mixture and make the batter look grainy.
- Waiting too long to serve, because the center thickens as it sits and you lose that liquid-hot pour.
Serving & Storage
Serving Ideas
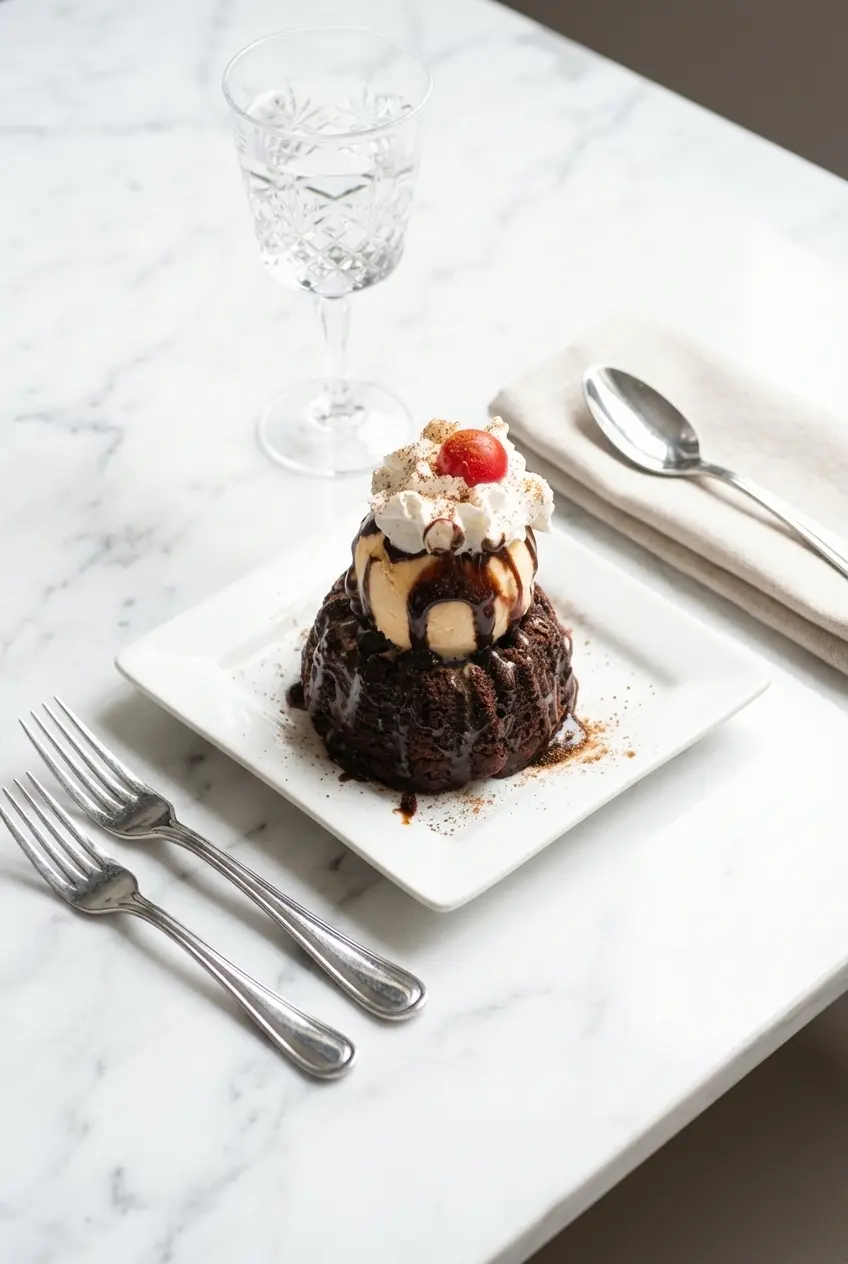
I love serving these the second they’re inverted, with vanilla ice cream melting into the crater. That hot-and-cold contrast is the whole point.
Magic Shell on top gives you that crisp crackle over a soft center, and caramel sauce makes the plate feel like a dessert menu moment. A savory-sweet upgrade is a spoon of miso caramel sauce for an umami finish that plays beautifully with chocolate.
If you enjoy espresso with dessert, that little espresso-bloomed chocolate note pairs naturally with a tequila carajillo cocktail. The warm spice and coffee edge make the whole thing feel like a modern dinner-party finale.
For a simple garnish, a dusting of powdered sugar, a pinch of flaky sea salt, or a few fresh raspberries cuts through the richness without stealing the spotlight.
Storage & Make-Ahead
Lava cakes are best right away, but leftovers can be covered and refrigerated. Expect the center to thicken as it chills, that’s normal once the molten chocolate firms up.
To reheat gently, warm a cake on a plate in short bursts until it’s heated through and soft again, stopping before the center fully sets. The goal is warm and fudgy, not piping hot and overcooked.
For make-ahead, prepare the batter and keep it chilled in the greased, cocoa-dusted cups. When you bake, keep the oven at 400℉ and use the edge-matte, center-jiggle cue to land the perfect timing.
Perfect Chilli Chocolate Lava Cake

Equipment
- Oven-safe cups
- Baking Sheet
- Microwave-safe Bowl
- Whisk
Ingredients
Cake Batter
- 1 cup Milk chocolate chips or semi-sweet
- 0.5 cup Butter
- 1 cup Powdered sugar
- 3 Eggs
- 1 Egg yolk
- 0.5 teaspoon Vanilla extract
- 6 Tablespoon Flour
Toppings
- 4 scoop Vanilla ice cream
- 4 Tablespoon Magic Shell chocolate topping
- 2 Tablespoon Caramel sauce
Instructions
Heat the Oven and Set Up the Cups
- Heat your oven to 400℉, and give it a few minutes to fully stabilize so the cakes start baking the moment they go in. This recipe lives and dies by consistent heat.
- Generously spray four 1 cup oven-safe cups with cooking spray, getting into every corner. Place them on a baking sheet now, because moving filled cups one by one is how spills happen.
Melt, Bloom, and Build the Batter
- In a microwave-safe bowl, combine the chocolate chips and butter, then microwave for 2 minutes. The bowl should feel hot and the chocolate should look slumpy, even if a few chips still hold their shape.
- Whisk right away, and while the mixture is still hot, whisk in the spices if using. This blooming moment wakes up fat-soluble aromas, and you will smell the chocolate turn almost perfumey.
- Whisk in the powdered sugar until the batter looks glossy and thick like warm fudge. If it looks sandy at first, keep whisking, it smooths out as the sugar hydrates.
- Add the 3 eggs and 1 egg yolk, then whisk until fully blended and silky, no streaks. You are creating a smooth emulsion, and the batter should look unified and shiny, not oily.
- Whisk in the vanilla extract and flour just until the last dry traces disappear. At this stage stop fussing, because over-mixing can make the edges a little tougher.
Bake for the Molten Center
- Evenly fill the prepared cups with batter, then keep them on the baking sheet to protect the bottoms from harsh heat. Slide the tray into the oven and bake for 13 to 15 minutes.
- Look for set, matte edges and a center that still looks soft and slightly glossy. The middle should have a gentle jiggle, like it is whispering one more minute but not actually collapsing.
Rest, Invert, and Finish Like a Restaurant
- Let the cakes cool for 2 to 3 minutes, just long enough for the outer crumb to firm up so it does not tear. You want them warm, not settled.
- Drizzle caramel sauce onto each plate, then invert a cake onto the caramel with a confident flip. Top with a scoop of vanilla ice cream and drizzle Magic Shell chocolate topping so it snaps into a thin, glossy shell.
Notes
Nutrition
Final Thoughts
This is the dessert I bake when I want maximum drama with minimum effort, a rich, gooey center, a warm cake edge, and that little kiss of cayenne that makes chocolate taste even more chocolatey.
If you’re on a decadent-chocolate kick, the same cravings that love lava cake usually love a fluffy, spoonable chocolate marshmallow mousse. In my kitchen, it’s the dessert I keep in my back pocket when I want something easy and deeply satisfying.