Homemade Sourdough Pizza Lunchables are DIY pizza kits made with fermented sourdough flatbreads, a quick marinara, shredded mozzarella, and pepperoni packed cold for lunch.
These lunchbox pizzas give you the fun of the classic kit, but with chewy sourdough flatbreads and better control over the ingredients. The flatbreads stay flexible enough to bite easily, even straight from the lunchbox.
They’re especially handy when you want a meal prep lunch that feels playful instead of repetitive. The cast iron step is the trick that keeps the crust tender and toasty.
Dust the counter well before rolling because this dough should feel slightly tacky, not dry, and that extra flour saves a lot of sticking.
Why Sourdough Makes the Ultimate Pizza Lunchable
Sourdough works especially well here because these mini crusts are meant to be eaten cold or at room temperature. Slow fermentation develops a deeper flavor and helps the flatbreads stay soft and bendable instead of turning stiff once chilled.
The lactic acid created during fermentation is also one reason many home cooks find sourdough easier to digest than standard quick doughs. That matters in a lunchbox recipe, because the crust needs to taste good hours later and still feel pleasant to chew.
You can use either active starter or discard for these flatbreads. Active starter gives you a bit more lift and tang, while discard is a smart anti-waste option that still makes a chewy, thin crust. If you like building lunches around extra starter, sourdough discard crackers make a great crunchy side for another day.
Another perk is texture. Fermented dough tends to hold moisture well when it includes olive oil, so the finished rounds stay tender enough for small bites instead of drying out like some baked mini crusts.
Sourdough Crust Ingredients and Sourcing
Each ingredient here does a specific job, from building chew and structure in the flatbreads to keeping the marinara thick, flavorful, and easy to pack without leaks.
For the Flatbreads
- 270 grams water (1 1/4 cup)
- 1 tbsp sugar or maple syrup
- 2 tbsp olive oil
- 1 tbsp salt
- 1/2 cup sourdough starter (active or discard)
- 450 grams AP flour (3 3/4 cup)
For the Marinara
- 1 28 ounce can crushed tomatoes
- 3 tbsp olive oil
- 1 clove garlic
- 1 tsp salt
- 1/2 tsp dried oregano
- 1 tsp Italian seasoning
For the Final Box
- 1 1/2 cups mozzarella cheese shredded
- 54 pepperonis (9 per box)
For the dough, all-purpose flour keeps the flatbreads tender and easy to roll, while some home cooks also like working with freshly milled whole grains for a heartier flavor. Olive oil is especially helpful here because it adds moisture and keeps the crust more supple when cold. The sugar or maple syrup rounds out the tang and supports browning in the skillet.
The starter does more than add flavor. It gives the dough a slight chew, helps with fermentation, and makes discard useful in a lunchbox recipe where you do not need a dramatic oven spring.
For the marinara, thick crushed tomatoes are the best choice. A watery sauce tends to seep, making the box messy and the crust soggy. Look for a canned tomato with a rich tomato taste, since this sauce is stirred together raw and every ingredient stays noticeable.
Mozzarella gives the familiar pizza pull and mild flavor, while pepperoni adds salt, spice, and that lunchable-style finish kids expect.
I like stopping the flour mix when the dough feels smooth but still slightly tacky to the touch, because that softer dough bakes up more pleasantly cold than a stiff one.
How to Make Sourdough Flatbread Pizza Crusts
To Make Flatbreads
- Mix the sourdough starter, water, flour, salt, and oil in a medium bowl until a shaggy dough forms, then knead it on the counter for 3 to 5 minutes.
The dough should become smooth, elastic, and only lightly tacky by the end. - Cover the dough and leave it at room temperature for 4 to 8 hours, or refrigerate it overnight for a slower fermentation.
It is ready when it looks puffier and feels airy rather than dense. - Portion the fermented dough into pieces about the size of ping pong balls, shape them into smooth balls, and let them rest for 15 minutes.
This short rest relaxes the dough so it rolls out without springing back. - Roll each ball on a lightly floured surface into a 3 to 4 inch circle about 1/4 inch thick.
Keep them at that thickness so they stay chewy and do not turn hard when cold. - Warm a cast iron skillet over medium heat, then cook one flatbread at a time for 1 to 2 minutes on the first side and about 1 minute after flipping.
Flip when small bubbles puff across the top, the bottom shows pale golden spots, and the dough smells lightly toasted. - Transfer the cooked flatbreads to a rack and let them cool completely before stacking or packing.
If any warmth is trapped, steam will soften the crust.
For the Marinara
- Place the crushed tomatoes, olive oil, garlic, salt, dried oregano, and Italian seasoning in a medium bowl.
The mixture will look loose at first but should stay thick enough to spoon neatly. - Whisk until the sauce is evenly blended.
You should see the seasonings distributed throughout with no oily streaks left on top.
To Assemble
- Set out six containers large enough to hold separate pizza kit components.
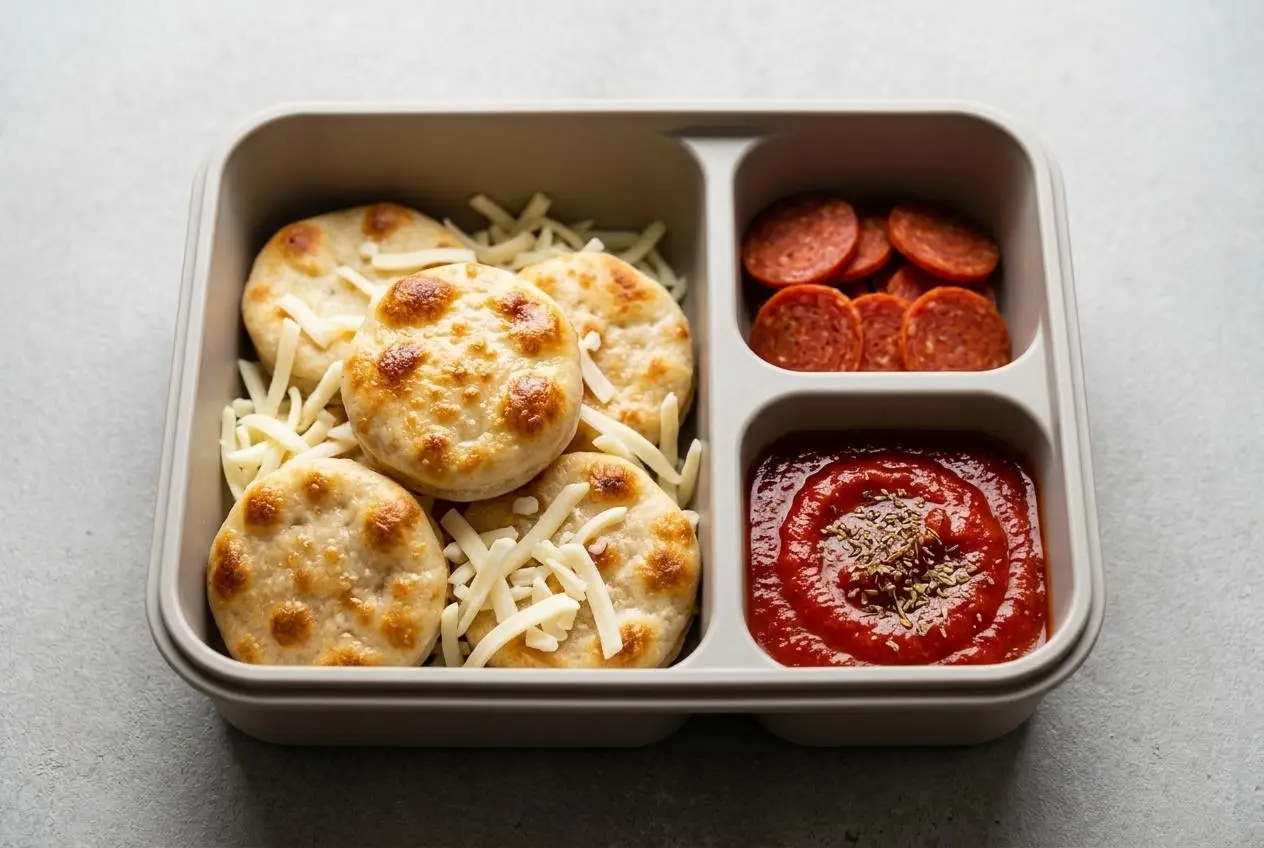
A snug layout helps keep everything from sliding around. - Place three flatbreads in one corner of each container and stack 9 pepperonis in another corner.
The crusts should be fully cool and flexible at this stage. - Spoon 3 tbsp of marinara into a small lidded jar or container that fits inside the lunch box, then close it tightly.
The sauce container should stay upright and secure without wobbling. - Add 1/4 cup of cheese in a small baggie or a parchment sling and tuck it into the box beside the other components.
Keeping the cheese separate helps it stay dry and loose instead of clumping. - Add a spoon and pack the lunchable with an ice pack to keep the ingredients cold.
The finished box should feel organized, compact, and ready to assemble at lunch.
If your skillet runs hot, lower the heat slightly after the first flatbread. You want light golden spotting and a toasted sourdough aroma, not a dark crust that turns firm once chilled.
Many home cooks wonder whether skillet cooking is really worth it here. It is. The cast iron gives the rounds quick surface color while keeping the centers soft, which is exactly what you want for a cold pizza lunch.
How to Pack and Prevent Soggy Pizza Lunchables
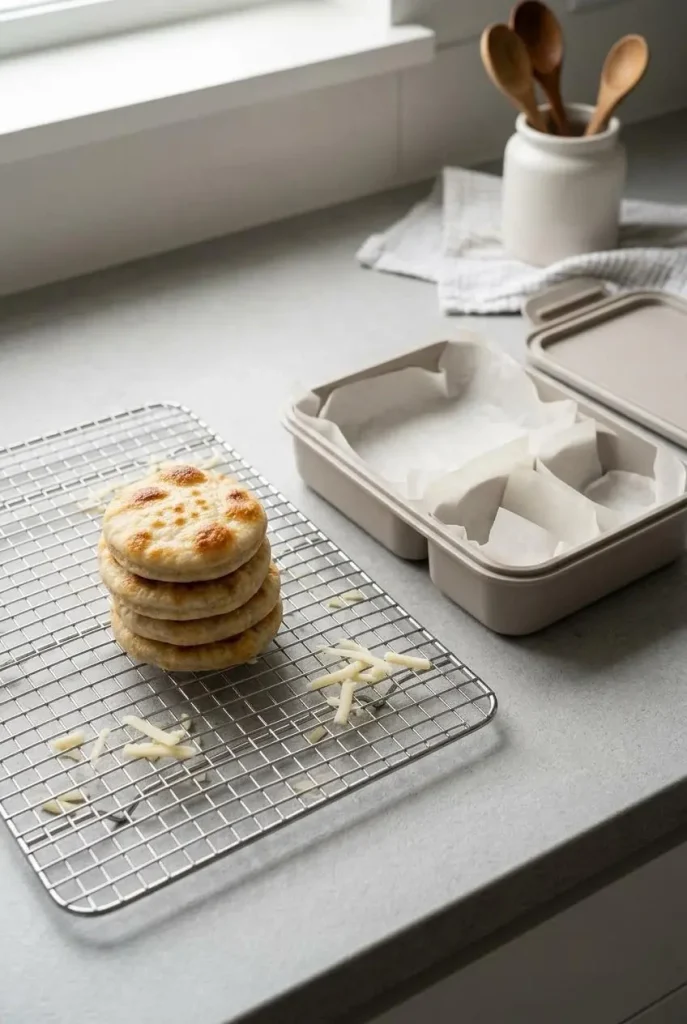
The biggest mistake is packing warm flatbreads. Any leftover heat turns into condensation inside the container, and that moisture settles back onto the crust. Let them cool completely on a wire rack before you stack or box them.
Keep the marinara in a small leak-proof dressing container or lidded jar instead of spooning it straight onto the bread ahead of time. That one step does most of the work when it comes to keeping the lunch neat.
For the best layout, place the flatbreads in one section, the pepperoni in another, and tuck the cheese into a parchment sling or small bag so it stays separate. A parchment divider also helps keep the cheese and pepperoni from getting oily or mingling too early.
Because these boxes include cheese and pepperoni, they should be packed cold with an ice pack. For U.S. school lunches, perishable foods are meant to stay at 40 °F or below and are best packed with two cold sources in an insulated bag, as explained by school lunch temperature guidance.
Alternative Quick Crust Options
If your sourdough dough is not ready, you can still build the same lunchbox idea with faster bases. Keep these as backups, not replacements for the main recipe, because the homemade flatbreads stay softer and taste better cold.
Quick No-Bake Pita and Naan Shortcuts
Mini naan and pita rounds both work for rushed mornings. Naan is usually softer and puffier, so it feels more tender in a cold lunch. Pita is thinner and a little drier, but it packs neatly.
If you use either one, give it a very light toast first so it holds sauce better and does not fold too easily in the box. For another lunch-prep use for starter, discard sandwich bread is another practical make-ahead option for school lunches.
Gluten-Free Sourdough Adaptation
You can adapt the dough with a good 1-to-1 gluten-free baking flour if needed. Gluten-free blends absorb liquid differently, so the dough may need a little adjustment in feel and often benefits from a softer, slightly looser texture before resting.
Roll gently and expect a bit less stretch than wheat-based dough. The goal is still the same: rounds that stay flexible enough to bite when cold.
Creative Pizza Box Toppings and Sides
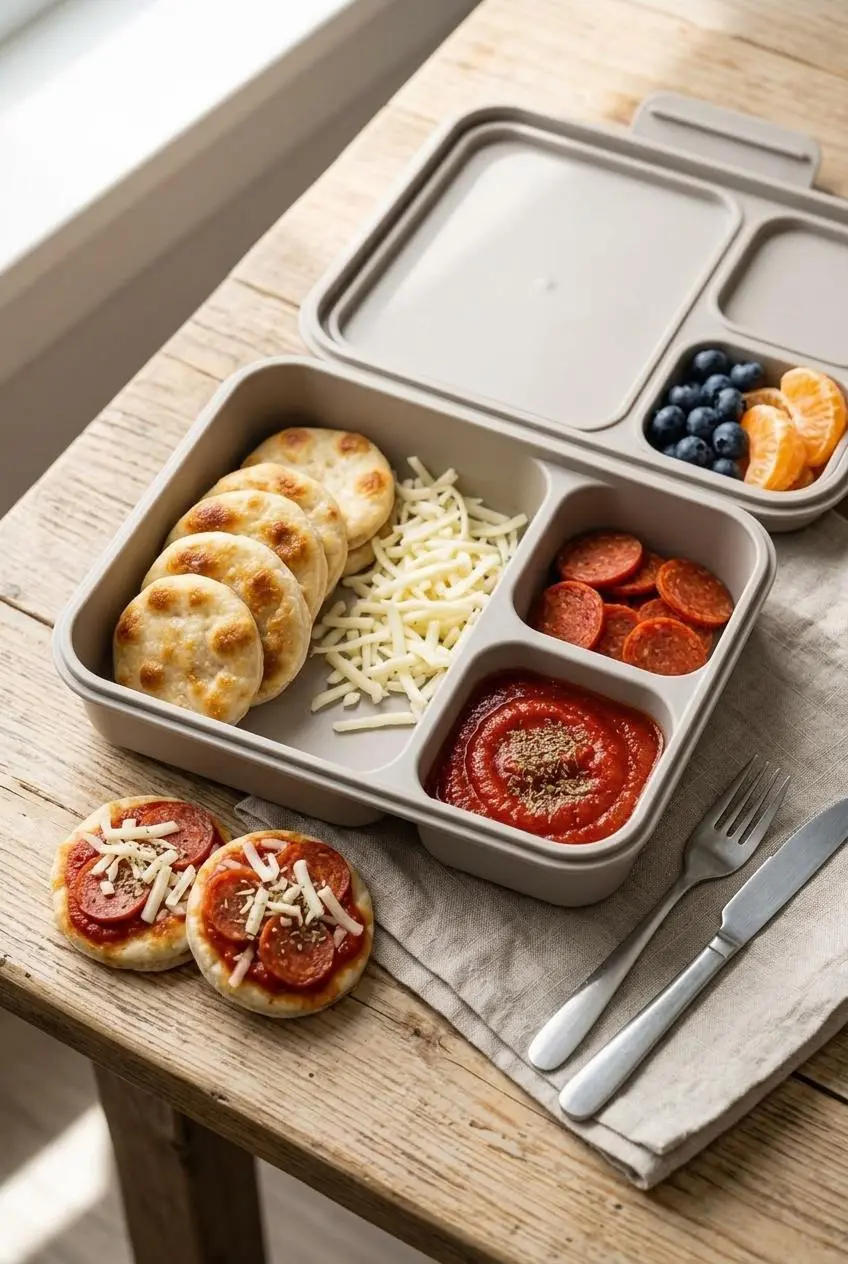
Once the main pieces are packed, it is easy to turn the box into a full lunch. Fresh fruit like blueberries or clementine segments adds sweetness and moisture, while raw mini vegetables bring crunch.
If you want more variety, try mini skewers of cherry tomatoes and mozzarella balls on the side, or tuck in a small sweet treat such as an oat cookie or brownie. Finely diced bell peppers and black olives can also be packed as optional toppings for kids who like building their own combinations.
You can lightly brush the warm crusts with garlic herb butter if you want extra flavor, but do it sparingly so the flatbreads stay tender rather than greasy once cooled. Think of it as a small bonus, not a heavy coating.
Baking vs. Skillet Cooking Pizza Crusts
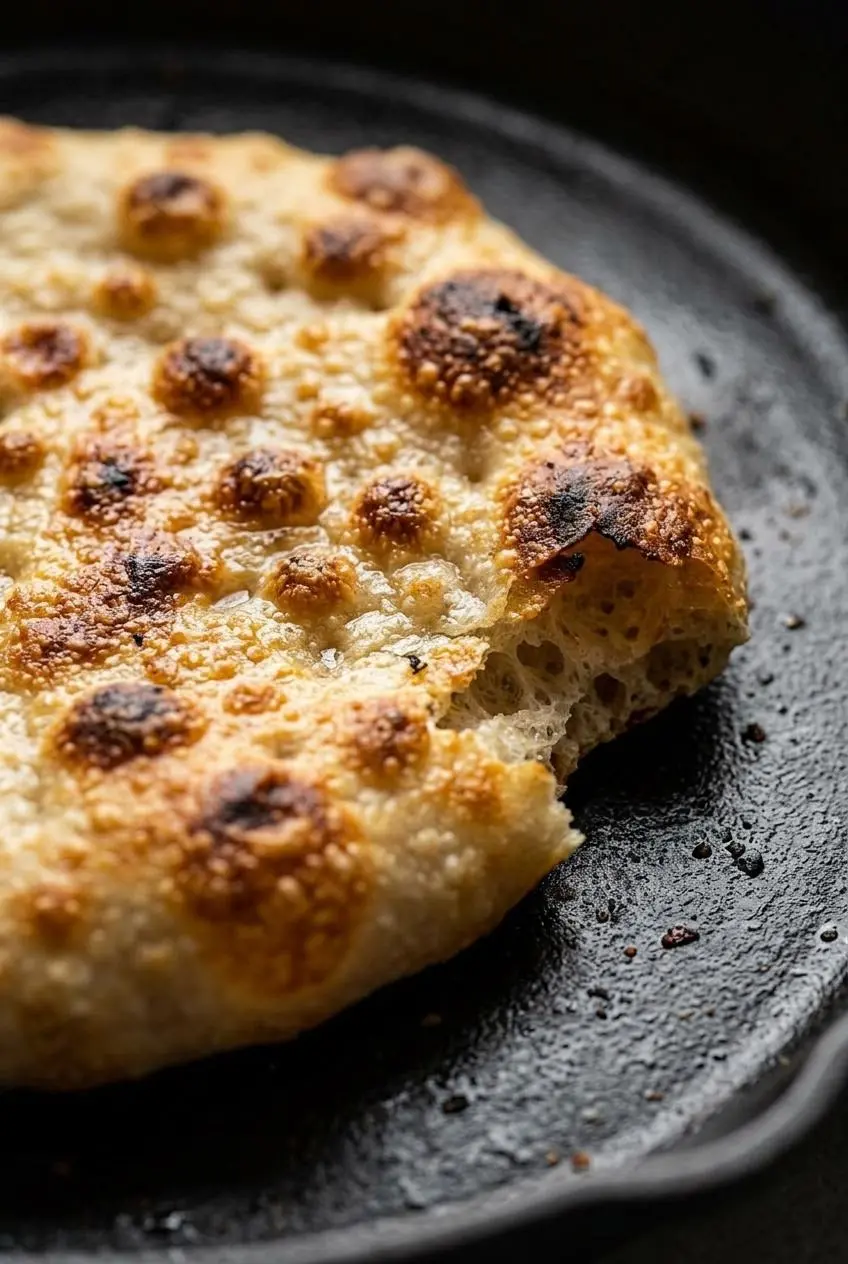
Both methods can work, but they give very different results in a lunchbox. Baked rounds tend to dry out faster and usually come back a little crisper, which is not ideal when the crust will be eaten cold several hours later.
Skillet-cooked rounds stay chewier and more flexible because the heat is fast and direct. They puff in spots, set quickly, and keep a softer interior. That is why this method is better for Homemade Sourdough Pizza Lunchables.
If you like working with pan pizza dough in general, cast iron skillet pizza uses the same idea of strong skillet heat to build better texture.
Conclusion
These lunchables are a smart way to turn sourdough starter into a fun, packable meal. The flatbreads are chewy, the sauce stays separate, and the whole box feels more homemade than anything off the shelf.
The main rule is simple: cool the crusts completely before packing. Once that part is handled, lunch gets a whole lot easier.
Frequently Asked Questions
Can I freeze these homemade sourdough pizza crusts?
Yes. Cook the flatbreads first, then cool them completely before freezing. Lay them flat in a single layer to firm up, then transfer them to a freezer bag with parchment between the rounds. You can freeze them for up to 2 months.
Can I use sourdough discard instead of active starter?
Yes, absolutely. This dough does not rely on a huge rise, so discard works very well. Active starter gives a slightly puffier result, but discard still produces a chewy flatbread with good sourdough flavor.
How do I prevent the pizza crusts from getting soggy in the lunchbox?
Cool the flatbreads completely on a wire rack before packing them. Even a little leftover warmth can create steam inside the container. Keep the marinara in its own lidded container and separate the cheese with a parchment sling or baggie.
Do kids need to heat up these pizza lunchables at school?
No. They are fully cooked and meant to be eaten cold or at room temperature. If someone prefers them warm and has access to a microwave, a brief warm-up works, but they are designed to taste good straight from the lunchbox.
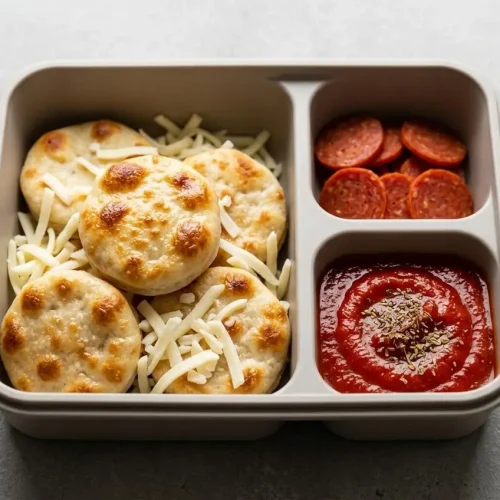
Homemade Sourdough Pizza Lunchables

Equipment
- Cast Iron Skillet
- Rolling Pin
- Bento box
- Mixing Bowl
- Whisk
Ingredients
For the Flatbreads
- 270 grams water (1 1/4 cup)
- 1 tbsp sugar or maple syrup
- 2 tbsp olive oil
- 1 tbsp salt
- 1/2 cup sourdough starter (active or discard)
- 450 grams AP flour (3 3/4 cup)
For the Marinara
- 1 28 ounce can crushed tomatoes
- 3 tbsp olive oil
- 1 clove garlic
- 1 tsp salt
- 1/2 tsp dried oregano
- 1 tsp Italian seasoning
For the Final Box
- 1 1/2 cups mozzarella cheese shredded
- 54 pepperonis (9 per box)
Instructions
To Make Flatbreads
- Mix the sourdough starter, water, flour, salt, and oil in a medium bowl until a shaggy dough forms, then knead it on the counter for 3 to 5 minutes. The dough should become smooth, elastic, and only lightly tacky by the end.
- Cover the dough and leave it at room temperature for 4 to 8 hours, or refrigerate it overnight for a slower fermentation. It is ready when it looks puffier and feels airy rather than dense.
- Portion the fermented dough into pieces about the size of ping pong balls, shape them into smooth balls, and let them rest for 15 minutes. This short rest relaxes the dough so it rolls out without springing back.
- Roll each ball on a lightly floured surface into a 3 to 4 inch circle about 1/4 inch thick. Keep them at that thickness so they stay chewy and do not turn hard when cold.
- Warm a cast iron skillet over medium heat, then cook one flatbread at a time for 1 to 2 minutes on the first side and about 1 minute after flipping. Flip when small bubbles puff across the top, the bottom shows pale golden spots, and the dough smells lightly toasted.
- Transfer the cooked flatbreads to a rack and let them cool completely before stacking or packing. If any warmth is trapped, steam will soften the crust.
For the Marinara
- Place the crushed tomatoes, olive oil, garlic, salt, dried oregano, and Italian seasoning in a medium bowl. The mixture will look loose at first but should stay thick enough to spoon neatly.
- Whisk until the sauce is evenly blended. You should see the seasonings distributed throughout with no oily streaks left on top.
To Assemble
- Set out six containers large enough to hold separate pizza kit components. A snug layout helps keep everything from sliding around.
- Place three flatbreads in one corner of each container and stack 9 pepperonis in another corner. The crusts should be fully cool and flexible at this stage.
- Spoon 3 tbsp of marinara into a small lidded jar or container that fits inside the lunch box, then close it tightly. The sauce container should stay upright and secure without wobbling.
- Add 1/4 cup of cheese in a small baggie or a parchment sling and tuck it into the box beside the other components. Keeping the cheese separate helps it stay dry and loose instead of clumping.
- Add a spoon and pack the lunchable with an ice pack to keep the ingredients cold. The finished box should feel organized, compact, and ready to assemble at lunch.