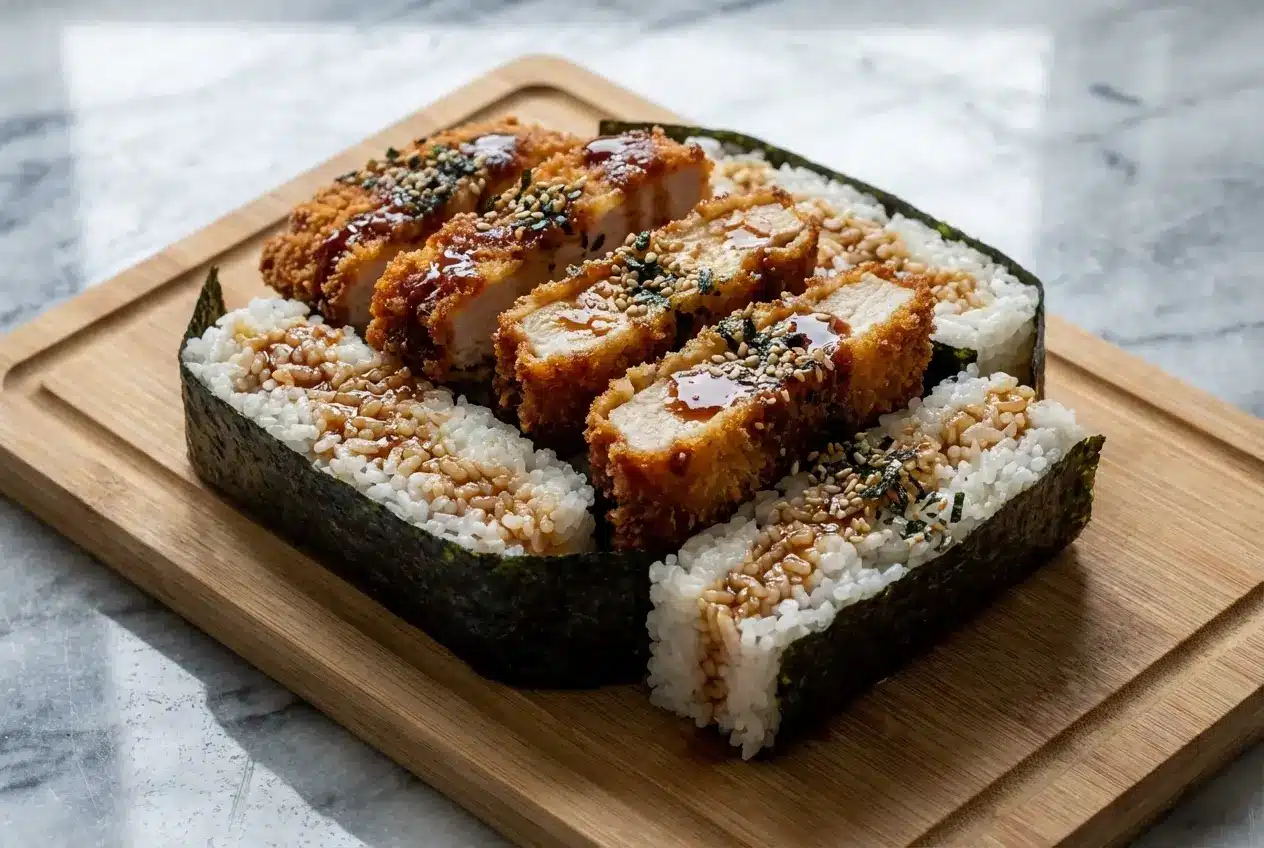
In my kitchen, Chicken Katsu Musubi is the kind of snack that disappears before the cooler is even packed. It has that familiar island convenience-store charm, but when you make it fresh at home, the contrast of crisp panko, warm rice, and glossy sweet-savory sauce is on another level.
This version is built for anyone who loves Hawaiian and Japanese-Hawaiian fusion flavors but wants a musubi that stays juicy, crunchy, and easy to wrap. While plenty of people grew up on Spam musubi, I think the chicken katsu version wins on texture every single time, especially with the double-dip glaze trick that keeps the breading lively instead of soggy.
Why You’ll Love This Recipe
Crunch in every bite: The mix of golden Panko breadcrumbs, juicy chicken thigh, and sticky short-grain rice gives you that perfect contrast musubi lovers chase. It is soft, crisp, savory, and deeply satisfying all at once.
The double-drip glaze: In my kitchen, a quick 2-second dip works better than a timid brush of sauce. It slips into the little crags of the crust, seasoning the katsu all over without turning the rice messy.
Made to travel: This Chicken Katsu Musubi is ideal for lunch boxes, beach days, and road trips. Once wrapped, it still holds its shape beautifully and keeps more texture than most homemade versions.
Real island flavor: Between the shoyu, nori seaweed, furikake seasoning, and that sweet umami glaze, you get the spirit of a classic Hawaiian grab-and-go snack with a little extra polish.
Ingredients and Substitutions
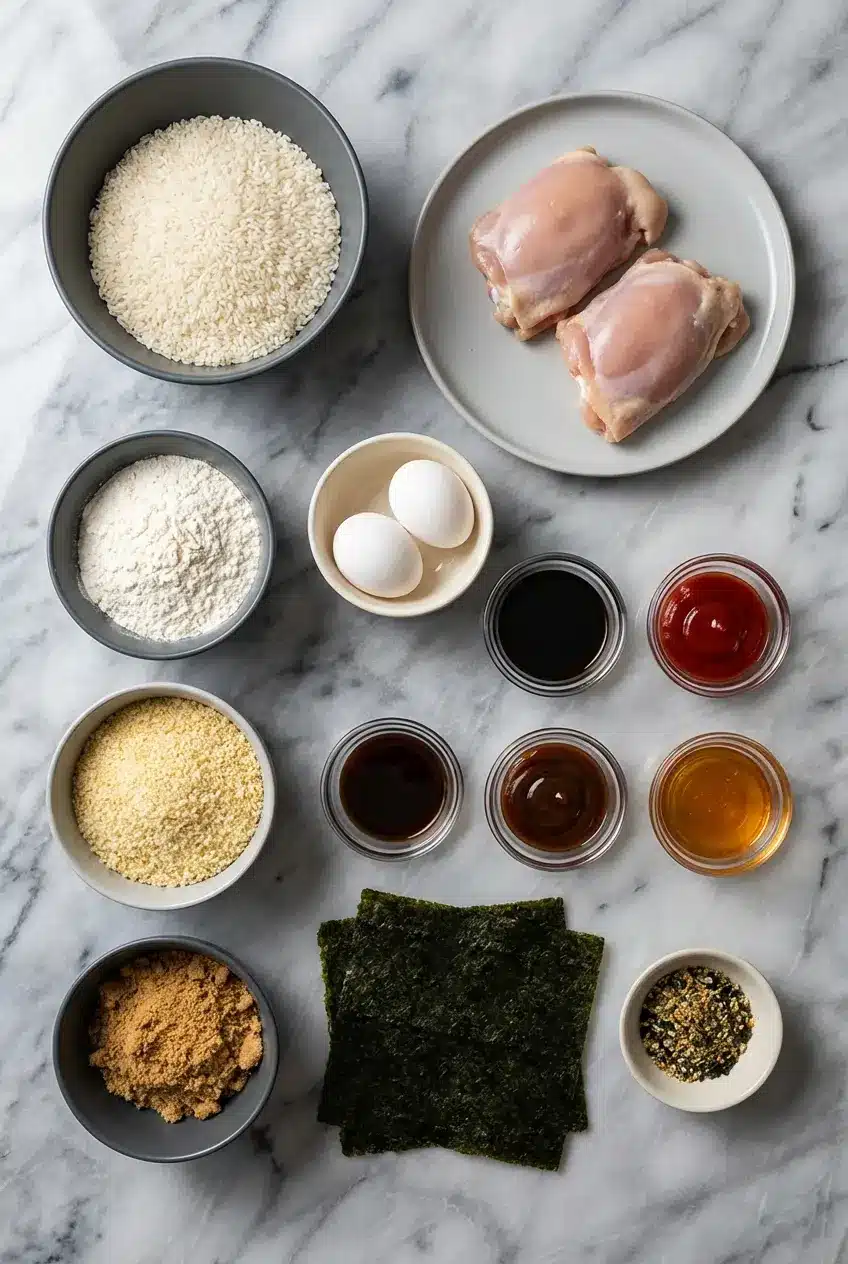
These ingredients are simple, but each one pulls real weight, from the cling of sushi rice to the airy crunch of Japanese panko and the glossy glaze that ties everything together.
Ingredients
Rice:
- 2 1/4 cup OR 3 rice cooker cups Rice
- 2 1/2 cup OR fill to 3 line Water
Chicken Katsu:
- 2 Boneless/Skinless Chicken Thighs
- Salt to taste
- Black Pepper to taste
- 1 cup AP Flour
- 2 Egg
- 2 cups Japanese Panko
- Frying Oil enough to submerge
Sauce:
- 3 tbsp Shoyu
- 3 tbsp Ketchup
- 2 tbsp Worchishire
- 2 tbsp Oyster Sauce
- 1 tbsp Hot Honey
- 2 tbsp Brown Sugar
Other:
- 2 sheets Nori
- Furikake to taste
Ingredient Notes & Substitutions
Rice Selection: Short-grain rice, often labeled sushi rice, is the one to use here because it has the amylopectin needed to cling together in neat blocks. Long-grain rice cooks up too separate and fluffy, so it tends to crumble when you press and wrap.
Chicken Thighs: I strongly prefer thighs for musubi because deep frying is unforgiving, and the extra fat keeps the meat tender after wrapping. If you want a meatless option, firm tofu can work well, just press it thoroughly so the coating sticks and the surface fries up crisp.
Panko Breadcrumbs: Japanese panko is non-negotiable if you want true katsu texture. Regular breadcrumbs sit heavier and finer, while panko creates those airy ridges that catch sauce and stay crisp longer.
Nori Seaweed: Good nori should smell lightly briny and feel dry, never limp. If your package has been open for a while, a few seconds near a warm pan can refresh the sheet and help it wrap more cleanly.
Furikake Seasoning: Furikake adds little bursts of salt, sesame, and seaweed flavor between the rice and katsu. You can use a classic sesame blend, or lean into local flavor with a slightly spicy version if you want a bolder bite.
Sauce Variations: This glaze is balanced and classic, but I have also stirred in a spoonful of white miso for a deeper fermented note. For a spicier musubi, a thin swipe of spicy mayo or a few sliced jalapeños under the katsu works beautifully.
How to Make Chicken Katsu Musubi
Prepare the Rice and Chicken
- Rinse the rice 4 to 5 times, or until the water runs mostly clear instead of cloudy. That quick extra effort washes away excess surface starch, which helps the grains come out sticky but distinct rather than gluey, then cook the rice with the water and let it cool until it is warm, not steaming.
- Cut each boneless, skinless chicken thigh into 3 equal pieces across the short side. Cover the pieces with plastic wrap and gently pound them with a meat mallet or a heavy pot until they are about 1/2-inch thick all over, because even thickness is what lets the center finish cooking right as the crust turns golden.
- Season both sides of the chicken with salt and black pepper so the meat itself has flavor under the crust.
Build the Crust and Fry the Katsu
- Set up a three-part dredging station with flour in one bowl, beaten eggs in the next, and Japanese panko in the last. Coat each piece first in flour and shake off the excess, then let it bathe in egg until every corner is covered, then press it firmly into the panko so the crumbs really adhere.
- Heat about 3 inches of frying oil in a heavy pot to 350°F. Fry the chicken for 5 to 6 minutes, turning as needed, until the outside is deeply golden and the coating looks crisp and craggy, then move the pieces to a wire rack so steam can escape and the bottoms stay crunchy.
Simmer the Glaze
In a small saucepan, whisk together the shoyu, ketchup, Worcestershire, oyster sauce, hot honey, and brown sugar over medium-low heat. Let it bubble gently for 5 to 7 minutes until the sugar fully dissolves and the sauce thickens slightly, enough to coat the back of a spoon with a shiny, savory-sweet glaze.
Assemble and Wrap
- Cut the nori sheets into 3 even strips. Place a musubi mold at the end of each strip with the rough side of the nori facing up, then fill the mold with 1/2 cup to 3/4 cup cooked rice, press it down firmly, and lift away the mold so you have a tidy rice block.
- Sprinkle furikake over the rice, then take each hot katsu piece and dip the whole thing into the warm sauce for 2 seconds before setting it on top. This is the double-drip move that lets the glaze sink into the panko without pooling across the rice.
- Press a tiny pinch of rice onto the far end of the nori to act as glue, then roll the musubi snugly until sealed. Let it sit a moment so the nori grips the rice and the shape settles before serving or wrapping.
Secrets for Perfection
Warm rice matters: The best assembly temperature is warm, roughly body temperature. If the rice is still steaming hot, it softens the nori too quickly and can make it chewy, but if it has gone cold, it will not mold or seal nearly as well.
Rough side up: Nori has a smoother face and a rougher face, and the rough side should touch the rice. That little detail gives better grip, which means cleaner wrapping and fewer musubi that spring loose on the seam.
The 2-second dip is the sweet spot: Brushing sauce over the top only flavors the surface, while a short dip saturates the crust just enough to build a juicy flavor barrier. The chicken tastes seasoned all the way through the coating, but the rice still stays neat and white instead of streaked with sauce.
The Anatomy of Superior Sushi Rice
Short-grain rice is what gives musubi its structure. It contains more of the starch that turns tacky when cooked, so the grains cling together under gentle pressure instead of scattering like long-grain rice would.
That cling should not be confused with mush. When you rinse the rice 4 to 5 times, you wash away excess starch on the outside of the grains, which is the part that can turn into a gummy paste in the pot. It is the same reason rice for musubi behaves very differently from something like chicken congee, where broken texture and creamy starchiness are actually the goal.
Once cooked, let the rice cool until warm before you press it. At that stage it is still pliable and sticky enough to hold a musubi mold shape, but it is no longer blasting steam into the nori.
Choosing the Best Cut: Thigh vs. Breast
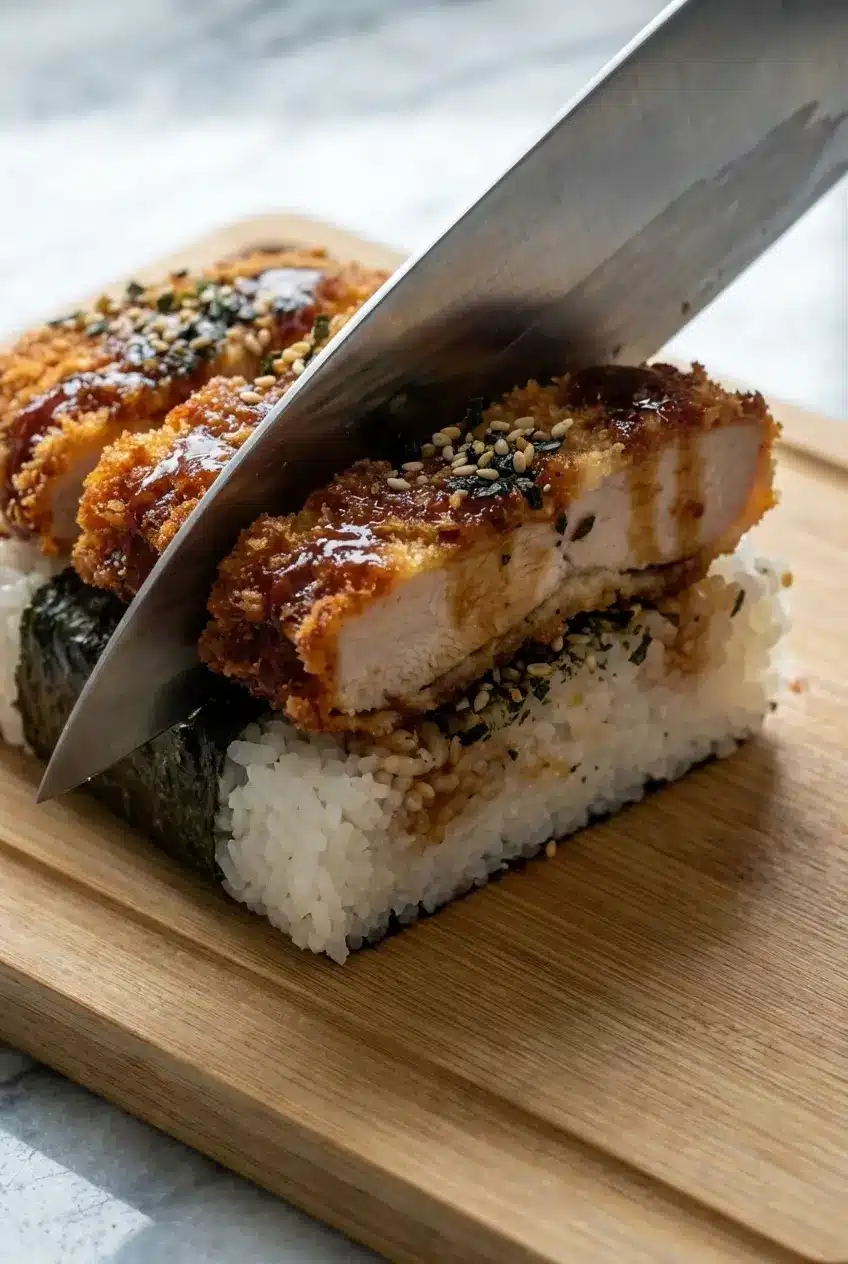
For Chicken Katsu Musubi, thighs are simply more forgiving. The higher fat and juiciness help the meat stay succulent after deep frying and wrapping, and even standard nutrition data reflects that higher fat and moisture content, which is exactly what protects the meat from tasting dry.
Chicken breast can work, but high heat is rough on such a lean cut, and the window between done and dry is much smaller. If you already know you prefer breast meat, handling it more carefully, like the methods used for air fryer breast, can help you understand why lean chicken needs a gentler touch than thigh meat does here.
There is also a flavor piece to consider. Thigh meat has a richer, deeper savory quality that plays especially well with shoyu, oyster sauce, and toasted panko, giving the finished musubi that full umami character people expect from good Japanese-Hawaiian fusion cooking.
Pro Tips & Troubleshooting
Pro Tips
- If you do not own a musubi mold, a cleaned Spam can works beautifully. Lightly moisten the inside so the rice slides out instead of sticking.
- Pounding the chicken to a uniform 1/2-inch thickness is what keeps the coating and the meat in sync. Without that step, the panko can brown too fast before the center is ready.
- Always rest fried katsu on a wire rack, never paper towels. A rack lets steam escape so those crisp panko ridges stay intact.
- For a party spread, fry the katsu up to 2 hours ahead and leave it uncovered on a rack at cool room temperature, then re-crisp briefly before glazing and assembling. That timing helps preserve the crunch much better than wrapping too early.
- If you enjoy experimenting with Japanese-inspired sweet-savory sauces, the balance used in teriyaki chicken is a handy comparison for adjusting this glaze toward a more classic profile without losing the musubi’s island character.
Common Mistakes to Avoid
- Handling rice with completely dry hands usually turns assembly into a sticky struggle. Slightly damp hands make shaping much cleaner.
- Skipping the rice rinse leads to a pasty, heavy texture instead of glossy, distinct grains that still hold together.
- Using too much rice in the mold creates a musubi that looks impressive but is awkward to bite. Keep the block compact and comfortable to eat.
- Wrapping nori around piping hot rice softens it too fast and can make it tough rather than pleasantly crisp at the edges.
- Using chicken breast without adjusting expectations often gives a drier result, especially after frying and resting.
Serving & Storage
Serving Ideas
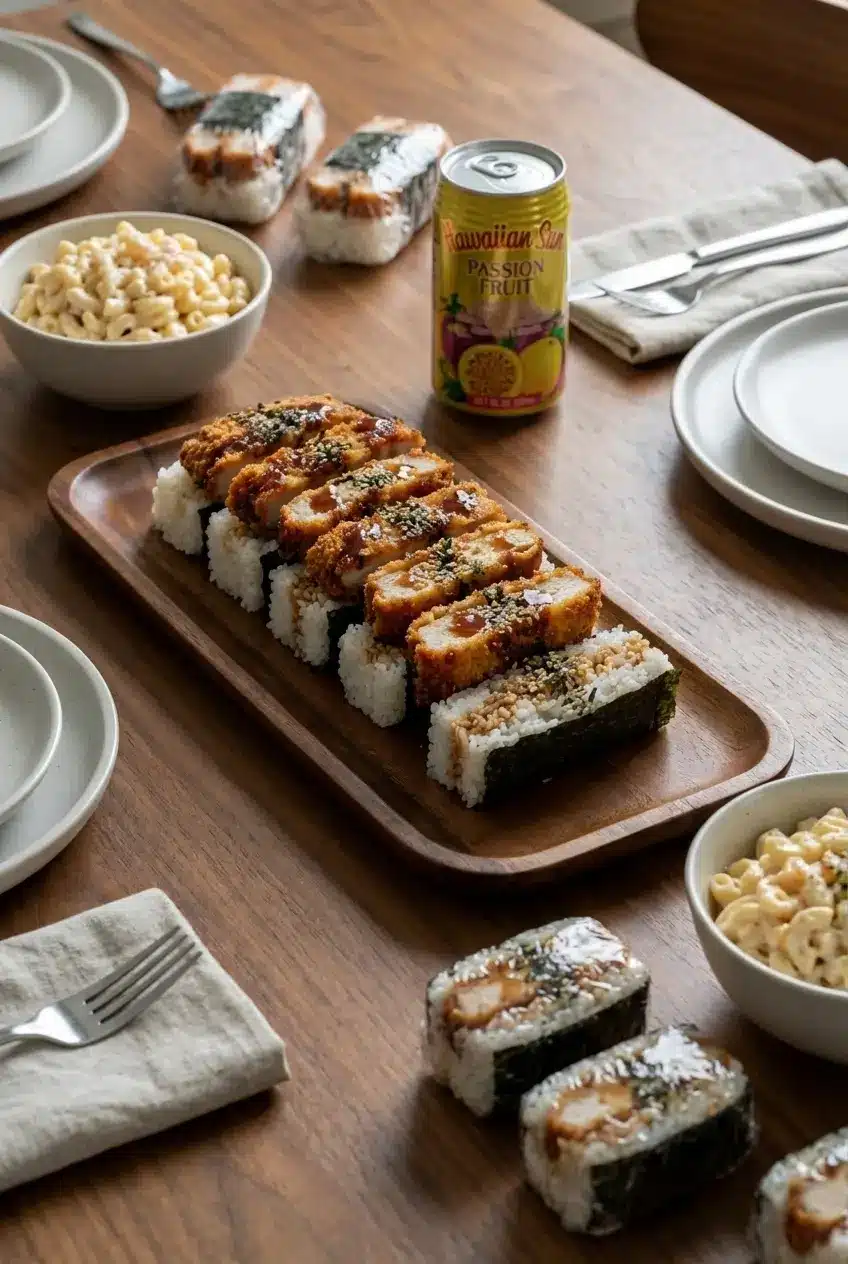
Chicken Katsu Musubi feels right at home beside Hawaiian macaroni salad and an icy fruit drink. If I am packing a cooler, I wrap each one individually so they are easy to grab at the beach, on a hike, or during a long car ride.
For a bigger potluck spread, I like pairing musubi with dishes that bring a different sweet-savory texture to the table. Something sticky and crisp like sweet sour chicken can round out the meal nicely without repeating the exact same flavor profile.
Storage & Reheating
Store leftover musubi in the fridge for up to 2 days. Just know that rice naturally hardens when chilled, so the texture will be firmer the next day.
For the best reheating, an air fryer brings the katsu back to life in about 2 to 3 minutes and helps recover some crunch. If your main goal is softening the rice, a short microwave warm-up with a damp paper towel works, though the nori will lose its snap and turn softer.
If you are making these ahead for a gathering, the smartest move is to prep the rice and sauce, fry the chicken, and hold the components separately until close to serving time. Assemble when the rice is warm and the katsu is freshly glazed, and the final texture will be far closer to what you would get from a fresh batch.
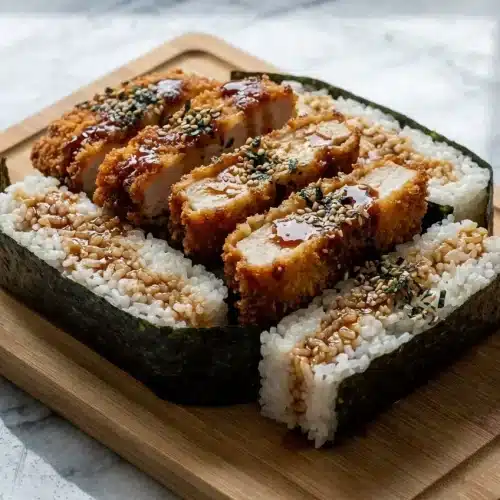
Crispy Chicken Katsu Musubi

Equipment
- Rice Cooker
- Meat Mallet or Heavy Pot
- Musubi Mold or Cleaned Spam Can
- Wire rack
- Heavy Pot for Frying
Ingredients
Rice:
- 2 1/4 cup OR 3 rice cooker cups Rice
- 2 1/2 cup OR fill to 3 line Water
Chicken Katsu:
- 2 Boneless/Skinless Chicken Thighs
- Salt to taste
- Black Pepper to taste
- 1 cup AP Flour
- 2 Egg
- 2 cups Japanese Panko
- Frying Oil enough to submerge
Sauce:
- 3 tbsp Shoyu
- 3 tbsp Ketchup
- 2 tbsp Worchishire
- 2 tbsp Oyster Sauce
- 1 tbsp Hot Honey
- 2 tbsp Brown Sugar
Other:
- 2 sheets Nori
- Furikake to taste
Instructions
Prepare the Rice and Chicken
- Rinse the rice 4 to 5 times until the water runs clear to remove excess starch. Cook the rice according to your machine’s settings, then let it cool until it is warm but no longer steaming.
- Cut each chicken thigh into 3 equal pieces across the short side. Cover with plastic wrap and pound with a meat mallet to a uniform 1/2-inch thickness.
- Season both sides of the chicken pieces generously with salt and black pepper.
Build the Crust and Fry the Katsu
- Set up a dredging station with bowls of flour, beaten eggs, and panko. Coat chicken in flour (shake off excess), dip in egg, and press firmly into the panko until fully covered.
- Heat 3 inches of oil to 350°F in a heavy pot. Fry the chicken for 5 to 6 minutes, turning once, until deeply golden and crisp. Move to a wire rack to rest.
Simmer the Glaze
- Whisk shoyu, ketchup, Worcestershire, oyster sauce, hot honey, and brown sugar in a saucepan over medium-low heat. Simmer for 5 to 7 minutes until thickened and glossy.
Assemble and Wrap
- Cut nori sheets into 3 strips. Place a musubi mold at the end of a strip (rough side up), fill with 1/2 to 3/4 cup warm rice, and press down firmly before lifting the mold.
- Sprinkle furikake over the rice block. Dip each piece of hot katsu into the warm sauce for 2 seconds and place it on top of the rice.
- Apply a tiny pinch of rice to the end of the nori to act as glue, then roll the musubi snugly. Let it sit for a few minutes to seal before serving.
Notes
Conclusion
What makes this Chicken Katsu Musubi special is not just the crispy chicken, it is the way the warm rice, rough-side-up nori, and double-drip glaze work together. Those small details turn a good musubi into the kind you keep thinking about after the last bite.
It takes a little more care than a shortcut version, but the payoff is huge, crunchy, juicy, sweet-savory, and miles better than anything that sat under a warmer. Once you make it once, it is an easy favorite for lunch prep, potlucks, and weekend snack runs.
Frequently Asked Questions
How do I keep the rice block from falling apart?
What’s the difference between Chicken Katsu Musubi and Onigiri?
How long can Chicken Katsu Musubi sit at room temperature?
Can I use brown rice for musubi?
Can I make chicken katsu musubi in an air fryer?
What do I do if I don’t have a Musubi mold?