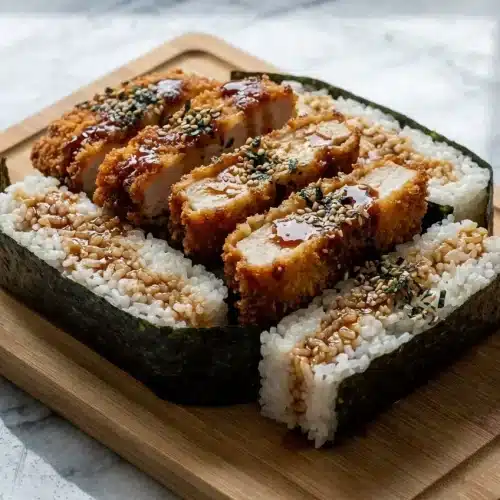
Crispy Chicken Katsu Musubi

A crispy, savory Hawaiian-Japanese fusion snack featuring golden panko-crusted chicken, sticky sushi rice, and a glossy umami glaze wrapped in nori. Perfect for lunch boxes and beach days.
Equipment
- Rice Cooker
- Meat Mallet or Heavy Pot
- Musubi Mold or Cleaned Spam Can
- Wire rack
- Heavy Pot for Frying
Ingredients
Rice:
- 2 1/4 cup OR 3 rice cooker cups Rice
- 2 1/2 cup OR fill to 3 line Water
Chicken Katsu:
- 2 Boneless/Skinless Chicken Thighs
- Salt to taste
- Black Pepper to taste
- 1 cup AP Flour
- 2 Egg
- 2 cups Japanese Panko
- Frying Oil enough to submerge
Sauce:
- 3 tbsp Shoyu
- 3 tbsp Ketchup
- 2 tbsp Worchishire
- 2 tbsp Oyster Sauce
- 1 tbsp Hot Honey
- 2 tbsp Brown Sugar
Other:
- 2 sheets Nori
- Furikake to taste
Instructions
Prepare the Rice and Chicken
- Rinse the rice 4 to 5 times until the water runs clear to remove excess starch. Cook the rice according to your machine's settings, then let it cool until it is warm but no longer steaming.
- Cut each chicken thigh into 3 equal pieces across the short side. Cover with plastic wrap and pound with a meat mallet to a uniform 1/2-inch thickness.
- Season both sides of the chicken pieces generously with salt and black pepper.
Build the Crust and Fry the Katsu
- Set up a dredging station with bowls of flour, beaten eggs, and panko. Coat chicken in flour (shake off excess), dip in egg, and press firmly into the panko until fully covered.
- Heat 3 inches of oil to 350°F in a heavy pot. Fry the chicken for 5 to 6 minutes, turning once, until deeply golden and crisp. Move to a wire rack to rest.
Simmer the Glaze
- Whisk shoyu, ketchup, Worcestershire, oyster sauce, hot honey, and brown sugar in a saucepan over medium-low heat. Simmer for 5 to 7 minutes until thickened and glossy.
Assemble and Wrap
- Cut nori sheets into 3 strips. Place a musubi mold at the end of a strip (rough side up), fill with 1/2 to 3/4 cup warm rice, and press down firmly before lifting the mold.
- Sprinkle furikake over the rice block. Dip each piece of hot katsu into the warm sauce for 2 seconds and place it on top of the rice.
- Apply a tiny pinch of rice to the end of the nori to act as glue, then roll the musubi snugly. Let it sit for a few minutes to seal before serving.
Notes
Crispness Secret: Always rest your fried chicken katsu on a wire rack instead of paper towels. This allows steam to escape from all sides, preventing the bottom from becoming soggy.
Assembly Tip: Keep your hands slightly damp when handling the sushi rice. This prevents the grains from sticking to your skin and makes it much easier to press a clean, tidy rice block.
Nori Technique: Ensure the rough side of the nori is facing up when you begin assembly. The texture provides a better grip for the rice, ensuring the musubi stays tightly wrapped and doesn't unravel.
Advance Prep: For gatherings, you can fry the katsu up to 2 hours ahead and leave it on a rack. Briefly re-crisp in an oven or air fryer before glazing and assembling for the best texture.
Nutrition information is estimated based on common ingredients and serving sizes and may vary.