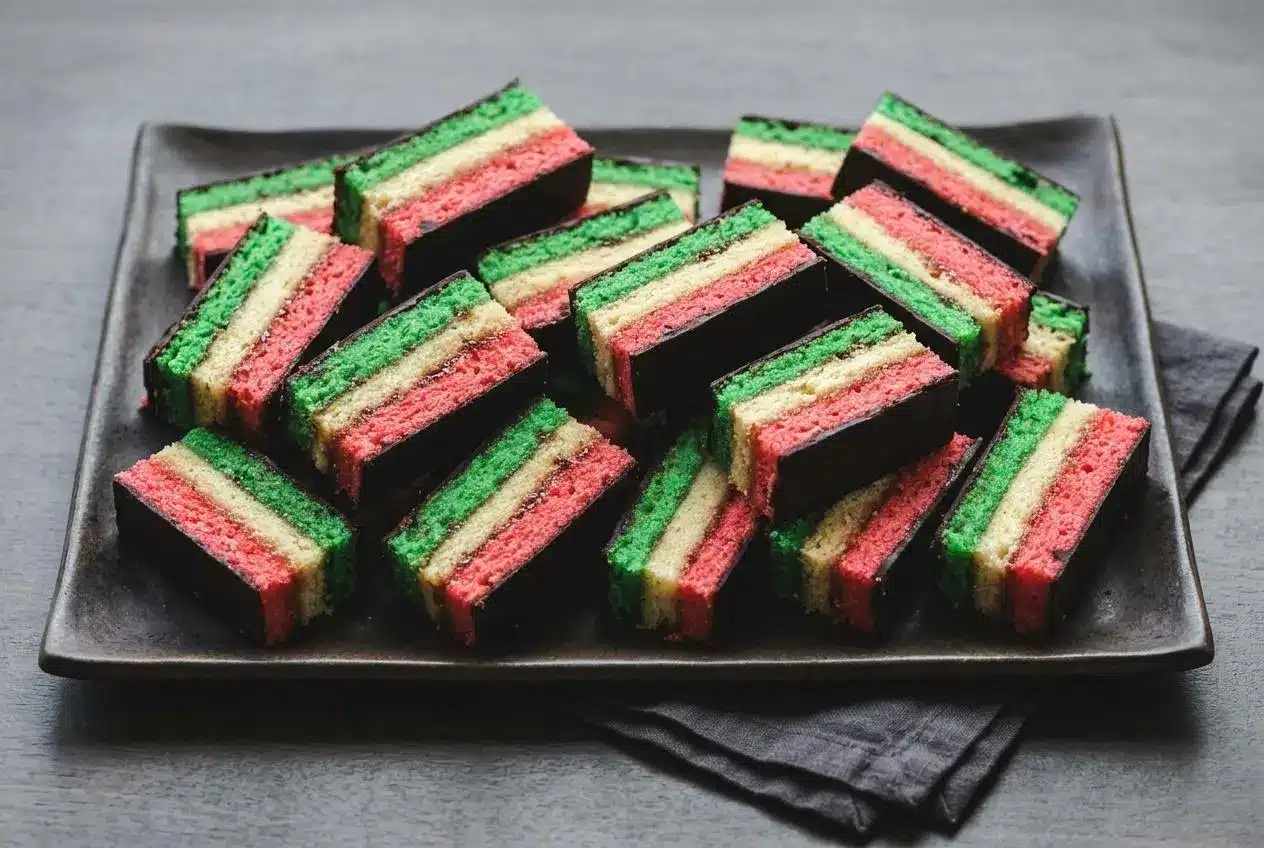
Soft almond cake and a thin chocolate shell make italian rainbow cookies an Italian-American bakery favorite. Three colorful layers sandwich tart preserves, then chill under weight before receiving chocolate on both sides. The result is moist, compact, and easy to portion into little rectangles.
These are layered cakes in cookie-sized bites, with the same sweet almond flavor running through the red, white, and green sponge. A restrained fruit filling keeps the almond and chocolate in balance.
Plan for overnight chilling rather than trying to finish everything in one baking session. The work breaks into manageable stages, and pressing gives the layers their close-knit texture. Thin jam layers make the difference.
Set out an offset spatula and a digital scale before mixing so you can divide and spread the batter without unnecessary handling.
What Are Italian Rainbow Cookies?
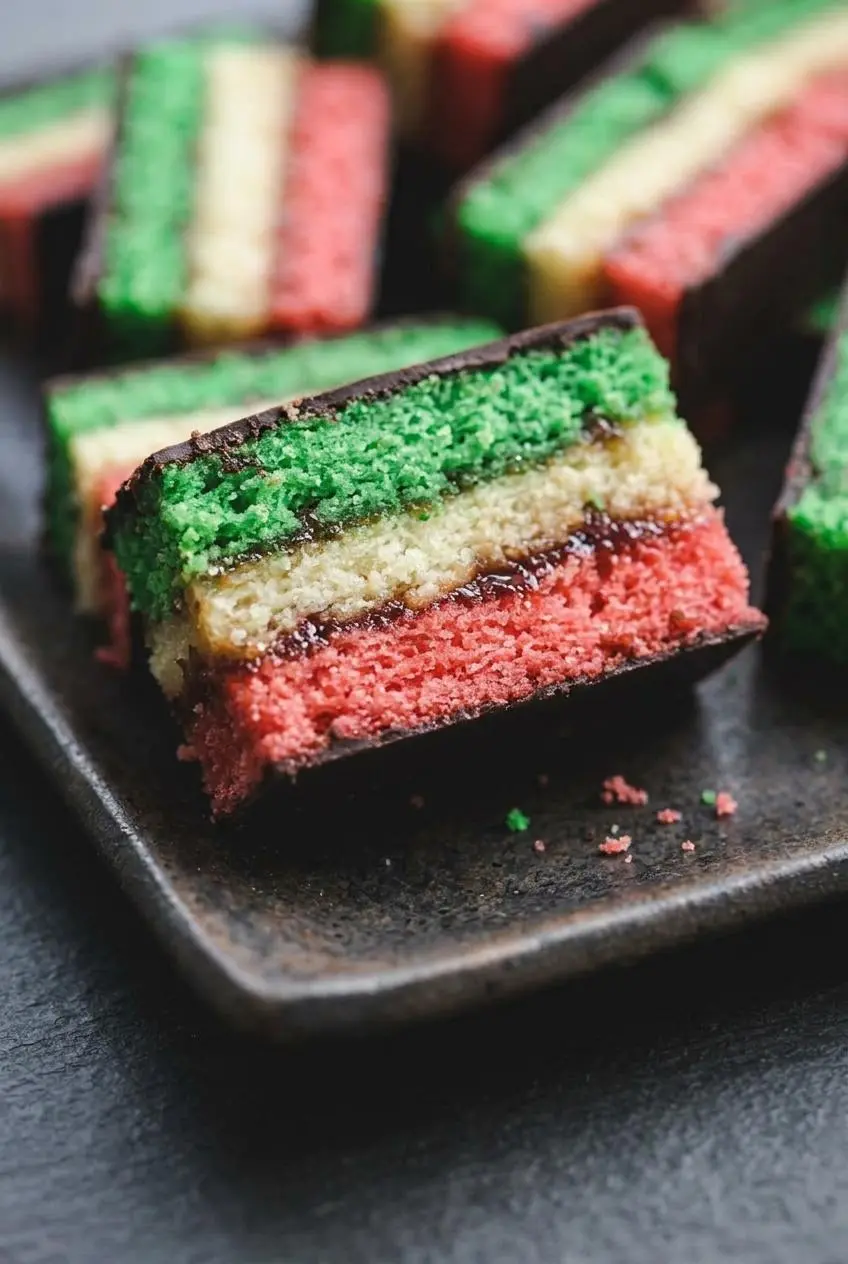
Think miniature almond layer cakes, not crisp cookies. These treats belong to the Italian-American bakery tradition, especially in New York City, and their colors echo the Italian flag.
Bakery names vary: tri-color cookies, Venetian cookies, Neapolitan cookies, Italian flag cookies, and seven-layer cookies all describe this familiar treat. “Seven layers” counts three cakes, two preserve fillings, and two chocolate coatings.
The colors don’t indicate different flavors. Every cake layer tastes of almond, with fruit and bittersweet chocolate providing contrast.
Key Ingredients and Smart Substitutions
Almond paste supplies flavor and body, eggs provide structure and lift, and softened fat keeps the crumb tender. Sugar, flour, and salt balance the cake, coloring creates the stripes, preserves bind the layers, and bittersweet chocolate adds a contrasting shell.
- 4 large eggs separated
- 1 cup sugar
- 1 8-oz can almond paste
- 2½ sticks 1 ¼ cups margarine (or butter), softened (10 oz or 285 grams total of butter)
- 1 teaspoon almond extract
- 2 cups all-purpose flour
- ½ teaspoon salt
- 25 drops red food coloring
- 25 drops green food coloring
- 1 12-oz jar apricot or raspberry preserves, heated and strained
- 7 oz fine-quality bittersweet chocolate not unsweetened, chopped
Whipped whites lighten the rich almond mixture without turning it into a fluffy layer cake. Softened butter or margarine blends evenly into the paste, while thin preserves help the finished cakes hold together.
I prefer breaking firm almond paste into small pieces before mixing so stubborn lumps are easier to spot.
Almond Paste vs. Marzipan and Almond Flour
Check the package name carefully. These almond products do different jobs:
- Almond paste: supplies almond solids, moisture, sweetness, and structure; use the required 8-ounce can.
- Marzipan: generally has a different sugar-to-almond balance and is designed for shaping or confectionery, rather than replacing paste here.
- Almond flour: is dry ground almonds, without the paste’s moisture and sugar balance.
- Almond extract: strengthens aroma but cannot supply the body of almond paste.
Choosing Preserves and Bittersweet Chocolate
Raspberry gives a brighter, tart berry contrast; apricot brings a rounder fruit flavor. Warm and strain either choice so seeds or fruit pieces don’t interrupt the thin filling.
Choose bittersweet chocolate, not unsweetened chocolate. Around 60% cacao is an optional shopping choice for a coating with some bitterness without overwhelming the almond cake. Keep the butter-or-margarine choice as written; dietary adaptations appear below.
How to Make Italian Rainbow Cookies Step by Step
Bake the thin cakes first, press the filled stack, then coat and cut it. For baking, use oven-rated parchment and follow its manufacturer’s directions; reserve wax paper for unheated assembly work.
Whip the Meringue and Cream the Almond Batter
- Heat the oven to 350°F with a rack in the center, then butter a 13-by-9-inch pan, line it with oven-rated parchment extending 2 inches beyond two opposite ends, and butter the liner.
The overhang should remain accessible for lifting the fragile cake. - Whisk the egg whites at medium-high speed to stiff peaks, gradually beat in ¼ cup sugar at high speed, and transfer to another bowl.
The finished peaks should stand upright with a slight gloss. - With the paddle attachment, blend almond paste and the remaining ¾ cup sugar for about 3 minutes, beat in softened margarine or butter for about 3 minutes, then mix in yolks and extract for about 2 minutes before incorporating flour and salt on low speed.
Look for a pale, fluffy mixture before the yolks go in, and stop mixing once the flour disappears. - Use a spatula to incorporate half the whipped whites, then gently fold in the rest.
The batter should look evenly blended without pockets of white, while retaining the air from whipping.
Divide, Tint, and Bake the Three Sponge Layers
- Weigh the batter in grams, divide that total by three, and portion it into three bowls; leave one plain, tint another with the red coloring and the third with green, then cover and refrigerate the plain and green portions while spreading the red batter in the pan.
An offset spatula should produce an even layer about ¼ inch thick, including the corners. - Bake the red cake for 8 to 10 minutes, checking for a set surface and a clean tester.
The cake can look pale and less baked than a conventional cake, but it should not contain wet batter. - Lift the cake onto a rack using the liner and cool for about 15 minutes, then clean, reline, and butter the pan for the white layer; bake it to the same doneness, bring the green batter to room temperature while it bakes, and repeat the pan preparation and baking for green.
Keep each cooled layer supported by its paper to reduce tearing during handling.
Layer With Warm Preserves and Weight Overnight
- Once the cakes have cooled, turn the green layer onto a large baking sheet lined with parchment or wax paper and peel away its baking liner.
The exposed cake surface should lie flat and be ready for filling. - Warm the heated, strained preserves in a microwave-safe bowl or saucepan for 1 minute, then spread half over the green cake.
Keep this single application very thin, with no thick pools that could make the stack slide. - Turn the white cake onto the green cake, remove its paper, spread with the remaining preserves, and finish with the red cake, peeling away its liner.
The stack should run green, white, then red from bottom to top, with two thin fruit fillings. - Wrap the stack in plastic, set a large baking sheet over it, add cookbooks as weights, and refrigerate for at least 8 hours.
The broad, even pressure helps close gaps and creates a compact slab. - Take off the weights, baking sheet, and plastic wrap, then let the layered cake reach room temperature.
The slab should remain compressed and level before coating.
Coat Both Sides in Chocolate and Slice Cleanly
- Stir the chocolate in a double boiler or metal bowl over barely simmering water until melted, then take the pan off the heat while keeping the bowl over the warm water.
The chocolate should flow smoothly; alternatively, melt about 3.5 ounces for each coating stage to limit firming between applications. - Square off the cake edges with a long serrated knife, spread half the chocolate thinly across the top, and refrigerate uncovered for about 15 minutes.
The coating should feel firm before you attempt the flip. - Lay parchment or wax paper over the chocolate, place another baking sheet on top, invert the supported slab, remove the exposed paper, and spread the remaining chocolate over the second side.
Refrigerate for about 30 minutes, until this coating has firmed. - Cut the cold slab into rows and then rectangles about 1 ½ inches by ¾ inch, wiping the serrated knife with a wet towel after every slice.
If the chocolate starts softening or smearing, refrigerate the slab again; an optional brief freeze before cutting can firm it further.
Expert Tips and Troubleshooting for Clean Layers
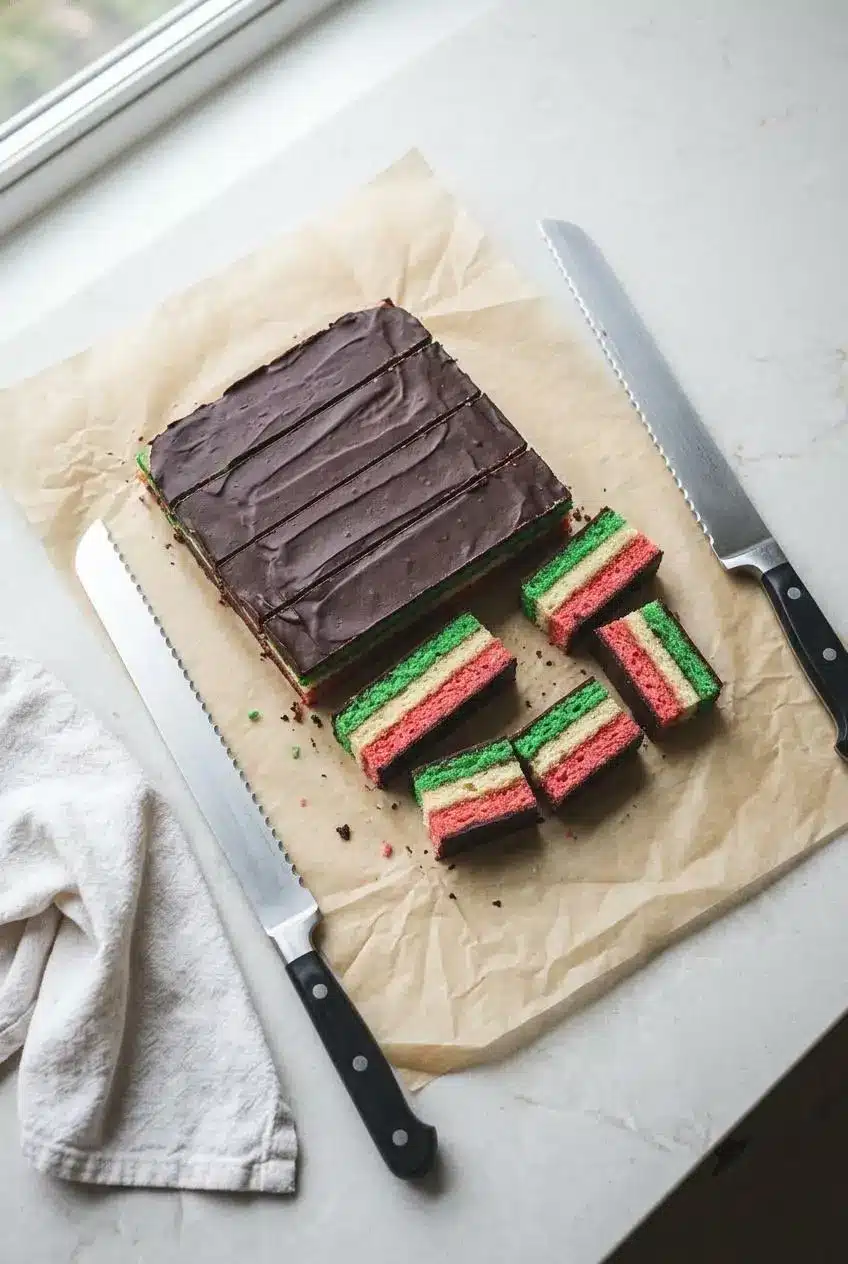
Most assembly problems begin with uneven batter, excessive filling, or rushed pressing. Aim for level cakes, barely-there fruit layers, and a thin chocolate coating.
Three Pans vs. One Pan Baking Strategy
The sequential method uses one 13-by-9-inch pan, relined between cakes. It takes more turnaround time but gives each layer the same baking position and pan dimensions.
Three matching pans reduce relining work, provided their usable dimensions match. Baking simultaneously requires enough oven space and isn’t a tested timing shortcut here, so check each cake individually rather than assuming they will finish together.
Spreading Sticky Batter Into the Corners
Move small amounts outward with an offset spatula instead of dragging one large mound across the entire pan. Hold the liner steady and use gentle strokes into the corners.
Stop when the surface is level and roughly ¼ inch thick. Repeatedly working the folded batter can sacrifice air; adding milk or extra fat would change the formula.
Troubleshooting Common Rainbow Cookie Mistakes
- Almond-paste lumps: break up the paste before mixing and check smoothness before adding flour; don’t try to fix lumps by beating the finished batter longer.
- Dry cake: overbaking is the likely cause, so check within the stated window rather than waiting for browned edges.
- Sliding layers: thick preserve pockets act like slippery cushions; spread thinly and complete the weighted chill.
- Layers separating after cutting: rushed pressing or uneven filling can leave gaps; distribute the weight across the whole slab.
- Seized chocolate: water entering the bowl can make chocolate grainy; keep utensils dry and prevent splashes or steam condensation from reaching it.
Cutting Cold Chocolate Without Shattering It
For extra control, warm a long serrated knife under hot water and wipe it dry before cutting. Use gentle sawing strokes instead of forcing the blade straight through the shell, then clean it with a damp towel after every cut.
Keep the cake cold, but if an optional freeze leaves the shell shattering, let its surface soften slightly before continuing. If chocolate smears instead, return the slab to the refrigerator. A clean blade also keeps colored crumbs from streaking the next slice.
Flavor, Color, and Dietary Variations for Rainbow Cookies
Keep these optional changes separate from the ingredient list and method above. Adaptations can alter the cake’s flavor, moisture, or structure.
Apricot vs. Raspberry Preserves
- Apricot: gives a mellow fruit accent that lets almond remain prominent.
- Raspberry: adds sharper berry contrast against the sweet cake.
- One of each: use a different fruit for each filling while keeping the combined preserve quantity unchanged.
Whichever arrangement you choose, warm, strain, and spread the preserves thinly. Neither fruit is the only valid bakery choice.
Natural Food Dyes With Beet and Matcha
Roasted red beet puree and matcha are optional coloring approaches, but neither is a drop-for-drop replacement for food coloring. Beet puree adds moisture, while matcha can introduce a noticeable tea flavor.
Expect different color intensity and possible texture changes. These adaptations haven’t been validated with this formula.
Dairy-Free and Gluten-Free Options
- Dairy-free: margarine is already an option, but check both its label and the bittersweet chocolate label for dairy ingredients.
- Gluten-free: a 1:1 baking-flour blend is an untested adaptation; the thin cakes may handle or slice differently.
- Allergens: the written formula includes eggs, almonds, and wheat, with possible milk depending on your fat and chocolate choices.
Optional Orange Zest and Flaky Sea Salt
Finely grated orange zest in the almond batter offers citrus contrast, while a light pinch of flaky sea salt over the melted chocolate sharpens its flavor. Both are optional, untested additions.
For another chocolate-and-salt bake, try salted brownie cookies.
How to Store Italian Rainbow Cookies
Protect the moist cake from drying out and the chocolate from heat or crushing. Separate the baking and finishing stages to make the schedule more manageable.
Make-Ahead Timeline and Two-Day Baking Schedule
- Day one: bake and cool the cakes, fill and stack them, then begin the required weighted chill.
- Day two: complete chilling, bring the slab to room temperature as directed, coat both sides, set the chocolate, and cut.
Allow roughly 11 hours total. The 30-minute prep estimate doesn’t include all elapsed cooling and assembly time, and the listed 10-minute cook estimate describes a layer’s baking window, not three sequential bakes. Expect approximately 5 dozen cookies, depending on trimming and cutting.
Keeping Almond Layers Moist and Protecting the Chocolate
Store finished cookies in an airtight container in the refrigerator, with parchment or wax paper between stacked layers to prevent sticking and scuffing. Avoid warm storage, where the coating can soften.
The optional brief freeze in the method is a cutting aid, not a long-term storage recommendation. Keep the container closed when moving cookies for serving to limit unnecessary exposure to moisture and air.
Holiday Platters, Espresso, and Leftover Trimmings
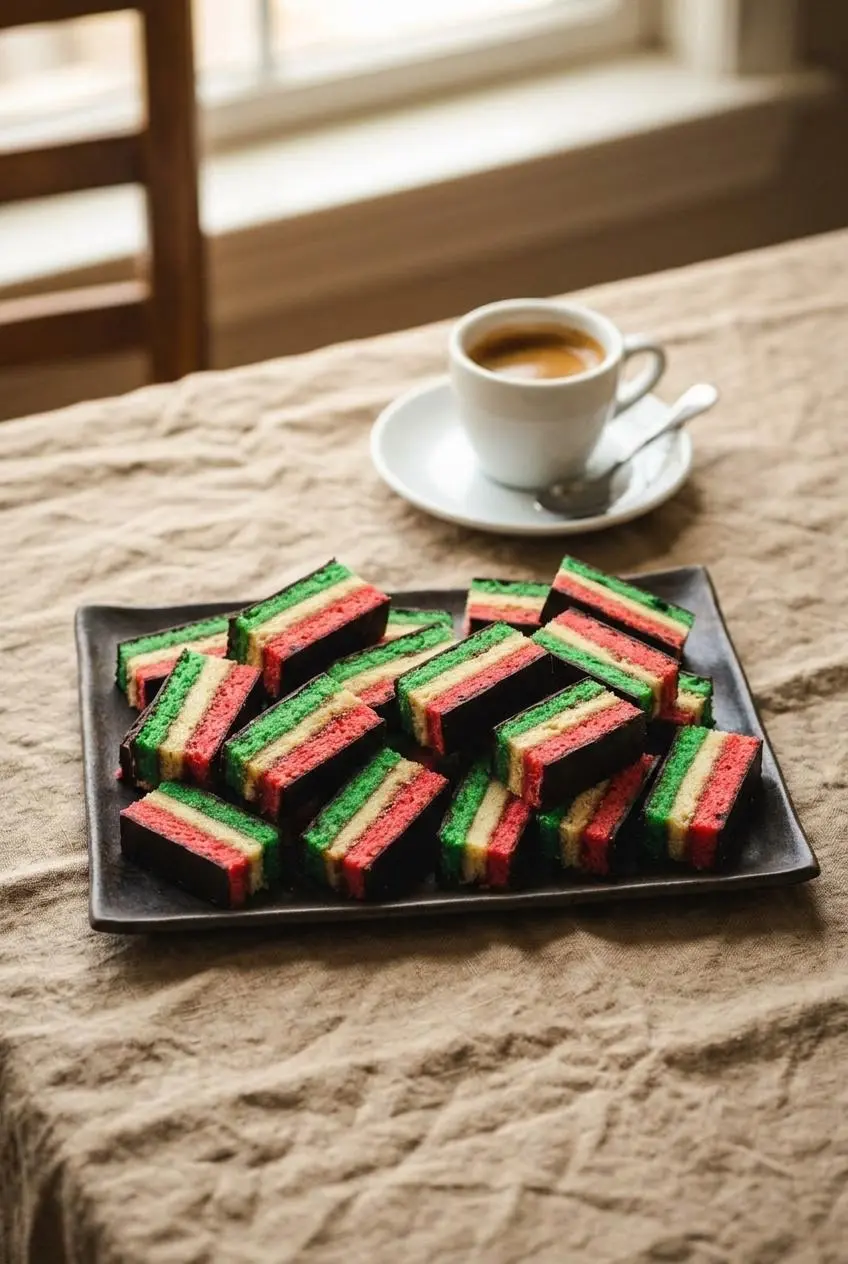
Serve chilled or at cool room temperature with espresso, cappuccino, or dark roast coffee. For a holiday platter, pair them with Italian wedding cookies, pignoli cookies, or Sicilian fig cookies.
Save the trimmed cake edges for scattering over vanilla or pistachio gelato. They have all the almond, fruit, and chocolate flavor, even without tidy corners.
Conclusion
Moist almond layers, thin fruit filling, and bittersweet chocolate give these colorful cookies their bakery appeal. Even spreading matters more than perfectly vivid colors.
Give the filled stack its overnight weighted chill, then cut with a clean blade while the cake stays cold. Take it stage by stage, and those neat little rectangles become much more manageable.
Frequently Asked Questions
What Are Italian Rainbow Cookies Really Called?
Common names include tri-color cookies, seven-layer cookies, Venetian cookies, Neapolitan cookies, and Italian flag cookies. The seven-layer name counts three cakes, two fillings, and two chocolate coatings.
Are There Rainbow Cookies in Italy?
They’re primarily an Italian-American New York bakery specialty, rather than a traditional Italian cookie. You may find versions in Italy today, but their familiar identity comes from Italian-American baking.
What Flavor Are Italian Rainbow Cookies?
All three cake layers share the same sweet almond flavor. Apricot or raspberry preserves add fruit contrast, and bittersweet chocolate balances the sweetness.
Can I Make Italian Rainbow Cookies Without Almond Paste?
This formula depends on almond paste for both flavor and texture. Choose a separately developed paste-free formula rather than substituting extract, almond flour, or marzipan directly.
Can I Substitute Marzipan for Almond Paste in Rainbow Cookies?
No, not as a direct substitution in this formula. Its different sugar and almond balance can change sweetness, moisture, and structure; use the specified almond paste.
Italian Rainbow Cookies

Equipment
- 3 jelly roll pans
- 1 food scale
Ingredients
- 4 large eggs separated
- 1 cup sugar
- 1 8-oz can almond paste
- 2½ sticks 1 ¼ cups margarine (or butter) softened (10 oz or 285 grams total of butter)
- 1 teaspoon almond extract
- 2 cups all-purpose flour
- ½ teaspoon salt
- 25 drops red food coloring
- 25 drops green food coloring
- 1 12-oz jar apricot or raspberry preserves heated and strained
- 7 oz fine-quality bittersweet chocolate not unsweetened, chopped
Instructions
Whip the Meringue and Cream the Almond Batter
- Heat the oven to 350°F with a rack in the center, then butter a 13-by-9-inch pan, line it with oven-rated parchment extending 2 inches beyond two opposite ends, and butter the liner. The overhang should remain accessible for lifting the fragile cake.
- Whisk the egg whites at medium-high speed to stiff peaks, gradually beat in ¼ cup sugar at high speed, and transfer to another bowl. The finished peaks should stand upright with a slight gloss.
- With the paddle attachment, blend almond paste and the remaining ¾ cup sugar for about 3 minutes, beat in softened margarine or butter for about 3 minutes, then mix in yolks and extract for about 2 minutes before incorporating flour and salt on low speed. Look for a pale, fluffy mixture before the yolks go in, and stop mixing once the flour disappears.
- Use a spatula to incorporate half the whipped whites, then gently fold in the rest. The batter should look evenly blended without pockets of white, while retaining the air from whipping.
Divide, Tint, and Bake the Three Sponge Layers
- Weigh the batter in grams, divide that total by three, and portion it into three bowls; leave one plain, tint another with the red coloring and the third with green, then cover and refrigerate the plain and green portions while spreading the red batter in the pan. An offset spatula should produce an even layer about ¼ inch thick, including the corners.
- Bake the red cake for 8 to 10 minutes, checking for a set surface and a clean tester. The cake can look pale and less baked than a conventional cake, but it should not contain wet batter.
- Lift the cake onto a rack using the liner and cool for about 15 minutes, then clean, reline, and butter the pan for the white layer; bake it to the same doneness, bring the green batter to room temperature while it bakes, and repeat the pan preparation and baking for green. Keep each cooled layer supported by its paper to reduce tearing during handling.
Layer With Warm Preserves and Weight Overnight
- Once the cakes have cooled, turn the green layer onto a large baking sheet lined with parchment or wax paper and peel away its baking liner. The exposed cake surface should lie flat and be ready for filling.
- Warm the heated, strained preserves in a microwave-safe bowl or saucepan for 1 minute, then spread half over the green cake. Keep this single application very thin, with no thick pools that could make the stack slide.
- Turn the white cake onto the green cake, remove its paper, spread with the remaining preserves, and finish with the red cake, peeling away its liner. The stack should run green, white, then red from bottom to top, with two thin fruit fillings.
- Wrap the stack in plastic, set a large baking sheet over it, add cookbooks as weights, and refrigerate for at least 8 hours. The broad, even pressure helps close gaps and creates a compact slab.
- Take off the weights, baking sheet, and plastic wrap, then let the layered cake reach room temperature. The slab should remain compressed and level before coating.
Coat Both Sides in Chocolate and Slice Cleanly
- Stir the chocolate in a double boiler or metal bowl over barely simmering water until melted, then take the pan off the heat while keeping the bowl over the warm water. The chocolate should flow smoothly; alternatively, melt about 3.5 ounces for each coating stage to limit firming between applications.
- Square off the cake edges with a long serrated knife, spread half the chocolate thinly across the top, and refrigerate uncovered for about 15 minutes. The coating should feel firm before you attempt the flip.
- Lay parchment or wax paper over the chocolate, place another baking sheet on top, invert the supported slab, remove the exposed paper, and spread the remaining chocolate over the second side. Refrigerate for about 30 minutes, until this coating has firmed.
- Cut the cold slab into rows and then rectangles about 1 ½ inches by ¾ inch, wiping the serrated knife with a wet towel after every slice. If the chocolate starts softening or smearing, refrigerate the slab again; an optional brief freeze before cutting can firm it further.