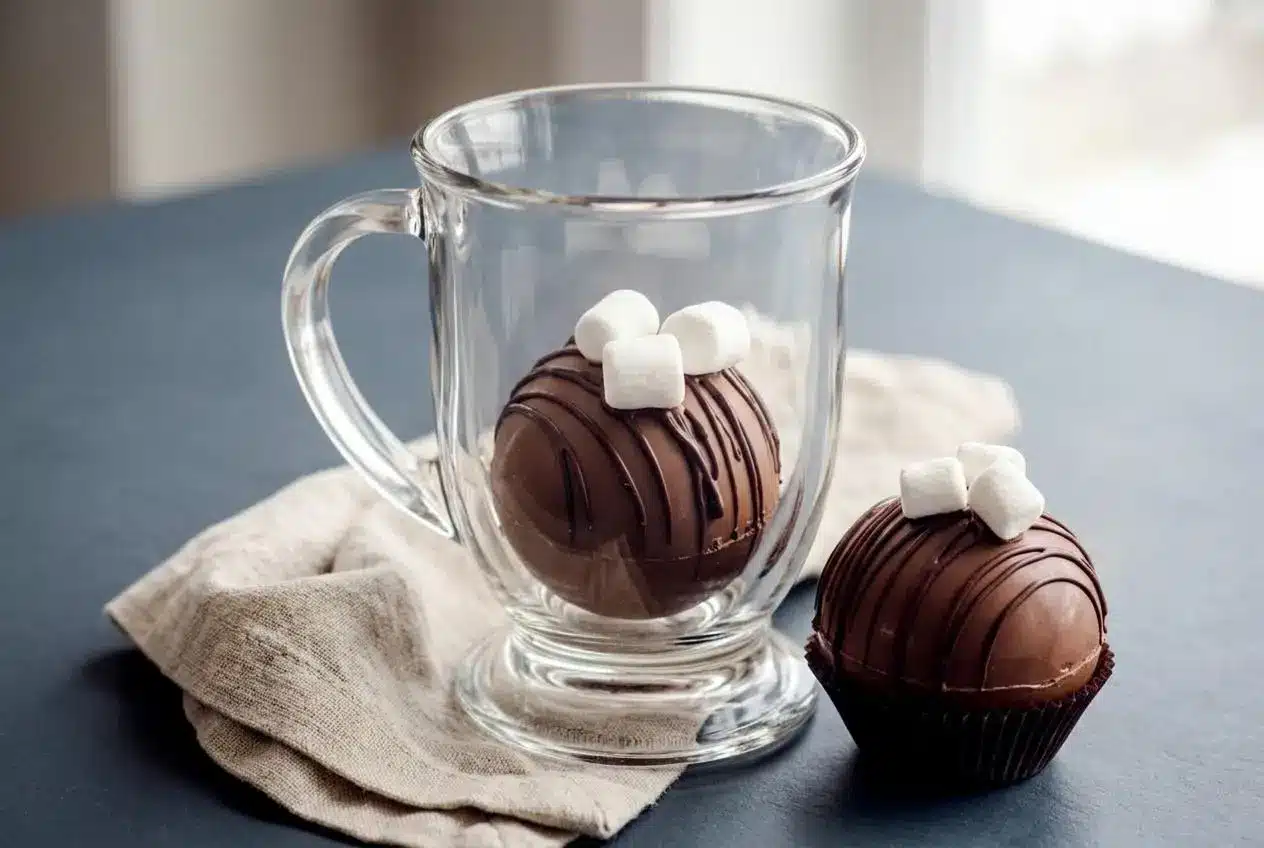
This hot chocolate bombs recipe makes hollow chocolate shells filled with cocoa mix and marshmallows. Brush the molds with two coats, chill each coat, then seal the halves using a heated plate. Add hot milk to turn each sphere into rich marshmallow cocoa.
A chocolate shell softens under steaming milk, then opens to release its marshmallow filling. These homemade cocoa bombs bring that little moment to your mug, with a dark chocolate drizzle for a decorative finish.
The technique takes more patience than fancy equipment. Reinforcing the rims helps the shells survive unmolding, while a smooth seam keeps the filling tucked inside. The edges make the difference.
Keep your bowl, brush, and molds completely dry before working with melted chocolate.
Ingredients You Need and Why They Matter
Milk chocolate provides the shell’s structure and sweetness, cocoa mix builds the drink’s chocolate flavor, and marshmallows add softness. Dark chocolate creates a contrasting drizzle, while your chosen fillings and toppings bring extra flavor and texture.
- 6 ounces milk chocolate melts, chocolate chips, or chopped bar chocolate
- 1/3 cup hot cocoa mix
- Mini marshmallows
- 2 ounces dark chocolate melts or dark chocolate chips, melted, for drizzling
- Additional fillings and toppings, as desired
Choose a cocoa mix you enjoy drinking, since its sweetness and milk-powder content influence the finished mug. The chocolate shell adds richness beyond the mix itself. Keep marshmallows inside the rim so they don’t interfere with sealing.
I prefer handling the finished halves in cupcake liners rather than holding the chocolate directly.
Melting Wafers vs. Chocolate Chips vs. Bar Chocolate
All three options can form shells, but they don’t behave identically.
- Melting wafers: Compound coatings generally set without tempering and make an approachable choice for molding, though their mouthfeel can differ from real chocolate. Check the label because products called “melts” vary.
- Chocolate chips: Their formulation helps them hold their shape during baking, so some brands melt into a thicker coating that needs more careful spreading.
- Chopped bar chocolate: Flavor and fluidity depend on the formulation and cocoa butter content. Real chocolate may need tempering for dependable shine and snap.
The microwave method below melts chocolate; it does not reliably temper it. Chilling alone won’t guarantee a glossy finish with every product.
Homemade 3-Ingredient Hot Cocoa Mix Ratio
For an optional homemade filling, use 2 parts powdered sugar, 2 parts powdered milk, and 1 part unsweetened cocoa powder by volume. Use the same measuring utensil for each part so the ratio stays consistent.
This replaces the purchased cocoa mix rather than adding to it. The listed cocoa quantity remains 1/3 cup, and the assembly method calls for 1 tablespoon per filled half.
Choosing a Mold That Fits Your Mug
A silicone half-sphere mold measuring about 2 to 2.5 inches across is a practical starting point. Check your mug opening first: mug widths and mold capacities vary, and a finished sphere needs room to sit inside.
Gather a microwave-safe bowl, spoon or pastry brush, half-sphere mold, cupcake cups, microwave-safe plate, and butter knife. A double boiler offers a stovetop melting option. A rigid baking sheet underneath a flexible mold is optional but makes transfers steadier.
How to Make Hot Chocolate Bombs Step by Step
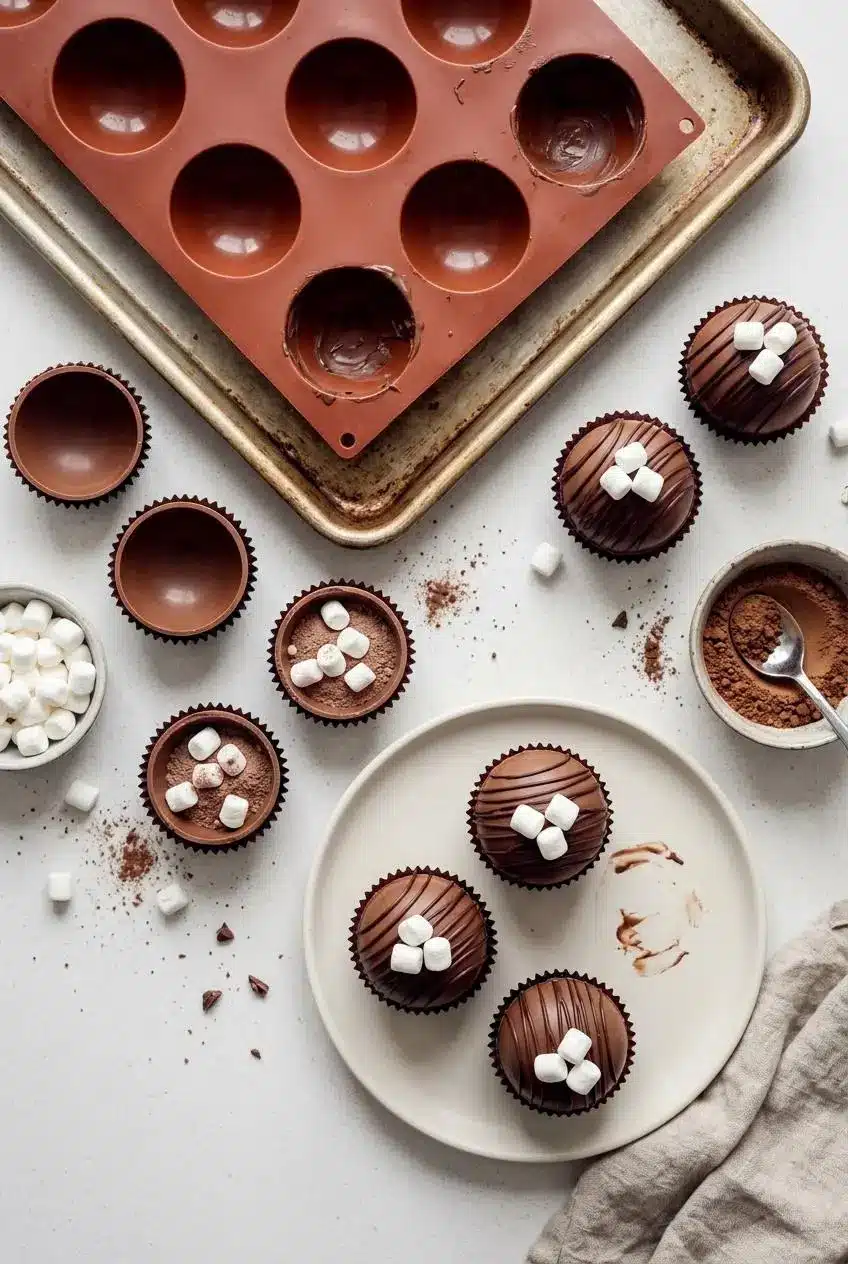
Build an even shell before worrying about decorations. Full coverage and reinforced rims matter more than a perfectly tidy first coat.
Prep: 45 minutes. Chill time: 10 minutes. Total: 45 minutes. Listed yield: 6.
Before you begin: The listed 1/3 cup cocoa mix does not supply six full 1-tablespoon fillings, so the ingredient amount, filling measure, and listed yield don’t fully align. Mold capacity also affects how many shells the chocolate makes; don’t count on six fully filled bombs from these amounts.
- Heat the milk chocolate in a microwave-safe bowl for 30 seconds, then stir and continue in 15-second bursts, stirring between each burst.
Stop when stirring produces a smooth, melted coating without unmelted pieces. - For the stovetop alternative, melt the milk chocolate in a double boiler instead of using the microwave.
The finished chocolate should flow smoothly enough to spread inside the molds. - Spread chocolate over the entire interior of each half-sphere cavity using a spoon back or pastry brush, then freeze for 5 minutes.
The first coat should cover the curved walls and rim and feel firm before the next coat. - Brush on a second coat, giving the sides and rims extra attention, then freeze until firm, about 5 more minutes, repeating coating and firming wherever holes or thin patches remain.
A continuous, opaque shell with substantial edges will release more readily than a translucent one. - Peel the molds gently away from the firm shells, settle half the shells in cupcake cups, and add 1 tablespoon hot cocoa mix, marshmallows, and any desired additional filling to each supported half.
The liners should hold the shells upright with their rims clear for joining. - Heat a microwave-safe plate in the microwave for 90 seconds, then lightly rotate the rim of an empty half against it and immediately join that half to a filled one.
The softened edge should sit flush against the lower shell to form a closed sphere. - Work melted chocolate from the plate into any remaining seam gaps with a butter knife.
The join should look continuous, with no openings where cocoa powder can escape. - Add the melted dark chocolate in thin drizzles and finish with extra mini marshmallows or your preferred decorations.
The drizzle should cross the shell’s surface without obscuring its shape. - Set a finished bomb in a mug, pour very hot milk or hot water over it, and stir to combine.
The shell and cocoa mix should dissolve into the liquid as the marshmallows rise.
Handle the heated plate carefully, using protection as needed. Microwave performance and plate materials vary, so the 90-second heating step won’t produce the same plate temperature in every kitchen.
Expert Tips and Troubleshooting
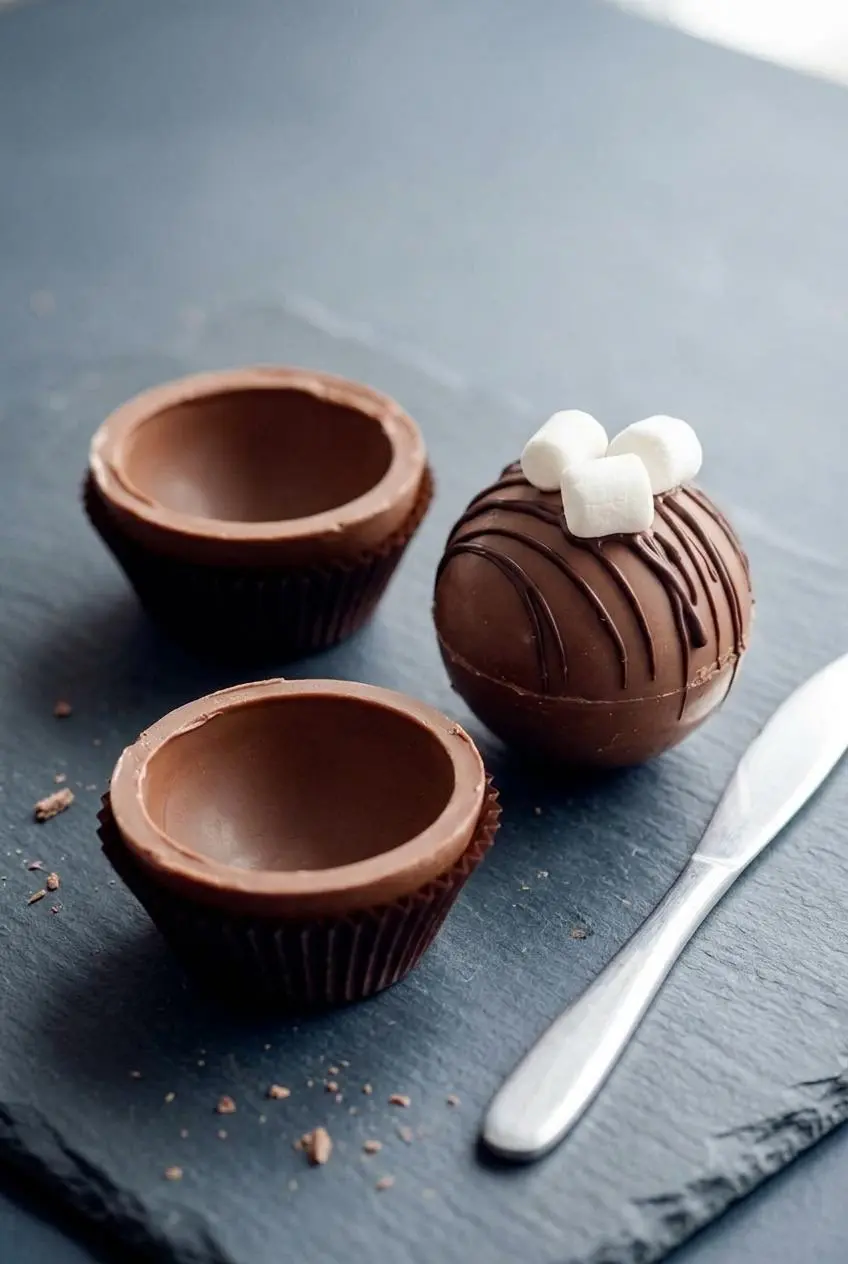
Check the shells before unmolding, when you can still repair weak areas without handling loose chocolate halves.
- Wobbly mold: Set a flexible silicone mold on a rigid baking sheet before coating it. The support helps prevent bending and spills during transfers.
- Thin spots: Hold the mold toward a kitchen light. Translucent patches reveal places that need more chocolate before release.
- Second coat setting quickly: The cold first layer firms the fresh chocolate rapidly. Spread deliberately, especially around the rim, rather than repeatedly brushing a patch that has already set.
- Cracked rims: Thin edges or early unmolding can cause breaks. Reinforce the rim during coating, wait for firm shells, and peel the silicone away instead of pulling on the chocolate.
- Fingerprints: Warm hands soften the surface. Use cupcake liners to cradle the shells and keep direct handling brief.
- Grainy chocolate: Overheating can scorch chocolate; moisture can make it seize and thicken. Keep utensils dry and follow the short heating intervals, stirring thoroughly rather than adding unlisted oil or liquid.
- Dull finish: Chocolate formulation, tempering, and moisture affect appearance. A dull shell isn’t automatically a weak shell, and extra chilling won’t correct every finish problem.
- Leaky seam: An uneven join can leave openings. Patch those gaps with melted chocolate using the butter knife before decorating.
For more help with gentle heating and consistency, see how to melt chocolate.
Creative Variations and No-Mold Options
These optional shapes and fillings offer alternatives for gift assortments, but the listed timing and yield don’t automatically carry over.
How to Make Hot Chocolate Bombs Without a Silicone Mold
Coat the interiors of paper or silicone cupcake liners with chocolate to create cup-shaped halves. Build complete coverage, let the chocolate firm, and carefully remove the liners before filling and joining matching rims. Expect chocolate cups, not perfect spheres; flexible silicone usually releases more easily than paper.
Food-contact-safe plastic egg halves are another possible form only if the manufacturer identifies them as suitable for the chocolate’s temperature. Skip craft eggs and unknown plastics.
Hot Chocolate Bombs on a Stick
Chocolate on a stick is a solid stir-in rather than a hollow, filled bomb. Let melted chocolate firm around a food-safe wooden stick in a suitable small mold or liner, then use the stick to stir it into hot milk. It melts into the drink without opening to release a hidden filling.
Holiday Gift Box Flavor Ideas
Keep additions optional and leave enough room to close the shells neatly.
- Peppermint: Crushed candy canes add cool mint flavor and a festive crunch.
- Salted caramel: Dry caramel-flavored cocoa mix or crushed caramel candy brings buttery sweetness without introducing a wet filling.
- Cookies and cream: Crushed chocolate sandwich cookies add cookie flavor and a flecked finish.
- Peanut butter cup: Chopped peanut butter cups add a nutty, creamy candy filling.
- Peppermint mocha: Instant espresso powder and crushed candy canes combine coffee depth with mint.
- Deeper chocolate: An optional tiny pinch of flaky sea salt and instant espresso powder can balance sweetness and deepen the cocoa flavor, though the coffee may remain noticeable.
Check labels when assembling assortments: milk, wheat, and peanut ingredients can differ between flavors. Wet fillings also change storage needs, so don’t treat them like dry cocoa-and-marshmallow fillings.
For a mixed confection box, pack homemade chocolate truffles separately from the delicate shells.
How to Serve, Store, and Gift Hot Chocolate Bombs
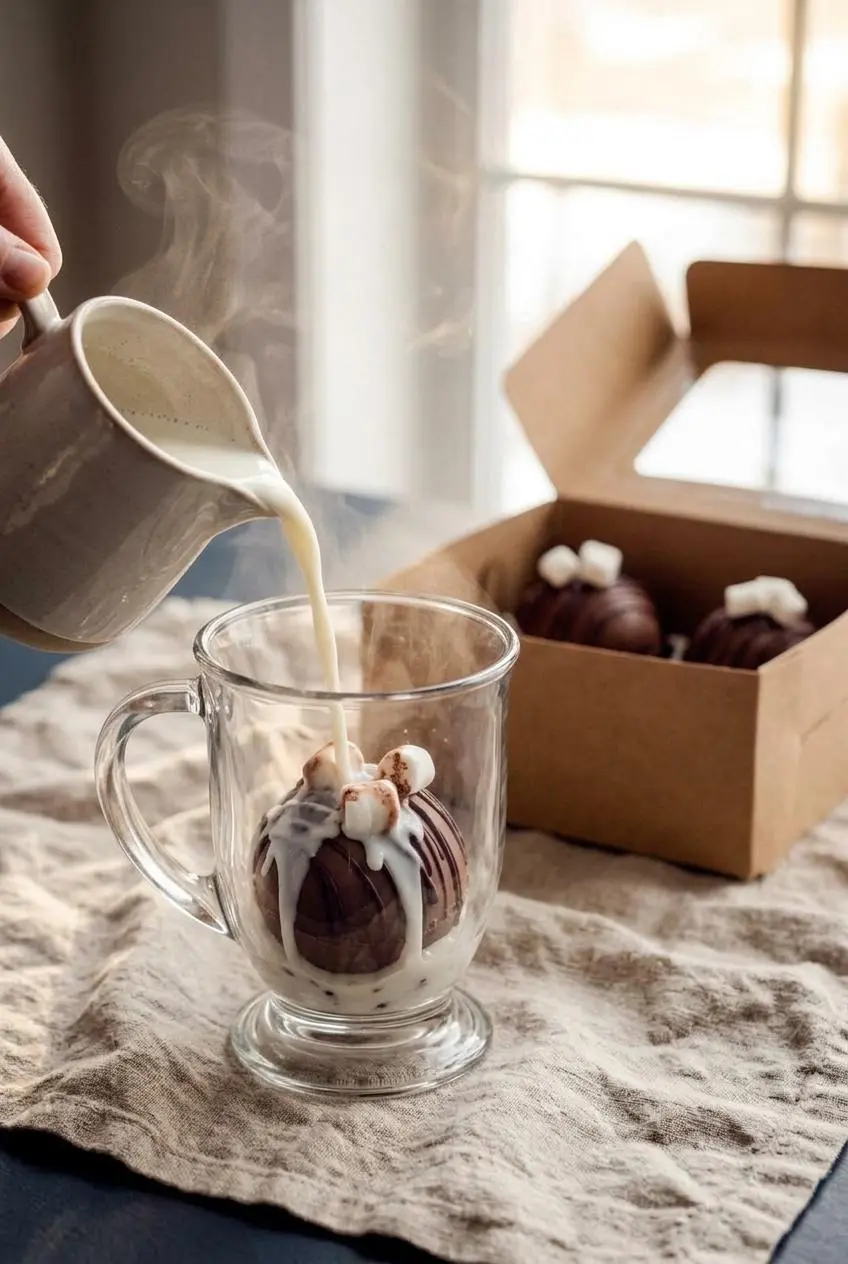
Start with a measured mug of milk, then protect unused shells from heat and moisture.
One Bomb With 8 Ounces of Hot Milk
Use 8 ounces, or 1 cup, of steaming whole milk as a starting point for one standard 2-inch bomb containing 1 tablespoon cocoa mix. Heat the milk until steaming, just below boiling, and pour toward the seam before stirring thoroughly.
Using 16 ounces produces a lighter, more diluted drink. Larger shells and stronger cocoa mixes may need adjustment. Hot water also works but gives a less creamy result.
The seam’s thickness and chocolate choice affect opening speed, so expect melting rather than a guaranteed dramatic burst. Handle the hot liquid carefully.
Keeping Shells Dry Until Gift Day
Keep dry-filled bombs in an airtight container in a cool, dry place away from sunlight, humidity, heat, and strong odors. There isn’t a verified storage duration here; follow the ingredients’ package storage directions and earliest date rather than assigning a fixed homemade shelf life.
If room conditions soften the shells, refrigeration is a practical option. Let the closed container return toward room temperature before opening to help limit condensation on the chocolate.
Packing a Holiday Cocoa Gift Box
Set each bomb in an individual cupcake liner inside a snug bakery box, with enough support to prevent rolling and crushing. Keep the box away from warmth during transport, and allow extra clearance for delicate decorations.
Label each flavor, relevant allergens, storage conditions, and the 8-ounce milk starting point. Pack chocolate covered pretzels in a separate compartment if you want a sweet-and-salty accompaniment.
Conclusion
Sturdy cocoa bombs begin with two complete chocolate coats and reinforced rims. Careful unmolding and a sealed join keep the marshmallow filling where it belongs until the hot milk arrives.
Keep the decorations playful and the handling gentle. A well-packed chocolate sphere makes a lovely invitation to pause for a warm mug.
Frequently Asked Questions
What Is the Best Chocolate to Use for Hot Cocoa Bombs?
Compound melting wafers are generally the easiest setting option without tempering. Chips may melt thicker, while chopped bars vary by formulation. Real chocolate may need tempering for reliable shine and snap, so check the product rather than relying on the word “melts.”
Do You Use 8 Ounces or 16 Ounces of Hot Milk for One Cocoa Bomb?
Start with 8 ounces, or 1 cup, for a standard 2-inch bomb filled with 1 tablespoon cocoa mix. Using 16 ounces makes a lighter drink. Adjust for larger shells or a particularly strong mix.
How Long Do Homemade Hot Chocolate Bombs Last and Do They Need Refrigeration?
No verified shelf life applies to every homemade filling. Keep dry-filled bombs airtight, cool, and dry, following ingredient dates and storage directions. Refrigerate when heat would soften the shells, and let the closed container approach room temperature before opening to limit condensation.
How Do You Make Hot Chocolate Bombs Without a Silicone Mold?
Make chocolate cup halves in paper or silicone cupcake liners, then fill and join matching rims. Suitable food-safe egg-shaped molds can also work. Solid chocolate on a stick is a separate stir-in option, not a hollow bomb, and alternate forms won’t necessarily match the listed yield or timing.
Hot Chocolate Bombs Recipe

Equipment
- Microwave-safe Bowl
- Double Boiler
- Pastry brush
- half-sphere mold
- cupcake cups
- microwave-safe plate
- butter knife
Ingredients
- 6 ounces milk chocolate melts, chocolate chips, or chopped bar chocolate
- 1/3 cup hot cocoa mix
- Mini marshmallows
- 2 ounces dark chocolate melts or dark chocolate chips melted, for drizzling
- Additional fillings and toppings as desired
Instructions
- Heat the milk chocolate in a microwave-safe bowl for 30 seconds, then stir and continue in 15-second bursts, stirring between each burst. Stop when stirring produces a smooth, melted coating without unmelted pieces.
- For the stovetop alternative, melt the milk chocolate in a double boiler instead of using the microwave. The finished chocolate should flow smoothly enough to spread inside the molds.
- Spread chocolate over the entire interior of each half-sphere cavity using a spoon back or pastry brush, then freeze for 5 minutes. The first coat should cover the curved walls and rim and feel firm before the next coat.
- Brush on a second coat, giving the sides and rims extra attention, then freeze until firm, about 5 more minutes, repeating coating and firming wherever holes or thin patches remain. A continuous, opaque shell with substantial edges will release more readily than a translucent one.
- Peel the molds gently away from the firm shells, settle half the shells in cupcake cups, and add 1 tablespoon hot cocoa mix, marshmallows, and any desired additional filling to each supported half. The liners should hold the shells upright with their rims clear for joining.
- Heat a microwave-safe plate in the microwave for 90 seconds, then lightly rotate the rim of an empty half against it and immediately join that half to a filled one. The softened edge should sit flush against the lower shell to form a closed sphere.
- Work melted chocolate from the plate into any remaining seam gaps with a butter knife. The join should look continuous, with no openings where cocoa powder can escape.
- Add the melted dark chocolate in thin drizzles and finish with extra mini marshmallows or your preferred decorations. The drizzle should cross the shell’s surface without obscuring its shape.
- Set a finished bomb in a mug, pour very hot milk or hot water over it, and stir to combine. The shell and cocoa mix should dissolve into the liquid as the marshmallows rise.