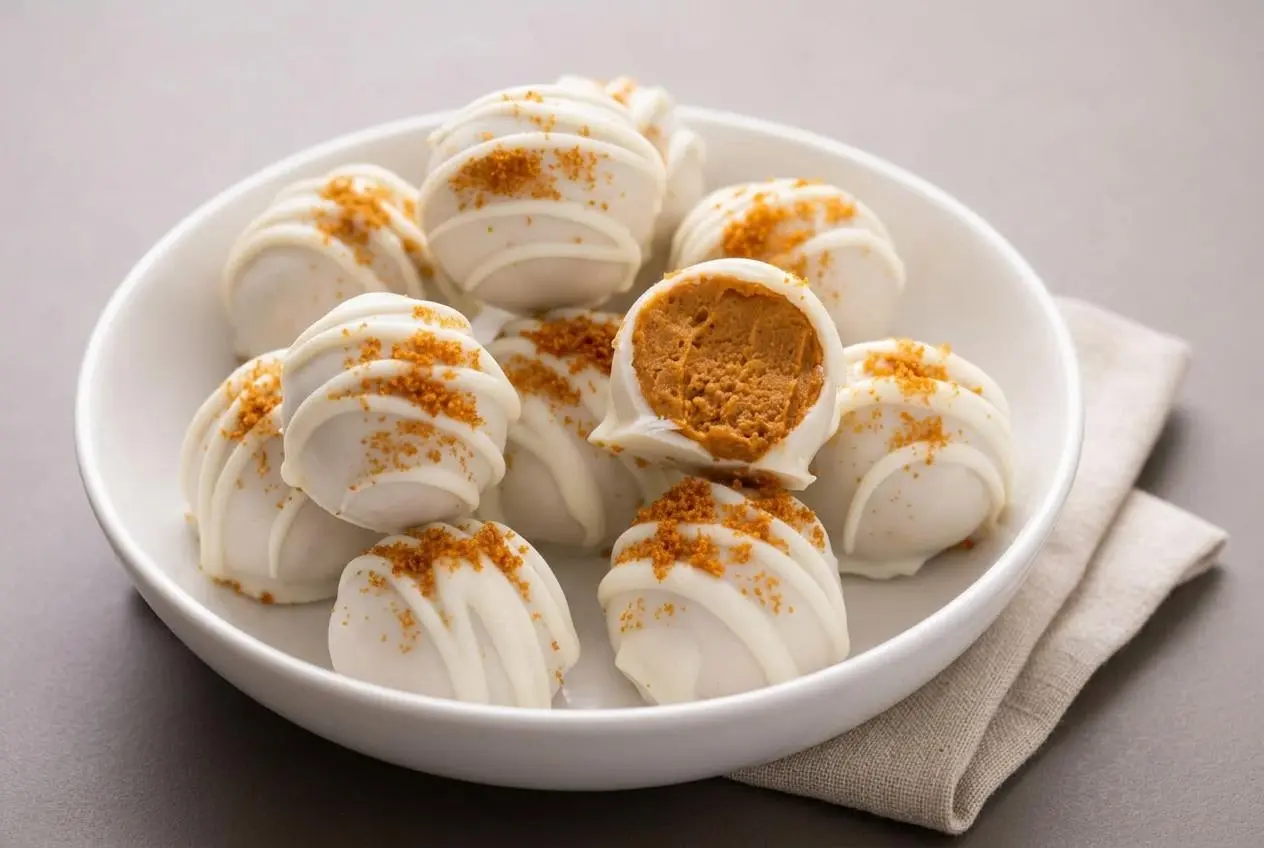
Pumpkin cheesecake balls are bite-sized, no-bake treats made with cream cheese, pumpkin puree, warm spice, and fine cookie crumbs. Chill the filling, roll it into balls, then dip the cold centers in melted white vanilla wafers for a crisp shell.
The center tastes tangy and gently spiced, with the dense, silky texture of cheesecake rather than cake. Biscoff crumbs bring a caramel warmth that suits the pumpkin.
They’re easy to portion for a fall dessert platter, and the oven stays off. The little snap when you bite through the coating is worth the wait.
Before mixing, press a paper towel against the measured pumpkin puree if it looks wet.
Why You Will Love These No-Bake Pumpkin Cheesecake Balls
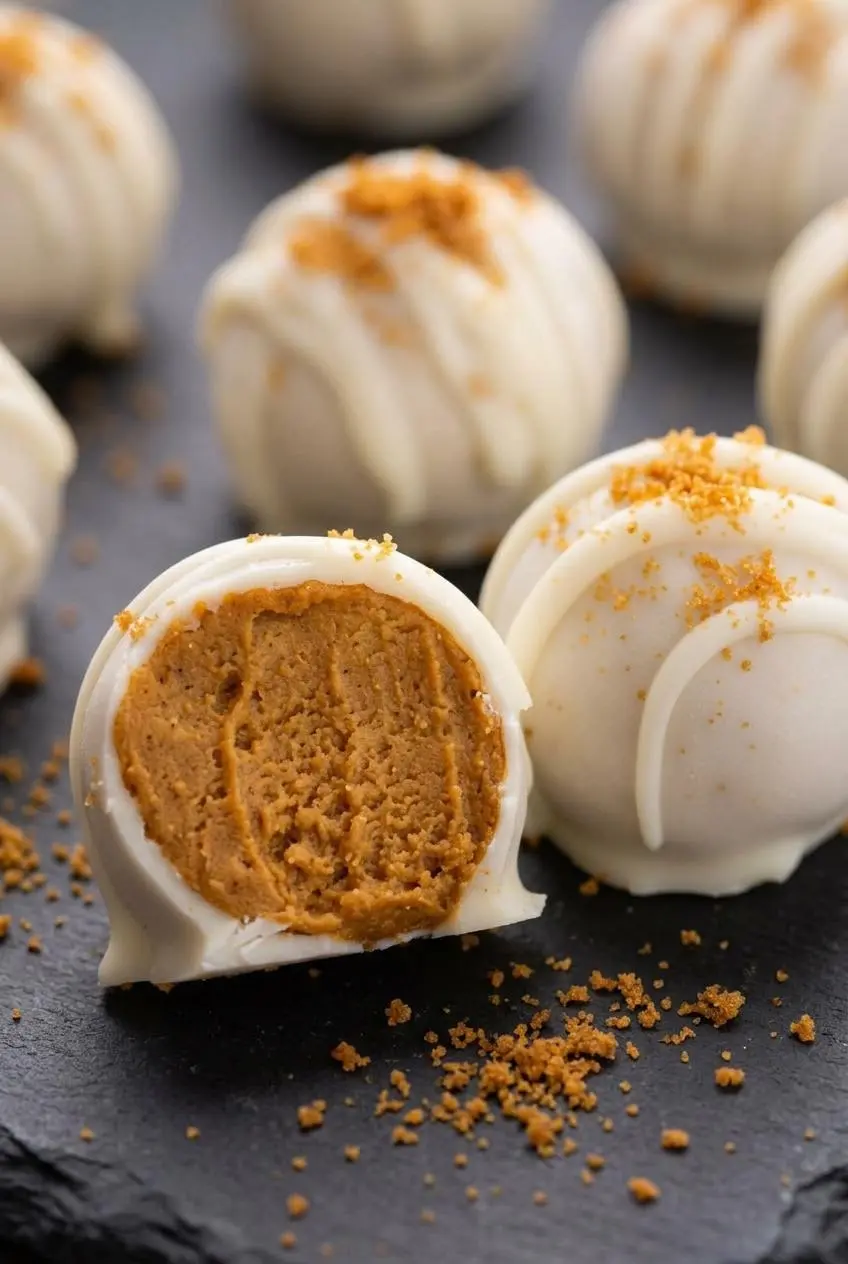
These bites give you the flavor of traditional pumpkin cheesecake without baking a full dessert. Cream cheese supplies the familiar tang, while pumpkin pie spice and Biscoff crumbs make the filling feel right at home on an autumn dessert table.
The contrast matters: the center is cool and velvety, and the vanilla coating sets firm around it. A medium scoop also makes the balls easy to portion, so guests can take one without cutting slices. Plan for the chilling time, though. The filling needs to firm up before rolling, and the shaped balls need another cold spell before dipping.
Cheesecake Balls vs Cake Balls
Cake balls usually start with baked cake mixed into a soft binder, which gives them a cakey crumb. These no-bake balls use cream cheese and finely crushed cookies instead. Their interior stays denser and smoother, with a distinct cheesecake tang. If you want that silky texture, beat the cream cheese until no small white lumps remain before adding the pumpkin.
Essential Ingredients for Spiced Pumpkin Cheesecake Balls
Each ingredient has a job: cream cheese gives the filling richness and structure, pumpkin and spice bring its fall flavor, cookie crumbs help it hold shape, and the vanilla wafers form the crisp outer shell.
- 8 ounces cream cheese
- ½ cup canned pumpkin puree
- ⅓ cup powdered sugar
- 1 teaspoon pure vanilla extract
- 1 package Biscoff cookies (8.8 ounces, crushed into fine crumbs)
- 1 ½ teaspoons pumpkin pie spice
- ¼ teaspoon fine sea salt
- 10 ounces Ghirardelli white vanilla melting wafers
- 2 teaspoons coconut oil or vegetable shortening
Use full-fat brick cream cheese for a filling that can hold its shape; softer tub spreads can make rolling harder. Powdered sugar blends in without a gritty texture, and the salt keeps the sweetness from tasting flat. The coconut oil or shortening loosens the melted wafers so excess coating can run off before the shell sets.
I let the cream cheese soften until a spoon presses through it easily; that makes it much easier to beat out every little lump.
Pure Pumpkin Puree vs Pumpkin Pie Mix
Choose canned pumpkin puree, not prepared pumpkin pie mix. Pie mix already contains sweeteners and seasonings, so it changes both the flavor and consistency of the filling. Check the can before opening, especially if both products sit side by side at the store.
Puree can still vary in moisture. If yours has visible liquid on top or leaves a wet puddle on a spoon, blot the measured portion gently between paper towels. Press enough to pick up loose moisture without squeezing the pumpkin dry. You want a thick puree that blends into the cream cheese, not liquid that makes the cookie crumbs work overtime.
Choosing the Best Cookie Crumb Base
Fine, even crumbs mix through the filling more smoothly than coarse pieces. Biscoff is the ingredient used here, but these optional swaps give the bites a different character:
- Biscoff speculoos cookies: Their caramelized flavor adds warmth without covering up the cream cheese.
- Graham crackers: Use an equal weight of finely crushed crackers for a more traditional cheesecake-crust flavor. A little extra pumpkin pie spice can make up for their milder seasoning.
- Crisp gingersnaps: Choose crunchy cookies and crush them finely for a bolder ginger and molasses flavor.
How to Make Pumpkin Cheesecake Balls Step by Step
Start with smooth cream cheese, then give the mixed filling at least 2 hours in the refrigerator. After scooping and rolling, freeze the balls for 1 hour before they meet the warm coating. That second chill helps the rounds keep their shape during dipping.
- Beat the cream cheese in a stand mixer with the paddle attachment, or use an electric mixer and a large bowl, on medium speed for 1 to 2 minutes.
It should look smooth, with no small white flecks or lumps. - Mix in the pumpkin puree, powdered sugar, and vanilla until combined, then turn the mixer to low and add the Biscoff crumbs, pumpkin pie spice, and salt.
The filling should have an even pumpkin color with crumbs distributed throughout. - Cover the bowl and refrigerate the filling for at least 2 hours, then line a baking sheet with parchment paper.
The chilled mixture should be firm enough to scoop rather than flow off the scoop. - Portion the filling with a medium 1.5-tablespoon cookie scoop, roll each portion between your palms, and place the balls on the lined sheet to make about 20.
The rounds should hold their shape without leaving a thick layer of filling on your hands. - Freeze the shaped balls for 1 hour.
They should feel firm when lifted for dipping. - Melt the Ghirardelli wafers with the coconut oil or shortening in a bowl, following the package directions.
The coating should be smooth and fluid enough to fall from a spoon. - Lift each cold ball with a toothpick, dip it into the melted coating, gently shake off the excess over the bowl, and return it to the parchment.
A thin, even shell should begin to set around the filling. - If desired, drizzle melted wafers over the dipped balls and immediately add sprinkles or Biscoff crumbs.
The topping should cling before the coating firms. - Refrigerate the finished balls until ready to serve.
The coating should feel firm against the soft center.
Moisture Control: The Secret to Rollable Pumpkin Dough
Extra moisture is the main reason pumpkin filling clings to your hands instead of forming neat rounds. Measure the puree first, then touch a clean paper towel to its surface and underside to absorb any loose liquid. If the towel comes away soaked, use another and check that the puree still looks thick rather than runny.
The amount of blotting depends on what comes out of the can, not on a label such as organic or conventional. The same applies if you use homemade pumpkin puree: look for visible moisture and blot as needed before mixing. Avoid pressing so hard that you remove much of the pumpkin itself; the filling still needs its flavor and color.
Fine crumbs provide structure, but they cannot fully compensate for a watery puree. Taking care of the moisture before mixing is easier than trying to rescue a loose filling after it has chilled.
Mastering the Dipping Technique for Clean Truffles
Neat dipping depends on two textures working together: firm, cold centers and coating that flows easily without being overheated. Keep the shaped balls cold until you are ready to coat them, and work with a smooth pool of melted wafers rather than a thick paste.
Smooth Melting and Tapping Method
Follow the wafer package directions for melting. If using a microwave, heat in short bursts and stir between them so the wafers melt evenly. The coconut oil or shortening helps the coating flow, but avoid getting water into the bowl, which can make it clump.
Insert a toothpick just far enough to lift a ball, dip it, and hold it above the bowl. A light tap against the bowl’s edge, or a gentle tap of the wrist holding the toothpick, lets the excess fall away. Listen for the little tap and wait for the drips to slow before setting the ball on parchment. That pause helps prevent a thick puddle around the bottom.
Fixing Toothpick Marks Cleanly
Once the dipped ball rests on parchment, ease out the toothpick. Cover the small hole with a dab of melted coating while the surface is still workable. An optional drizzle and a scattering of Biscoff crumbs can also hide the mark without adding a heavy second coat.
Troubleshooting Sticky or Melting Cheesecake Balls
If a batch gets messy, check whether the trouble starts in the filling or the coating. Each needs a different fix:
- The filling sticks heavily to your palms: It may be too warm or the pumpkin may have added excess moisture. Chill it longer before rolling; if it remains tacky, fold in a little more finely crushed cookie crumbs. Avoid raw flour in this no-bake filling.
- Rounds flatten while you shape them: Return the filling to the refrigerator until it scoops cleanly. Roll with light pressure rather than squeezing each portion.
- Centers slip or soften during dipping: They may not be cold enough. Keep the undipped balls in the freezer until firm and take them out as you work.
- The coating grows thick as you dip: Warm it gently and stir. A little warm, melted shortening can loosen coating that has thickened as it cools; if water has made it grainy and clumpy, starting with fresh wafers is more dependable.
- A toothpick hole shows: Touch it with a little melted coating or cover it with the optional drizzle before the shell fully sets.
Coating and Topping Variations to Try
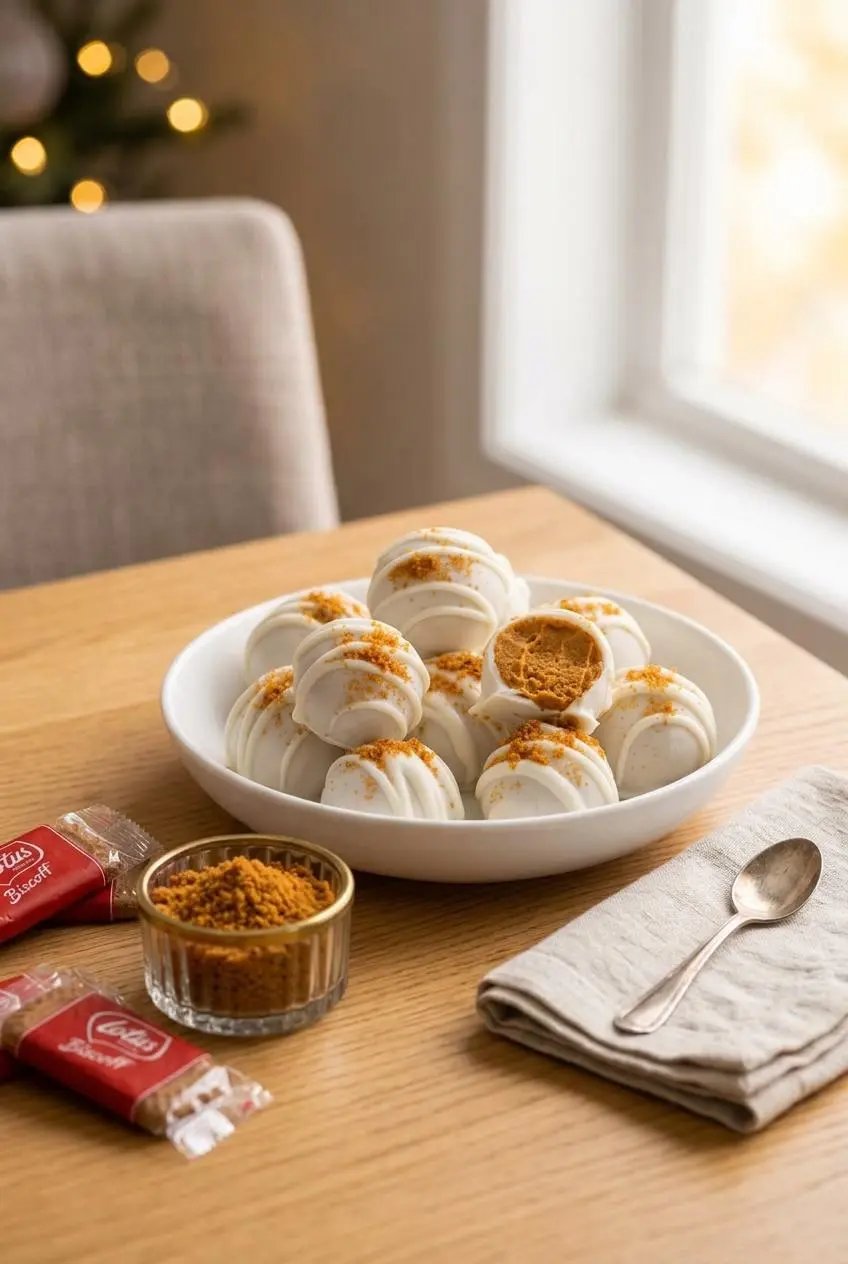
The dipped vanilla shell is the main version, but you can change the finish without changing the cream cheese filling. Keep toppings ready before dipping so they adhere while the coating is still soft. For a party platter with another bite-sized flavor, pair them with Oreo cheesecake bites.
Classic White Vanilla Shell
For a little color or extra spice, scatter autumn sprinkles, finely crushed Biscoff crumbs, or a light pinch of pumpkin pie spice over the coating before it firms. You can also drizzle more melted vanilla wafers across the set shells. Keep the drizzle thin so the crisp exterior still gives way easily to the creamy center.
Dark chocolate is an optional alternative if you prefer a less sweet contrast with the pumpkin filling. Melt the coating you choose until smooth, and keep the centers cold for dipping.
Crumb-Rolled No-Chocolate Option
To skip melted wafers, roll the chilled, shaped balls in finely crushed graham crackers, gingersnaps, or Biscoff crumbs. Cinnamon sugar or finely chopped toasted pecans offer different finishes, though neither forms the firm shell of the dipped version.
These balls feel softer and less sweet without the vanilla coating. Coat them close to serving so the outside keeps more of its texture, and return them to the refrigerator if they begin to soften while you work.
Gluten-Free Holiday Variation
For guests avoiding gluten, substitute certified gluten-free graham crackers or crisp gluten-free gingersnaps for the Biscoff cookies by equal weight. Crush them finely so the filling holds together evenly. Check the labels on the melting wafers and any toppings as well before serving them as a gluten-free option.
Make-Ahead, Storage, and Freezing Guidelines
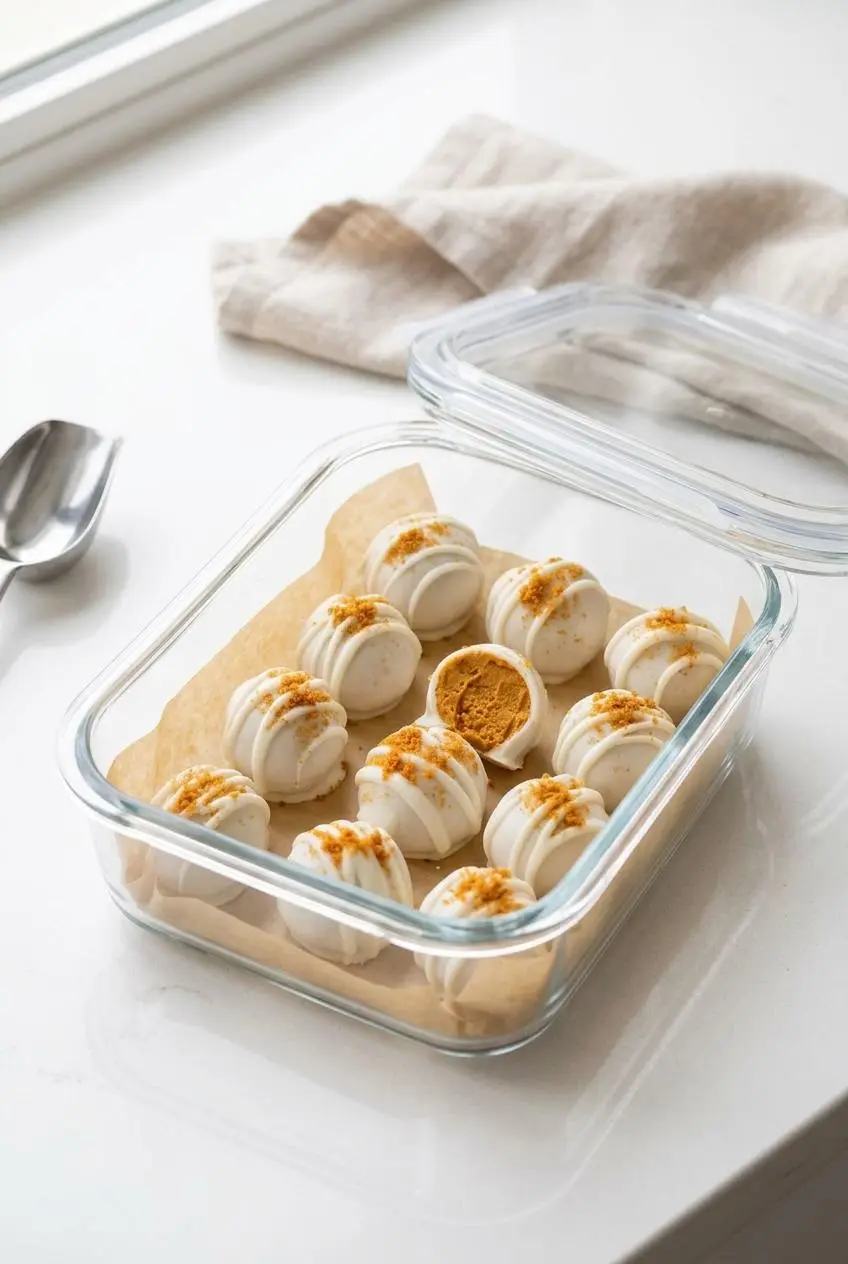
The recipe already includes a make-ahead pause: cover the mixed filling and refrigerate it for at least 2 hours before shaping. After dipping, keep the finished balls covered in the refrigerator until serving. An airtight container protects the coating from picking up refrigerator odors, and a little space between balls helps preserve a neat finish.
For a dessert platter, bring out the chilled balls when guests are ready for dessert rather than leaving the cream cheese filling in a warm room. Small baking cups make them easier to lift and package. No tested refrigerator storage limit is established here, so avoid planning around a specific number of days.
Freezing Before Dipping
Set the freshly rolled balls on a parchment-lined baking sheet and freeze them for the recipe’s 1-hour firming step. Leaving space between them keeps the rounds separate and makes each one easy to lift with a toothpick. Dip them while they are still firm; there is no need to thaw them first.
The freezer step prepares the centers for coating. It does not establish a long-term freezer storage period for finished balls or a thawing schedule, so keep completed truffles covered and refrigerated until serving.
Conclusion
These pumpkin cheesecake balls bring a velvety, spiced filling together with a crisp vanilla shell, all without turning on the oven.
Blot visibly wet pumpkin and give the shaped centers their full freezer firming step before dipping. Those two small habits make the coating much easier to handle.
Frequently Asked Questions
How Do You Keep Pumpkin Cheesecake Balls From Becoming Too Soft?
Blot loose moisture from the measured pumpkin puree, use brick-style cream cheese, and chill the filling before rolling. Freeze the shaped balls for the recipe’s 1-hour firming step before dipping them.
Can I Substitute Graham Crackers for Biscoff Cookie Crumbs?
Yes. Use an equal weight of finely crushed graham crackers in place of the Biscoff cookies. Regular or cinnamon grahams work, and a little extra pumpkin pie spice can bring back some of Biscoff’s warmth.
How Long Do Pumpkin Cheesecake Balls Stay Fresh?
Keep finished balls in an airtight container in the refrigerator until serving. There is no established storage duration for this version, so make them close to when you plan to serve them rather than relying on a specific shelf-life estimate.
Can You Freeze Pumpkin Cheesecake Balls After Dipping?
This method calls for freezing the shaped centers before dipping, but it does not establish how the finished coating holds up during longer freezer storage or thawing. For the intended texture, let the dipped shells set and keep the balls covered in the refrigerator until serving.
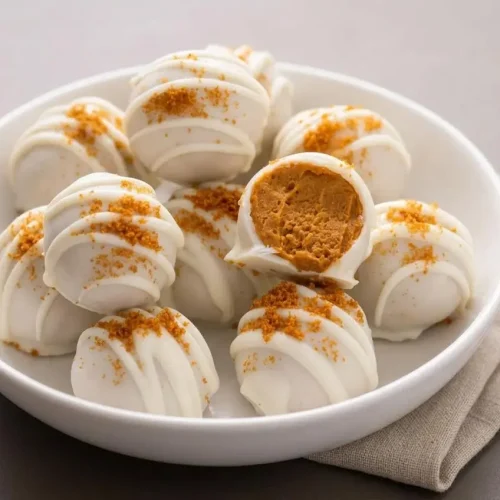
Pumpkin Cheesecake Balls

Equipment
- KitchenAid 9-Speed Digital Hand Mixer
- Mixing Bowl Set
- Cookie Scoop Set
Ingredients
- 8 ounces cream cheese
- ½ cup canned pumpkin puree
- ⅓ cup powdered sugar
- 1 teaspoon pure vanilla extract
- 1 package Biscoff cookies 8.8 ounces, crushed into fine crumbs
- 1 ½ teaspoons pumpkin pie spice
- ¼ teaspoon fine sea salt
- 10 ounces Ghirardelli white vanilla melting wafers
- 2 teaspoons coconut oil or vegetable shortening
Instructions
- Beat the cream cheese in a stand mixer with the paddle attachment, or use an electric mixer and a large bowl, on medium speed for 1 to 2 minutes. It should look smooth, with no small white flecks or lumps.
- Mix in the pumpkin puree, powdered sugar, and vanilla until combined, then turn the mixer to low and add the Biscoff crumbs, pumpkin pie spice, and salt. The filling should have an even pumpkin color with crumbs distributed throughout.
- Cover the bowl and refrigerate the filling for at least 2 hours, then line a baking sheet with parchment paper. The chilled mixture should be firm enough to scoop rather than flow off the scoop.
- Portion the filling with a medium 1.5-tablespoon cookie scoop, roll each portion between your palms, and place the balls on the lined sheet to make about 20. The rounds should hold their shape without leaving a thick layer of filling on your hands.
- Freeze the shaped balls for 1 hour. They should feel firm when lifted for dipping.
- Melt the Ghirardelli wafers with the coconut oil or shortening in a bowl, following the package directions. The coating should be smooth and fluid enough to fall from a spoon.
- Lift each cold ball with a toothpick, dip it into the melted coating, gently shake off the excess over the bowl, and return it to the parchment. A thin, even shell should begin to set around the filling.
- If desired, drizzle melted wafers over the dipped balls and immediately add sprinkles or Biscoff crumbs. The topping should cling before the coating firms.
- Refrigerate the finished balls until ready to serve. The coating should feel firm against the soft center.