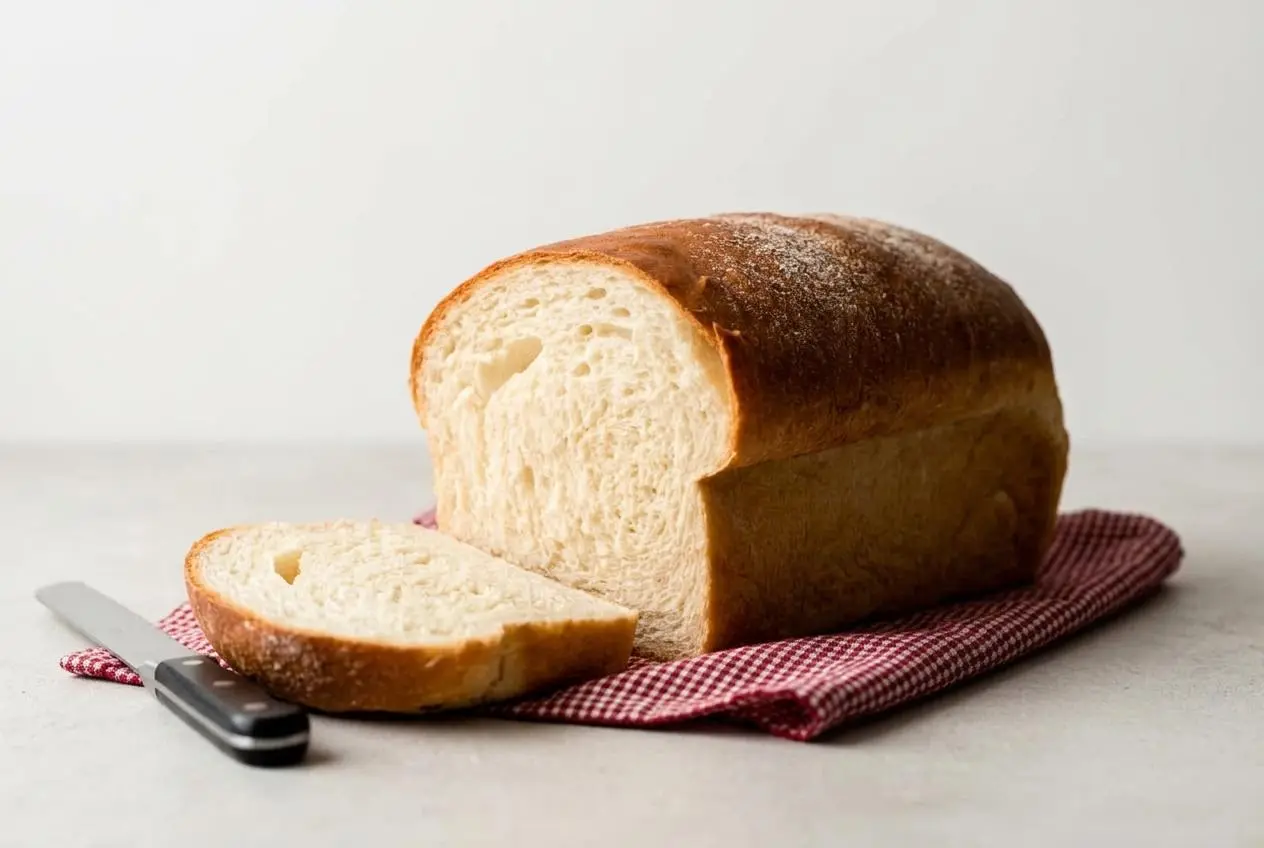
This easy sandwich bread recipe creates a single loaf of perfectly soft, fluffy white bread with a golden crust, ideal for sandwiches and toast. It uses 7 ingredients and can be made with a stand mixer or by hand.
This sandwich bread recipe is a classic enriched loaf made with water, milk, butter, sugar, yeast, salt, and flour. The result is a tender crumb that slices neatly for lunch sandwiches, morning toast, or a very good grilled cheese.
It’s reliable for beginners, but still has enough detail for bakers who want a better rise, a softer crust, and a loaf that feels worth the wait. The Tangzhong option makes it even silkier.
Keep the dough slightly tacky while kneading, because extra flour is the fastest route to a heavy loaf.
Why You’ll Love This Sandwich Bread Recipe
This loaf lands right in the sweet spot between practical and bakery-worthy. It bakes up with a soft fluffy crumb, a golden buttery crust, and that warm bread smell that makes it hard to wait for the first slice.
It also gives you clear checkpoints along the way, so you’re not guessing whether the dough is ready to rise or ready for the oven. If you’ve ever wondered why homemade bread sometimes turns out dense, this method helps you avoid that.
You can knead it in a stand mixer or by hand, and both work well. The dough should feel smooth, elastic, and slightly tacky, like a soft earlobe, once the gluten is properly developed.
Ingredients Explained
Each ingredient has a real job here, from building gluten structure to adding moisture, richness, and that soft sandwich-style texture.
- 1 cup (240ml) water, warmed to about 110°F (43°C)
- 1/4 cup (60ml) whole milk, warmed to about 110°F (43°C)
- 2 and 1/4 teaspoons (7g) Platinum Yeast from Red Star instant yeast (1 standard packet)
- 2 Tablespoons (25g) granulated sugar
- 4 Tablespoons (1/4 cup; 56g) unsalted butter, softened to room temperature
- 1 and 1/2 teaspoons (9g) salt
- 3 and 1/3 cups (about 420–430g) all-purpose flour or bread flour (spooned & leveled), plus more as needed
The Best Flour for Sandwich Bread
Both all-purpose flour and bread flour work in this dough, but they give slightly different results. Bread flour has more protein, so it develops stronger gluten and gives the loaf a bit more structure and a slightly chewier crust. If you want slices that stand up especially well to hearty sandwich fillings, bread flour is a great choice.
All-purpose flour makes a loaf with a softer, more tender crumb. That’s often what people want in everyday white sandwich bread, especially for toast or lunchbox sandwiches. If you’re after maximum softness, choose all-purpose. If you want a little more chew and lift, choose bread flour.
Choosing Your Yeast: Instant vs. Active Dry
This recipe is written for instant yeast, which can go straight into the bowl with the warm liquids and sugar. It works quickly and keeps the mixing process straightforward.
If you’re using active dry yeast instead, dissolve it in the warm water with the sugar first and wait until it looks foamy before moving on. If nothing happens, the yeast is likely no longer active. Active dry yeast may also take a bit longer to rise, so use the dough’s look and feel, not just the clock.
The Role of Fat and Sugar
Milk and butter are what make this loaf feel like sandwich bread instead of a crustier artisan loaf. The fat coats some of the flour proteins, which helps keep the crumb softer and the flavor richer. That’s why this loaf stays more tender than a leaner French bread made mostly with water and flour.
Sugar gives the yeast something to feed on early in the process and adds a light sweetness that rounds out the flavor. It doesn’t make the bread sugary. It just helps the loaf taste balanced and more fully baked, if that makes sense.
I like to let the butter soften fully before mixing, because it blends into the dough more evenly and you’re less likely to chase cold butter bits around the bowl.
How to Make Sandwich Bread
This method follows a classic kneaded approach, and the biggest wins come from watching the dough itself. Look for a soft, elastic texture after kneading, a full rise in the bowl, and a shaped loaf that crests about 1 inch above the rim of the pan before baking.
- Whisk the warm water, warm milk, instant yeast, and sugar together in the bowl of a stand mixer fitted with the dough hook, then cover and let the mixture stand for 5 minutes.
The surface should look a little creamy and active by the end of the rest. - Add the softened butter, salt, and 1 cup flour, mix on low speed for 30 seconds, scrape the bowl, add another cup of flour, then mix on medium until mostly combined before adding the remaining flour and mixing for about 2 minutes.
The dough should begin to gather and pull away from the sides of the bowl, even if a few butter pieces are still visible at first. - Knead the dough in the mixer for 5–8 minutes more, or turn it out onto a lightly floured surface and knead by hand for 5–8 minutes, adding flour 1 teaspoon at a time only if the dough becomes too sticky.
When it is ready, the dough should feel smooth, elastic, and slightly tacky, and a small piece should stretch thin enough to let light through without tearing right away. - Lightly grease a large bowl with olive oil or nonstick spray, place the dough inside, turn it so all sides are coated, then cover and let it rise in a warm spot for 1-2 hours.
The dough should expand until it has doubled in size and feel airy when you press it lightly. - Grease a 9×5-inch loaf pan.
Having the pan ready now makes shaping easier once the first rise is complete. - Deflate the risen dough, lightly flour the work surface, hands, and rolling pin, then roll the dough into an 8×15-inch rectangle and roll it up into an 8-inch log before placing it in the prepared pan.
A snug roll helps the finished loaf hold a neat sandwich shape instead of spreading wide. - Cover the shaped loaf with aluminum foil, plastic wrap, or a clean kitchen towel and let it rise for about 1 hour.
It should crest about 1 inch above the top edge of the pan before it goes into the oven. - Move the oven rack to a lower position and preheat the oven to 350°F (177°C).
Baking the loaf lower in the oven helps the top brown more evenly without getting too dark too soon. - Bake the loaf for 32-36 minutes, tenting it loosely with aluminum foil if the top is browning too fast.
The crust should turn golden brown, and the loaf should sound hollow when tapped on the bottom or read 195–200°F (90–93°C) in the center if you check with an instant-read thermometer. - Let the bread cool in the pan for a few minutes on a wire rack, then remove it from the pan and cool before slicing.
If you cut it while still hot, the crumb can turn gummy instead of light and fluffy.
If you don’t have a stand mixer, you can absolutely make this by hand. Use a sturdy spoon to bring the dough together, then knead on the counter until it becomes smooth and stretchy. It takes a little more effort, but the dough gives the same cues when it’s ready.
If you want to bake two loaves, double the ingredient list and divide the dough between two 9×5-inch pans after shaping. Keep an eye on the rise rather than rushing it. Bread likes patience more than pep talks.
The Tangzhong Method (For Ultimate Softness)
If you want the softest possible loaf, Tangzhong is a great optional upgrade. It’s a cooked paste made from a small amount of flour and liquid, and it helps the dough hold onto moisture so the bread stays extra tender.
To make it, whisk a small portion of the recipe’s flour with a small portion of the water or milk in a saucepan until smooth, then cook gently over medium-low heat until it thickens into a soft paste. It should look like loose pudding, not a stiff lump. Let it cool until just warm before using it.
Add the Tangzhong with the wet ingredients at the start of the recipe, then continue with the main method as written. Because that paste pre-gelatinizes some of the starch, the finished loaf usually has a silkier crumb and stays soft longer at room temperature.
This technique sounds fancy, but it’s very manageable. If you can whisk gravy without panic, you can make Tangzhong.
Tips for Baking Success
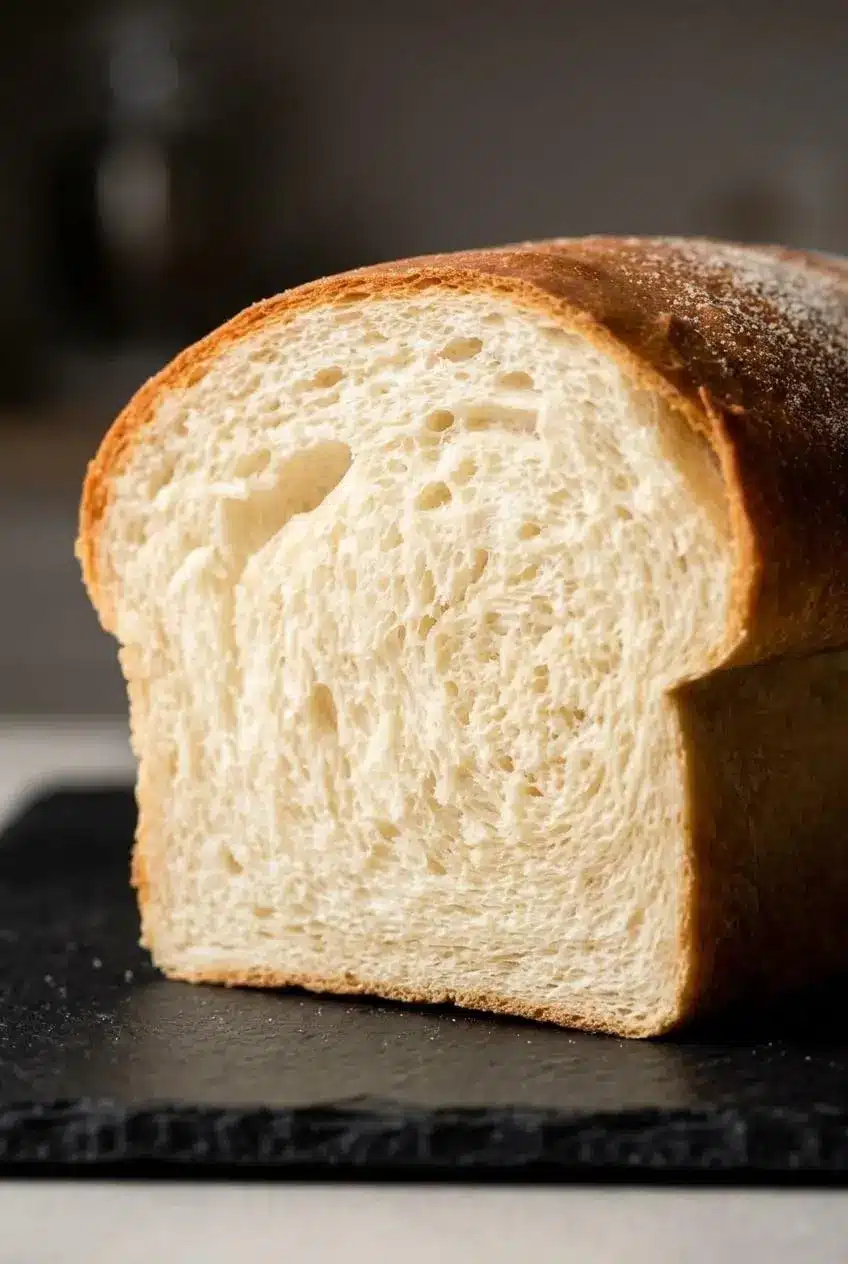
These small choices make the difference between a lofty loaf and one that feels a bit stubborn.
- If you’re unsure about your yeast, proof it in the warm water with the sugar first. A foamy surface means it’s active and ready to work.
- Hold back on extra flour unless the dough is truly unmanageable. A slightly tacky dough bakes into lighter bread than a dry one.
- Use a thermometer if you like precision. It’s the easiest way to double-check doneness when the loaf looks beautifully browned but you’re still unsure.
- Brush the top with melted butter right after baking if you want a softer, more flavorful crust.
- Cool the loaf completely on a wire rack before slicing. Warm bread smells amazing, but slicing too early can compress the crumb and leave the center gummy.
- For a faster rise, place the covered dough in a slightly warm, turned-off oven. You want gentle warmth, not a hot box that stresses the yeast.
Troubleshooting Common Bread Problems
When bread goes sideways, the dough usually tells you why. Here are the fixes that matter most.
- My bread is dense and heavy. This usually comes from too much added flour, under-kneading, or cutting the rise short. Keep the dough slightly tacky, knead until it’s elastic, and wait for a full rise instead of baking on hope alone.
- My dough didn’t rise. The yeast may have been inactive, the liquid may have been too hot or too cool, or the room may have been chilly. Start with warm liquid around 110°F and give the dough a warm, draft-free place to rise.
- The crust is too hard. Over-baking is the usual cause, and some ovens run hotter than they claim. Pull the loaf when the crust is golden and the center tests done, then brush the hot top with butter if you want a softer finish.
- My bread is gummy inside. The most common reason is slicing too soon. Let the loaf cool fully so the crumb can set and excess steam can escape.
- The dough feels sticky while kneading. Sticky is normal at first. Add flour only a teaspoon at a time, because a soft dough bakes into a better loaf than a stiff one.
- The loaf rose, then sank. That often means the second rise went too far. Bake once the dough has risen about 1 inch above the pan, before it gets puffy enough to wobble dramatically.
How to Store and Freeze Your Bread
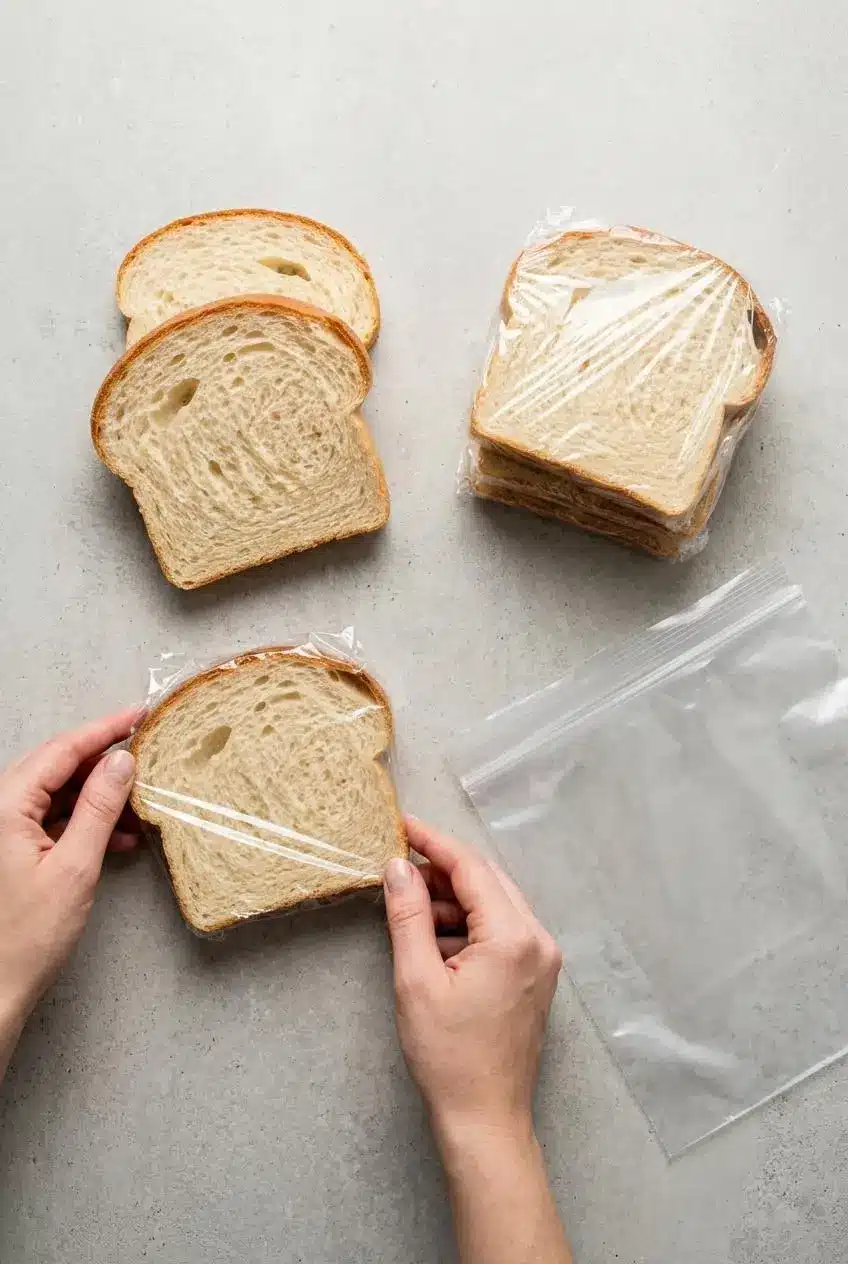
Homemade bread keeps best once it has cooled completely. Store the loaf in a sealed bag or bread box at room temperature for up to 5 days, and skip the refrigerator because it tends to make bread go stale faster.
You can also freeze the loaf whole or freeze individual slices for easier use later. Wrap it tightly in plastic wrap, then add a layer of foil or place it in a freezer bag for up to 3 months.
To thaw, leave the loaf wrapped until it comes back to room temperature so it doesn’t dry out. For slices, you can toast them straight from frozen. If your bread starts getting a bit too dry for sandwiches, turn it into homemade breadcrumbs instead of tossing it.
Recipe Variations
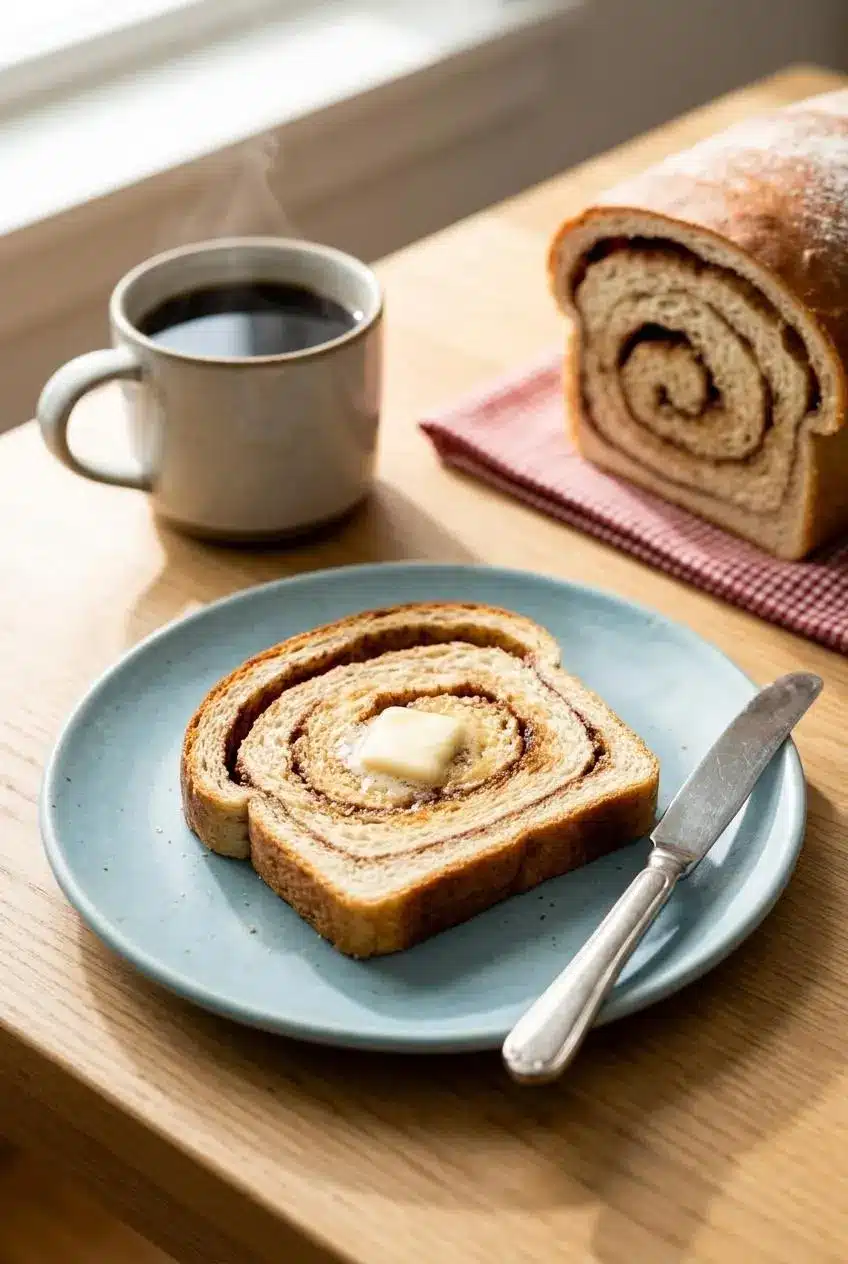
Once you’ve made the main loaf, there’s plenty of room to branch out. Keep these as optional paths, not changes to the core recipe.
Easy No-Knead Sandwich Bread
For a lower-effort version, mix the dough until no dry flour remains, then let it rest for a long slow rise with a few folds during the early stage to build structure. After that, shape it, let it rise in the pan, and bake as usual.
The crumb will be a little different from the classic kneaded loaf, but it still makes good sandwich bread with much less hands-on work. If you already enjoy slower fermented loaves, a sourdough sandwich bread is another nice direction to try.
Cinnamon Swirl Bread
Turn this dough into a sweet breakfast loaf by rolling it into a rectangle before the second rise, then sprinkling the surface with a cinnamon-sugar mixture before rolling it into a log. Shape it gently so the swirl stays defined instead of squeezing out the sides.
It bakes up especially well for toast. If you want a full version built around that idea, try this cinnamon swirl loaf.
Conclusion
A good homemade sandwich loaf feels wonderfully useful. You get a bread that slices cleanly, tastes rich without being heavy, and makes everyday lunches and toast much better.
If you want the softest result, give the Tangzhong method a try next time. Either way, once you pull a golden loaf from the oven, store-bought starts feeling a lot less tempting.
Frequently Asked Questions
What’s the Difference Between Using Bread Flour and All-Purpose Flour for Sandwich Bread?
Bread flour has more protein, so it creates stronger gluten and a slightly chewier, more structured loaf. All-purpose flour gives you a softer, more tender crumb. Both work well in this recipe, so the choice depends on whether you want more chew or more softness.
How Do I Know When My Dough Is Kneaded Enough Without Over-Kneading?
Look for dough that feels smooth, elastic, and slightly tacky rather than rough or sticky. Press it lightly with a finger. If it slowly springs back, that’s a good sign. Use the windowpane test by stretching a small piece until it turns thin enough to let light through without tearing right away.
What Is the Best Way to Store Homemade Bread to Keep It Fresh?
Let the loaf cool completely first. Store it in a sealed bag or bread box at room temperature for up to 5 days. Avoid refrigerating it, because that speeds up staling and can dry out the crumb.
Can I Freeze This Bread?
Yes, you can freeze it as a whole loaf or in individual slices. Wrap it tightly before freezing so it doesn’t dry out. Slices can go straight into the toaster, while a full loaf is best thawed wrapped at room temperature.
Can I Substitute Whole Wheat Flour in This Recipe?
Yes, you can replace up to half of the flour with whole wheat flour. The loaf will be a bit denser and less soft than the original version. For a fully whole wheat loaf, a recipe developed specifically for that style usually gives a better result.
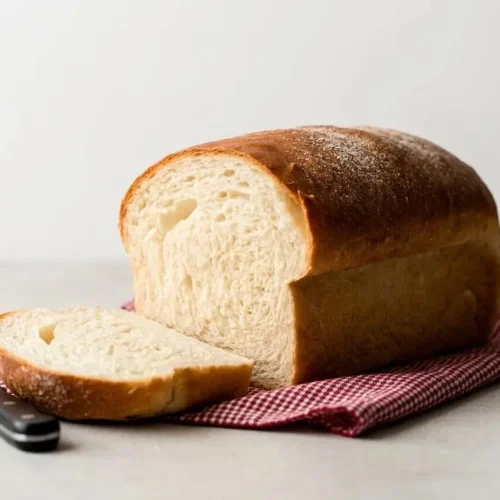
Sandwich Bread Recipe

Equipment
- Stand mixer
- Dough hook
- 9×5-inch Loaf Pan
- Rolling Pin
Ingredients
- 1 cup water, warmed to about 110°F (43°C) (240ml)
- 1/4 cup whole milk, warmed to about 110°F (43°C) (60ml)
- 2 1/4 teaspoons Platinum Yeast from Red Star instant yeast (1 standard packet) (7g)
- 2 Tablespoons granulated sugar (25g)
- 4 Tablespoons unsalted butter, softened to room temperature (1/4 cup; 56g)
- 1 1/2 teaspoons salt (9g)
- 3 1/3 cups all-purpose flour or bread flour (spooned & leveled), plus more as needed (about 420–430g)
Instructions
- Whisk the warm water, warm milk, instant yeast, and sugar together in the bowl of a stand mixer fitted with the dough hook, then cover and let the mixture stand for 5 minutes. The surface should look a little creamy and active by the end of the rest.
- Add the softened butter, salt, and 1 cup flour, mix on low speed for 30 seconds, scrape the bowl, add another cup of flour, then mix on medium until mostly combined before adding the remaining flour and mixing for about 2 minutes. The dough should begin to gather and pull away from the sides of the bowl, even if a few butter pieces are still visible at first.
- Knead the dough in the mixer for 5–8 minutes more, or turn it out onto a lightly floured surface and knead by hand for 5–8 minutes, adding flour 1 teaspoon at a time only if the dough becomes too sticky. When it is ready, the dough should feel smooth, elastic, and slightly tacky, and a small piece should stretch thin enough to let light through without tearing right away.
- Lightly grease a large bowl with olive oil or nonstick spray, place the dough inside, turn it so all sides are coated, then cover and let it rise in a warm spot for 1-2 hours. The dough should expand until it has doubled in size and feel airy when you press it lightly.
- Grease a 9×5-inch loaf pan. Having the pan ready now makes shaping easier once the first rise is complete.
- Deflate the risen dough, lightly flour the work surface, hands, and rolling pin, then roll the dough into an 8×15-inch rectangle and roll it up into an 8-inch log before placing it in the prepared pan. A snug roll helps the finished loaf hold a neat sandwich shape instead of spreading wide.
- Cover the shaped loaf with aluminum foil, plastic wrap, or a clean kitchen towel and let it rise for about 1 hour. It should crest about 1 inch above the top edge of the pan before it goes into the oven.
- Move the oven rack to a lower position and preheat the oven to 350°F (177°C). Baking the loaf lower in the oven helps the top brown more evenly without getting too dark too soon.
- Bake the loaf for 32-36 minutes, tenting it loosely with aluminum foil if the top is browning too fast. The crust should turn golden brown, and the loaf should sound hollow when tapped on the bottom or read 195–200°F (90–93°C) in the center if you check with an instant-read thermometer.
- Let the bread cool in the pan for a few minutes on a wire rack, then remove it from the pan and cool before slicing. If you cut it while still hot, the crumb can turn gummy instead of light and fluffy.