Skip to content
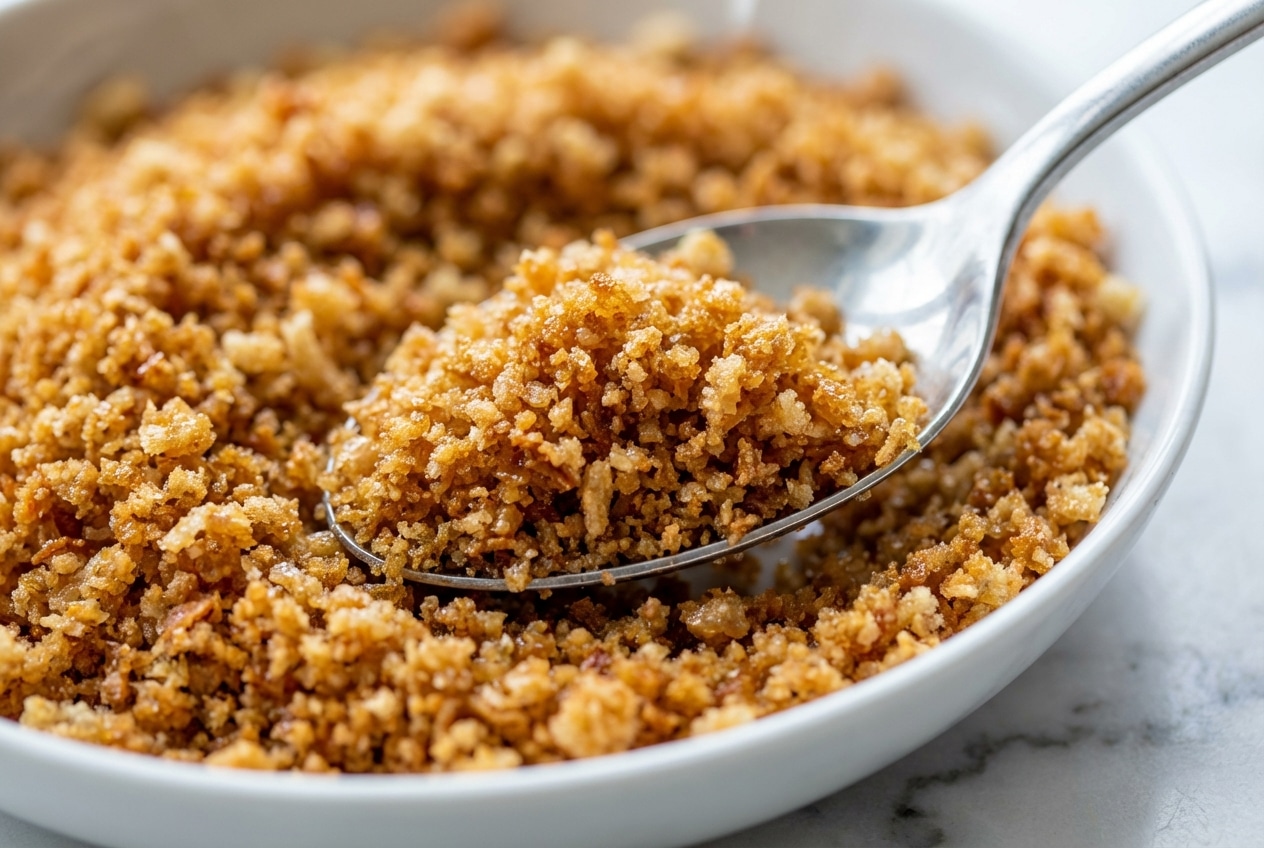
In my kitchen, breadcrumbs are the quiet little hero that makes dinner feel “restaurant” without any fuss. When I’m finishing mac and cheese for a Sunday night crowd, or tightening up a meatball mix so it holds together, this Breadcrumbs Recipe is the one I reach for.
The secret is a quick brown butter moment that turns plain crumbs into something nutty, toasty, and deeply savory. Once you learn how to control crumb size and dryness, you’ll never settle for the dusty can again.
Why You Will Love This Recipe
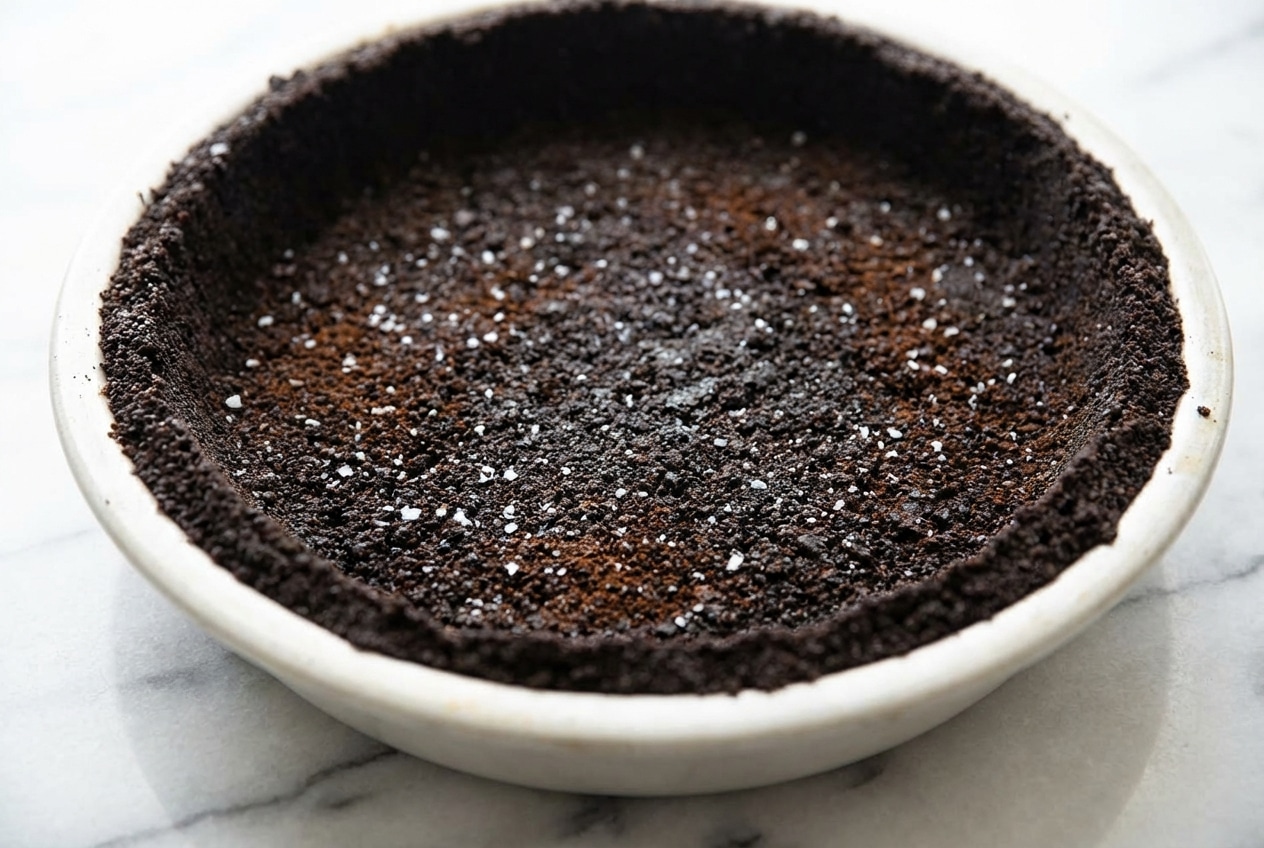
The Brown Butter Difference: In my skillet, beurre noisette is the move, those toasted milk solids perfume the crumbs with a caramel, nutty aroma that plain oil just can’t match.
Superior Texture: With a few smart pulses in the food processor, you decide the crunch, from fine snow to rustic crags, instead of whatever the store decides for you.
Maillard Reaction Magic: When the crumbs toast, that savory browning builds real depth, and the kitchen smells like warm bread crust and roasted notes.
Versatility for Any Loaf: Sourdough, sandwich bread, rustic boules, this technique adapts, as long as you respect dehydration and keep the crumbs in a single layer.
Ingredients and Substitutions

This short list is all about balance, bread for structure, seasonings for a clean savory base, and a method that coaxes out toasted flavor without scorching.
Ingredients
- 4 ounces bread
Italian bread crumbs:
- 1 cup homemade bread crumbs
- 1/2 teaspoon kosher salt
- 1/8 teaspoon garlic powder
- 1/2 teaspoon onion powder
- 1/2 teaspoon dried Italian seasoning
Ingredient Notes & Substitutions
Bread choice: Sourdough gives a tangy backbone and a sturdier bite, while soft white bread stays neutral and lets your seasonings lead. I like cubing with a serrated knife so you don’t mash the crumb as you cut.
Crusts: Dark, rustic crusts toast faster and can turn bitter, so I often trim them when I want a clean, sweet toastiness. If you love a deeper flavor, keep them, but process crust pieces separately so the food processor doesn’t overheat the softer interior.
The fat for browning: This method leans on browned butter for that nutty finish. Olive oil works if that’s your pantry reality, but you’ll miss the toasted milk solids that make the crumbs taste “chef-y.”
Seasoning adjustments: Dried Italian seasoning is a classic, but I also love a pecorino cheese direction or lemon zest brightness depending on the dish. If you add anything moisture-rich later, think ahead about storage so the shelf life stays safe and crisp.
How to make this Breadcrumbs Recipe
Oven Setup
Set the oven rack to the center position and preheat to 300°F (149°C). This lower heat gently drives off moisture for true dehydration, so you get crunch without rushing into burnt territory.
Process the Bread to Your Ideal Crumb
- Cube your bread, then add it to a food processor so the pieces can tumble freely. You want the bowl no more than comfortably filled, or the crumbs turn uneven.
- Process on high speed for 30 seconds for coarse crumbs, they’ll look jagged and pebbly, with little craggy bits that promise big crunch. Process for 1 minute for fine crumbs, they’ll resemble sandy grains that cling well for breading.
Toast, Dry, and Cool for Maximum Crunch
- Spread the crumbs onto a large sheet pan or two small pans in a single, even layer. If they’re piled, steam gets trapped and you’ll lose that crisp snap.
- Bake for 5 minutes, then stir so the edges and center swap places, and bake another 5 minutes. At this point they should look lightly browned and feel dry to the touch, like warm toast crumbs between your fingers.
- Bake another 2 to 5 minutes as needed until they’re completely dry. The smell should be toasty and clean, not sharp or burnt.
- Let the bread crumbs cool on the sheet pan for 10 to 15 minutes, this is where carry-over drying finishes the job. They’ll audibly crisp up as the last bit of steam escapes.
- Transfer to an airtight container to store, keeping humidity out is everything. If you want them even finer, pulse the toasted crumbs again until the size matches your dish.
Secrets for a Professional Finish

Mastering crumb size: Fine crumbs are the tidy workhorses for breading delicate fish or chicken, because they coat evenly and cling. Coarse crumbs, closer to panko in spirit, are what I sprinkle over baked pasta and casseroles for that golden, shattering top.
The carry-over drying rule: Pulling crumbs when they’re dry but still a touch pale keeps you safe from over-browning. The residual heat on the tray continues evaporation, and that final dehydration is what locks in crunch.
Preventing gummy crumbs: Fresh, squishy bread can clump into doughy balls the moment it hits the food processor. A gentle oven dry keeps the crumbs separate, so they toast instead of paste together.
Pro Tips & Troubleshooting
Pro Tips
- Sourdough advantage: Its sturdy structure toasts beautifully and holds up in heavy pasta dishes without tasting flat.
- Crust management: If the crust is very dark, remove it to avoid bitterness, or process crusts separately so they break down evenly.
- Freeze for freshness: Store crumbs unseasoned in the freezer, then toast right before serving for the best aroma.
Common Mistakes to Avoid
- Using fresh bread: Processing moist bread right away can turn it into clumps instead of crumbs.
- Over-processing: Avoid turning everything into powder unless you truly need a super-fine coat, pulsing gives control.
- Improper storage: Crumbs mixed with fresh garlic or herbs should not sit at room temperature, moisture invites mold.
Serving and Storage

Creative Serving Ideas
The golden crunch is my favorite finishing touch, especially when crumbs get glossy with olive oil and a shower of pecorino cheese. Coarse crumbs also give bruschetta pasta a restaurant-style, crispy topping.
Fine crumbs are the quiet binder that keeps mixtures juicy and together. That’s exactly why honey garlic meatballs stay tender without falling apart.
When I’m working with fish mixtures, fine crumbs prevent cracking and crumbling in the pan. A batch of salmon patties benefits from that gentle structure.
For casseroles, I like a thick blanket of coarse crumbs that browns into a lid you can hear. The top of cabbage roll casserole turns extra cozy with that crunchy finish.
Storage and Make-Ahead Instructions
Keep plain crumbs in an airtight container in a cool, dry place for up to two weeks. Humidity is the enemy, so don’t store them near the stove where steam drifts.
For longer storage, freeze them in a freezer-safe bag, they can be used straight from the freezer. If the crumbs ever lose their snap, a quick 2-minute toast in a dry pan wakes them right up.

Breadcrumbs Recipe
Equipment
- Food processor
- Sheet Pan
- Serrated Knife
Ingredients
- 4 ounces bread
Italian bread crumbs:
- 1 cup homemade bread crumbs
- 1/2 teaspoon kosher salt
- 1/8 teaspoon garlic powder
- 1/2 teaspoon onion powder
- 1/2 teaspoon dried Italian seasoning
Instructions
Oven Setup
- Set the oven rack to the center position and preheat to 300°F (149°C) to ensure gentle dehydration and prevent burning.
Process the Bread to Your Ideal Crumb
- Cube the bread using a serrated knife and place the pieces into a food processor without overfilling the bowl.
- Process on high speed for 30 seconds for coarse, pebbly crumbs, or for 1 minute for fine, sandy grains.
Toast, Dry, and Cool for Maximum Crunch
- Spread the crumbs in a single, even layer onto a large sheet pan to allow steam to escape.
- Bake for 5 minutes, stir the crumbs thoroughly to swap the edges and center, and bake for another 5 minutes.
- Continue baking for 2 to 5 minutes as needed until the crumbs are completely dry and lightly browned.
- Let the crumbs cool on the sheet pan for 10 to 15 minutes to allow carry-over drying to finish the crisping process.
- Transfer to an airtight container and store in a cool, dry place to maintain maximum crunch.
Notes
Nutrition
Conclusion
Once you taste breadcrumbs that are truly crisp, deeply toasted, and kissed with that brown butter nuttiness, the store-bought tub just feels sad. Play with crumb size, keep an eye on carry-over drying, and you’ll have a pantry staple that upgrades everything it touches.
If you’re in a cozy-dinner mood, a crunchy finish over bruschetta pasta is one of my favorite uses.