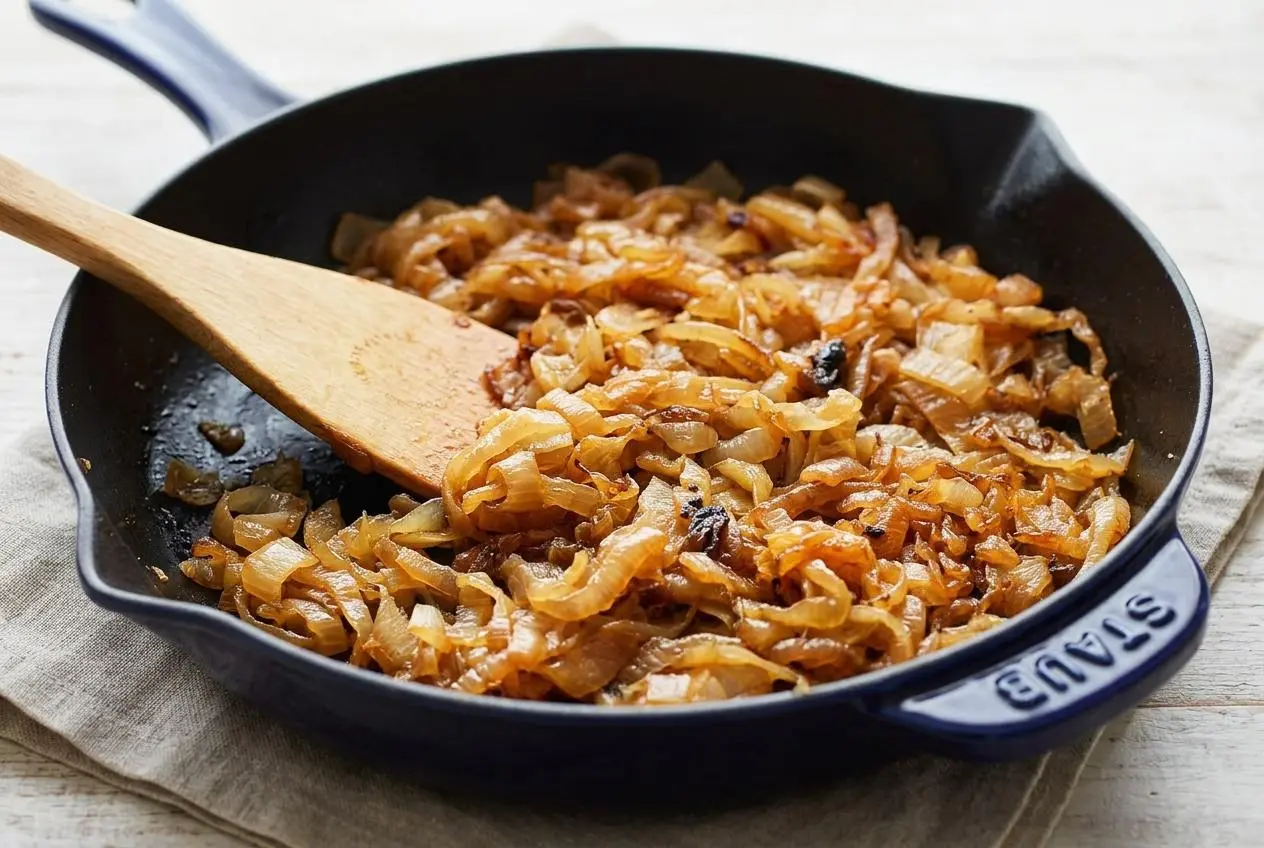
Caramelized onions are made by cooking sliced onions slowly in oil over medium-low heat for about an hour until they turn deeply browned, soft, and jammy. The secret is patience, a wide pan, and enough time for their natural sugars to develop.
These caramelized onions are sweet, savory, rich, and deeply browned, with a foolproof stovetop method that works well for beginners. You’ll also find the best onion types, a faster option, troubleshooting help, and plenty of ways to use them.
The classic version takes time, but the flavor payoff is huge. Once you smell that mellow, jammy sweetness, you’ll get it.
Use the widest heavy skillet you have so the onions can brown instead of steam.
Why This Caramelized Onion Recipe Works
If you want truly great results, low and slow is the way to go. This method gives the onions time to soften, release moisture, and gradually turn from sharp and pungent to sweet, savory, and almost jam-like.
It also keeps you out of the most common trouble zone: heat that’s too high. Fast heat can soften onions, sure, but it usually stops short of that deep, rich flavor that makes caramelized onions worth making in the first place.
The onions in this version cook down until they’re golden to deep brown, with concentrated flavor and plenty of fond in the pan to scrape up along the way. And if you need them sooner, there’s a quicker stovetop option below that trades a little depth for speed.
Choosing the Best Onions for Caramelizing
Almost any onion will caramelize, but the type you choose changes the final flavor quite a bit. Some turn out sweeter, some stay a little sharper, and some bring more savory depth.
Yellow Onions: The All-Purpose Standard
Yellow onions are the best all-around choice for caramelizing. They have enough natural sugar to brown beautifully, but they also keep a strong onion flavor that doesn’t disappear during the long cook.
That balance is what makes them so reliable. You get sweetness, yes, but also that deep savory backbone that works on burgers, steaks, soups, eggs, and pasta.
Sweet Onions (Vidalia, Walla Walla): For Extra Sweetness
Sweet onions caramelize a bit faster and taste milder from the start. Their lower sulfur bite means the finished onions lean more sugary and mellow, with less of that darker savory edge.
They’re great when you want a softer, sweeter result, especially for dips, flatbreads, or anything where you want the onions to feel extra silky.
Red and White Onions: How They Compare
Red onions can be caramelized too, but the flavor is usually a little less sweet and a touch more winey or earthy. They also turn a darker brown with a faint purplish cast.
White onions are milder and a bit sharper than yellow onions. They work, but they usually don’t build the same full, rounded flavor as yellow onions after a long cook.
| Onion Type | Flavor Profile | Best For |
|---|---|---|
| Yellow onions | Balanced, savory-sweet, rich | Best all-purpose choice |
| Sweet onions | Milder, sweeter, softer flavor | Dips, sandwiches, gentle sweetness |
| White onions | Mild but a little sharper, less deep | Tacos, lighter savory dishes |
| Red onions | Earthier, less sweet, darker finish | Pizzas, tarts, bold toppings |
Essential Tools and Ingredients
Each ingredient has a clear job here: oil helps the onions soften and brown evenly, the onions provide the sweetness and body, and salt draws out moisture and sharpens the final flavor.
- 2 tablespoons extra-virgin olive oil
- 4 medium yellow onions, halved and sliced
- ½ teaspoon sea salt
I always try to slice the onions as evenly as I can so the thinner edges don’t race ahead while the thicker pieces lag behind.
A wide, heavy-bottomed skillet matters more than people expect. Cast iron and stainless steel both hold heat well and give the onions enough surface area to brown instead of pile up and steam. For this amount, a 12-inch skillet is the sweet spot.
How to Make Perfect Caramelized Onions (The Classic Method)
This is the gold-standard method when you want the deepest flavor. Expect the full process to take about 1 hour, and resist the urge to rush it.
- Warm the olive oil in a 12-inch cast iron skillet over medium heat, then add the sliced onions and cook for 5 minutes.
The onions should begin to soften and slump, with a steady sizzle but no dark browning yet. - Sprinkle in the salt, lower the heat to medium-low, and continue cooking for 50 to 80 minutes, stirring every few minutes.
As they cook, the onions will shrink dramatically and change from translucent to pale gold, then to a rich golden brown with a sweet aroma. - If the onions start sticking hard to the pan, turn the heat down to low and keep cooking gently; if you want more color after 50 minutes, raise the heat slightly and stir continuously until they deepen.
The finished onions should look very soft, glossy, and deeply caramelized, with no burnt smell or black spots.
A Visual Guide to Caramelization Stages
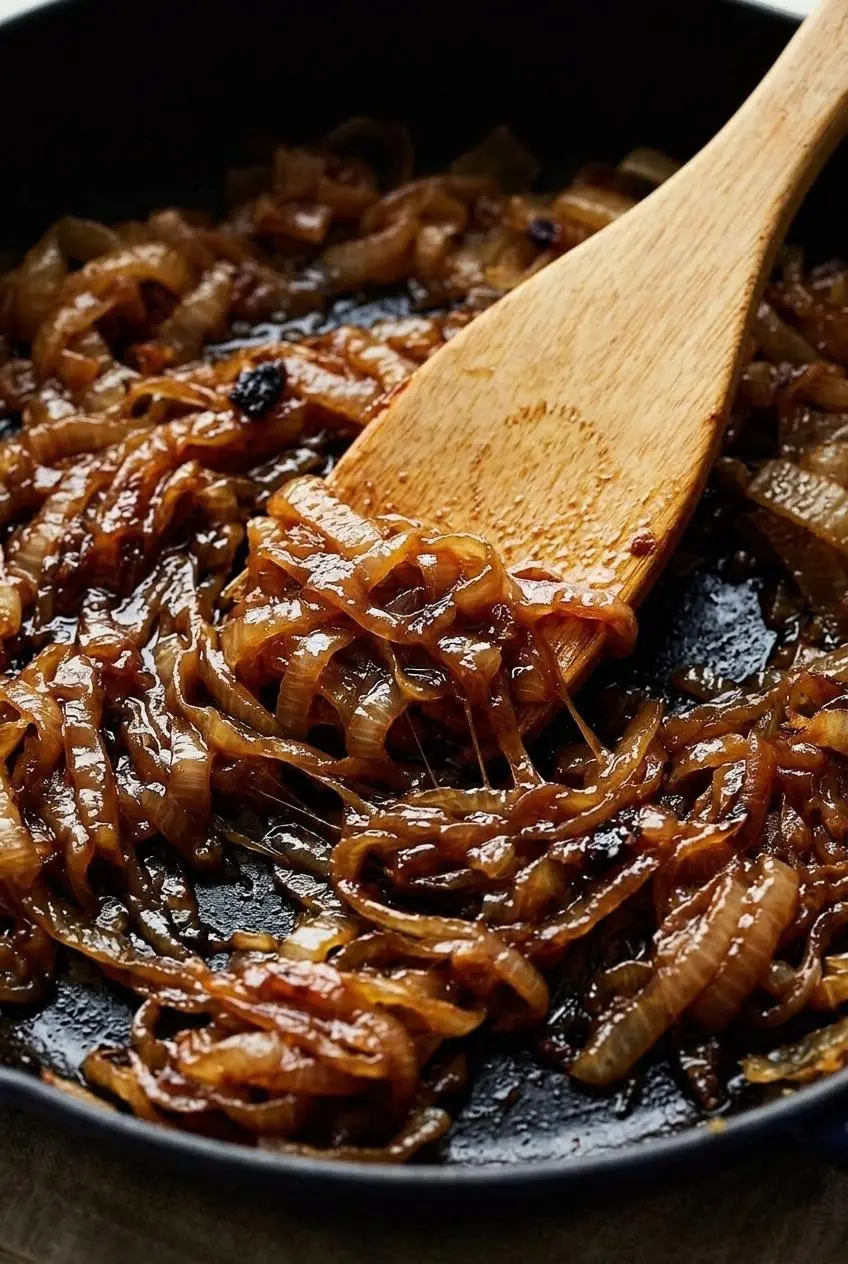
Knowing what to look for makes this process much less stressful. A lot of home cooks wonder if their onions are taking too long, but the changes happen gradually.
10 to 15 minutes: The onions are soft and translucent, and the pan looks a little watery. They still smell fairly sharp, though the raw bite is starting to fade.
25 to 30 minutes: The pile is much smaller now. The onions turn a pale straw color, and the aroma shifts from oniony to sweeter and rounder.
40 to 50 minutes: This is where things get exciting. The onions become light amber brown, the texture turns jammy, and the kitchen starts smelling sweet, savory, and rich.
60 minutes and beyond: The onions are deep brown, almost mahogany in spots, and very soft. This is peak caramelized onion territory: glossy, concentrated, and intensely flavorful.
Short on Time? The 20-Minute Method
If dinner is already moving and you need something faster, this method helps. It won’t give you the same deep, slow-built complexity as the classic version, but it can still get you tasty browned onions in a pinch.
Use the same ingredients and a wide skillet, but keep the heat at medium after the onions go in. Stir more often than you would with the classic method so the onions brown without scorching. If they need a little help with color, a tiny pinch of sugar is optional near the middle of cooking.
The result is softer and sweeter than plain sautéed onions, but usually less jammy and less deeply savory than the slow method. Honestly, it’s the weeknight compromise that earns its keep.
Expert Tips for Success
Small choices make a big difference here. These tips keep the onions browning evenly and help you build more flavor without burning them.
- Use a wide, heavy-bottomed pan so moisture can evaporate.
- Start on medium heat to soften the onions, then drop to medium-low for the long cook.
- Keep the pan uncovered so the onions brown instead of steam.
- Slice the onions evenly for more consistent cooking.
- Don’t overcrowd the pan. If the onions are heaped too high, they’ll soften but struggle to brown.
- Scrape up the fond as it forms. Those browned bits add serious flavor.
- If the pan gets too dry, add a small splash of water and stir it in to loosen the browned bits.
- A mix of butter and oil is a great optional variation if you want a richer, rounder finish.
The Science of Sweetness: Why ‘Low and Slow’ Works
Low heat gives the onions time to do two good things at once. Their natural sugars slowly deepen in flavor, and the surface browns through the Maillard reaction, which creates those savory, complex notes that make caramelized onions taste so full.
When the heat is too high, the sugars on the outside can burn before the inside has time to soften and sweeten. That’s when bitterness shows up. So yes, patience feels annoying in the moment, but it pays off on the plate.
Troubleshooting Common Problems
Most caramelized onion problems are fixable, and nearly all of them come down to heat, pan size, or stirring habits. If your onions look off, this chart will usually tell you why.
Problem: My Onions are Bitter or Burnt
Bitterness usually means the heat climbed too high and the sugars scorched. Turn the burner down right away, remove any obviously burnt bits, and loosen the pan with a small splash of water so the fond doesn’t keep darkening.
Problem: My Onions are Steaming, Not Browning
This happens when the pan is too crowded or covered. Move to a wider skillet next time, keep the onions in a looser layer, and leave the pan uncovered so moisture can evaporate.
Problem: My Onions are Cooking Unevenly
Uneven slices and hot spots are the usual causes. Stir from the edges toward the center, and aim for more uniform slices next time so everything softens and browns at a similar pace.
| Problem | Likely Cause | Fix |
|---|---|---|
| Bitter or burnt taste | Heat is too high | Lower the heat, remove burnt bits, and loosen the pan with a splash of water |
| Soft but pale onions | Too much moisture trapped in the pan | Use a wider pan and keep it uncovered |
| Some pieces dark, some still firm | Uneven slicing or hot spots | Stir more evenly and slice onions to a similar thickness |
Flavor Variations and Add-Ins
Once the onions are almost done, you can nudge the flavor in different directions. Keep these additions optional so the classic version stays true to the original method.
Balsamic and Thyme Finish
A splash of balsamic vinegar added near the end gives the onions a tangy-sweet edge that works especially well with beef, roasted vegetables, and flatbreads. Fresh thyme adds an earthy aroma that makes the whole pan smell amazing.
Add them during the last part of cooking so the onions stay the star. The balsamic should melt into the onions, not sit on top of them.
How to Use Caramelized Onions
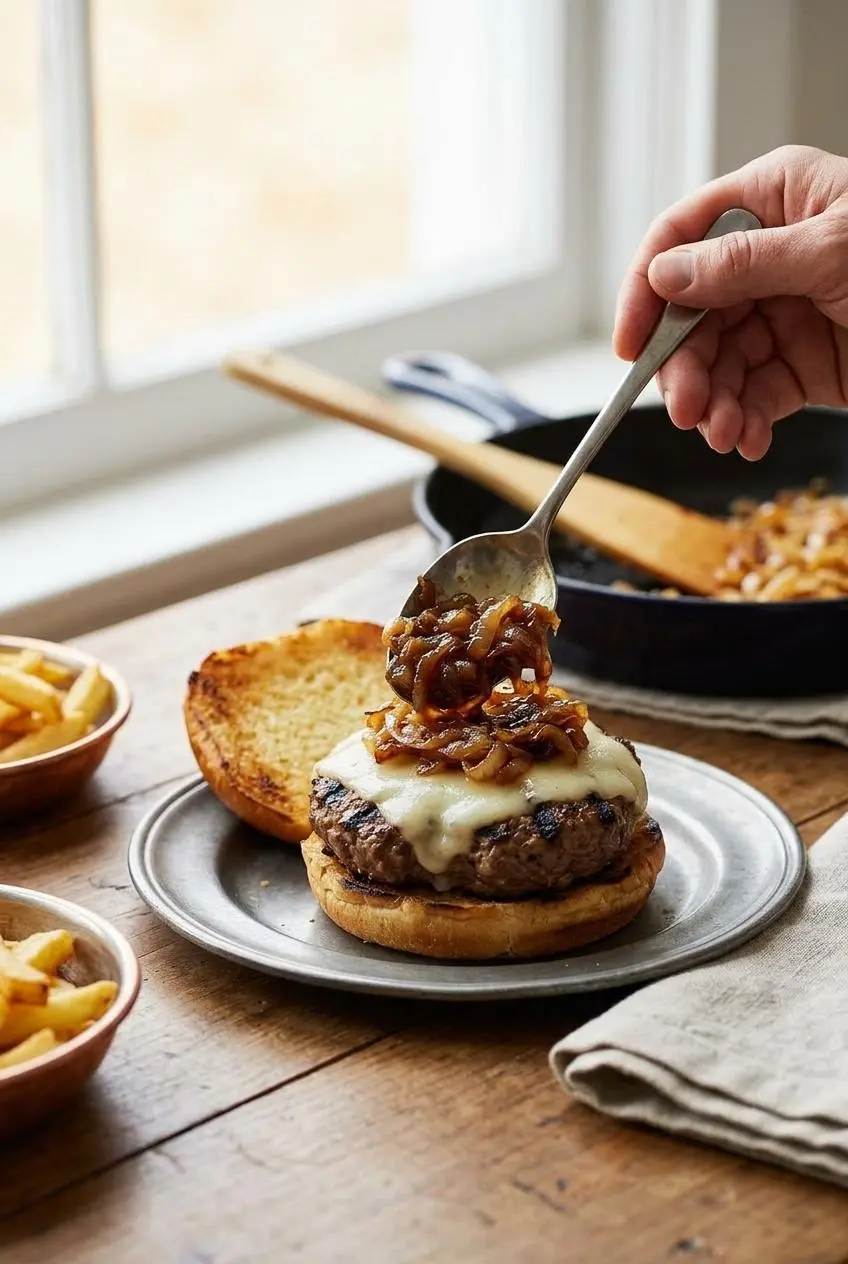
This is where they really shine. A batch of caramelized onions can turn a plain dinner into something that tastes like you worked much harder than you did.
- Pile them on burgers and hot dogs.
- Spoon them over steaks or use them as a topping for steak salad.
- Add them to grilled cheese for extra richness.
- Layer them into sandwiches, especially on a meatball sub.
- Use them as a base for French onion soup.
- Scatter them over pizza or flatbread.
- Fold them into omelets, frittatas, or scrambled eggs.
- Stir them into mashed potatoes.
- Mix them into risotto for deeper umami flavor.
- Swirl them into dips, especially onion dip.
- Tuck them into grain bowls or roasted vegetable bowls.
- For a bright, tangy contrast to sweet onions, try quick pickled onions on sandwiches or tacos.
They’re also excellent stirred into cottage pie filling when you want a deeper, more savory base.
Storing, Freezing, and Reheating
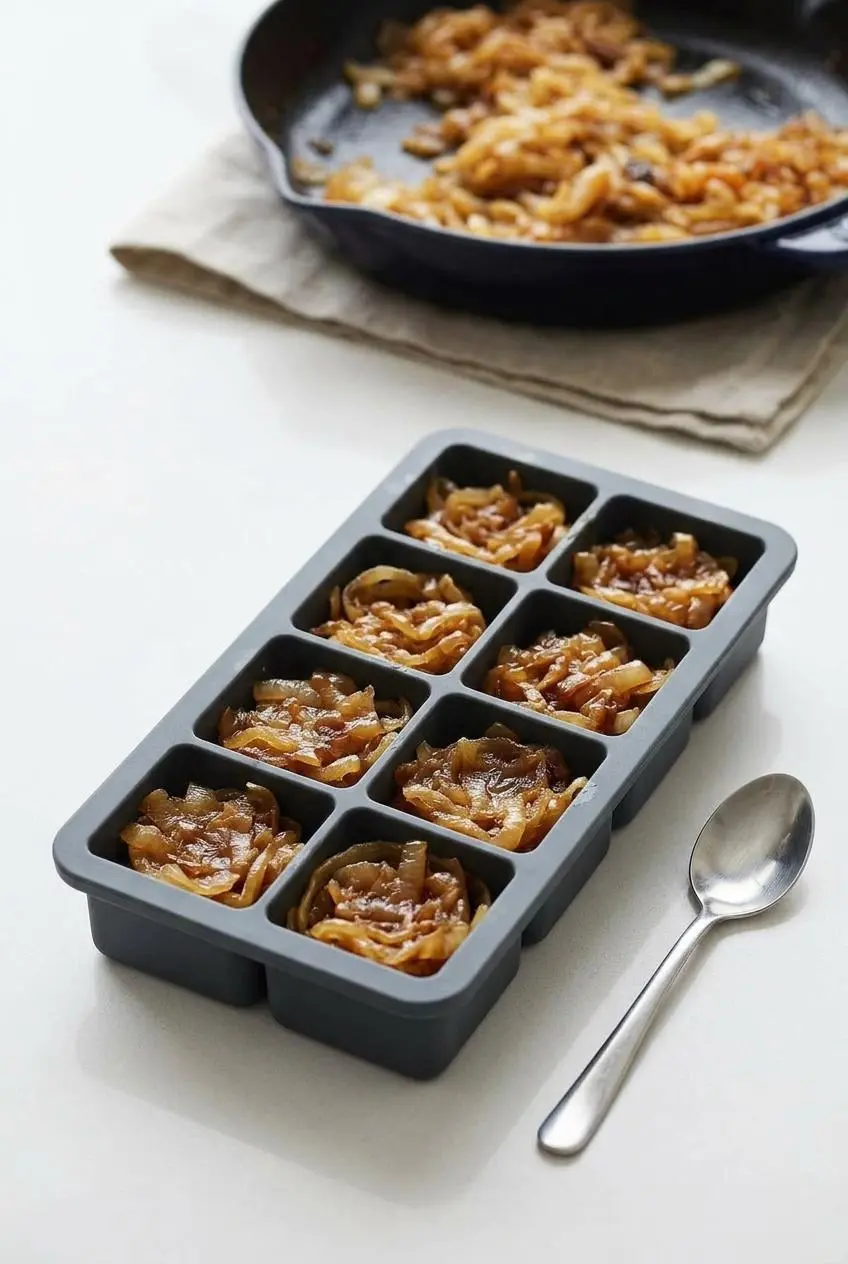
Because caramelized onions take time, making extra is a smart move. The key is to cool them, keep them covered, and reheat gently so they stay soft and glossy instead of drying out.
Refrigerating for Short-Term Use
Let the onions cool, then transfer them to an airtight container and refrigerate. Use clean utensils when scooping some out so the rest of the batch stays in good shape.
Freezing for Long-Term Storage (The Ice Cube Tray Trick)
If you want ready-to-use portions, spoon cooled onions into an ice cube tray and freeze until firm, then move the portions to a freezer-safe container or bag. It’s an easy way to grab a small amount for burgers, soups, or eggs without thawing a whole batch.
How to Reheat for the Best Texture
Reheat the onions gently in a skillet over low heat until warmed through. If they seem a little tight or sticky, add a tiny splash of water and stir to loosen them.
The microwave works too for small portions. Warm them briefly, then stir so the heat spreads evenly.
Conclusion
The secret to great caramelized onions is simple: low heat, a wide pan, and patience. Give them time, and they’ll reward you with sweet, rich flavor that plain sautéed onions just can’t match.
Make a generous batch when you can and keep some on hand for easy meals. They have a way of making almost everything taste a little more special.
Frequently Asked Questions
What’s the difference between sautéed onions and caramelized onions?
Sautéed onions cook much faster over higher heat until they soften and turn translucent, usually in about 5 to 10 minutes. Caramelized onions cook slowly over low or medium-low heat for about an hour, which gives them their deep brown color and sweet, jammy flavor.
Can I make caramelized onions in a slow cooker or oven?
Yes. Both methods work well when you want a more hands-off approach. In the oven, cook them in a covered Dutch oven at 375 °F and stir occasionally until they’re deeply browned. In a slow cooker, cook on low with the lid slightly ajar so moisture can escape.
Why do my caramelized onions taste bitter?
That usually means the heat was too high and the sugars burned instead of slowly browning. Keep the heat low to medium-low, and if the pan starts getting too dark too quickly, loosen it with a small splash of water.
How much will my onions shrink when caramelized?
A lot. Onions lose most of their volume as their moisture cooks away, so a full skillet cooks down to a surprisingly small amount. As a rough guide, 3 to 4 large onions usually end up around 1 cup.
What is the best pan for making caramelized onions?
A wide, heavy-bottomed pan like cast iron or stainless steel is your best bet. It holds steady heat and gives the onions enough room to brown instead of steaming in a crowded pile.
How can I caramelize onions faster?
You can speed things up by keeping the heat a little higher, stirring more often, and using a tiny pinch of sugar if needed for extra browning. The trade-off is that the onions won’t be quite as deep, jammy, or complex as the classic slow version.
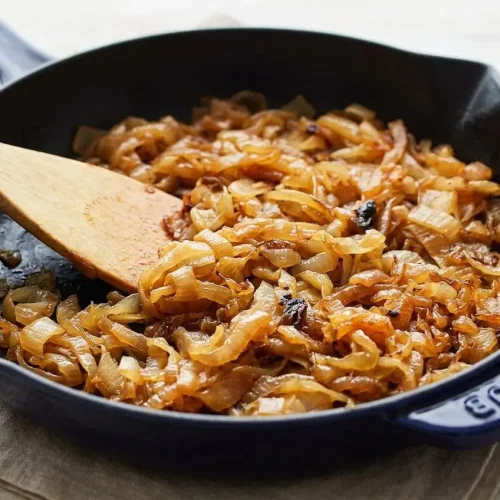
Caramelized Onions

Equipment
- 12-inch cast iron skillet
Ingredients
- 2 tablespoons extra-virgin olive oil
- 4 medium yellow onions, halved and sliced
- ½ teaspoon sea salt
Instructions
- Warm the olive oil in a 12-inch cast iron skillet over medium heat, then add the sliced onions and cook for 5 minutes. The onions should begin to soften and slump, with a steady sizzle but no dark browning yet.
- Sprinkle in the salt, lower the heat to medium-low, and continue cooking for 50 to 80 minutes, stirring every few minutes. As they cook, the onions will shrink dramatically and change from translucent to pale gold, then to a rich golden brown with a sweet aroma.
- If the onions start sticking hard to the pan, turn the heat down to low and keep cooking gently; if you want more color after 50 minutes, raise the heat slightly and stir continuously until they deepen. The finished onions should look very soft, glossy, and deeply caramelized, with no burnt smell or black spots.