Red Velvet Chocolate Chip Cookies are soft, chewy cookies with mild cocoa flavor, vanilla sweetness, and a slight tang. Chilling the sticky dough is the key step for thick cookies that bake up tender in the center and set nicely at the edges.
These cookies have that classic red velvet character without turning into plain chocolate cookies with food coloring. The flavor is gentler, the texture stays plush, and the red color makes them feel a little festive right away.
If you want a from-scratch cookie that looks bakery-pretty and still feels easy enough for a weeknight bake, this is it. The dough starts sticky, bakes with soft centers, and rewards a little patience.
Use a medium cookie scoop if you have one, because even dough portions bake more evenly and give you a neater batch.
What Are Red Velvet Chocolate Chip Cookies?
Red velvet cookies taste like a blend of mild cocoa, sweet vanilla, and a subtle tang from buttermilk or milk. They are softer and gentler than deeply chocolatey cookies, so if you want a richer cocoa punch, fudgy brownie cookies are a better match.
Key Ingredients for Red Velvet Cookies
Each ingredient pulls its weight here, shaping the cookies’ color, chew, tenderness, and that mellow red velvet flavor.
- 1 and 2/3 cups (210g) all-purpose flour
- 1/4 cup (21g) unsweetened natural cocoa powder
- 1 teaspoon baking soda
- 1/4 teaspoon salt
- 1/2 cup (8 Tbsp; 113g) unsalted butter, softened to room temperature
- 3/4 cup (150g) packed light or dark brown sugar
- 1/4 cup (50g) granulated sugar
- 1 large egg, at room temperature
- 1 Tablespoon milk (I recommend buttermilk)
- 2 teaspoons pure vanilla extract
- 3/4 teaspoon gel red food coloring
- 1 cup (180g) white or semi-sweet chocolate chips (plus a few extra for tops)
Cocoa powder gives these cookies their mild chocolate base, but red velvet is meant to taste softer and less intense than a classic chocolate cookie. That small amount of cocoa is enough to add depth without stealing the show from the vanilla and tangy notes.
Buttermilk, if you use it for the tablespoon of milk, adds tenderness and that slight tang people expect from red velvet desserts. It is a small amount, but it rounds out the flavor and keeps the dough from tasting flat.
Using both brown sugar and granulated sugar matters here. Brown sugar brings moisture and chew, while granulated sugar helps the edges set with a little more structure, so you get cookies that stay soft in the middle instead of turning cakey.
Gel food coloring is the easiest way to get a rich red hue without thinning the dough. White chocolate chips lean sweeter and creamier, while semi-sweet chips keep the contrast sharper and a little more classic-cookie-like.
I always make sure the butter and egg are truly at room temperature, because the dough comes together more smoothly and creams up better from the start.
How to Make Red Velvet Chocolate Chip Cookies
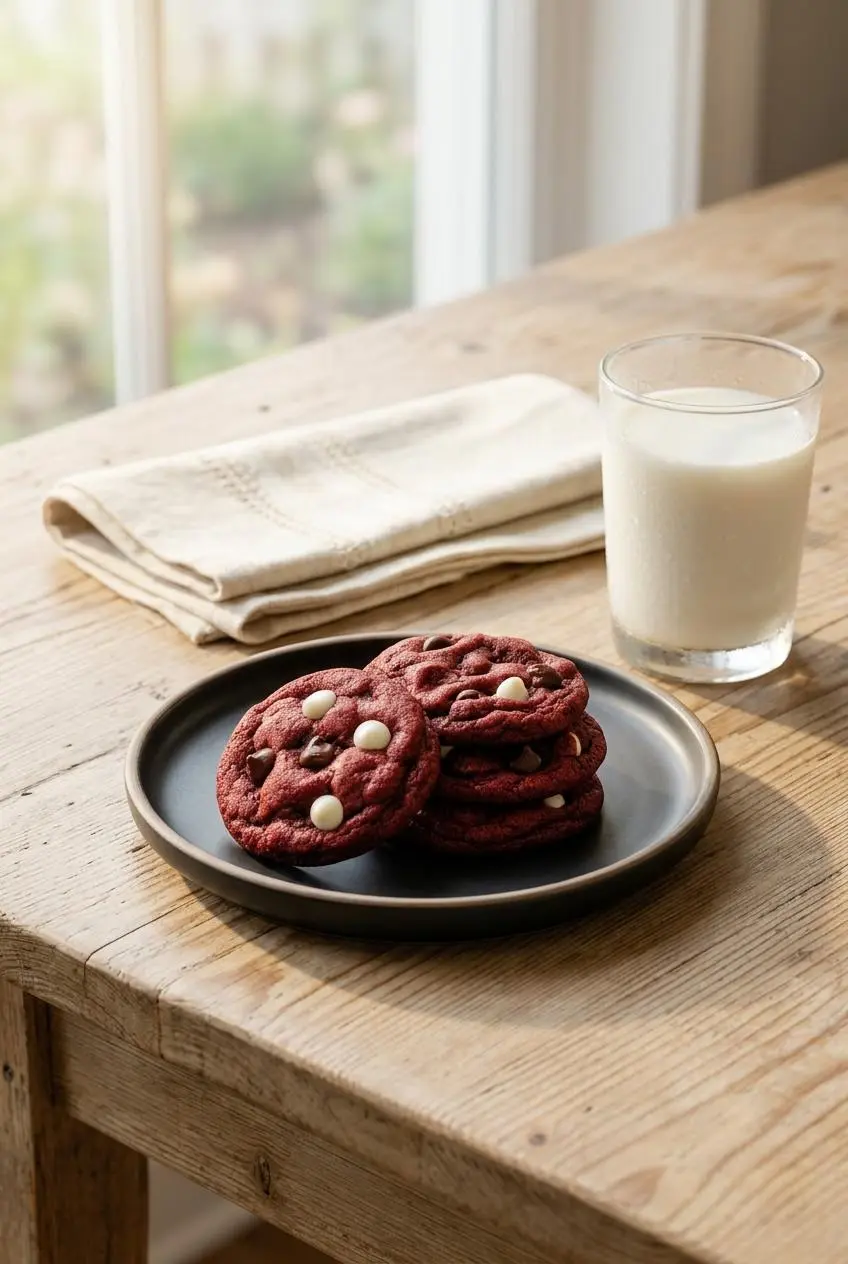
The method is straightforward, but a few visual cues make all the difference. The dough should feel sticky before chilling, then firm and much easier to handle once cold.
- Whisk the flour, cocoa powder, baking soda, and salt in a medium bowl until the cocoa is evenly distributed.
The mixture should look uniformly light brown with no streaks or little pockets of baking soda. - Beat the butter, brown sugar, and granulated sugar on medium speed for about 3 minutes with a hand mixer or stand mixer fitted with the paddle attachment.
Stop when the mixture looks creamy and slightly fluffier, not dense or greasy. - Mix in the egg and vanilla extract on high speed for about 1 minute, scraping the bowl as needed so everything blends evenly.
The mixture should look smooth and glossy with no separated butter around the edges. - Add the dry ingredients, then pour in the milk and food coloring, and mix on low just until the dough comes together.
The dough will be sticky, and that is exactly what you want at this stage. - Beat in the chocolate chips on low speed only until they are distributed through the dough.
The dough should stay thick and tacky, with the chips suspended throughout instead of sinking to the bottom. - Cover the bowl and chill the dough for at least 1 hour and up to 3 days.
After about 1 to 2 hours, the dough will be firm and much less sticky, which makes it easy to roll and helps the cookies bake thicker and chewier. - If the dough has been chilled for longer than 2 hours, let it sit at room temperature for at least 15 minutes before shaping.
This takes the hard chill off so the cookies can spread more naturally in the oven. - Preheat the oven to 350°F (177°C) and line large baking sheets with parchment paper or silicone baking mats.
The lined sheets help the cookies bake evenly and keep the bottoms from sticking or overbrowning. - Scoop and roll portions of dough about 1.5 Tablespoons (30–35g) each, then place them 3 inches apart on the prepared baking sheets.
Keeping the cookies evenly sized helps them finish at the same time and keeps the batch looking consistent. - Bake for 11 to 13 minutes, until the edges are set but the centers still look very soft.
They may seem slightly underbaked in the middle, and that is the cue to pull them before they dry out. - If the warm cookies did not spread as much as you wanted, gently press them with the back of a spoon, then add a few extra chocolate chips on top if desired.
This quick fix gives them a smoother bakery-style shape and a more generous chip topping. - Let the cookies cool on the baking sheets for 5 minutes, then transfer them to a wire rack to cool completely.
They will finish setting as they cool, and that rest helps build the chewy texture.
Tips for Perfect Red Velvet Cookies Every Time
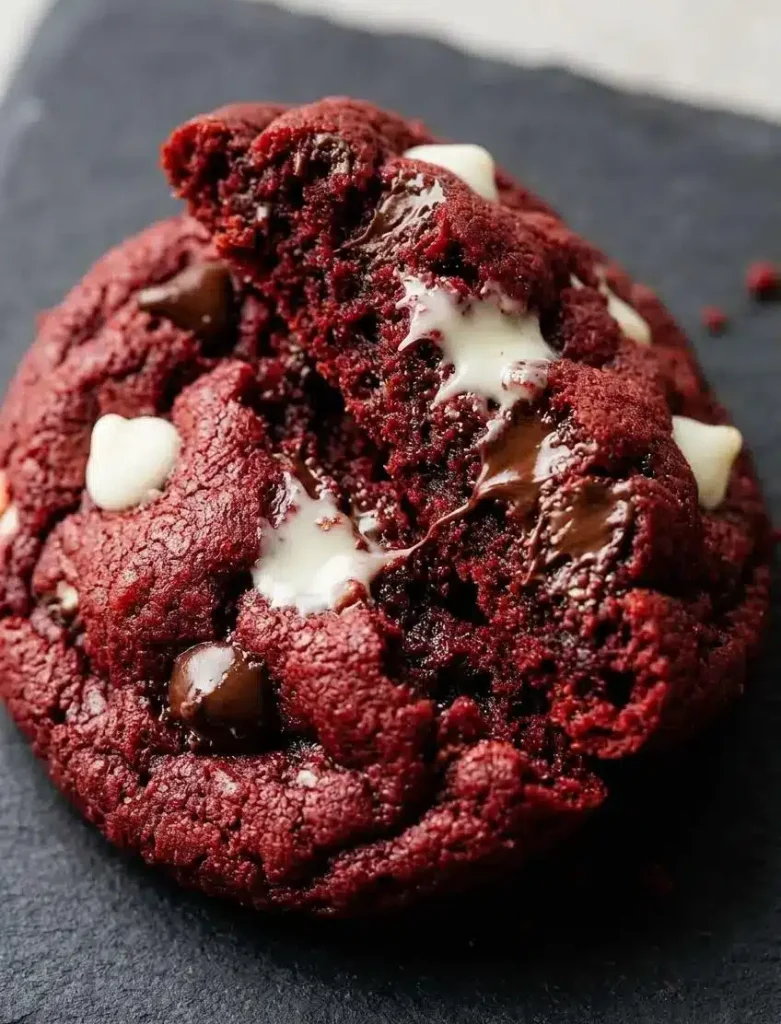
These are the little things that keep the cookies soft, chewy, and evenly colored instead of thin, dry, or muddy-looking.
- Chill the dough for at least 1 hour. This firms the butter, slows spreading, and gives you a thicker, chewier cookie.
- Do not panic when the dough feels sticky before chilling. That texture is normal for this recipe.
- Use butter that is softened, not melty. Overly soft butter makes the cookies spread too fast.
- Mix the flour in on low speed and stop as soon as the dough comes together. Over-mixing can make the cookies tougher and more cakey.
- Use gel food coloring for the boldest red color with the least extra liquid in the dough.
- If your cookies come out thicker than expected, gently flatten the warm tops with the back of a spoon right after baking.
- Press a few extra chocolate chips into the warm cookies if you want a more polished bakery look.
- For a more old-school red velvet flavor, you can add 1/2 teaspoon of white vinegar with the wet ingredients. It is optional, but it gives a slight nod to classic red velvet cake.
Choosing the Right Red Food Coloring
The best coloring depends on how vivid you want the cookies and whether you mind a slight flavor or texture tradeoff. Gel is the easiest choice for strong color and stable dough.
| Type | Color Result | Effect on Dough | Best For |
|---|---|---|---|
| Gel food coloring | Deep, vibrant red | Adds very little extra liquid | The most reliable red velvet look |
| Liquid food coloring | Lighter red unless you use more | Can loosen the dough slightly | Using what is already in the pantry |
| Natural coloring such as beet powder | Muted red or reddish brown | Can slightly change flavor and texture | A more natural look rather than a bright classic red |
If you skip the food coloring entirely, the cookies will still taste like red velvet. They will just bake up more cocoa-brown than red.
Fun Variations for Red Velvet Cookies
These ideas are optional, but they are fun ways to change the look or flavor without changing the main recipe. Red velvet cookies also fit right into holiday trays, and if you are building a festive box, these pair well with more Valentine’s Day cookies.
Red Velvet White Chocolate Chip Cookies
This is the classic pairing for red velvet. Swap the semi-sweet chips for white chocolate chips and you get a sweeter, creamier cookie with a strong red-and-white contrast that feels a lot like the flavor direction of cream cheese frosting.
White chocolate also softens the cocoa edge, so the cookies taste a bit richer and more dessert-like. If you want the prettiest color contrast, this is the variation to try first.
Red Velvet Crinkle Cookies
To turn these into crinkle cookies, roll the chilled dough balls in powdered sugar right before baking. As the cookies spread and puff, the tops crack through the sugar and create that signature crinkled finish.
This works best when the dough is well chilled. The colder dough helps the outside hold onto the sugar coating long enough to create a stronger crackle pattern.
Red Velvet Cookie Sandwiches
These cookies make excellent sandwich cookies once fully cooled. Spread or pipe a layer of cream cheese frosting between two cookies for a red velvet treat that feels a little more special and leans into the classic flavor pairing.
If you want them for a themed party, a shaping guide for Heart-Shaped Cookies can help you make them feel even more occasion-ready.
If you are curious about shortcut methods, plenty of bakers also enjoy cookies from cake mix, but this from-scratch dough gives you a chewier, richer result.
Troubleshooting Common Cookie Problems
Most cookie problems come down to dough temperature, flour measurement, or baking time. The good news is that each one is pretty easy to fix once you know what to look for.
| Problem | Likely Cause | Fix |
|---|---|---|
| Cookies spread too much | Butter was too soft or dough was not chilled long enough | Start with softened, not melted, butter and chill the dough for at least 1 hour |
| Cookies did not spread enough | Dough was very cold or too much flour was added | Let the dough sit briefly before baking and spoon and level the flour |
| Cookies are dry or cakey | Flour was over-mixed or cookies baked too long | Mix just until combined and remove when the centers still look soft |
| Color looks dull | Too little coloring or a weak liquid coloring | Use gel coloring for a deeper red hue |
| Texture feels gritty | Butter and sugar were not creamed long enough | Beat the butter and sugars until creamy and lighter in texture |
Problem: My Cookies Spread Too Much
This usually happens when the butter is too soft or the dough goes into the oven before it is fully chilled. The butter melts too fast, the dough relaxes too early, and the cookies flatten before the structure sets.
Use room-temperature butter that still holds its shape, and chill the dough for at least 1 hour. If your kitchen runs warm, pop the shaped dough back into the fridge while the oven finishes heating.
Problem: My Cookies Didn’t Spread Enough
The two most common reasons are over-chilled dough and too much flour. If the dough has been in the refrigerator for a long stretch, it can be so firm that the cookies stay puffed up instead of spreading.
Let very cold dough sit at room temperature for 15 minutes before baking. Also spoon and level the flour instead of scooping directly with the measuring cup, which can pack in too much.
Problem: My Cookies Are Dry and Cakey
Dry, cakey cookies usually come from over-mixing once the flour goes in or leaving the cookies in the oven too long. Either one can push the texture away from chewy and into muffin-top territory.
Mix on low speed just until you no longer see dry flour, then stop. Bake until the edges are set and the centers still look very soft and slightly underbaked, because they continue setting on the hot pan.
Make-Ahead, Storing, and Freezing Instructions
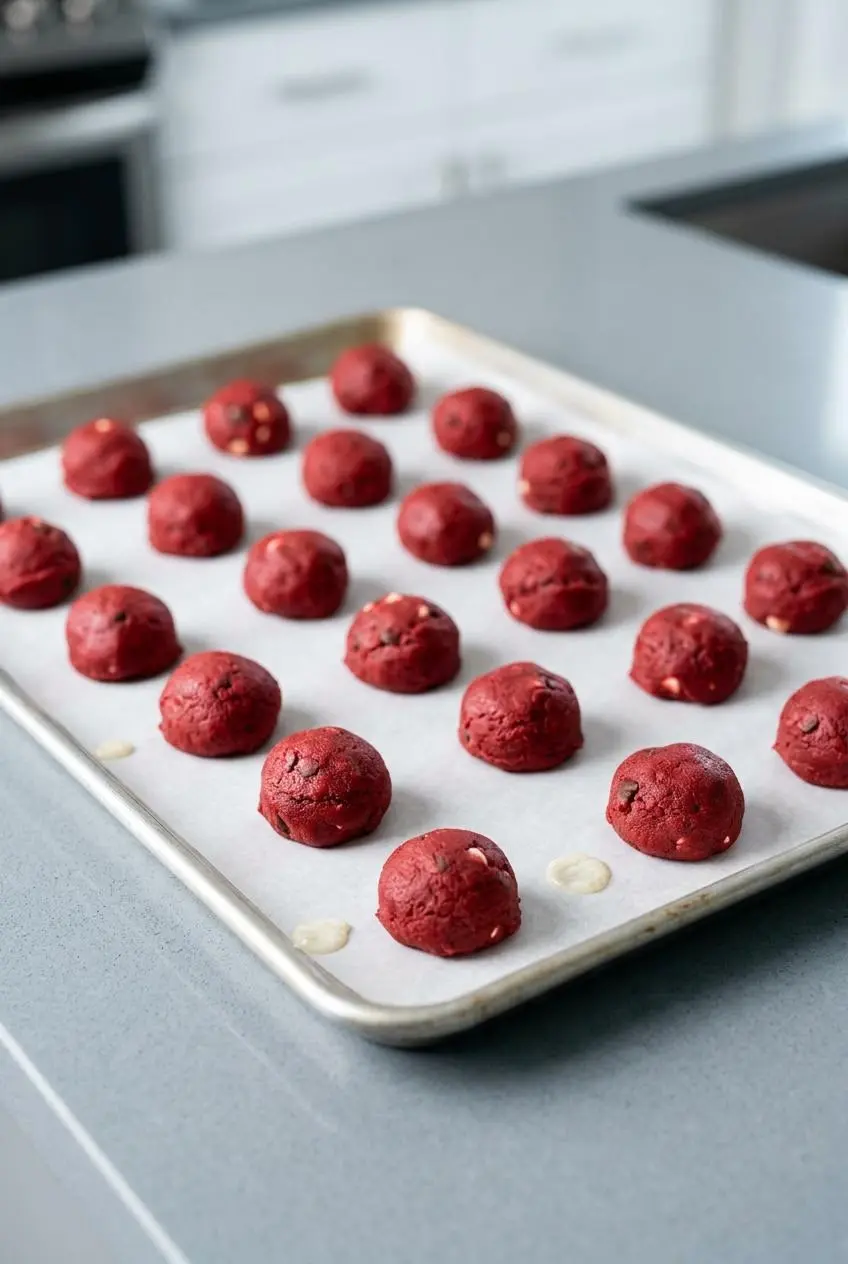
This recipe is flexible, but texture matters. Cool the cookies fully before storing so they keep their chewy centers instead of trapping steam and turning damp.
Storing Baked Cookies
Once the cookies are completely cool, keep them in an airtight container at room temperature. The official recipe notes that they can be stored this way for up to 1 week.
Freezing Cookie Dough
You can freeze the shaped dough balls if you want to bake off cookies later. Arrange the portions so they firm up first, then transfer them to a well-sealed freezer container or bag once solid.
Bake them straight from frozen and add a couple of minutes to the baking time. Watch for the same doneness cue as the fresh dough: set edges and very soft centers.
Freezing Baked Cookies
Fully cooled cookies can also be frozen in a tightly sealed container, with layers separated if needed to protect their shape. Thaw them covered at room temperature so they do not dry out on the counter.
If you want that just-baked feel again, warm a cookie briefly after thawing until the chips soften slightly. A cold glass of milk alongside does not hurt, either.
Conclusion
These cookies hit the sweet spot between festive and practical. You get the signature red velvet flavor, a chewy center, and a from-scratch dough that is easy to handle once chilled.
If you remember one thing, make it the chill time. That hour in the fridge is what helps these cookies stay thick, soft, and worth baking again.
Frequently Asked Questions
What is the flavor of red velvet supposed to be?
Red velvet tastes like mild cocoa with sweet vanilla and a slight tang. It is softer and less intensely chocolatey than a regular chocolate cookie. The buttermilk note is part of what makes it feel smooth and a little more rounded.
Why didn’t my red velvet cookies spread?
The most likely causes are dough that is too cold or too much flour. If the dough was chilled for a long time, let it sit at room temperature for 15 to 20 minutes before baking. Also spoon and level the flour instead of scooping straight from the bag.
Can I make these cookies with a red velvet cake mix?
Yes, you can make a shortcut version with cake mix, eggs, and oil. The texture will be softer and more cake-like than this from-scratch version. If you want a chewier cookie with better flavor definition, stick with the recipe here.
Which food coloring is best for red velvet?
Gel food coloring is the best choice for most bakers. It gives you a stronger red color without adding much liquid, so the dough stays thick enough to bake into chewy cookies. Liquid coloring can work, but the color is usually weaker and the dough can loosen more easily.

Red Velvet Chocolate Chip Cookies

Equipment
- Electric Mixer (Handheld or Stand)
- Baking Sheet
- Silicone Baking Mat or Parchment Paper
- Medium Cookie Scoop
- Cooling Rack
Ingredients
- 1 and 2/3 cups all-purpose flour (210g)
- 1/4 cup unsweetened natural cocoa powder (21g)
- 1 teaspoon baking soda
- 1/4 teaspoon salt
- 1/2 cup unsalted butter, softened to room temperature (8 Tbsp; 113g)
- 3/4 cup packed light or dark brown sugar (150g)
- 1/4 cup granulated sugar (50g)
- 1 large egg, at room temperature
- 1 Tablespoon milk (I recommend buttermilk)
- 2 teaspoons pure vanilla extract
- 3/4 teaspoon gel red food coloring
- 1 cup white or semi-sweet chocolate chips (180g) plus a few extra for tops
Instructions
- Whisk the flour, cocoa powder, baking soda, and salt in a medium bowl until the cocoa is evenly distributed. The mixture should look uniformly light brown with no streaks or little pockets of baking soda.
- Beat the butter, brown sugar, and granulated sugar on medium speed for about 3 minutes with a hand mixer or stand mixer fitted with the paddle attachment. Stop when the mixture looks creamy and slightly fluffier, not dense or greasy.
- Mix in the egg and vanilla extract on high speed for about 1 minute, scraping the bowl as needed so everything blends evenly. The mixture should look smooth and glossy with no separated butter around the edges.
- Add the dry ingredients, then pour in the milk and food coloring, and mix on low just until the dough comes together. The dough will be sticky, and that is exactly what you want at this stage.
- Beat in the chocolate chips on low speed only until they are distributed through the dough. The dough should stay thick and tacky, with the chips suspended throughout instead of sinking to the bottom.
- Cover the bowl and chill the dough for at least 1 hour and up to 3 days. After about 1 to 2 hours, the dough will be firm and much less sticky, which makes it easy to roll and helps the cookies bake thicker and chewier.
- If the dough has been chilled for longer than 2 hours, let it sit at room temperature for at least 15 minutes before shaping. This takes the hard chill off so the cookies can spread more naturally in the oven.
- Preheat the oven to 350°F (177°C) and line large baking sheets with parchment paper or silicone baking mats. The lined sheets help the cookies bake evenly and keep the bottoms from sticking or overbrowning.
- Scoop and roll portions of dough about 1.5 Tablespoons (30–35g) each, then place them 3 inches apart on the prepared baking sheets. Keeping the cookies evenly sized helps them finish at the same time and keeps the batch looking consistent.
- Bake for 11 to 13 minutes, until the edges are set but the centers still look very soft. They may seem slightly underbaked in the middle, and that is the cue to pull them before they dry out.
- If the warm cookies did not spread as much as you wanted, gently press them with the back of a spoon, then add a few extra chocolate chips on top if desired. This quick fix gives them a smoother bakery-style shape and a more generous chip topping.
- Let the cookies cool on the baking sheets for 5 minutes, then transfer them to a wire rack to cool completely. They will finish setting as they cool, and that rest helps build the chewy texture.