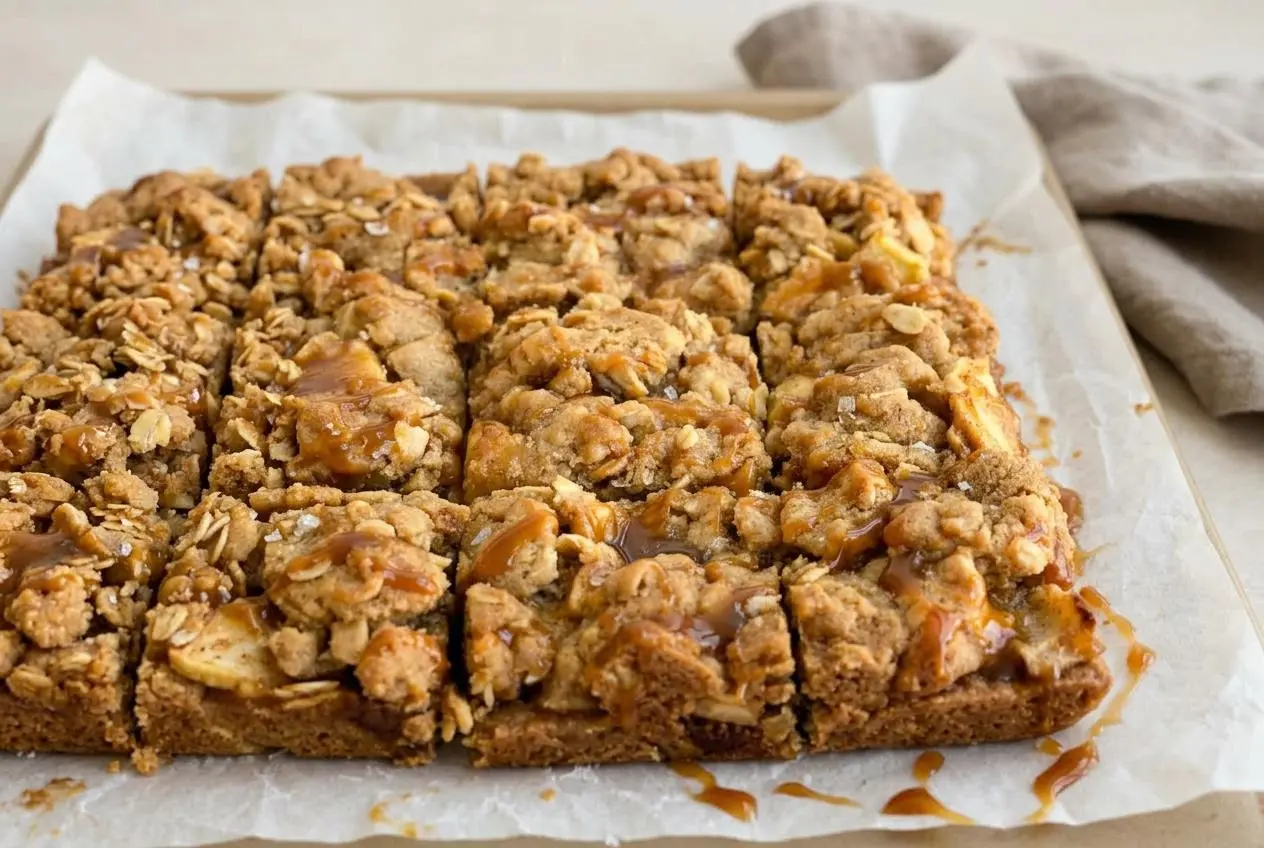
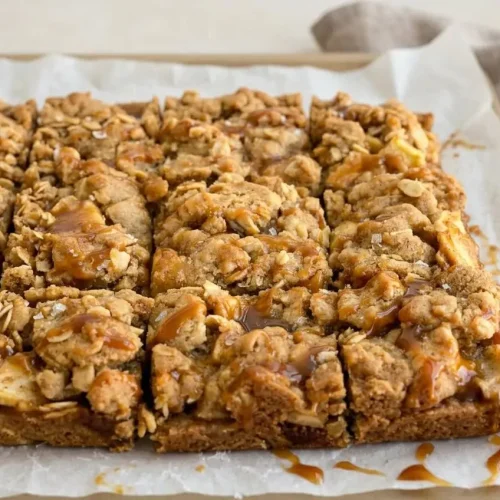
Salted caramel apple pie bars layer thinly sliced, spiced apples and gooey caramel between a buttery oat crust and golden crumb topping. Pre-baking the bottom helps it hold together, while complete cooling gives you neat squares finished with flaky sea salt.
These salted caramel apple pie bars bring cinnamon-scented apples, chewy oats, and bubbling caramel together in an 8×8 pan. The same dough makes the bottom and topping, so there’s no pie dough to roll or delicate crust to transfer.
They’re a good fit for a fall dessert tray or a coffee break when you want apple pie flavor in a handheld square. Allow time for cooling beyond the baking time, especially if you want tidy portions. Those golden oat edges are worth the wait.
Leave parchment hanging over two opposite sides of the pan so you can lift the cooled bars without digging into the corners.
Key Ingredients and Their Roles
Apples provide a tender fruit layer, flour gives structure and thickens the juices, and oats add chew. Butter and brown sugar enrich the crumb, while lemon, warm spices, vanilla, and salt balance the caramel’s sweetness.
Apple Filling
- 1 lb thinly sliced apples (about 2 large apples)
- 1 tablespoon lemon juice
- 2 tablespoons flour
- 2 tablespoons granulated sugar
- ½ teaspoon cinnamon
- ⅕ teaspoon nutmeg
- pinch of salt
Oat Bottom/Topping
- ¾ cup salted butter
- ¾ cup brown sugar
- 1 teaspoon vanilla
- ¾ teaspoon salt
- ½ teaspoon baking soda
- ¼ teaspoon cinnamon
- 1 cup all-purpose flour
- 1 cup old fashioned oats
- 3 ounces caramel (kraft bits, homemade or from the jar)
- 1 tablespoons heavy whipping cream (Use this if melting caramels vs. jarred)
- flaked sea salt for topping
Use old-fashioned rolled oats for their distinct flakes and chewy texture. Quick oats have smaller, thinner pieces that hydrate differently and produce a finer, less defined crumb. They aren’t the best substitute when you want a topping with texture rather than a dusty crumble.
Salted butter brings richness, and brown sugar helps the dough stay chewy while adding a deeper sweetness than granulated sugar alone. Vanilla rounds out the caramel flavor. The finishing salt adds little bursts of contrast, so scatter it lightly rather than coating the surface.
Best Apples to Use (And Why Slice Thickness Matters)
Granny Smith apples are a useful choice when you want tartness against the sweet caramel. Honeycrisp gives a sweeter filling with firm texture, although it can release plenty of juice. Choose firm fruit rather than soft, mealy apples; no variety makes careful slicing unnecessary.
Aim for thin, even slices, roughly 1/8 inch thick rather than chunky wedges. Thick pieces can remain firm after the topping browns. Nest the slices closely together so the filling settles into a compact layer instead of leaving hollow spaces.
The flour thickens released apple juices during baking. Lemon juice adds brightness and helps limit browning during preparation; it doesn’t replace the flour’s thickening role. Sugar, cinnamon, and nutmeg should coat the slices evenly rather than collect at the bottom of the bowl.
I favor even, thin apple slices over perfectly shaped ones; consistent thickness matters more than making every piece look alike.
Choosing Your Caramel: Bits vs. Jarred or Homemade Sauce
Choose caramel that becomes pourable when warm but isn’t watery. The cream depends on which form you start with:
- Caramel bits or firm block caramel: Melt with the listed tablespoon of heavy whipping cream, stirring between microwave intervals until smooth.
- Thick jarred sauce: Skip the cream because the sauce already contains enough liquid to pour.
- Homemade sauce: Use a thick homemade salted caramel sauce without additional cream; a thin dessert syrup can leave the filling loose.
How to Make the Salted Caramel Apple Pie Bars Step by Step
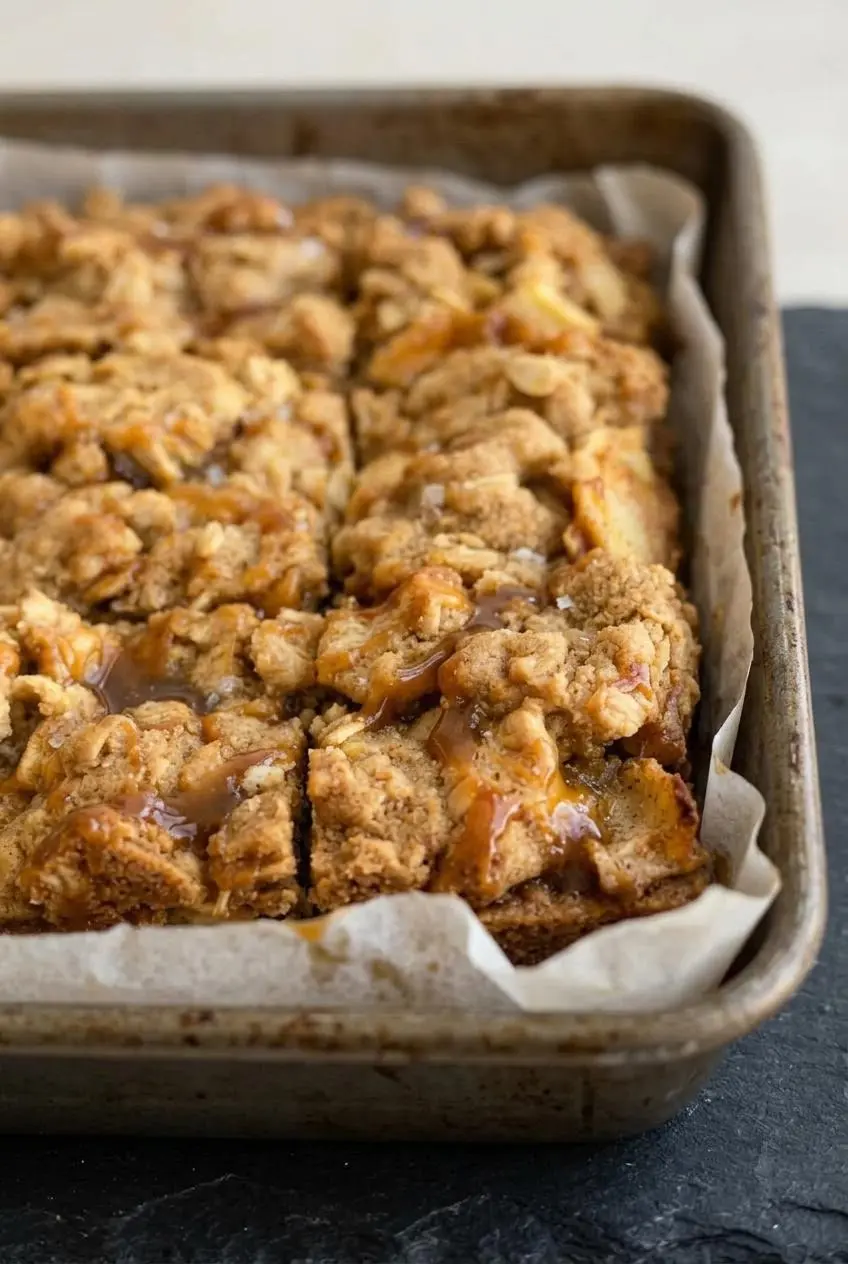
This recipe makes 12 bars. Allow about 15 minutes for preparation, an 8-minute crust pre-bake, and another 28 to 33 minutes in the oven, followed by complete cooling before slicing.
- Heat the oven to 350°F and coat an 8×8-inch baking pan with cooking spray before fitting parchment inside.
Keep enough parchment above opposite sides to form handles, with the paper tucked neatly into the corners. - Peel the apples, cut them into very thin slices, and toss in a small bowl with the lemon juice, flour, granulated sugar, cinnamon, salt, and nutmeg; set aside.
The slices should have an even, lightly spiced coating without pockets of dry flour. - Beat the butter, brown sugar, and vanilla in a large mixing bowl using a paddle attachment until aerated.
Look for a lighter, fluffy mixture rather than dense streaks of butter and sugar. - Mix in the salt, baking soda, cinnamon, flour, and oats just until the dough comes together.
The oats will make it look thick and somewhat sandy, but the mixture should hold when pressed. - Distribute half the dough across the prepared pan, press it into an even bottom layer, and bake for 8 minutes.
This initial bake gives the crust a head start before the moist filling goes on, though it won’t yet look fully browned. - During the crust bake, microwave firm caramel with the cream in 30-second intervals, stirring after each interval, or warm caramel sauce without cream.
Stop when the caramel flows smoothly from the spoon, without firm pieces remaining. - Arrange the coated apples closely over the hot crust, gently compact the layer, and pour the warm caramel across the fruit.
The apples may initially look like a tall mound, but overlapping them tightly reduces empty spaces beneath the topping. - Pinch off portions of the remaining oat dough and scatter them over the apples as uneven dollops.
Leave gaps between the pieces rather than smoothing them into a solid lid, so caramel can bubble through. - Return the pan to the oven for 28 to 33 minutes, then remove it and immediately scatter flaked sea salt over the surface.
Golden-brown edges and caramel actively bubbling through the topping are the signs to watch for before removing the pan. - Leave the bars in the pan until completely cool before lifting and cutting.
The center should feel settled rather than warm and loose, with caramel that stays between the layers instead of flowing outward.
Expert Baking Tips and Troubleshooting
Texture depends on accurate flour measuring, a properly baked bottom, and patience after baking. Don’t judge the finished structure while the caramel is still hot.
For an optional deeper flavor, brown the butter and let it cool back to a soft, creamable consistency before mixing the dough. This changes its moisture and handling, so use regular butter for the most straightforward result. A little ground cardamom in the apple filling is another optional way to complement the cinnamon and nutmeg.
How to Cool and Slice Clean, Bakery-Style Squares
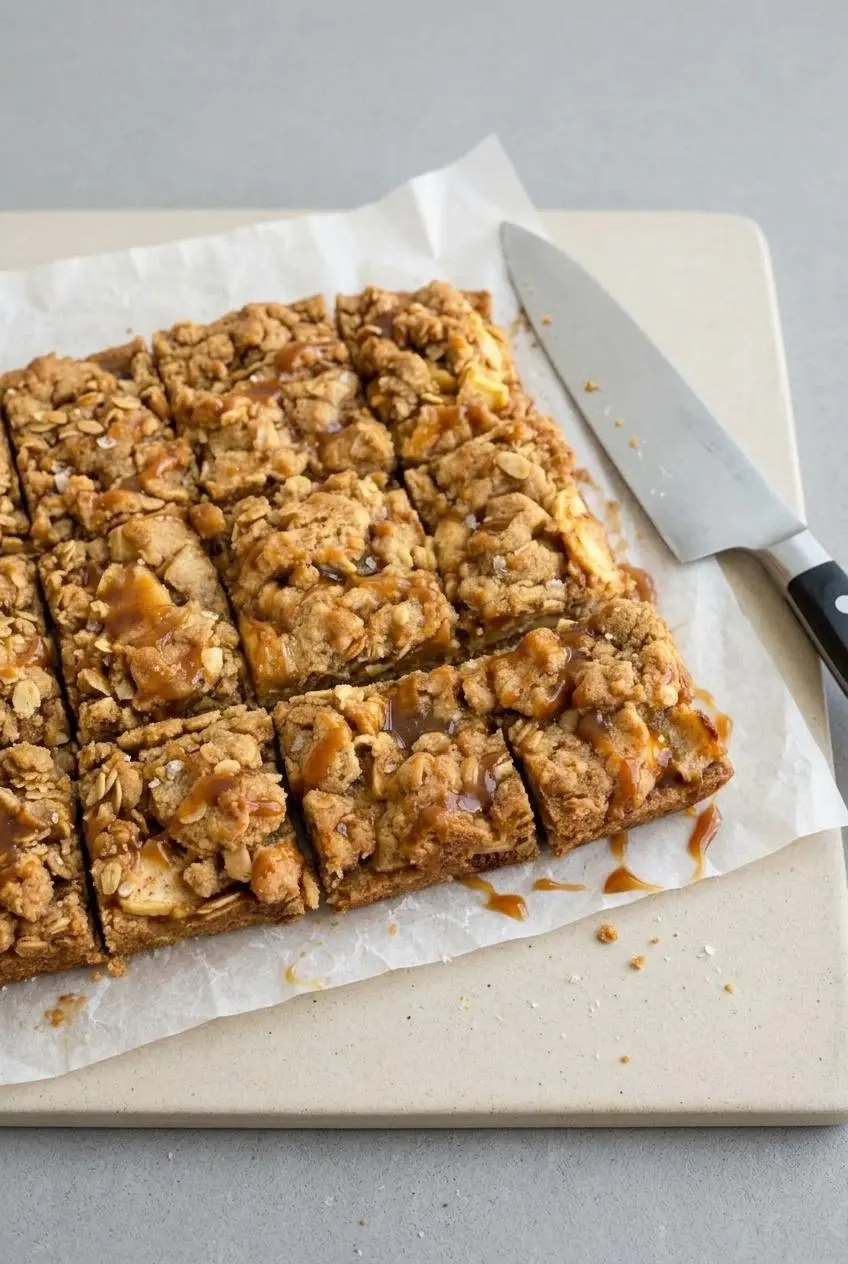
Warm caramel flows, and hot apples shift under the knife. Let the pan cool completely at room temperature, then refrigerate it until the filling feels firm enough to cut without squeezing out.
Lift with both parchment handles, supporting the slab underneath as you transfer it to a cutting board. Use a sharp knife and press straight down rather than sawing through the topping. Wipe the blade between cuts to keep sticky caramel from pulling the next piece apart.
Common Mistakes and How to Avoid Them
- Dry, crumbly dough: Packed flour can throw off the balance; spoon flour into the measuring cup and level it instead of scooping with the cup.
- Soggy bottom: Skipping the crust pre-bake leaves the dough exposed to wet fruit too soon; give it the full initial bake before filling.
- Runny center: Extra cream in prepared sauce can make the filling too loose; omit it and let the baked bars cool fully before judging consistency.
- Overly firm caramel: Excessive microwave heating can toughen caramel as it cools; stir frequently and stop as soon as it becomes smooth.
- Bars that break apart: Warm cutting is a common cause; chill the cooled slab and support it when lifting from the pan.
Variations, Shortbread Option, and 9×13 Pan Scaling
These optional adaptations change the batch size or texture without changing the ingredient list and method above. For your first batch, the 8×8 version gives you the clearest reference for dough consistency and doneness.
Doubling for a 9×13 Pan
Double every ingredient and use a parchment-lined 9×13-inch pan. Keep the same layering order, dividing the oat dough between the bottom and topping. Distribute the apples evenly into the corners rather than piling most of them in the middle.
The larger batch may need about 2 to 5 additional minutes during both the pre-bake and final bake. Treat that as a checking window, not a guarantee: pan material and oven performance affect browning. Look for a set bottom layer first, then golden edges and bubbling caramel during the final bake.
Gluten-Free Salted Caramel Apple Pie Bars
For an optional gluten-free adaptation, replace the flour in both the dough and apple coating with a 1-to-1 gluten-free baking flour blend containing xanthan gum. Use certified gluten-free old-fashioned rolled oats and check the remaining ingredient labels for your needs.
The crumb may feel more delicate than the wheat-flour version. Complete cooling and chilling are especially helpful before lifting and portioning it.
Chewy Oat Crust vs. Classic Shortbread Crust
- Chewy oat style: One creamed dough forms both layers, with visible oat flakes and caramel baked directly around the apples.
- Classic shortbread style: A separate buttery crust supports the apples beneath an oat streusel, often with caramel drizzled on after cooling.
A shortbread version needs its own dough proportions, so don’t simply remove the oats here. If you prefer spoonable fruit beneath a loose topping, classic apple crisp offers that softer serving style.
Serving Suggestions and Storage
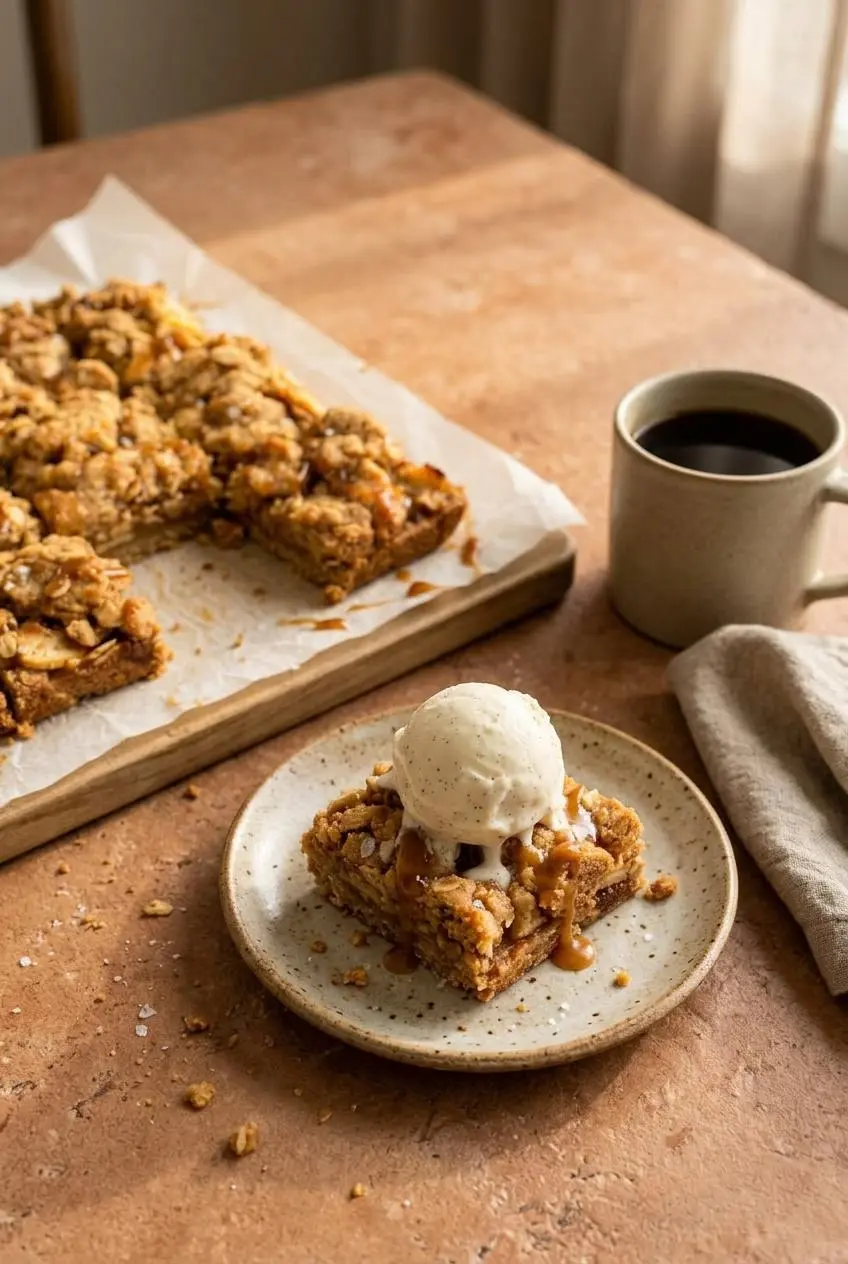
For neat handheld portions, serve the bars chilled or at room temperature. Cut smaller squares for a dessert tray, where the rich caramel filling makes a bite-sized portion satisfying.
For a plated dessert, cut the bars once set, then gently warm individual portions and add vanilla bean ice cream. A light extra caramel drizzle is plenty. Hot apple cider or black coffee also pairs well with the buttery oat topping.
Once the bars have cooled completely, place leftovers in a tightly covered container and refrigerate them. Keep parchment between stacked layers to limit sticking, and protect the crumb from condensation by avoiding sealing the bars while they’re still warm.
To serve warm, heat only the portions you need, briefly and gently, checking frequently until the center softens. Use a microwave-safe plate or an oven-safe dish as appropriate. Too much heat makes the caramel flow again, so keep warmed portions on a plate rather than expecting them to stay firm enough to hold.
Conclusion
These bars bring together tender spiced apples, buttery oat chew, and a gooey caramel middle without rolling a pie crust. Pre-baking the bottom and watching for bubbling caramel help each layer bake properly.
Let the bars cool completely before cutting, and chill them when sharp edges matter. Once you’re comfortable with the method, try the optional browned butter and cardamom for a toastier, warmly spiced batch.
Frequently Asked Questions
Can I Double These Salted Caramel Apple Pie Bars for a 9×13 Pan?
Yes. Double all ingredients and use a parchment-lined 9×13-inch pan. Allow a little extra time for both baking stages, following the larger-pan guidance above and checking the color and bubbling rather than the clock alone.
If I Use Jarred or Homemade Caramel Sauce, Do I Still Need to Add Heavy Cream?
No. Skip the cream when using prepared caramel sauce. It’s only needed to loosen firm caramel bits or candies as they melt; adding it to sauce can make the filling runny.
Do I Have to Peel My Apples for Apple Pie Bars?
Peeling gives the most tender, cohesive filling and is recommended for this method. You can leave the skins on if you prefer their texture, but slice the apples very thinly so the skins don’t form chewy strips.
Can I Make These Apple Pie Bars Gluten-Free?
Yes, as an optional adaptation. Use a 1-to-1 gluten-free baking flour blend with xanthan gum for both flour additions, plus certified gluten-free old-fashioned oats. Check the other ingredient labels as needed.
How Do I Rewarm These Bars If I Make Them Ahead of Time?
Gently warm cut portions in the microwave or an oven-safe dish, checking frequently until the caramel softens. Warm only what you plan to serve, and use a plate because reheating makes the filling looser.
Salted Caramel Apple Pie Bars

Equipment
- 8×8 pan
- Parchment Paper
- Large Mixing Bowl
- Paddle attachment
Ingredients
Apple Filling
- 1 lb thinly sliced apples (about 2 large apples)
- 1 tablespoon lemon juice
- 2 tablespoons flour
- 2 tablespoons granulated sugar
- ½ teaspoon cinnamon
- ⅕ teaspoon nutmeg
- pinch of salt
Oat Bottom/Topping
- ¾ cup salted butter
- ¾ cup brown sugar
- 1 teaspoon vanilla
- ¾ teaspoon salt
- ½ teaspoon baking soda
- ¼ teaspoon cinnamon
- 1 cup all-purpose flour
- 1 cup old fashioned oats
- 3 ounces caramel (kraft bits, homemade or from the jar)
- 1 tablespoons heavy whipping cream (Use this if melting caramels vs. jarred)
- flaked sea salt for topping
Instructions
- Heat the oven to 350°F and coat an 8×8-inch baking pan with cooking spray before fitting parchment inside. Keep enough parchment above opposite sides to form handles, with the paper tucked neatly into the corners.
- Peel the apples, cut them into very thin slices, and toss in a small bowl with the lemon juice, flour, granulated sugar, cinnamon, salt, and nutmeg; set aside. The slices should have an even, lightly spiced coating without pockets of dry flour.
- Beat the butter, brown sugar, and vanilla in a large mixing bowl using a paddle attachment until aerated. Look for a lighter, fluffy mixture rather than dense streaks of butter and sugar.
- Mix in the salt, baking soda, cinnamon, flour, and oats just until the dough comes together. The oats will make it look thick and somewhat sandy, but the mixture should hold when pressed.
- Distribute half the dough across the prepared pan, press it into an even bottom layer, and bake for 8 minutes. This initial bake gives the crust a head start before the moist filling goes on, though it won’t yet look fully browned.
- During the crust bake, microwave firm caramel with the cream in 30-second intervals, stirring after each interval, or warm caramel sauce without cream. Stop when the caramel flows smoothly from the spoon, without firm pieces remaining.
- Arrange the coated apples closely over the hot crust, gently compact the layer, and pour the warm caramel across the fruit. The apples may initially look like a tall mound, but overlapping them tightly reduces empty spaces beneath the topping.
- Pinch off portions of the remaining oat dough and scatter them over the apples as uneven dollops. Leave gaps between the pieces rather than smoothing them into a solid lid, so caramel can bubble through.
- Return the pan to the oven for 28 to 33 minutes, then remove it and immediately scatter flaked sea salt over the surface. Golden-brown edges and caramel actively bubbling through the topping are the signs to watch for before removing the pan.
- Leave the bars in the pan until completely cool before lifting and cutting. The center should feel settled rather than warm and loose, with caramel that stays between the layers instead of flowing outward.