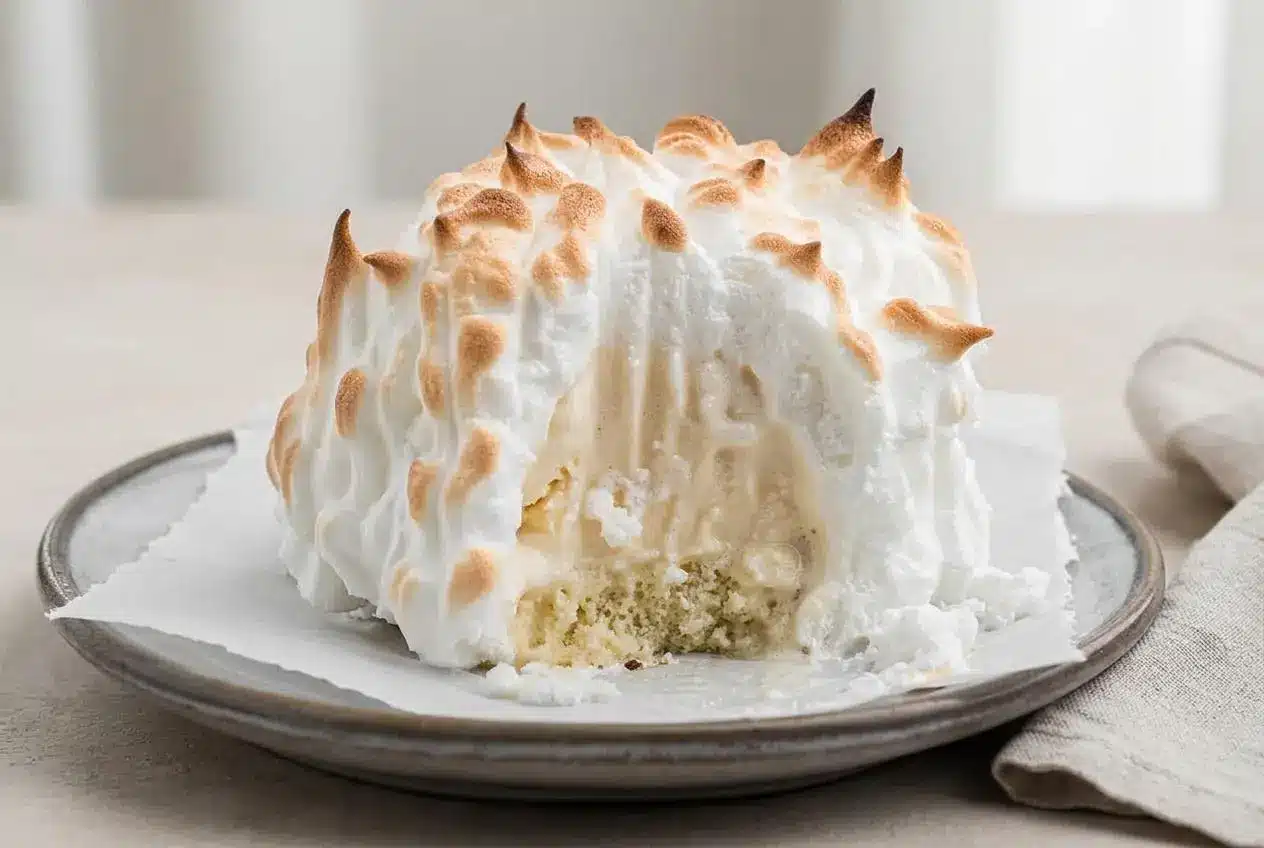
Baked Alaska layers pound cake and firm ice cream beneath a completely sealed coating of meringue. Bake at 425 °F for 6 to 8 minutes to toast the outside while trapped air in the cake and meringue slows heat transfer to the frozen center.
This baked alaska recipe delivers warm, golden meringue over cold vanilla ice cream, with buttery cake underneath. Prepared pound cake keeps the individual portions approachable, so you can focus on whipping the whites and covering every exposed edge.
The six-serving recipe takes about 23 minutes when your ice cream is firm and your egg whites are already at room temperature. It has all the charm of a retro dinner-party dessert without requiring a homemade cake. The real trick is at the bottom edge.
Clear space in the freezer for the baking sheet before you start assembling the portions.
Why the Ice Cream Does Not Melt in Baked Alaska
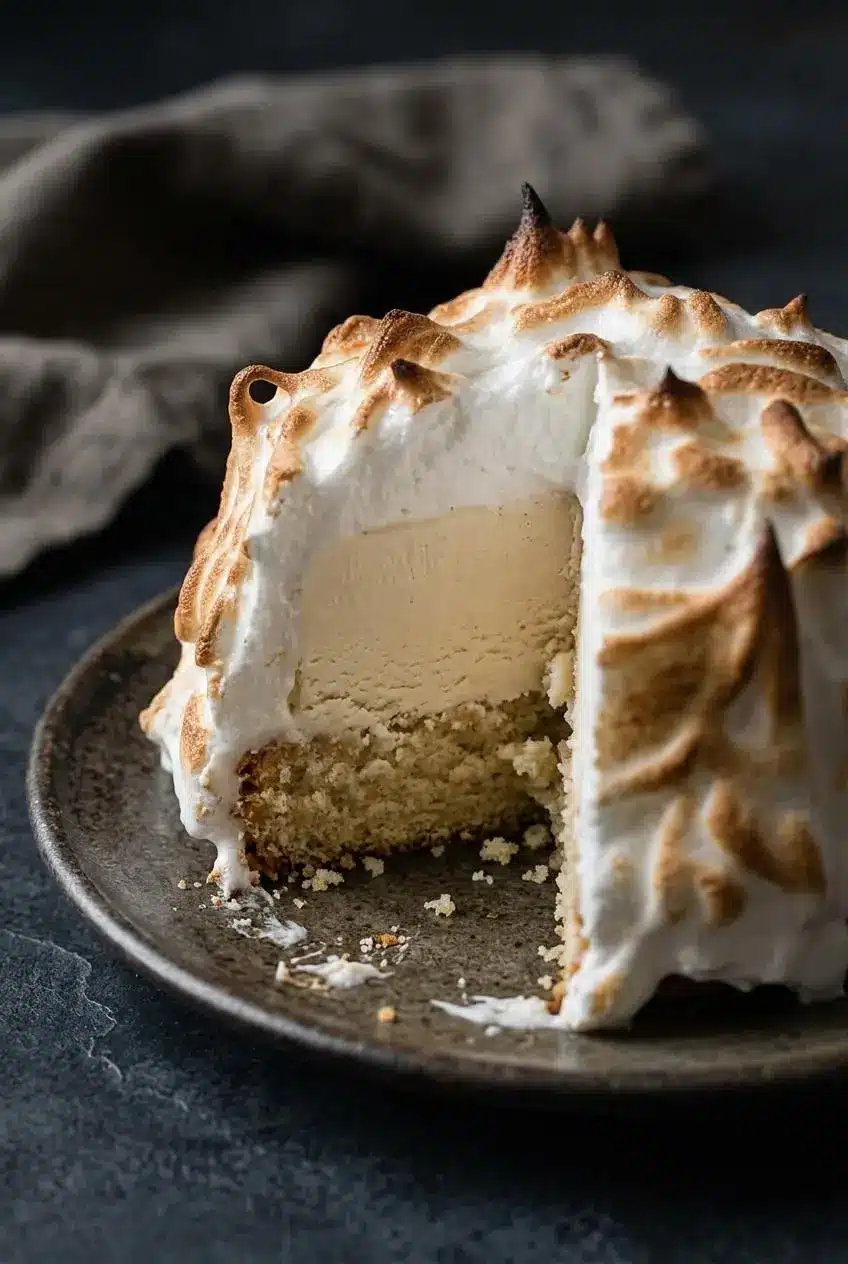
The ice cream survives its brief oven visit because the surrounding layers slow down heat transfer. They buy you time, rather than making the center immune to melting.
Whipped egg whites contain tiny air pockets, and pound cake has an airy crumb within its sturdy structure. Together, they insulate the ice cream from above, around the sides, and underneath. The exposed meringue browns before much heat reaches the middle.
That protection depends on complete coverage. A gap near the cake lets hot air reach the ice cream more directly. Spread the meringue beyond the cake edge and press it against the parchment around the entire circumference.
Also known as Norwegian omelette, baked Alaska belongs to a long tradition of contrasting a warm egg-white exterior with a frozen filling. Its old-fashioned restaurant appeal is easy to understand once you cut into that hot-and-cold combination.
Key Ingredients and Their Roles
Pound cake supplies structure and buttery flavor, vanilla ice cream brings a creamy frozen center, egg whites create an insulating foam, and sugar sweetens and supports the meringue while helping its surface brown.
- 6 3-inch rounds pound cake
- 3 cups vanilla ice cream ((6 scoops approximately ½ cup each))
- 6 egg whites (at room temperature)
- 6 tablespoons sugar
Pound cake: Its close crumb supports the scoop without collapsing easily as the ice cream softens. Use intact rounds rather than crumbly pieces, since the cake forms the bottom of the insulating shell.
Vanilla ice cream: Choose a firm, creamy ice cream that holds a rounded scoop. Dense styles make a substantial center, but density alone does not determine melting speed. Starting with properly firm scoops matters more than a premium label.
Egg whites: Room-temperature whites generally whip readily into a fuller foam. Sugar helps support that foam; warmth alone does not make it stable. Pasteurized whites are an option if preferred, but check that the package says they are suitable for whipping.
Sugar: Add it near the end of whipping so the whites can first develop volume. The finished mixture should look smooth and glossy, not grainy or clumpy. Superfine sugar can dissolve more readily, though the listed sugar works for this method.
I prefer separating eggs while they’re cold, then letting the measured whites reach room temperature before whipping.
How to Make Baked Alaska Step by Step
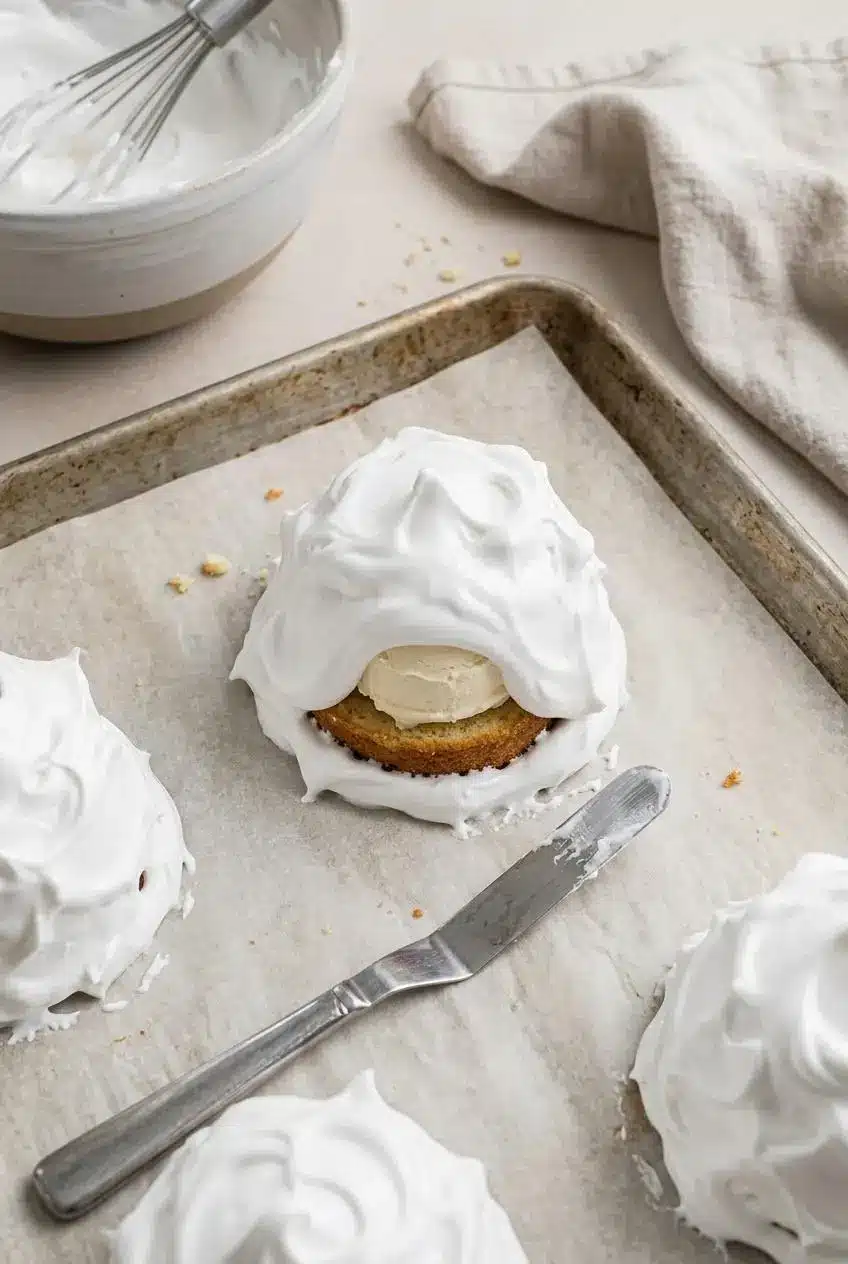
Have your parchment-lined baking sheet, electric mixer, and spatula ready before bringing out the ice cream. The listed timing is 15 minutes of preparation and up to 8 minutes of baking, with any additional firming time dependent on your ice cream.
- Set the oven to 425 °F and allow it to preheat.
The oven should be fully heated before the coated portions go inside. - Cover a baking sheet with parchment and arrange the pound cake rounds on it.
Keep the rounds separate so each portion has room for its meringue coating. - Add one approximately ½-cup scoop of vanilla ice cream to each round, then move the sheet to the freezer while you make the meringue.
Each scoop should sit securely on its cake and retain a firm, rounded shape. - Whip the room-temperature whites with an electric mixer on high speed, adding the sugar near the end and stopping at stiff peaks.
The foam should stand upright when the beaters lift, with a glossy surface rather than dry clumps. - Retrieve the chilled portions and spread meringue over each one, pressing it against the parchment around the full perimeter.
Check that no cake, ice cream, or open seam remains exposed. - Bake for 6 to 8 minutes, using golden-brown meringue as the finishing cue.
Look through the oven window at 5 minutes and remove the sheet immediately if white droplets of melted ice cream appear at the parchment seam. - Slide a spatula beneath each cake and transfer the portions directly to plates for immediate serving.
The meringue should feel warm while the center remains cold and creamy.
Layer and Freeze the Cake and Ice Cream
Parchment helps the finished portions release without tearing the cake or dragging the meringue across the pan. Center each scoop on its round so you can cover the sides without building an awkward overhang.
Keep the assembled cake and ice cream in the freezer while whipping the whites. If a scoop is already slumping, it needs to firm up before coating; meringue cannot compensate for a soft center.
Whip and Seal the Meringue
Near the end of whipping, the whites should form peaks that stand rather than fold back into the bowl. Add the sugar during this final stage and continue until the foam looks glossy and smooth. Stop before it becomes rough or cottony.
Cover the chilled portions promptly. Spread the meringue down the sides, then press its lower edge firmly against the parchment. Inspect that seam all the way around each cake. Complete coverage matters more than decorative peaks.
Oven Baking vs. Kitchen Blowtorch Method
The oven is the method used here. A kitchen blowtorch is an optional alternative for browning the exterior, but it does not reproduce the same overall heating.
- Oven: The 425 °F bake browns all six portions together without specialty equipment. Watch the surface and the lower seam rather than relying on the timer alone.
- Kitchen blowtorch: Use a heatproof surface away from parchment and other flammable materials, and sweep the flame continuously over the meringue. Pause as golden patches develop rather than holding the flame on one peak.
Surface browning is not proof that the egg whites have cooked throughout, especially with a torch. If you prefer pasteurized whites, choose a product intended for whipping rather than treating browning as a safety check.
Expert Tips and Troubleshooting for Perfect Meringue
Most problems start with either weak foam or an incomplete coating. Check those before changing the oven temperature.
- Ice cream leaks at the bottom: A gap in the coating or a softened scoop may be responsible. For the next batch, firm the centers thoroughly and inspect the entire parchment seam before baking.
- Whites stay flat: Yolk or grease can interfere with foaming. Use a clean, grease-free bowl and beaters, and separate eggs carefully; cold whites can still whip, though they may take longer.
- Meringue looks dry or clumpy: Overwhipping has weakened its smooth structure. Stop as soon as stiff, glossy peaks form rather than continuing for extra insurance.
- Meringue weeps or shrinks: Undissolved sugar and an unstable or overbeaten foam can contribute. Add sugar near the end, aim for a smooth finish, and serve promptly after browning.
- Peaks darken before the sides: Very tall spikes brown first. Make modest peaks and watch their color closely instead of waiting for every low spot to match.
For an optional stabilizing adjustment, add cream of tartar while whipping the whites. It helps support the foam, but it cannot repair yolk contamination or replace a complete meringue seal.
Another optional addition is a thin brushing of fruit jam over the cake before adding the scoop. It brings tartness and a slightly tacky surface. Keep the layer thin so the ice cream still sits securely.
Delicious Baked Alaska Variations and Dome Option
Keep the individual vanilla portions for the quickest approach, or change the cake and frozen filling for a different occasion. These alternatives are separate from the ingredient quantities and timing above.
How to Make One Large Molded Dome Baked Alaska
For a centerpiece, line an 8-inch bowl with plastic wrap, leaving enough overhang to help release the filling. Pack softened ice cream into the lined bowl, avoiding empty pockets, and place an 8-inch cake round over the opening.
Freeze until the filling holds its shape firmly. Invert onto a parchment-lined baking sheet, lift away the bowl, and remove all plastic wrap. Cover the dome completely with meringue, including the cake edge and lower seam, before browning.
This format requires different quantities and additional firming time. Do not assume the six individual portions translate directly into a full bowl, or that the 23-minute total applies to a molded centerpiece.
Chocolate, Coffee, and Hazelnut Variation
Pair chocolate cake with coffee ice cream for a deeper, less vanilla-forward flavor. Chopped roasted hazelnuts add crunch and a toasted aroma.
For the most straightforward coating, sprinkle the nuts lightly over the finished meringue. Folding them into the foam is another optional approach, but work gently and keep the coating substantial enough to cover the filling completely.
Fruit, Sorbet, and Holiday Flavor Swaps
- Chocolate cake and pistachio ice cream: A nutty pairing with a soft green center for a retro dinner-party finish.
- Chocolate cake and strawberry ice cream: A pink-centered option that suits a Valentine’s dessert.
- White cake and peach ice cream: A mellow summer combination with a lighter cake flavor.
- Raspberry-lime or passion fruit sorbet: A tart alternative to ice cream; use a firmly frozen center and expect a different texture from the creamy vanilla version.
Make-Ahead, Freezing, and Serving Guide
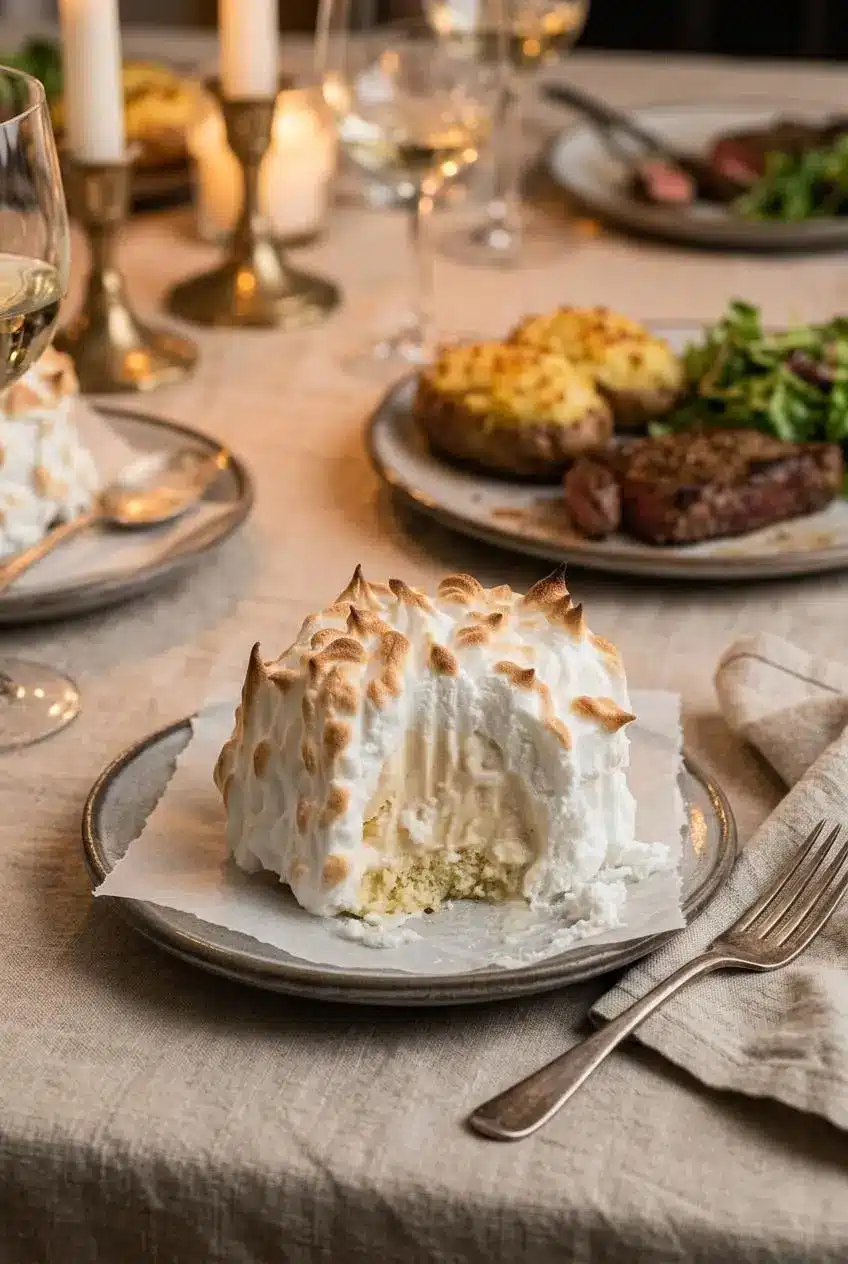
Separate the cold assembly from the last-minute browning. The supported freezing stage is the cake-and-ice-cream assembly while you prepare the meringue; no extended storage timeline is needed for this method.
- Cut the cake rounds and arrange them on parchment.
- Add the ice cream scoops and keep the assembled portions in the freezer while whipping the whites.
- Check that the scoops remain firm before coating them.
- Apply the meringue, bake, and serve as one continuous finishing stage.
Plan around immediate serving rather than storing the browned dessert. Holding it sacrifices the contrast between warm meringue and frozen filling, and the foam can lose its texture. Have dessert plates ready before the baking sheet goes into the oven.
For a celebratory menu, serve steak, twice baked potatoes, and a crisp green salad before bringing out the individual desserts. The cake rounds already define the portions, so plating needs little more than a steady spatula.
Conclusion
Baked Alaska turns four ingredients into a memorable contrast of toasted meringue, buttery cake, and cold vanilla ice cream. Individual portions make that classic presentation manageable at home.
Give the lower meringue seam your full attention, then serve promptly. Once you’re comfortable with the technique, a thin layer of fruit jam or optional cream of tartar offers a useful next variation.
Frequently Asked Questions
How Does Ice Cream Not Melt in Baked Alaska?
Air trapped in the whipped meringue and cake slows heat transfer during the brief bake. A firm center and complete coating help the outside brown before the ice cream melts substantially.
Is Baked Alaska Difficult to Make at Home?
It’s approachable with prepared pound cake and firm ice cream. Whipping glossy meringue and sealing the bottom edge take the most attention; the assembly itself is straightforward.
Can You Make Baked Alaska in Advance?
You can stage the cake and ice cream in the freezer while preparing the meringue. Keep the coating and baking for the final stage, and plan to serve immediately rather than hold the finished dessert.
How Do I Know When Baked Alaska Is Done Baking?
Look for golden-brown meringue within the 6-to-8-minute baking window. Begin watching at 5 minutes, and remove the portions immediately if ice cream starts seeping from the bottom.
Why Is Baked Alaska Also Called Norwegian Omelette?
Norwegian omelette is another traditional name for the same hot-and-cold dessert. The omelette reference points to its egg-white exterior, while the cold interior gives the name its wintry association.
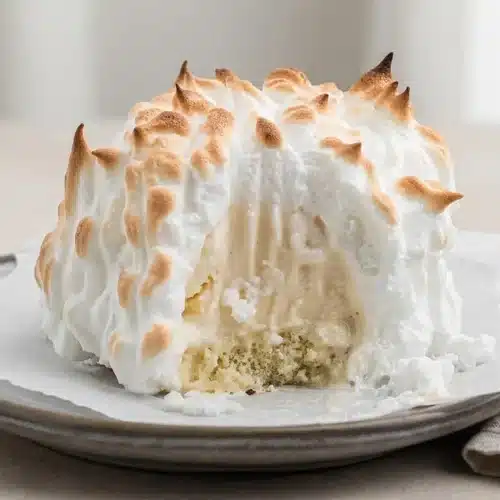
Baked Alaska Recipe

Equipment
- Baking Sheet
- Parchment Paper
- Electric Mixer
- Spatula
Ingredients
- 6 3-inch rounds pound cake
- 3 cups vanilla ice cream ((6 scoops approximately ½ cup each))
- 6 egg whites (at room temperature)
- 6 tablespoons sugar
Instructions
- Set the oven to 425 °F and allow it to preheat. The oven should be fully heated before the coated portions go inside.
- Cover a baking sheet with parchment and arrange the pound cake rounds on it. Keep the rounds separate so each portion has room for its meringue coating.
- Add one approximately ½-cup scoop of vanilla ice cream to each round, then move the sheet to the freezer while you make the meringue. Each scoop should sit securely on its cake and retain a firm, rounded shape.
- Whip the room-temperature whites with an electric mixer on high speed, adding the sugar near the end and stopping at stiff peaks. The foam should stand upright when the beaters lift, with a glossy surface rather than dry clumps.
- Retrieve the chilled portions and spread meringue over each one, pressing it against the parchment around the full perimeter. Check that no cake, ice cream, or open seam remains exposed.
- Bake for 6 to 8 minutes, using golden-brown meringue as the finishing cue. Look through the oven window at 5 minutes and remove the sheet immediately if white droplets of melted ice cream appear at the parchment seam.
- Slide a spatula beneath each cake and transfer the portions directly to plates for immediate serving. The meringue should feel warm while the center remains cold and creamy.