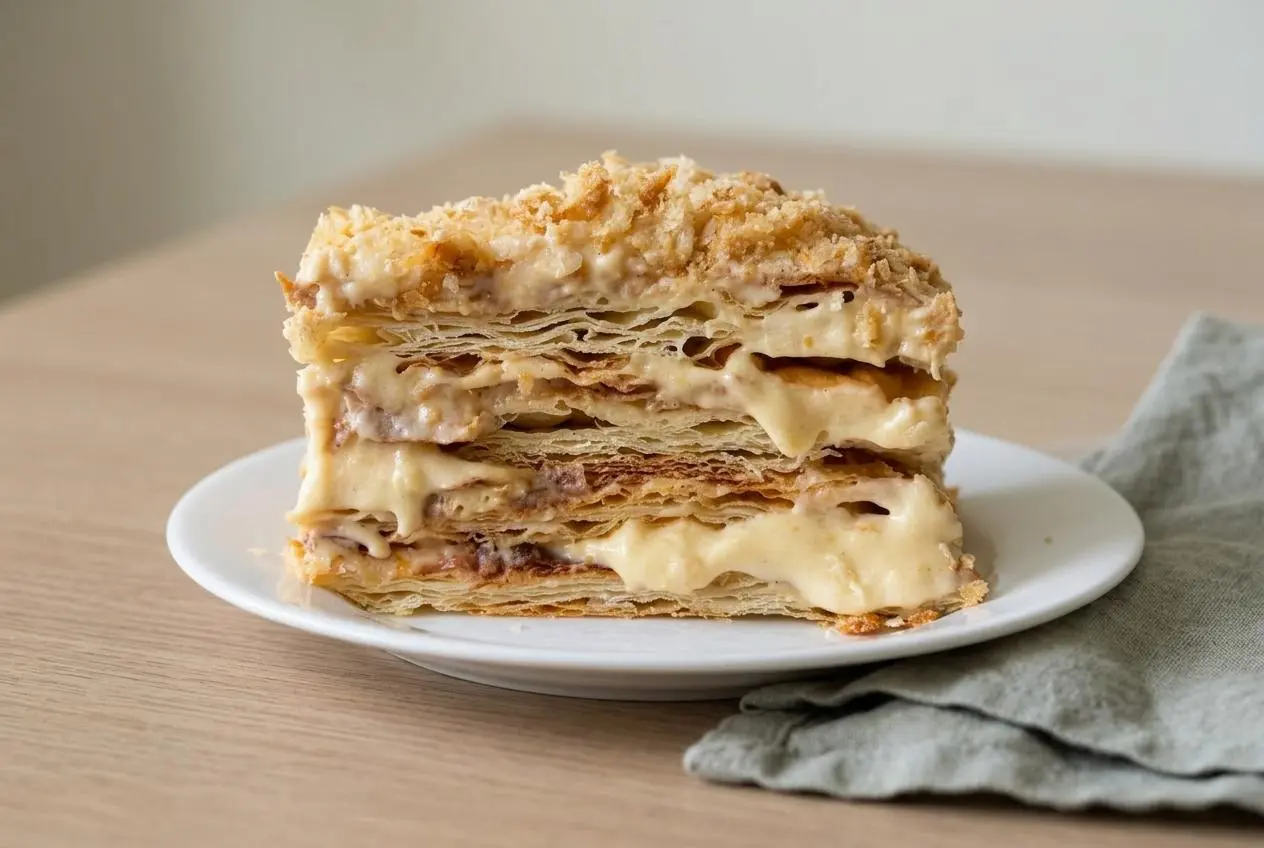
Crisp pastry turns tender overnight in this napoleon cake, an Eastern European dessert made with buttery laminated sheets, custard, whipped cream, and sweetened condensed milk. A pastry-crumb coating finishes the cake, which chills until the layers soften enough to slice together.
This napoleon cake uses grated cold butter and a series of folds rather than a traditional enclosed butter block. The filling combines thick cooked custard with whipped cream for a rich but airy texture.
It’s a project worth spreading across separate kitchen sessions, with cooling and resting doing much of the work. Freshly baked sheets start crisp and fragile, then absorb moisture from the cream. That’s where the tender layers begin.
Clear refrigerator space for the assembled cake before you start rolling the pastry.
What Makes This Layered Cake Different?
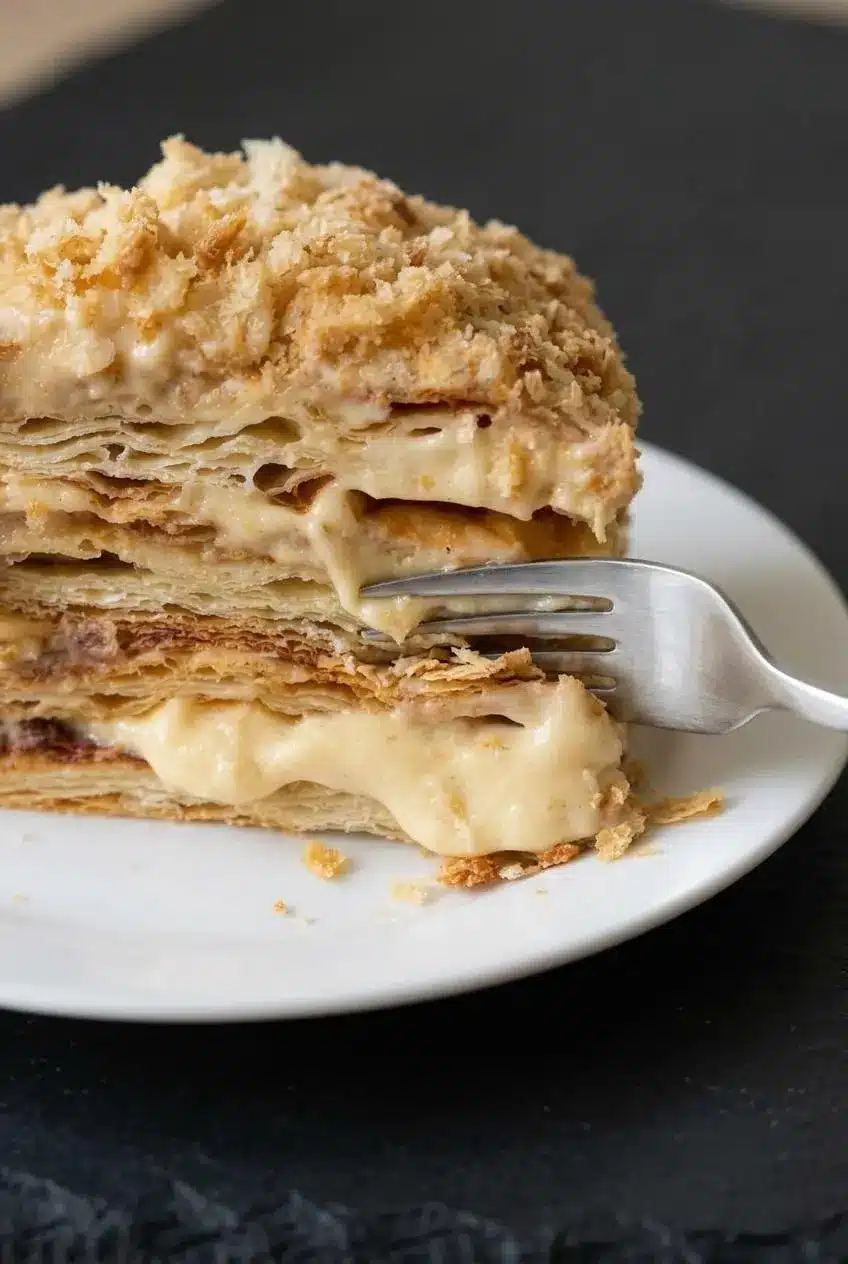
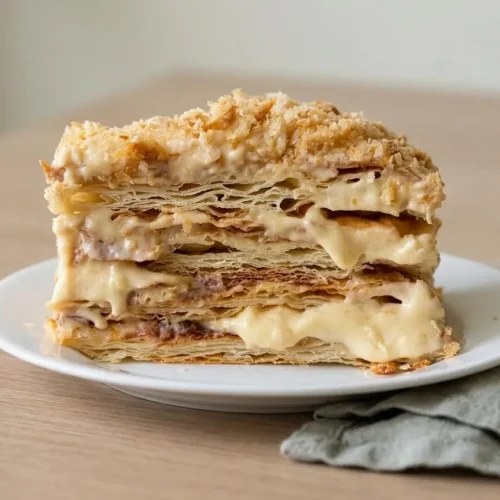
The overnight rest gives this Eastern European-style cake its defining texture: buttery pastry that yields to a fork while keeping distinct layers.
French mille-feuille commonly emphasizes crisp pastry and clearly separated cream layers. Here, the goal is a softer, cohesive cake. The custard-and-whipped-cream filling resembles diplomat cream, with sweetened condensed milk adding sweetness and body.
Honey cake, often called Medovik, takes another route. Its honey-sweetened, cookie-like layers differ from this quick laminated pastry, and its filling commonly has a tangy cream component. Both cakes come in different versions.
Key Ingredients and Their Roles
Butter creates flaky pockets, flour and eggs provide structure, and water hydrates the dough. In the filling, eggs and cornstarch thicken the milk, butter adds richness, and whipped cream lightens the custard while condensed milk supplies sweetness and body.
The Quick Laminated Dough
- 730 g All-purpose flour
- 580 g Unsalted butter (Must be rock-cold for shredding)
- 180 g Ice-cold water
- 2 large eggs
- 10 g Vinegar
- 8 g Salt
The Thick Custard Base
- 650 ml Milk
- 4 whole eggs (Or substitute 8 large egg yolks for an even richer texture)
- 300 g Sugar
- 5 tablespoons Cornstarch
- 100 g Butter
The Lightened Cream Filling
- 500 ml Heavy whipping cream
- 1 can Sweetened condensed milk
- Custard Base All of your prepared, completely cooled Custard Base
Cold butter and ice water: Keep the butter in distinct pieces rather than letting it blend completely into the flour. During baking, moisture turns to steam and helps separate the pastry into flaky layers. Look for visible butter shreds in cool, slightly rough dough.
Vinegar: Its acidity can help dough tenderness and handling, but it doesn’t replace resting. Dough that springs back still needs a pause, even with vinegar in the mixture.
Custard eggs: Four whole eggs give the custard a fuller, firmer body. Eight large yolks instead create a richer texture and deeper yellow color. That substitution applies only to the custard, not the dough eggs.
Cornstarch and cream: Cornstarch gives the cooked custard enough thickness to support the layers. Whipped cream then adds air, so fold gently to preserve it.
Sweetened condensed milk: Check the package before baking because can sizes vary. Use sweetened condensed milk, not evaporated milk, which doesn’t supply the same sweetness or consistency.
I keep the butter chilled until the grater and mixer bowl are ready so the shreds stay firm rather than smearing.
How to Make Napoleon Cake Step by Step
Plan around the separate rests, not just the oven time. Each batch of pastry bakes for 10 to 12 minutes, but the dough, custard, and assembled cake all need their own chilling windows.
1. Shred and Fold the Pastry Dough
- Grate the 580 g butter through a box grater’s coarse holes, then load a paddle-equipped stand mixer with the shreds, 730 g flour, 2 eggs, 10 g vinegar, 8 g salt, and 180 g ice-cold water.
The butter should enter the bowl as firm shreds, not a soft paste. - Run the mixer at low speed and stop as soon as the ingredients hold together.
A cool, uneven-looking dough with visible butter is the target, rather than a smooth, elastic ball. - Press the dough into a compact rectangle, seal it in plastic wrap, and flash-chill it in the freezer for 30 minutes.
The wrapped block should feel firm enough to roll without smearing the butter. - Cut the block in half and roll each half on a floured counter to approximately 75 x 20 cm, then give each piece 1 book fold followed by 2 letter folds.
For the book fold, bring the short ends toward the center and close the dough in half; for each letter fold, roll it out again and fold it into thirds. - Pause folding and chill the dough in the refrigerator or freezer for 10 to 15 minutes whenever it becomes soft or difficult to manage.
Continue when the dough feels cool and the butter no longer smears under the rolling pin. - Refrigerate both folded pieces for 1 to 2 hours before rolling the baking layers.
This rest relaxes the dough so it stretches more willingly and resists shrinking less.
2. Roll, Bake, and Trim the Layers
- Cut each folded piece into 2 portions for 4 thicker layers, or into 4 portions for 8 thinner layers.
The thinner option creates more alternating layers of pastry and cream. - Roll each portion into a rectangle slightly larger than a half-sheet pan, pausing for a 10 to 15-minute refrigerator rest if it recoils.
The sheet should stay extended rather than pulling back as soon as the rolling pin lifts. - Move the rolled dough onto parchment-lined baking sheets.
Keep the sheets spread flat rather than folded or bunched. - Bake the pastry at 400°F (200°C) for 10 to 12 minutes per batch.
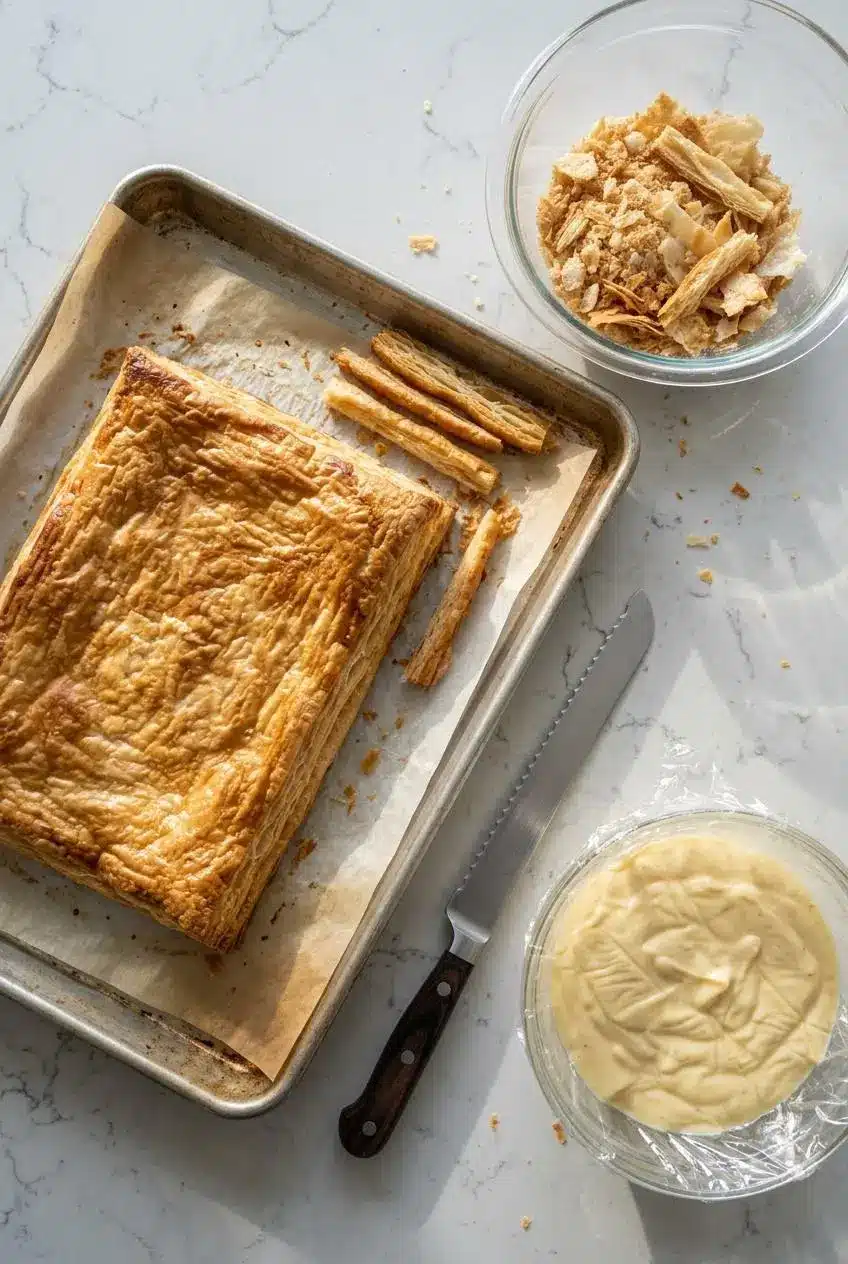
Use a deep golden color and visibly flaky surface as the finish cues. - Trim the hot sheets promptly with a sharp serrated knife to create matching rectangles, saving all the scraps.
After cooling, the scraps should crush into fine crumbs for coating the cake.
3. Cook the Custard & Cream Filling
- Combine 650 ml milk, 4 whole eggs or 8 yolks, 300 g sugar, and 5 tablespoons cornstarch in a medium saucepan, whisking out every dry pocket before heating.
The uncooked mixture should look uniform, with no visible starch clumps. - Stir continuously over medium heat until the custard thickens and bubbles, then keep cooking and stirring for 1 more minute.
The mixture should become thick throughout, not merely develop a thick patch on the bottom. - Take the saucepan off the burner and blend in the 100 g butter.
Keep stirring until the custard looks smooth with no separate buttery streaks. - Move the custard into a clean bowl, lay plastic wrap against its surface, and refrigerate it for several hours until completely cool.
Direct contact with the wrap prevents an exposed surface from forming a skin. - Whip 500 ml heavy cream in a large bowl to stiff peaks, mix in the full can of sweetened condensed milk, then gently fold the mixture into the cold custard.
Stop when the filling looks evenly combined, smooth, and fluffy.
4. Assemble and Rest Overnight
- Set a pastry rectangle on a serving tray or cake board and spread cream generously across it.
A level coating gives the next sheet an even surface to rest on. - Continue stacking pastry and cream, applying light downward pressure after adding each sheet.
Press only enough to level the cake, without pushing filling out around the edges. - Spread the remaining filling over the top and all four sides.
The cream should cover the exposed pastry and provide a surface for the crumbs to cling to. - Distribute the reserved pastry crumbs across the top and sides.
A continuous crumb coating gives the cake its textured finish. - Refrigerate the assembled cake for at least 6 hours, preferably overnight, and serve it cold.
The rested layers should feel more tender and cohesive than the freshly assembled sheets.
Expert Tips and Troubleshooting for Napoleon Cake
Texture problems usually begin with dough that gets too warm, custard that isn’t fully cooled, or a cake cut before its rest is complete.
Why the Dough Springs Back or Turns Tough
- Springing back: Tense gluten makes the sheet recoil; use the refrigerator rest described above rather than pressing harder with the rolling pin.
- Tough pastry: Excess mixing develops a more elastic dough; stop mixing while it still looks rough and contains visible butter.
- Smearing butter: Soft dough loses distinct butter pieces; pause and chill before continuing the folds.
How to Keep Warm Pastry Sheets From Shattering
- Cracked edges: Fully cooled pastry becomes brittle; have the serrated knife ready and trim while each sheet is still warm.
- Crushed corners: Heavy downward pressure breaks delicate layers; use a gentle sawing motion instead.
- Broken scraps: Save them rather than discarding them; their irregular shapes disappear once crushed into the coating.
How to Combine Cold Custard and Whipped Cream Without Losing Volume
- Custard lumps: Dry starch pockets and uneven cooking can create lumps; whisk thoroughly before heating and stir constantly as the mixture thickens.
- A custard skin: Exposed custard dries on top; place the wrap directly against the surface during cooling.
- Loose filling: Warm custard can soften whipped cream; combine the components only when the custard is completely cold.
- Lost volume: Vigorous beating knocks air from the cream; lift the mixture from the bottom and turn it gently over itself, stopping when no streaks remain.
Lumpy custard and deflated cream are different problems. More beating won’t restore air to a heavy filling, so prioritize a smooth custard before folding and keep both components cool.
Why the Layers Slide When the Cake Is Cut
Freshly assembled pastry is still crisp enough to resist the knife and shift against the filling. The refrigerated rest lets moisture soften the sheets so they cut together. If the cake hasn’t finished resting, give it that time rather than trying to force clean slices.
Napoleon Cake Variations and Shaping Options
Choose the layer format before dividing the dough, and keep optional flavor changes separate from the rectangular method above.
8-Egg-Yolk Silkier Custard Option
Replace the custard’s 4 whole eggs with 8 large egg yolks for a richer mouthfeel and deeper color. Keep the other custard ingredients unchanged. The yolks replace the whole eggs; they aren’t an addition.
12-Layer Round Cake vs Rectangular Sheet Layers
- 4 thicker rectangular layers: This official option uses fewer sheets and gives each pastry layer more presence.
- 8 thinner rectangular layers: This official option creates more pastry-and-cream interfaces and a finer layered texture.
- 12 round layers: For an optional traditional-style shape, divide the dough into 12 portions, roll thin rounds, and use a plate or cake ring as a trimming guide.
For round layers, optional fork docking can help limit uneven puffing. Retain the trimmings for crumbs, but don’t assume the rectangular baking window guarantees the same result for every round size or thickness.
If you’d rather bake a rectangular cake without separate pastry sheets, kefir sheet cake offers a different baking project.
Optional Vanilla, Flaky Salt, and Toasted Crumbs
- Vanilla bean paste: Stir it into the warm custard for a more pronounced vanilla aroma.
- Flaky sea salt: An optional pinch in the warm custard can balance the filling’s sweetness.
- Toasted crumbs: Lightly toast the reserved trimmings before crushing for a stronger browned-butter aroma, watching closely because the scraps are already golden.
Making Ahead, Chilling, and Serving Clean Slices
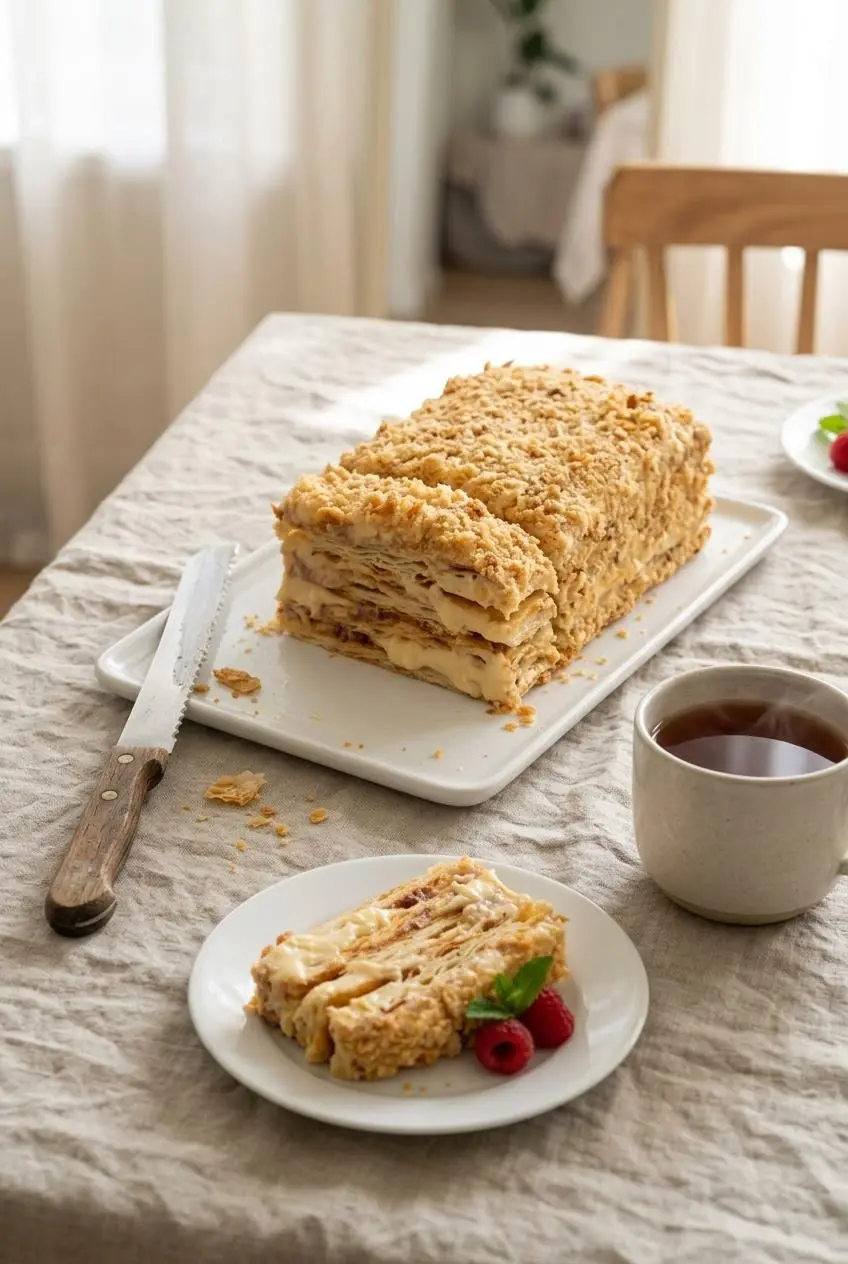
Work backward from serving time and leave room for the assembled cake’s overnight rest.
- Dough: Complete the folds and required refrigerator rest before rolling the sheets.
- Custard: Allow its separate cooling window before making the finished filling.
- Assembly: Choose a tray that fits in the refrigerator with space for a cover.
- Serving: Keep the cake cold until you’re ready to cut it.
Preparing the Laminated Dough for Baking
Keep the dough tightly wrapped during its refrigerator rest so the surface doesn’t dry out. Treat the flash chill and post-fold rest as working stages, not interchangeable pauses: the first firms the butter, while the later rest also makes rolling easier.
Refrigerating the Assembled Custard Cake
Cover the cake without pressing the cover into its crumb coating and keep it refrigerated between servings. Maintain a refrigerator temperature of 40°F or below for egg-containing leftovers.
The overnight rest is a texture-development step, not a refrigerator shelf-life guarantee. Avoid planning extended storage around this cream-filled cake.
Cutting and Serving the Crumb-Coated Layers
Use a sharp serrated knife with gentle back-and-forth strokes. Let the blade work through the cold layers instead of pressing straight down and squeezing out the cream.
Keep pastry crumbs as the coating, then add fresh berries, chopped nuts, or mint as optional garnishes. Unsweetened hot tea or espresso makes a pleasant contrast to the rich filling.
For another cream-filled celebration dessert, consider creamy cannoli cake.
Conclusion
Buttery pastry and fluffy custard make this cake rewarding, but the quiet resting stages matter as much as the baking. Keep the dough cold and stop mixing before it turns smooth and elastic.
Give the assembled layers their overnight rest, then slice the cake cold. Patience brings the pastry and cream together into tender, distinct layers.
Frequently Asked Questions
What Is a Napoleon Cake Made Of?
It combines laminated butter pastry with cooked custard, whipped cream, and sweetened condensed milk. Crushed pastry trimmings coat the top and sides.
Is Napoleon Cake the Same as Honey Cake?
No. Napoleon uses flaky butter pastry, while honey cake, or Medovik, uses honey-sweetened, cookie-like layers. Medovik commonly has a tangy cream filling, though both desserts have variations.
Can I Prepare the Napoleon Cake Dough Before Assembly?
Yes. The dough has its own chilling and resting stages before baking, separate from the custard cooling and cake assembly. Keep it wrapped during the specified rests and follow the dough preparation sequence above.
Why Is My Dough Shrinking When I Roll It?
The gluten needs time to relax. Return the dough to the refrigerator for the rest specified in the method, then resume rolling gently rather than forcing it thinner.
How Long Does Napoleon Cake Last in the Refrigerator?
Keep it covered and refrigerated, and avoid extended storage. The assembled chilling period in the method softens the pastry for serving; it doesn’t establish a shelf-life limit for the custard-filled cake.
Napoleon Cake

Equipment
- Box grater
- Stand mixer
- Medium Saucepan & Whisk
- Large Mixing Bowl
- Half-Sheet Baking Pans & Parchment Paper
- Rolling Pin
- Serrated Knife
- Plastic wrap
- Kitchen scale
Ingredients
The Quick Laminated Dough
- 730 g All-purpose flour
- 580 g Unsalted butter (Must be rock-cold for shredding)
- 180 g Ice-cold water
- 2 large eggs
- 10 g Vinegar
- 8 g Salt
The Thick Custard Base
- 650 ml Milk
- 4 whole eggs (Or substitute 8 large egg yolks for an even richer texture)
- 300 g Sugar
- 5 tablespoons Cornstarch
- 100 g Butter
The Lightened Cream Filling
- 500 ml Heavy whipping cream
- 1 can Sweetened condensed milk
- Custard Base All of your prepared, completely cooled Custard Base
Instructions
1. Shred and Fold the Pastry Dough
- Grate the 580 g butter through a box grater’s coarse holes, then load a paddle-equipped stand mixer with the shreds, 730 g flour, 2 eggs, 10 g vinegar, 8 g salt, and 180 g ice-cold water. The butter should enter the bowl as firm shreds, not a soft paste.
- Run the mixer at low speed and stop as soon as the ingredients hold together. A cool, uneven-looking dough with visible butter is the target, rather than a smooth, elastic ball.
- Press the dough into a compact rectangle, seal it in plastic wrap, and flash-chill it in the freezer for 30 minutes. The wrapped block should feel firm enough to roll without smearing the butter.
- Cut the block in half and roll each half on a floured counter to approximately 75 x 20 cm, then give each piece 1 book fold followed by 2 letter folds. For the book fold, bring the short ends toward the center and close the dough in half; for each letter fold, roll it out again and fold it into thirds.
- Pause folding and chill the dough in the refrigerator or freezer for 10 to 15 minutes whenever it becomes soft or difficult to manage. Continue when the dough feels cool and the butter no longer smears under the rolling pin.
- Refrigerate both folded pieces for 1 to 2 hours before rolling the baking layers. This rest relaxes the dough so it stretches more willingly and resists shrinking less.
2. Roll, Bake, and Trim the Layers
- Cut each folded piece into 2 portions for 4 thicker layers, or into 4 portions for 8 thinner layers. The thinner option creates more alternating layers of pastry and cream.
- Roll each portion into a rectangle slightly larger than a half-sheet pan, pausing for a 10 to 15-minute refrigerator rest if it recoils. The sheet should stay extended rather than pulling back as soon as the rolling pin lifts.
- Move the rolled dough onto parchment-lined baking sheets. Keep the sheets spread flat rather than folded or bunched.
- Bake the pastry at 400°F (200°C) for 10 to 12 minutes per batch. Use a deep golden color and visibly flaky surface as the finish cues.
- Trim the hot sheets promptly with a sharp serrated knife to create matching rectangles, saving all the scraps. After cooling, the scraps should crush into fine crumbs for coating the cake.
3. Cook the Custard & Cream Filling
- Combine 650 ml milk, 4 whole eggs or 8 yolks, 300 g sugar, and 5 tablespoons cornstarch in a medium saucepan, whisking out every dry pocket before heating. The uncooked mixture should look uniform, with no visible starch clumps.
- Stir continuously over medium heat until the custard thickens and bubbles, then keep cooking and stirring for 1 more minute. The mixture should become thick throughout, not merely develop a thick patch on the bottom.
- Take the saucepan off the burner and blend in the 100 g butter. Keep stirring until the custard looks smooth with no separate buttery streaks.
- Move the custard into a clean bowl, lay plastic wrap against its surface, and refrigerate it for several hours until completely cool. Direct contact with the wrap prevents an exposed surface from forming a skin.
- Whip 500 ml heavy cream in a large bowl to stiff peaks, mix in the full can of sweetened condensed milk, then gently fold the mixture into the cold custard. Stop when the filling looks evenly combined, smooth, and fluffy.
4. Assemble and Rest Overnight
- Set a pastry rectangle on a serving tray or cake board and spread cream generously across it. A level coating gives the next sheet an even surface to rest on.
- Continue stacking pastry and cream, applying light downward pressure after adding each sheet. Press only enough to level the cake, without pushing filling out around the edges.
- Spread the remaining filling over the top and all four sides. The cream should cover the exposed pastry and provide a surface for the crumbs to cling to.
- Distribute the reserved pastry crumbs across the top and sides. A continuous crumb coating gives the cake its textured finish.
- Refrigerate the assembled cake for at least 6 hours, preferably overnight, and serve it cold. The rested layers should feel more tender and cohesive than the freshly assembled sheets.