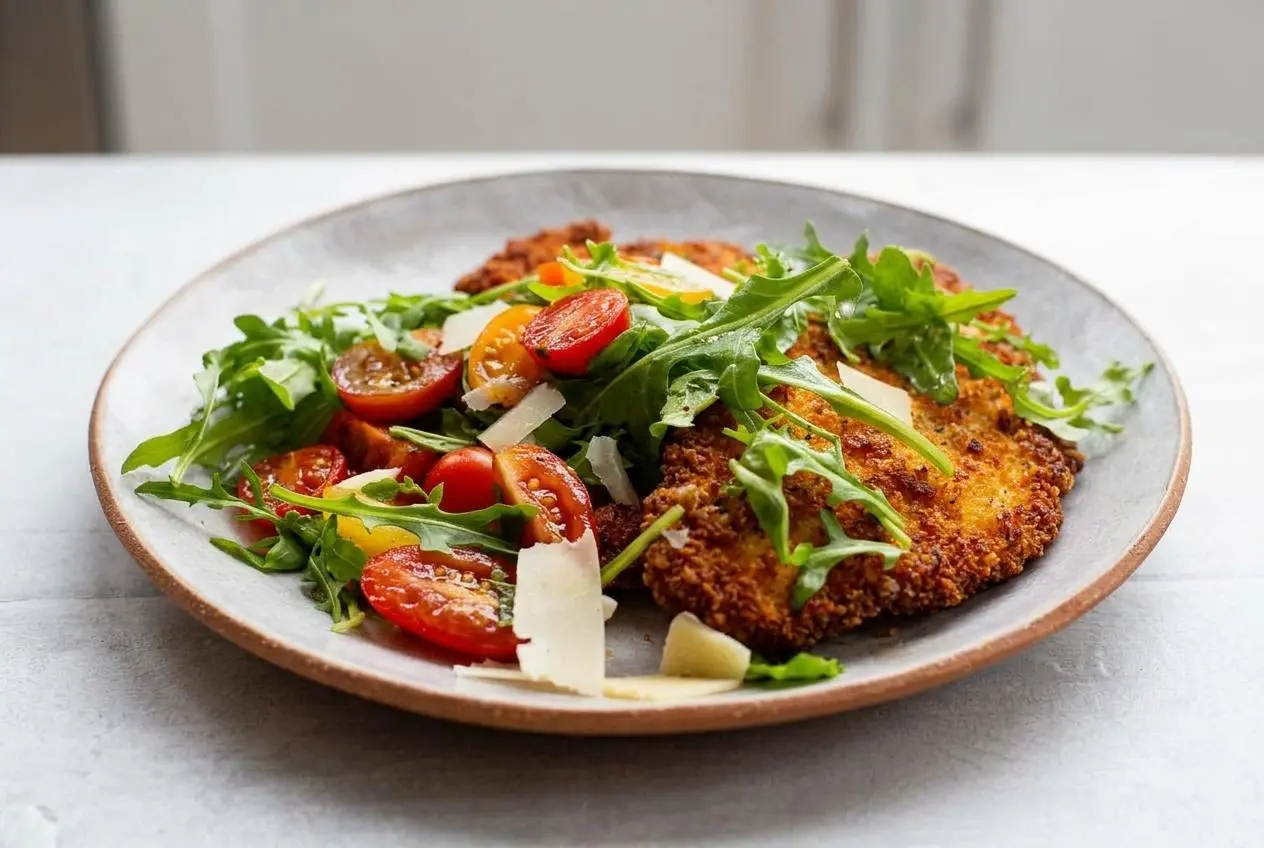
Chicken Milanese is a thin breaded chicken cutlet, pan-fried until golden and crisp, then finished with lemon and a fresh arugula salad for contrast.
Chicken Milanese gives you that restaurant-style mix of crunchy coating, juicy chicken, and bright, peppery greens without complicated steps. The thin cutlets cook quickly, and the Parmesan breadcrumb crust brings big flavor.
You’ll hear a lively sizzle as each piece hits the oil, and the kitchen starts smelling like fried chicken, lemon, and garlic almost right away. That resting step before frying is the little trick that changes everything.
Set a wire rack over a sheet pan before you start so the finished cutlets stay crisp instead of steaming.
Why You’ll Love This Chicken Milanese Recipe
This is the kind of dinner that feels a little fancy but fits real life. The chicken stays tender, the crust turns deeply golden, and the fresh salad keeps the whole plate from feeling heavy.
- Crispy, golden-brown coating with juicy, tender chicken inside.
- Bright lemon, tomatoes, basil, and arugula balance the rich fried cutlets.
- Easy to scale for a weeknight dinner or a casual dinner party.
- Flexible enough to serve with salad, pasta, potatoes, or in a sandwich.
Ingredients for the Perfect Chicken Milanese
Each ingredient earns its place here, building crunch, tenderness, savory depth, and a fresh lemony finish that keeps the whole dish balanced.
For the Chicken
- 2 ½ cups homemade or panko breadcrumbs
- 2 cloves garlic (finely minced)
- 3 tablespoons finely minced fresh parsely
- ¼ teaspoon kosher salt (plus more for seasoning)
- ¼ teaspoon freshly ground pepper (plus more for seasoning)
- 1 cup finely grated parmesan cheese (divided)
- 3 large eggs
- 1 cup all purpose flour
- 2 lbs boneless (skinless chicken breasts, thinly sliced)
- olive oil or neutral oil for frying
For the Salad
- 2-3 cups assorted heirloom tomatoes (cut into a large pieces, or cherry tomatoes cut in half)
- 1 clove garlic (smashed with the side of your knife)
- 3 tablespoons freshly squeezed lemon juice
- kosher salt and freshly cracked black pepper to taste
- ½ cup extra virgin olive oil
- 8 ounces fresh arugula (cleaned and dried)
- ½ cup loosely packed fresh basil leaves
- 4 ounces Parmigiano Reggiano or Grana Padano (shaved with a vegetable peeler)
- lemon wedges for serving
The core structure is classic: chicken for tenderness, flour to help the coating grab on, egg to bind, and breadcrumbs for crunch. Panko gives a lighter, airier crust than regular breadcrumbs, which tend to fry up denser. Parmesan in both the breadcrumb mixture and the egg mixture adds a savory, nutty boost that makes the cutlets taste fuller and more seasoned. The salad matters too. Peppery arugula, juicy tomatoes, basil, lemon juice, and shaved cheese cut through the richness and make the plate feel lively. If you want a subtle twist, finely ground toasted almonds can be mixed into the breadcrumbs for extra nuttiness, but keep that as an optional flourish.
I like using my fingers to really rub the minced garlic into the breadcrumbs so you don’t end up with little clumps in one bite and none in the next.
How to Make Chicken Milanese (Step-by-Step)
The process is straightforward once you set up the flour, egg, and breadcrumb stations in order. Thin chicken, an even coating, and properly heated oil are what turn this from good to great.
For the Chicken
- Combine the breadcrumbs, minced garlic, parsley, ½ cup grated parmesan, salt, and pepper in a medium shallow dish.
Mix until the garlic is evenly worked through the crumbs so the coating looks uniform instead of patchy. - Whisk the eggs with the remaining ½ cup parmesan, salt, black pepper, and 1 tablespoon of water in a second shallow dish, then season the flour with salt and pepper in a third dish.
You should have three clearly separate stations, and the egg mixture should look smooth and lightly thickened. - Lay one piece of chicken on a cutting board, cover it with plastic wrap or parchment, and pound it with a meat mallet until it is about ½ inch thick; repeat with the rest.
This evens out the thickness so the cutlets stay tender and cook at the same pace. - Season both sides of each piece of chicken with salt and pepper.
A full, even seasoning layer helps the chicken taste good all the way through, not just on the crust. - Dredge each cutlet in the flour and shake off the excess, coat it in the egg mixture, then press it into the breadcrumb mixture until well covered.
The flour helps adhesion, the egg acts as the binder, and the crumbs should cling in a full layer without bare spots. - Heat a generous layer of oil in a large skillet over medium-high heat and fry 1 to 3 pieces at a time, depending on pan size, until golden brown on both sides, then transfer them to a wire rack.
The chicken should hit the oil with a lively sizzle, and the crust should look toasted and deep golden brown, not pale or dark.
For the Salad and Serving
- Stir the tomatoes, garlic clove, lemon juice, olive oil, salt, and pepper together in a bowl, then remove the garlic if you like and tear in the basil just before serving.
The tomatoes should look glossy and juicy, and the dressing at the bottom of the bowl becomes part of the final seasoning. - Toss the arugula with a little of the tomato juices, place a chicken cutlet on each plate, and pile the arugula on top before spooning over the tomatoes.
Finish with shaved parmesan, a drizzle of olive oil, and lemon wedges so every serving stays fresh, crisp, and bright.
Pounding the chicken thin does two jobs at once. It tenderizes the meat and keeps the cutlets cooking evenly, so you don’t get a dry edge with an underdone center. During breading, think of the coating as layers with a purpose: flour dries the surface and gives the egg something to hold on to, egg creates the sticky bridge, and breadcrumbs form the crisp shell. Once the cutlets go into the pan, avoid fussing with them. Let the crust set, then flip when the underside is richly browned and releases cleanly.
Tips for the Crispiest, Juiciest Results
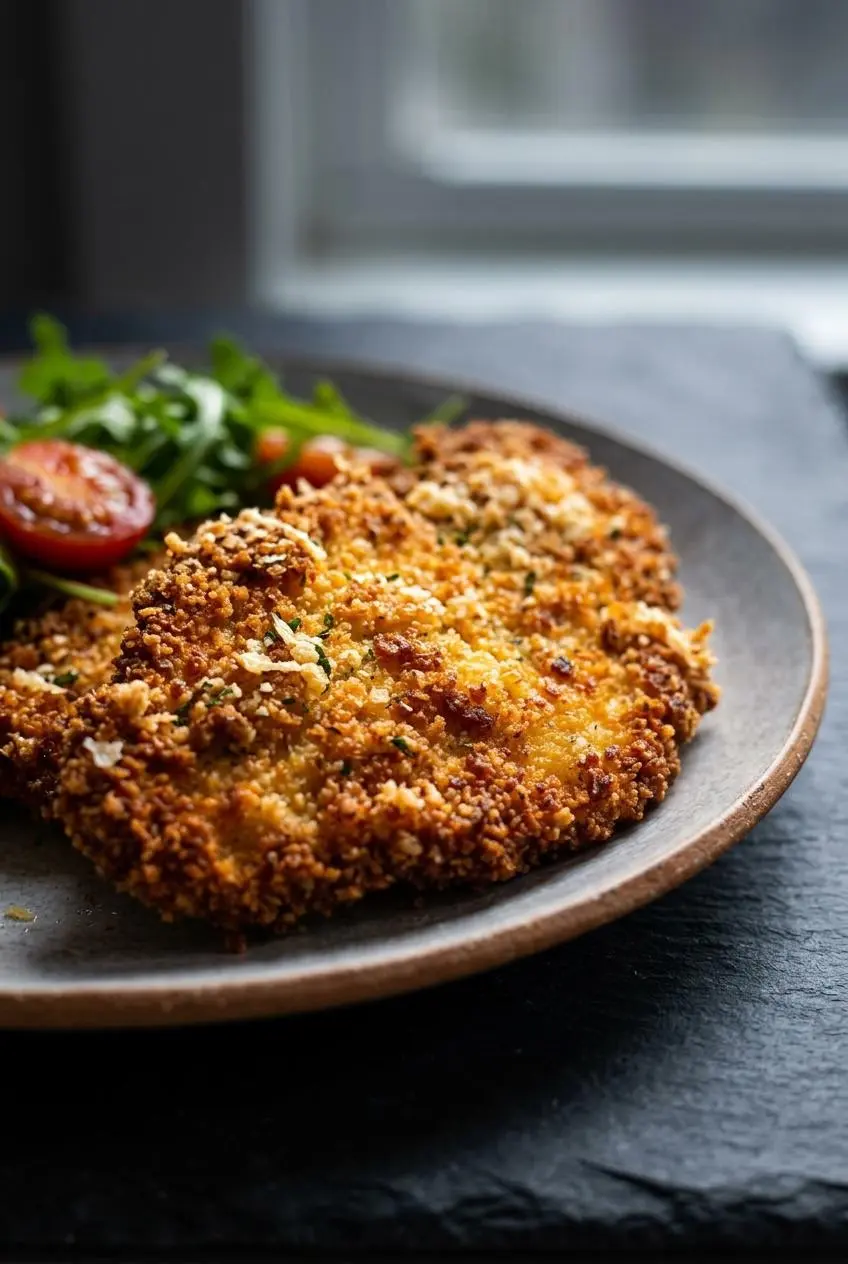
A few small technique choices make the difference between decent fried chicken and truly great Chicken Milanese. This is where you save yourself from soggy breading, uneven cooking, and that frustrating moment when the crust slides right off.
How to Prepare Perfect Chicken Cutlets
If your chicken breasts are thick, butterfly them first by slicing horizontally through the middle and opening each one like a book. Then separate if needed and pound each piece between plastic wrap or parchment until it reaches an even ¼ to ½-inch thickness.
This is the most important step for texture. Thin, even cutlets cook quickly and stay tender. Thick spots take longer, which pushes the thinner parts toward dryness. Keep the pounding firm but controlled, starting at the center and working outward so the meat spreads without tearing.
Set Up an Efficient Breading Station
Arrange the dishes in a straight line: flour first, egg second, breadcrumbs last, with a clean plate or rack at the end for the breaded cutlets. That simple setup keeps the process fast and stops you from backtracking with messy hands.
Use one hand for dry ingredients and the other for the egg. It sounds fussy, but it saves you from building breadcrumb mittens on your fingers. Press the crumbs gently but firmly onto the chicken so the coating adheres instead of falling off in the skillet.
Rest Before You Fry
After breading, let the cutlets sit on a wire rack before they go into the pan. That short rest helps the coating hydrate slightly and bond to the chicken, which means fewer bare spots during frying.
This is also a good time to heat the oil and organize the salad ingredients. If you skip the rest and move straight to frying, the crust is more likely to slip or break when you flip it.
Choosing the Best Frying Oil
The best frying oil depends on whether you want more flavor, more heat tolerance, or a balance of both. For Chicken Milanese, a mix of olive oil and a neutral oil is a smart middle ground because you get olive oil flavor without pushing it too hard over the heat.
| Oil Type | Smoke Point | Flavor Profile and Best For |
|---|---|---|
| Olive oil | Medium | More flavor and a classic Italian feel, best when blended with another oil |
| Vegetable or canola oil | Medium-high to high | Neutral taste and steady frying, great for crisp browning |
| Avocado oil | High | Clean flavor and strong heat tolerance, useful for hotter frying |
Whichever oil you use, make sure the chicken sizzles as soon as it touches the pan. A weak gurgle means the oil is too cool, and the coating will start absorbing fat instead of crisping. The same principle matters in other fried dishes too, including crispy fried chicken wings.
What to Serve with Chicken Milanese
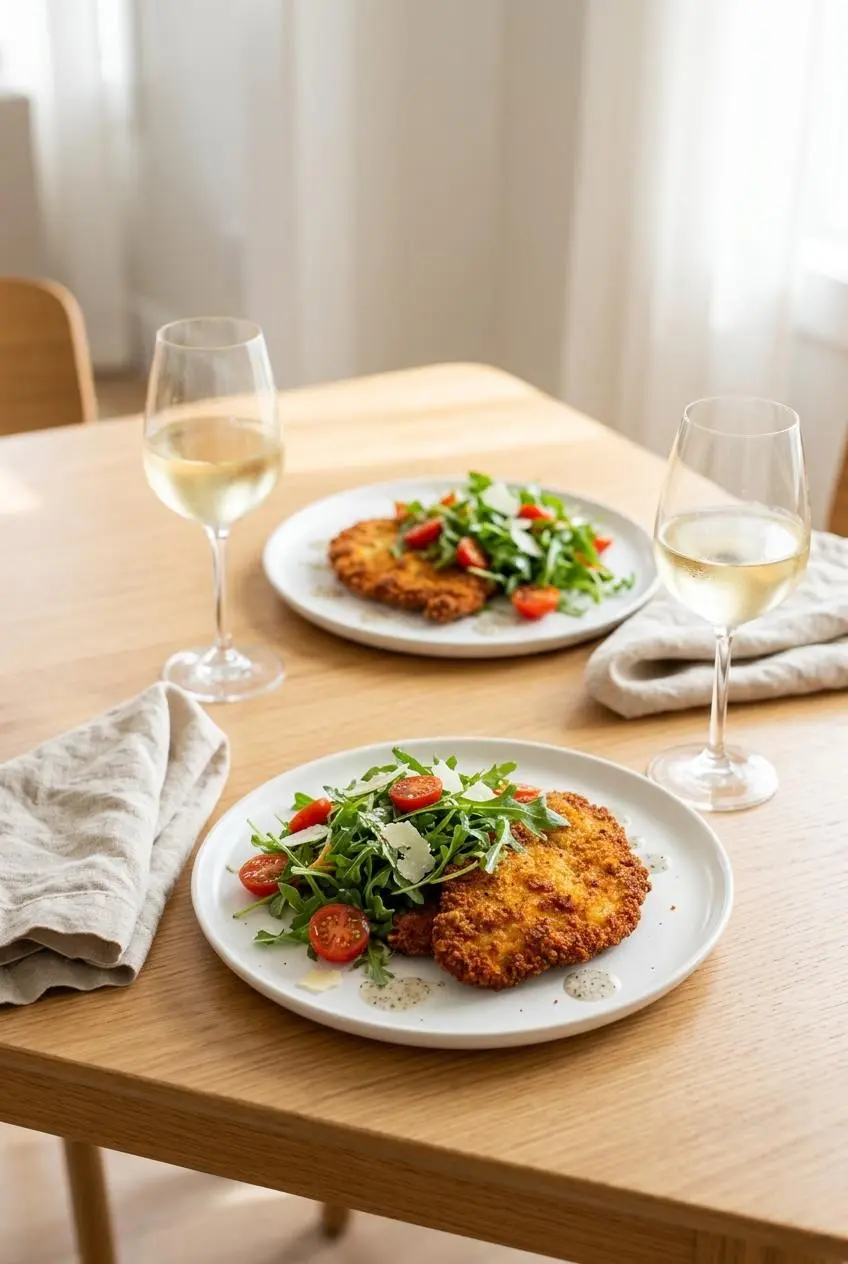
The classic pairing is already built into this recipe: arugula tossed with some of the tomato juices, topped with marinated tomatoes, shaved cheese, olive oil, and plenty of lemon. That fresh, peppery salad is exactly what the crunchy cutlet needs.
If you want to turn it into a bigger meal, serve it over pappardelle or spaghetti with a light lemony sauce. For that kind of plate, a delicious Lemon Chicken Pasta is a good flavor reference, especially if you love the lemon and Parmesan combination. Roasted potatoes, mashed potatoes, or a Caesar salad also work well.
Chicken Milanese over pasta is especially good when you keep the sauce light. Think lemon butter, a quick tomato sauce, or just olive oil, garlic, and parsley. You can also tuck a cutlet into a crusty roll with provolone and greens for a very solid sandwich lunch.
Variations and Cooking Methods
The classic version is hard to beat, but this dish adapts well if you want a different texture, a faster cleanup, or a richer finish. Keep the main method as written the first time, then play around once you know how the cutlets should look and feel.
Air Fryer Chicken Milanese
For an air fryer version, bread the chicken the same way, then lightly spray both sides with oil. Cook at 375 to 400 °F until the coating is crisp and the chicken is cooked through, flipping halfway so both sides brown evenly.
Because air fryers vary, start checking once the crust looks deeply golden. The result is usually a little less rich than pan-frying, but still very crisp. Give the basket enough space so the air can move around the cutlets instead of trapping steam.
Sauce Options for Chicken Milanese
If you want Chicken Milanese with sauce, keep the sauces quick and bright so they support the crispy crust instead of smothering it. A spooned-over finish works better than drowning the cutlet.
| Option | What It Adds | Best Use |
|---|---|---|
| Lemon-caper pan sauce | Salty, sharp, and buttery | Perfect when you want a classic restaurant feel |
| Creamy tomato and fennel sauce | Soft sweetness and a richer finish | Great over pasta or for a cozier dinner |
| Quick marinara | Bright tomato flavor | Best when you want a bridge toward chicken parm territory |
For a lemon-caper pan sauce, pour off most of the frying oil, then add a splash of water and lemon juice to the skillet with capers and scrape up the browned bits. Swirl in a little butter at the end if you want it silkier. For a creamy tomato and fennel sauce, soften sliced fennel in olive oil, add crushed tomatoes, then finish with a splash of cream until the sauce turns mellow and lightly rosy. If you love saucy Italian chicken dinners, Chicken Arrabbiata is another good one to keep in rotation.
One useful distinction: Chicken Milanese is served as a crisp breaded cutlet with lemon or salad, while Chicken Parmesan takes that breaded cutlet, adds marinara and cheese, then finishes it until bubbly. Similar starting point, very different mood.
Gourmet Upgrade: Add Prosciutto and Melted Cheese
For a richer spin, top each hot cutlet with a slice of prosciutto and a slice of Taleggio, Gruyere, or Havarti right after frying. The residual heat softens the cheese and warms the prosciutto without taking away the crust underneath.
This version leans a little toward the comfort-food appeal of classic Chicken Cordon Bleu, but keeps the open-faced Milanese style. It’s excellent with greens or potatoes when you want something a bit more indulgent.
Using Chicken Thighs
Boneless, skinless chicken thighs work well here if you prefer darker meat. Pound them to an even thickness just like breasts so the coating browns evenly and the centers cook at the same pace.
Thighs stay a little juicier and often bring more flavor, though they may need a touch more time in the skillet. If you enjoy the panko-style crispness in other cutlet recipes, Japanese Chicken Katsu is a fun cousin to compare.
How to Store and Reheat
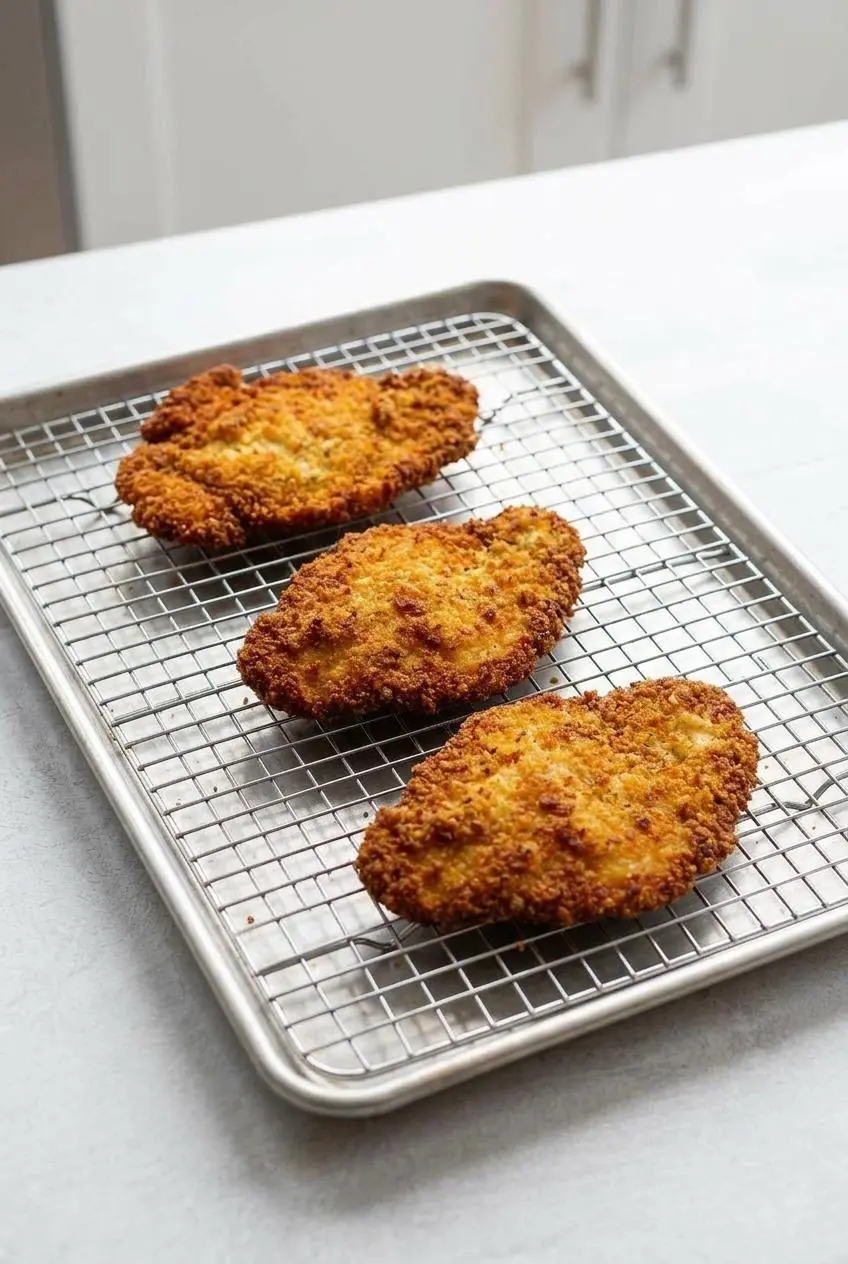
This dish is at its absolute best right after frying, but leftovers can still be very good if you protect the texture. The main rule is to keep the salad and chicken separate so the crust stays as crisp as possible.
Storing Leftovers
Let the cutlets cool, then place them in an airtight container and refrigerate them. Store the tomato mixture, arugula, and any extra lemon separately so the breading does not soften from moisture.
If you know you’ll have leftovers, it helps to keep some salad off the chicken from the start. That way the crust stays intact and you only dress what you plan to eat right away.
Freezing Instructions
Uncooked breaded cutlets can be arranged in a single layer until firm, then packed with parchment between layers if you want to save them for another time. Cooked cutlets can also be frozen once fully cooled, though the crust is usually best when freshly made.
For the best texture, freeze the chicken without the salad and add the fresh toppings only after reheating. Avoid trapping warm steam in the container before chilling or freezing, since that softens the coating.
The Best Way to Reheat
Reheat the cutlets in a hot oven or air fryer until the coating turns crisp again and the chicken is heated through. Skip the microwave here if you can, because it tends to soften the crust and make the breading chewy.
A wire rack helps during reheating just like it does after frying. Air can move underneath, which keeps the bottom from getting damp.
Troubleshooting Common Problems
Chicken Milanese is straightforward, but a few small mistakes can cause big frustration. If something goes wrong, the fix is usually simple.
| Problem | Likely Cause | How to Fix It |
|---|---|---|
| Breading falls off | The chicken was damp, the crumbs were not pressed on well, or the cutlets went straight into the pan after breading | Pat the chicken dry, shake off extra flour, press the breadcrumbs on firmly, and let the breaded cutlets rest before frying |
| Chicken is soggy or greasy | The oil was too cool or the pan was overcrowded | Test the oil with a breadcrumb and fry in batches so the coating crisps instead of soaking up oil |
| Chicken is dry | The cutlets were pounded too thin or cooked too long | Pound to an even ¼ to ½-inch thickness and pull the chicken once the coating is deeply golden and the center is just cooked through |
| Uneven browning | The cutlets were different thicknesses or the pan heat was inconsistent | Pound evenly and give the pan a moment to recover between batches |
| Crust gets scraped off during flipping | The cutlets were moved too early or flipped with rough handling | Wait until the first side releases easily and use a thin spatula or fork instead of grabbing hard with tongs |
Conclusion
Chicken Milanese rewards good setup more than fancy technique. Pound the cutlets evenly, bread them carefully, let them rest, and fry them in properly heated oil, and you get that crisp, golden restaurant feel at home.
Serve it with the lemony arugula salad for the classic version, or branch out with pasta, sauce, or a sandwich if the mood strikes. Once you hear that first lively sizzle, you’re in very good shape.
Frequently Asked Questions (FAQ)
How do you get the breading to stick to Chicken Milanese?
Pat the chicken dry before it goes into the flour. Shake off excess flour, then press the breadcrumbs firmly onto the cutlets so they fully adhere. Let the breaded chicken rest on a wire rack before frying. That rest helps the coating set and makes it less likely to slide off in the pan.
What is the difference between Chicken Milanese and Wiener Schnitzel?
The technique is very similar. Both are thin breaded cutlets that are fried until crisp. The main difference is the meat. Wiener Schnitzel is traditionally made with veal, while Chicken Milanese uses chicken.
Why is my Chicken Milanese greasy?
The most common reason is oil that is not hot enough. When the oil is too cool, the coating absorbs fat instead of crisping quickly. Test the pan with a breadcrumb first. If it doesn’t sizzle right away, give the oil more time.
Can you prepare Chicken Milanese ahead of time?
Yes, up to a point. You can bread the cutlets ahead and keep them chilled on a rack until you are ready to fry. For the best texture, fry just before serving and keep the salad separate until the last minute. That way the crust stays crisp and the greens stay fresh.
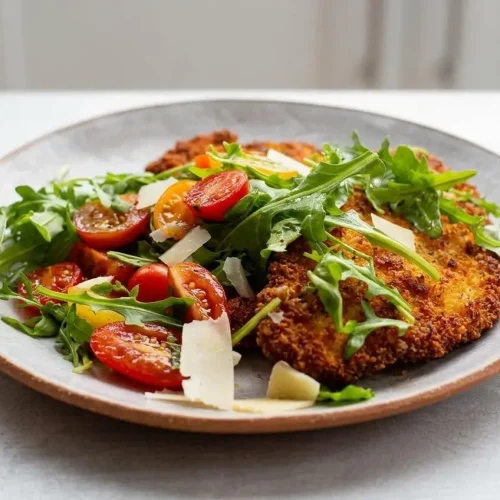
Chicken Milanese

Equipment
- Meat Mallet
- Shallow dishes
- Large Skillet
- Wire rack
Ingredients
For the Chicken
- 2 ½ cups homemade or panko breadcrumbs
- 2 cloves garlic finely minced
- 3 tablespoons finely minced fresh parsely
- ¼ teaspoon kosher salt plus more for seasoning
- ¼ teaspoon freshly ground pepper plus more for seasoning
- 1 cup finely grated parmesan cheese divided
- 3 large eggs
- 1 cup all purpose flour
- 2 lbs boneless, skinless chicken breasts, thinly sliced
- olive oil or neutral oil for frying
For the Salad
- 2-3 cups assorted heirloom tomatoes cut into a large pieces, or cherry tomatoes cut in half
- 1 clove garlic smashed with the side of your knife
- 3 tablespoons freshly squeezed lemon juice
- kosher salt and freshly cracked black pepper to taste
- ½ cup extra virgin olive oil
- 8 ounces fresh arugula cleaned and dried
- ½ cup loosely packed fresh basil leaves
- 4 ounces Parmigiano Reggiano or Grana Padano shaved with a vegetable peeler
- lemon wedges for serving
Instructions
For the Chicken
- Combine the breadcrumbs, minced garlic, parsley, ½ cup grated parmesan, salt, and pepper in a medium shallow dish. Mix until the garlic is evenly worked through the crumbs so the coating looks uniform instead of patchy.
- Whisk the eggs with the remaining ½ cup parmesan, salt, black pepper, and 1 tablespoon of water in a second shallow dish, then season the flour with salt and pepper in a third dish. You should have three clearly separate stations, and the egg mixture should look smooth and lightly thickened.
- Lay one piece of chicken on a cutting board, cover it with plastic wrap or parchment, and pound it with a meat mallet until it is about ½ inch thick; repeat with the rest. This evens out the thickness so the cutlets stay tender and cook at the same pace.
- Season both sides of each piece of chicken with salt and pepper. A full, even seasoning layer helps the chicken taste good all the way through, not just on the crust.
- Dredge each cutlet in the flour and shake off the excess, coat it in the egg mixture, then press it into the breadcrumb mixture until well covered. The flour helps adhesion, the egg acts as the binder, and the crumbs should cling in a full layer without bare spots.
- Heat a generous layer of oil in a large skillet over medium-high heat and fry 1 to 3 pieces at a time, depending on pan size, until golden brown on both sides, then transfer them to a wire rack. The chicken should hit the oil with a lively sizzle, and the crust should look toasted and deep golden brown, not pale or dark.
For the Salad and Serving
- Stir the tomatoes, garlic clove, lemon juice, olive oil, salt, and pepper together in a bowl, then remove the garlic if you like and tear in the basil just before serving. The tomatoes should look glossy and juicy, and the dressing at the bottom of the bowl becomes part of the final seasoning.
- Toss the arugula with a little of the tomato juices, place a chicken cutlet on each plate, and pile the arugula on top before spooning over the tomatoes. Finish with shaved parmesan, a drizzle of olive oil, and lemon wedges so every serving stays fresh, crisp, and bright.