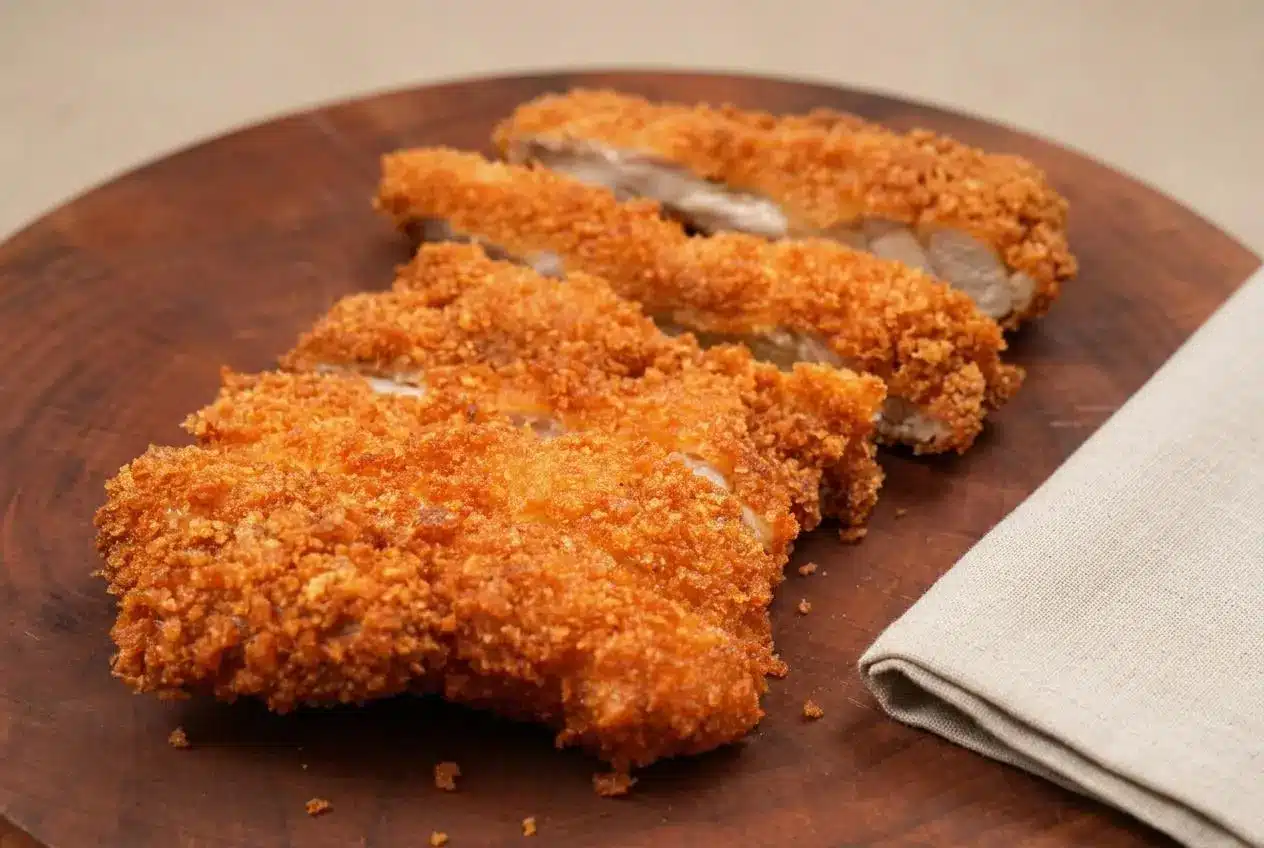
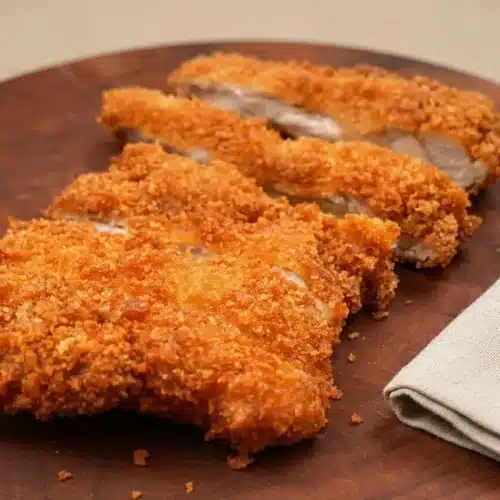
Chicken katsu is a Japanese-style chicken cutlet coated in flour, egg, and panko, then fried until deeply golden with a crisp shell and tender center.
Fresh chicken katsu delivers that unmistakable crackle of warm panko around juicy, seasoned chicken. The method moves quickly once the breading station and oil are ready.
Boneless thighs keep the meat flavorful and forgiving, while the flour-and-egg batter gives every panko flake something to hold onto. That deep amber crunch is worth chasing.
Set a wire rack over a sheet pan before frying so each cutlet has a dry, elevated place to rest.
What Makes Chicken Katsu Special
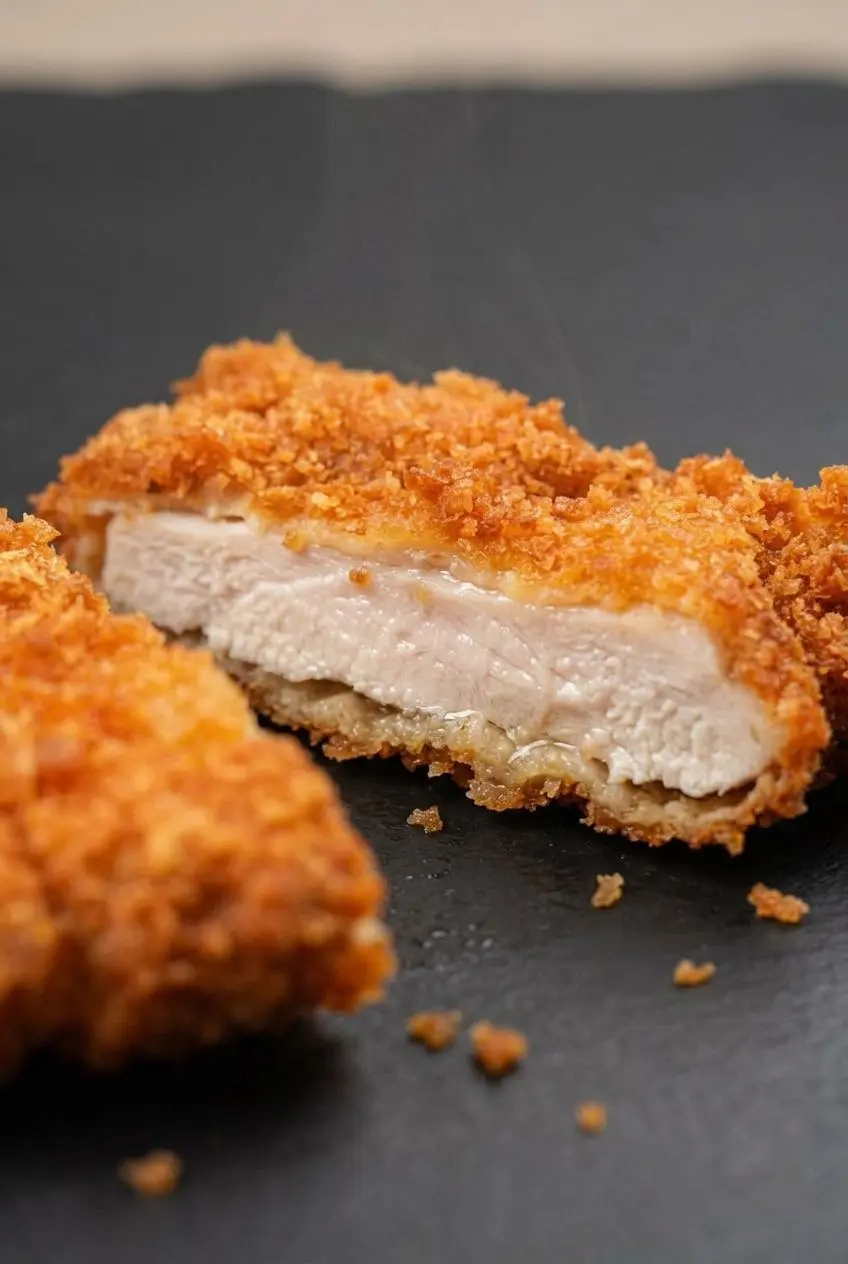
Chicken katsu is defined by contrast: a thin, tender chicken cutlet inside an airy panko crust that stays crisp after frying. Unlike heavily battered fried chicken, katsu has a clean, structured coating and a mild savory flavor that works with rice, curry, or a dipping sauce.
The cutlet thickness matters as much as the coating. Pounding the chicken to an even 1/2-inch thickness helps the center cook at the same pace as the outside browns, so the crust does not race ahead of the meat.
Panko Breadcrumbs vs Traditional Breadcrumbs
Panko is made in larger, jagged flakes than standard fine breadcrumbs. Those flakes create tiny gaps in the coating, which gives the crust its light, brittle crunch instead of a dense, compact layer.
Fine breadcrumbs form a more uniform coating and can brown quickly, but they do not give the same craggy texture. If you enjoy comparing breaded cutlets, crispy chicken milanese offers a different style of golden chicken with a more traditional Western coating.
Press panko onto the chicken firmly, but do not crush it into a paste. You want the flakes attached on all sides while keeping their rough shape intact.
Chicken Thighs vs Chicken Breasts
Boneless, skinless chicken thighs are especially well suited to katsu because they stay juicy and have a little more flexibility if one cutlet cooks slightly longer than another. Their richer flavor also stands up well to tangy tonkatsu sauce or Japanese curry.
Chicken breast works too if you prefer leaner white meat. Butterfly thick breasts horizontally first, then pound them evenly between sheets of plastic wrap with a meat mallet. The goal is a uniform cutlet, not a paper-thin one.
Essential Ingredients and Their Roles
Each ingredient contributes to the cutlet’s flavor, adhesion, color, and crunch, from seasoned chicken and binding batter to the panko crust and frying oil.
- 1 lb chicken thigh, boneless, skinless pounded to 1/2″ thick
- 2 eggs
- 3 tbsp all-purpose flour
- 1/2 tsp kosher salt
- 1/2 tsp black pepper
- 1 tsp garlic powder
- 2 cups panko breadcrumbs
- 2 quarts neutral oil, for frying
The chicken thighs provide a moist, flavorful center. Kosher salt, black pepper, and garlic powder season the meat and the batter, so the flavor reaches beyond the crust. Eggs and flour create a loose slurry that grips the chicken and gives panko a sturdy foundation.
Panko supplies the signature crunch. Use a neutral frying oil such as peanut, canola, vegetable, or corn oil so its flavor stays in the background while the panko turns golden.
I pat the chicken completely dry before it goes near the batter, because even a little surface moisture can make the coating slip.
How to Make Chicken Katsu Step by Step
Arrange the chicken, batter, and panko in that order before heating the oil. A single panko crumb should create a quick, gentle sizzle when it hits the oil, a useful sign that frying can begin.
Use an instant-read thermometer in the thickest center of a cutlet. Cook poultry to 165°F as measured with a food thermometer.
- Pound the chicken thighs to an even 1/2-inch thickness, then season both sides with the salt and black pepper.
Even cutlets fry at the same rate, preventing an over-browned crust around an underdone center. - Whisk the eggs, flour, salt, black pepper, and garlic powder until the mixture is smooth and slightly looser than pancake batter.
The batter should coat a spoon in a thin layer rather than falling away in dry clumps. - Coat each seasoned cutlet fully in the batter, let the excess drip away, then press it into the panko until every surface is covered.
Look closely at the edges and corners for bare patches before moving the cutlet to the hot oil. - Heat the neutral oil in a large heavy-bottomed pot over medium-high heat to 350°F, then fry the cutlets for 4 to 6 minutes until cooked through.
Turn gently as needed until the panko shifts from pale gold to deep amber and the thickest center reaches 165°F. - Transfer the fried cutlets to the prepared wire rack before slicing.
The raised rack lets steam escape instead of softening the crust underneath.
Prepping and Pounding the Cutlets
Place a thigh between plastic wrap and use the flat side of a meat mallet to gently even it out. Start in the thicker areas and work outward rather than pounding aggressively in one spot.
A consistent 1/2-inch thickness gives you better control in hot oil. The chicken should feel flat and even, with no thick mound in the middle that could delay cooking.
The Perfect Dredge and Bread Station
The flour-egg slurry replaces a separate flour and egg station, making the breading process tidier and faster. Whisk until no dry flour pockets remain, then let excess batter drip from the cutlet for a moment before it reaches the panko.
Use one hand for the wet batter and the other for panko when possible. This small habit keeps the crumbs loose and fluffy instead of turning them into sticky clusters.
After breading, let the cutlets stand briefly while the oil comes back to temperature. That pause helps the coating settle against the chicken, especially around the thinner edges.
Frying Techniques for Deep or Shallow Pan Fry
The full amount of oil in a deep pot gives the cutlets room to fry evenly. If using a deep skillet for a shallow fry, keep the oil at 350°F and turn each cutlet gently once the underside is golden, taking care not to scrape the crust.
Fry in batches rather than crowding the pot. Adding too much cold chicken at once drops the oil temperature, which leads to pale panko that absorbs more oil before it crisps. Let the oil return to 350°F between batches.
Move finished cutlets straight to the wire rack. A flat paper towel or solid plate traps steam below the crust, and steam is the fastest route from crackly to limp.
Troubleshooting Common Chicken Katsu Mistakes
- The panko falls off: Moisture on the chicken or a thick layer of batter can cause separation. Pat the chicken dry, let extra batter drip away, press the panko firmly into the surface, and allow the coated cutlet to sit briefly before frying.
- The crust browns too fast: Oil that runs hotter than 375°F can darken the panko before the chicken cooks through. Lower the heat and wait for a steady, moderate sizzle rather than an aggressive crackle.
- The cutlets look pale and greasy: The oil likely cooled too much after adding chicken. Fry fewer cutlets at once and allow the oil to recover to 350°F before starting the next batch.
- The coating has bare spots: The cutlet was not fully covered in batter or panko. Check the edges before frying and gently press loose flakes over any exposed chicken.
- The bottom turns soft: Steam is collecting beneath the cutlet. Rest it on a wire rack, never directly on a plate or a flat layer of paper towels.
- The chicken seems dry: Uneven cutlets often create this problem because thin edges overcook while a thick center catches up. Pound to a consistent thickness and check the thickest area first.
Serving Suggestions and Delicious Pairings
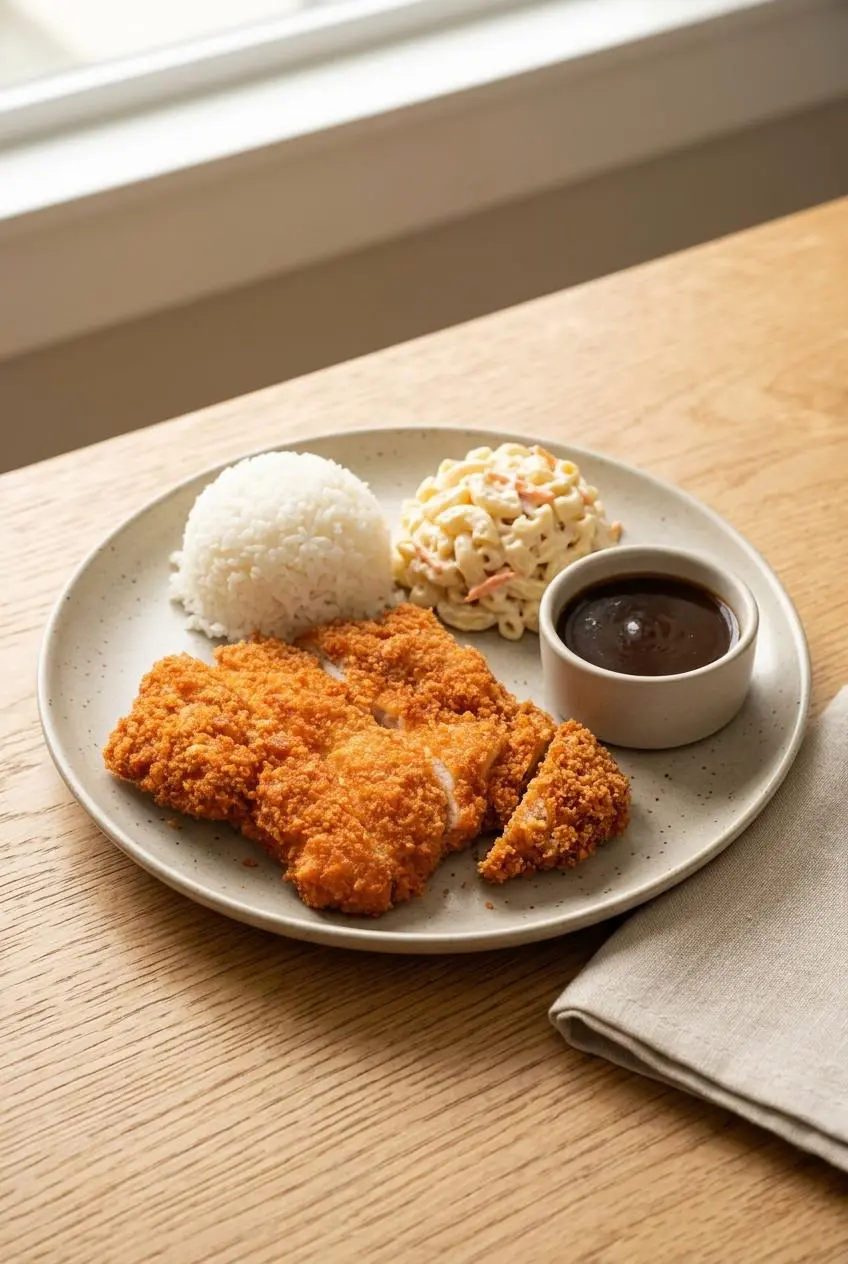
Serve katsu soon after frying, when the panko still has its loudest crunch. Slice each cutlet just before plating so the interior stays juicy and the crust remains intact.
For an optional nutty finish, mix finely grated toasted sesame seeds into the panko before breading. The sesame adds aroma without changing the core method.
Hawaii-Style Plate Lunch
Build a plate lunch with warm Calrose white rice, creamy Hawaiian macaroni salad, and sliced chicken katsu. Keep the cutlet beside the rice instead of directly underneath it, so steam from the rice does not soften the bottom crust.
For a handheld Hawaiian-style meal, turn extra cutlets into chicken katsu musubi. It is a practical way to use sliced katsu while keeping the flavors in the same comforting lane.
Japanese Chicken Katsu Curry
For chicken katsu curry, spoon aromatic Japanese curry sauce around steamed rice, then place sliced katsu on top at the last moment. Let the sauce touch the lower edge of the cutlet while leaving the top crust exposed and crisp.
Traditional chicken katsu is savory and mild rather than spicy. The curry brings warmth and fragrance, while the cutlet supplies the crunch that makes the plate feel complete.
Quick Homemade Tonkatsu Sauce
Stir together ketchup, Worcestershire sauce, oyster sauce, and a touch of sugar for a sweet, tangy dipping sauce. Serve it alongside the katsu rather than pouring it over the whole cutlet, so each bite can keep its crunch.
A mound of finely shredded cabbage is another good match, especially with a light dressing. For a fresher side, a crisp Asian chicken salad balances the fried cutlet with cool vegetables and bright flavor.
Storage, Prep, and Reheating Guide
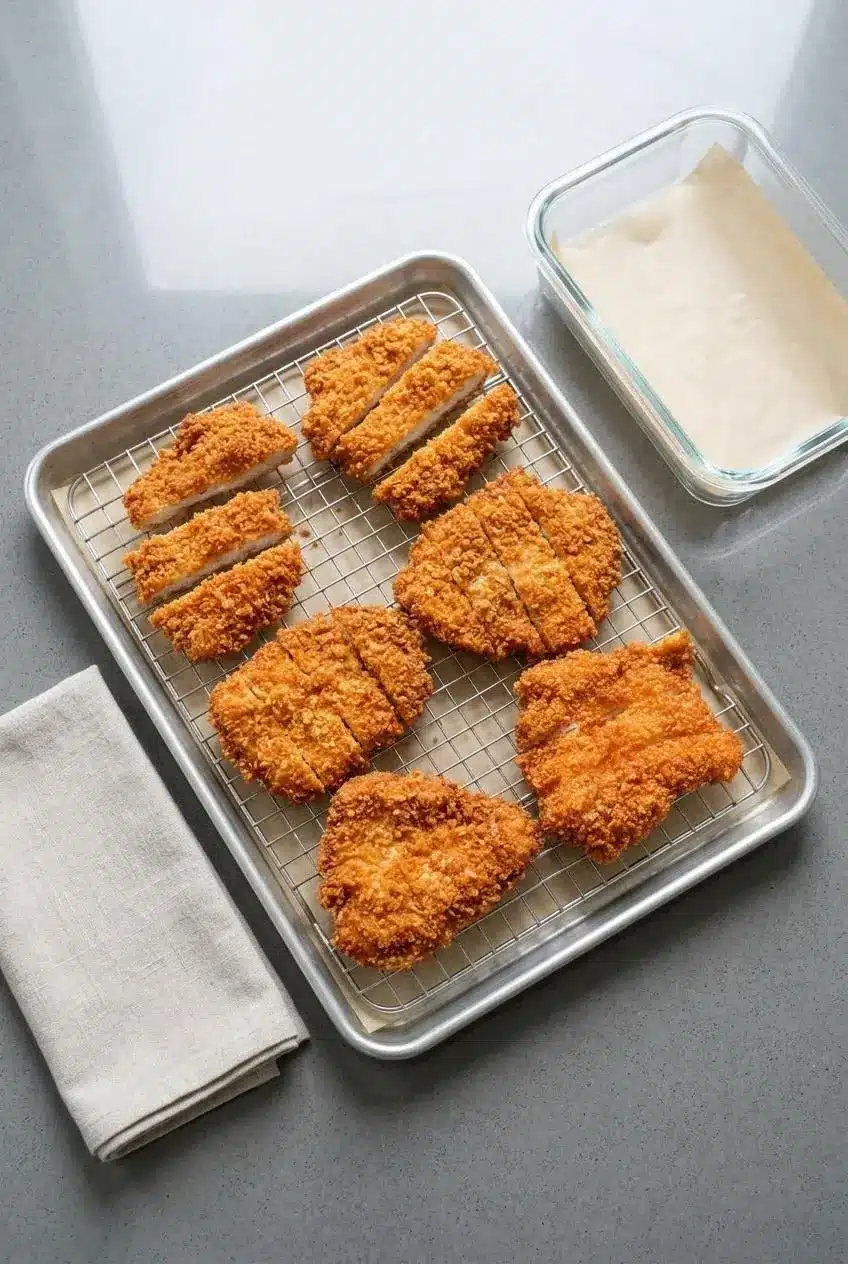
Cool leftover cutlets on a wire rack before transferring them to an airtight container and keeping them chilled. Separate stacked pieces with parchment if possible, which helps protect the panko coating from excess moisture.
For the best texture, reheat katsu in an air fryer or on a wire rack set over a baking sheet in the oven until the crust is hot and crisp again. Avoid the microwave when crunch matters, since it steams the breading soft.
You can prepare the chicken, batter, and panko station shortly before cooking, but bread the cutlets close to frying time for the firmest crust. For a gluten-free option, use white rice flour in place of all-purpose flour and gluten-free panko in place of regular panko; the coating will still fry up crisp.
Conclusion
Fresh chicken katsu brings together juicy chicken, seasoned batter, and a deeply golden panko crust in a meal that feels special without being fussy.
Pound the cutlets evenly, hold the oil near 350°F, and rest the finished chicken on a wire rack. Those three habits make every crunchy bite count.
Frequently Asked Questions
What Is Chicken Katsu Made Of?
Chicken katsu is made from seasoned chicken, usually boneless thighs or breasts, coated in flour, egg, and coarse panko breadcrumbs. The breaded cutlets are fried until golden outside and fully cooked in the center. This version uses chicken thighs for a juicy result.
What Makes Chicken Katsu Different From Regular Fried Chicken?
Chicken katsu uses coarse Japanese panko rather than a thick flour batter. The larger flakes create a lighter, more crackly crust with a distinctly airy texture. It is also usually made with thin chicken cutlets, which cook quickly and stay balanced with the crisp coating.
How Do You Keep Breading From Falling Off Chicken Katsu?
Pat the chicken dry first, then coat it fully in the flour-and-egg batter and let excess batter drip off. Press panko firmly onto every side, especially the edges. Let the breaded chicken sit briefly before frying, and turn it gently in the oil so the crust has time to set.
Can I Make Chicken Katsu in an Air Fryer?
Yes. Spray the breaded cutlets lightly with neutral oil, then air fry at 375°F for 12 to 15 minutes, flipping halfway through. Cook until the panko is golden and the thickest part of the chicken reaches 165°F.
What Oil Is Best for Frying Chicken Katsu?
Choose a neutral oil suited to frying, such as peanut, canola, vegetable, or corn oil. These oils keep the flavor focused on the seasoned chicken and panko. Avoid olive oil for this style of frying because its stronger flavor can distract from the clean, classic katsu taste.
Chicken Katsu

Equipment
- Dutch oven
- Infrared Thermometer
- Meat tenderizer
Ingredients
- 1 lb chicken thigh, boneless, skinless pounded to 1/2″ thick
- 2 eggs
- 3 tbsp all-purpose flour
- 1/2 tsp kosher salt
- 1/2 tsp black pepper
- 1 tsp garlic powder
- 2 cups panko breadcrumbs
- 2 quarts neutral oil, for frying
Instructions
- Pound the chicken thighs to an even 1/2-inch thickness, then season both sides with the salt and black pepper. Even cutlets fry at the same rate, preventing an over-browned crust around an underdone center.
- Whisk the eggs, flour, salt, black pepper, and garlic powder until the mixture is smooth and slightly looser than pancake batter. The batter should coat a spoon in a thin layer rather than falling away in dry clumps.
- Coat each seasoned cutlet fully in the batter, let the excess drip away, then press it into the panko until every surface is covered. Look closely at the edges and corners for bare patches before moving the cutlet to the hot oil.
- Heat the neutral oil in a large heavy-bottomed pot over medium-high heat to 350°F, then fry the cutlets for 4 to 6 minutes until cooked through. Turn gently as needed until the panko shifts from pale gold to deep amber and the thickest center reaches 165°F.
- Transfer the fried cutlets to the prepared wire rack before slicing. The raised rack lets steam escape instead of softening the crust underneath.