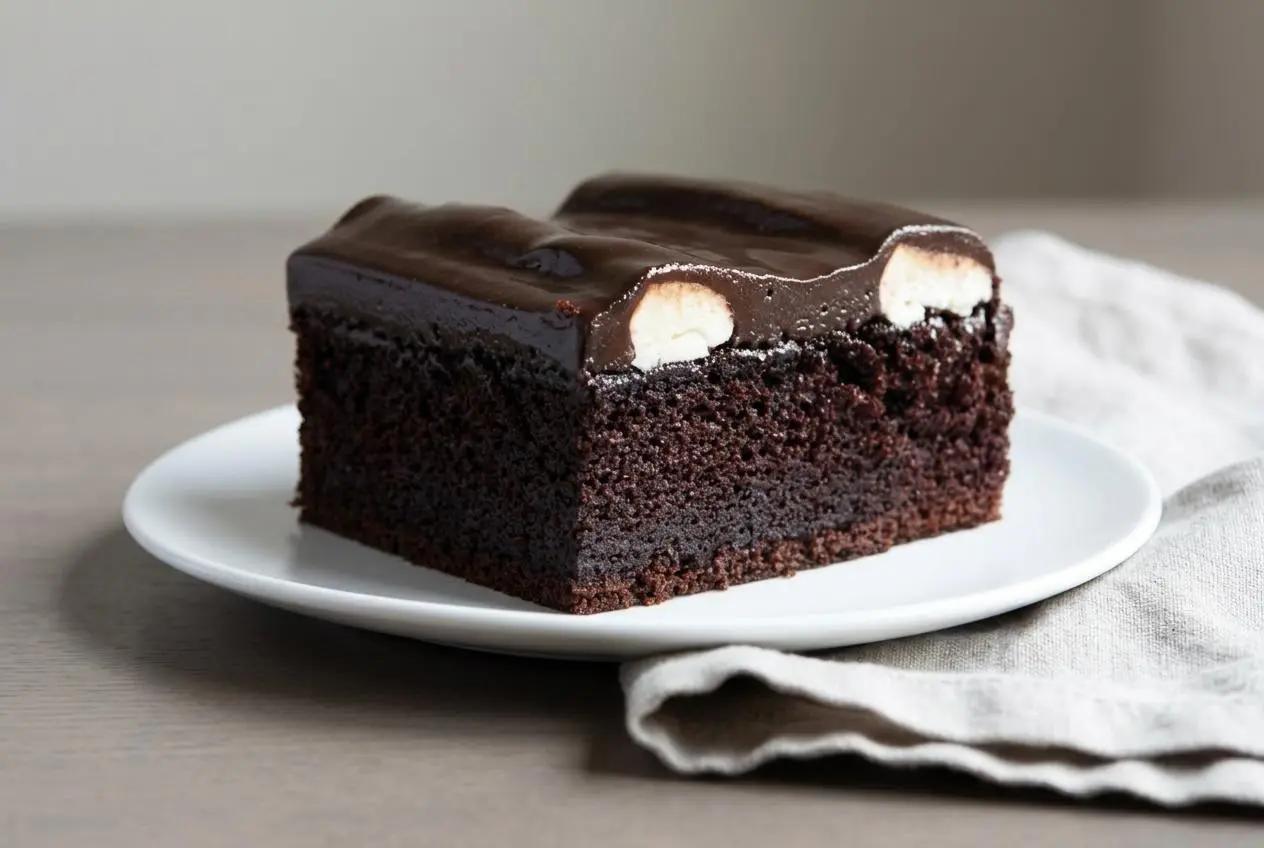
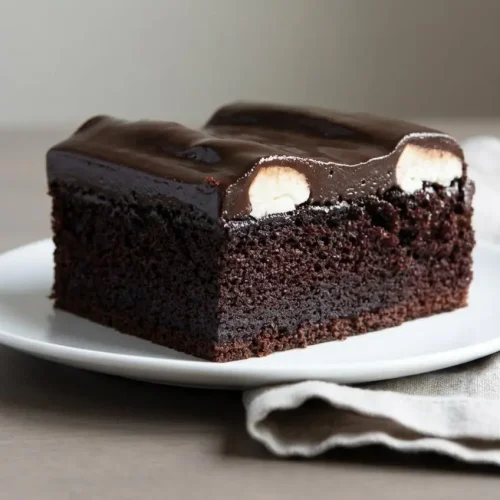
This bumpy cake recipe makes a Detroit favorite: moist buttermilk devil’s food cake topped with frozen vanilla buttercream ridges and coated in warm, poured chocolate fudge. The signature bumps stay distinct thanks to freezer rests and two separate coats of glaze.
Each slice combines tender chocolate crumb, creamy vanilla frosting, and a glossy fudge coating. It’s a chocolate sheet cake with a little more personality, baked in a 9×13 pan and cut into 24 servings.
The assembly takes patience rather than fancy decorating skills. You’ll bake the cake, pipe straight buttercream rows, and let the cold layers do much of the work before pouring the fudge. Those white buttercream centers make the first cut worth the wait.
Clear a flat space in the freezer for your cake pan before you start mixing.
What Is Detroit Bumpy Cake?
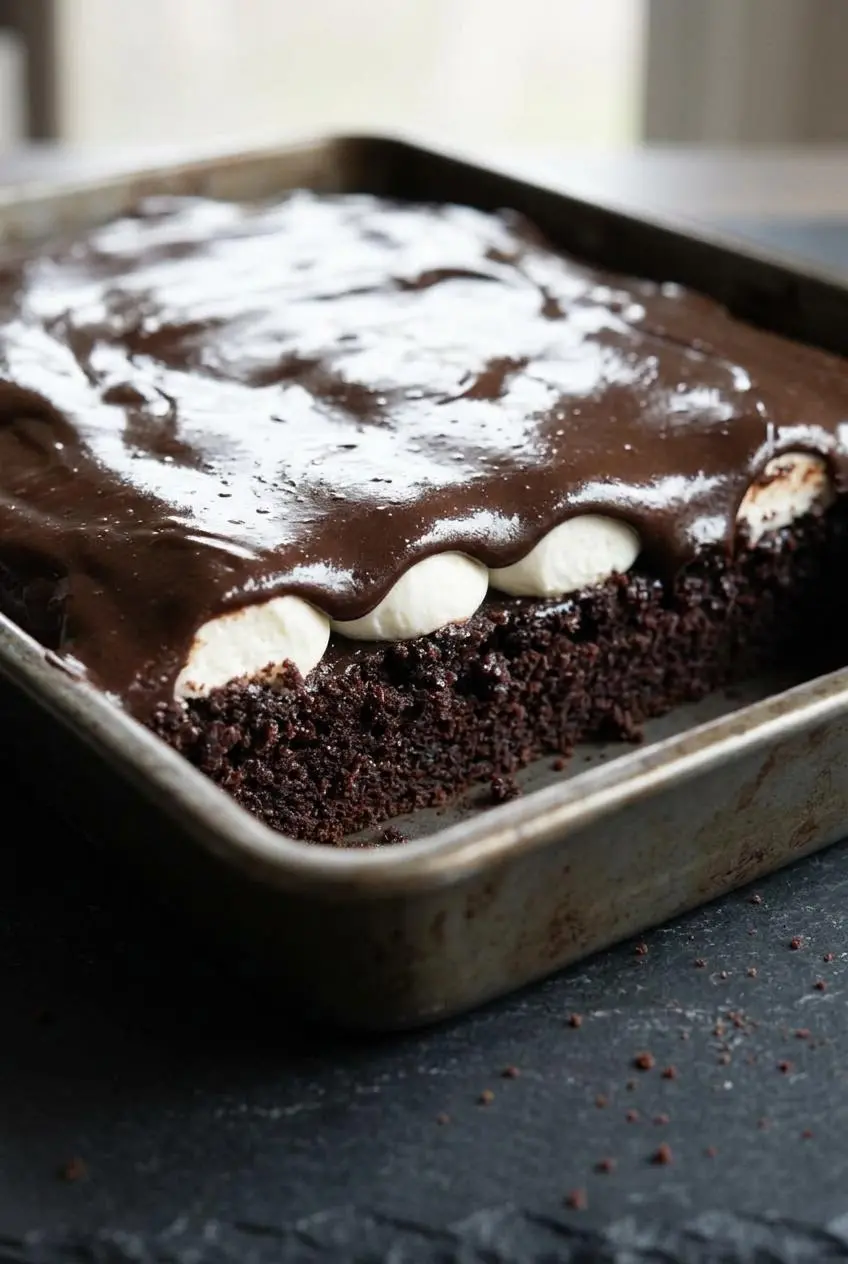
Detroit bumpy cake gets its name from the buttercream ridges beneath its chocolate coating. Fred Sanders Confectionery created the Michigan specialty in the early 1900s, selling it as Sanders Devil’s Food Buttercream Cake.
Three components define this Sanders-style dessert: an oil-and-buttermilk chocolate cake, thick vanilla buttercream strips, and poured chocolate fudge. Unlike a conventionally frosted cake, it keeps the vanilla icing in distinct rows rather than spreading it across the surface.
Freezing during assembly protects that shape. A firm cake supports the piping, frozen buttercream resists the slightly warm glaze, and a chilled first coating helps the second coat cover evenly.
Key Ingredients and Their Roles
Cocoa and coffee build chocolate depth, buttermilk and oil keep the crumb tender, and butter gives the ridges richness. Confectioners’ sugar provides frosting structure, while corn syrup helps the poured fudge stay smooth.
- 1/2 cup (43g) Dutch-process cocoa
- 1/2 cup (113g) brewed coffee or water, hot
- 1/2 cup (99g) vegetable oil
- 1 cup (227g) buttermilk, at room temperature
- 1 1/2 teaspoons baking soda
- 1/2 teaspoon table salt
- 2 teaspoons King Arthur Pure Vanilla Extract
- 2 large eggs, at room temperature
- 1 3/4 cups (347g) granulated sugar
- 2 cups (240g) King Arthur Unbleached All-Purpose Flour
- 6 tablespoons (85g) unsalted butter, at room temperature
- 1/8 teaspoon table salt
- 2 cups (227g) confectioners’ sugar, sifted
- 1 teaspoon King Arthur Pure Vanilla Extract
- 1 to 2 tablespoons (14g to 28g) milk or half-and-half, as needed
- 1/2 cup (113g) buttermilk
- 2 tablespoons (39g) dark corn syrup
- 8 tablespoons (113g) unsalted butter
- 1/2 cup (43g) Dutch-process cocoa
- 1/4 teaspoon table salt
- 4 cups (454g) confectioners’ sugar, sifted
- 1 teaspoon King Arthur Pure Vanilla Extract
For the Devil’s Food Cake
The first ten ingredient lines belong to the cake, ending with the all-purpose flour. Keep these separate from the frosting ingredients as you measure, especially the repeated cocoa, salt, vanilla, and buttermilk.
Hot coffee wets and blooms the Dutch-process cocoa, helping distribute its flavor throughout the batter. Coffee adds depth to the chocolate; hot water is also an option. Oil keeps the crumb soft when chilled, while buttermilk supplies moisture and acidity that works with the baking soda.
Room-temperature eggs and buttermilk blend more readily into the batter. Flour and eggs provide structure, sugar sweetens and contributes tenderness, and salt keeps the chocolate flavor from tasting flat.
For the Vanilla Buttercream Bumps
The next five lines make the ridges, beginning with 6 tablespoons butter and ending with milk or half-and-half. Beating the softened butter and salt until pale creates a lighter foundation before the confectioners’ sugar and vanilla go in.
Add the dairy cautiously. You want frosting that passes through the piping opening without tearing but still holds a rounded strip. Too much liquid makes neat ridges harder to form, even before the warm glaze enters the picture.
For the Poured Fudge Frosting
The final seven lines make the cooked coating, starting with 1/2 cup buttermilk. Cocoa supplies chocolate flavor, butter adds richness, and confectioners’ sugar gives the glaze body.
Dark corn syrup helps discourage graininess and contributes to a glossy, pliable finish. Buttermilk supplies the liquid and a tangy counterpoint to the sugar. This coating should flow when slightly warm, then settle into a sliceable layer as the cake chills.
I sift both portions of confectioners’ sugar before starting so lumps don’t interrupt the buttercream mixing or the fudge pouring.
How to Make Bumpy Cake Step by Step
Follow the chilling intervals even if the surface looks ready sooner. The cake and buttercream need firmness beneath the surface, not just a cool exterior.
- Set the oven to 350°F and grease a 9" x 13" baking pan.
Coat the corners as well as the bottom to help the finished slices release. - Stir the hot coffee or water into the cocoa in a large bowl, then incorporate the oil and buttermilk.
Work out any dry cocoa pockets so the mixture looks evenly dark and smooth. - Beat in the baking soda and salt for 30 seconds, blend in the vanilla and eggs, then add the sugar and flour and mix at medium speed for 2 minutes before scraping the bowl, beating another 30 seconds, and transferring the batter to the pan.
The finished batter should look uniform, with no flour clinging to the bowl. - Bake for 33 to 35 minutes, rest the pan on a rack for 30 minutes, then freeze the cake for at least 1 hour.
Before removing it from the oven, check that a gentle press rebounds and a slight gap has begun to form along the pan edges. - Whip the butter and salt until light, beat in the confectioners’ sugar and vanilla until fluffy, then add milk or half-and-half as needed, starting with 1 tablespoon, and fill a piping bag fitted with a 1/2-inch round tip.
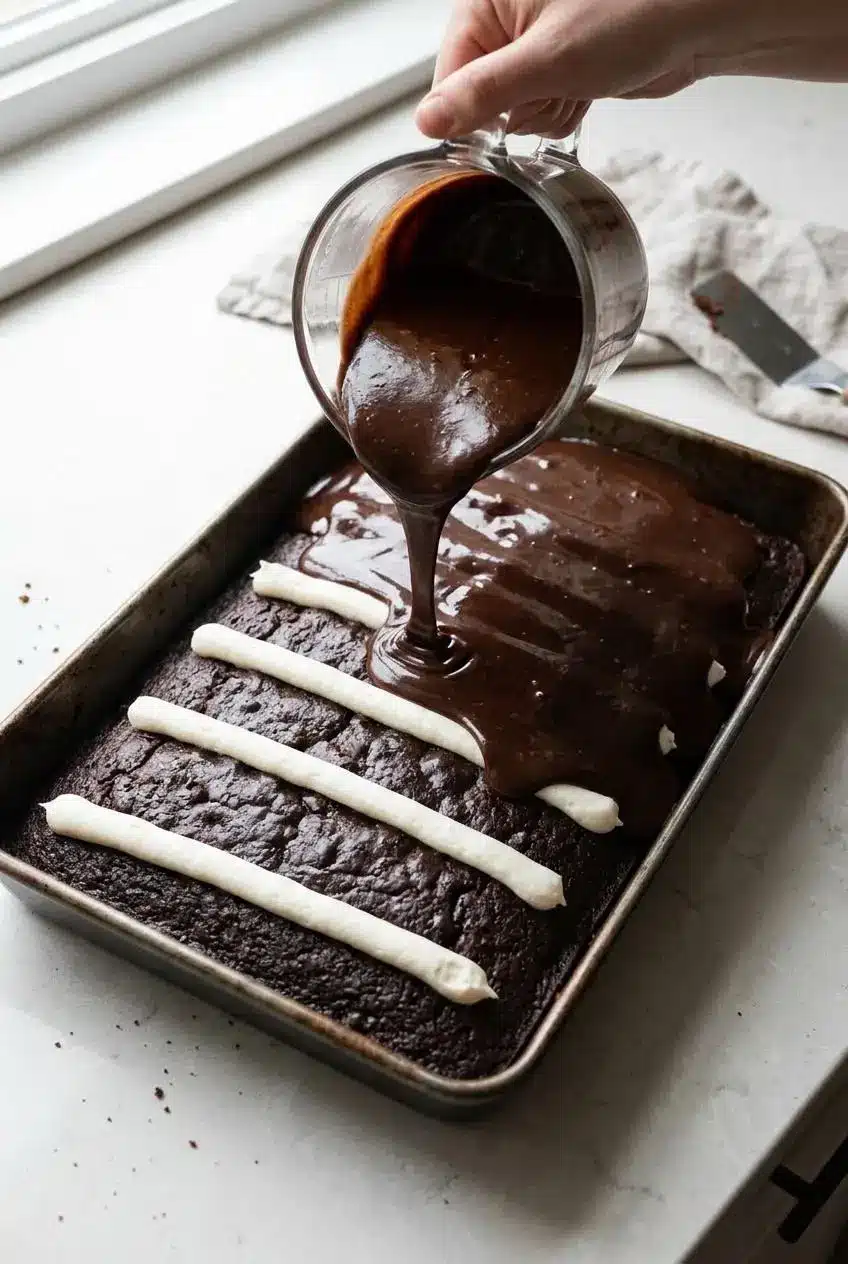
The icing should hold its shape while remaining smooth enough to pipe; refrigerate it for 5 to 10 minutes if it feels overly soft. - Pipe seven edge-to-edge buttercream strips across the cake’s shorter, 9-inch dimension, making each strip 1/2 inch in diameter with 1 inch between lines, then freeze for at least 30 minutes.
Keep steady pressure on the bag for rounded ridges that become firm before coating. - Heat the buttermilk, corn syrup, butter, cocoa, and salt in a medium heavy-bottomed saucepan over medium heat, boil for 2 to 3 minutes, reduce to low, whisk in the confectioners’ sugar until dissolved, then remove from the heat, stir in vanilla, and transfer to a large glass measuring cup to cool.
Listen for sharp snaps from the bursting bubbles during the boil, and wait until the finished glossy glaze feels only slightly warm before pouring. - Pour half the fudge over the frozen cake in steady passes, gently tipping the pan wherever the coating needs help reaching.
Let the flowing glaze surround the buttercream ridges rather than dragging a knife across them. - Freeze the first coating for 5 to 10 minutes, pour on the remaining fudge, and refrigerate the cake for 20 minutes before cutting.
If the reserved glaze stops flowing smoothly, microwave it in 5-second bursts with stirring between each burst. - Keep the finished cake covered in the refrigerator until serving.
A chilled coating and firm buttercream centers make the slices easier to handle.
Bake and Freeze the Chocolate Sheet Cake
Judge doneness by the cake as well as the timer. A top that stays indented needs more baking; a lightly springy surface and edges just beginning to release signal readiness. The rack cooling comes before the freezer rest, giving the cake time to lose its initial heat.
Pipe and Freeze the Buttercream Strips
Run each strip across the short width of the pan, arranging the seven rows along its length. Aim for consistent thickness rather than perfect decorating. Keep the cake level in the freezer so the ridges set where you piped them.
Boil and Pour the Two-Coat Fudge Glaze
The measuring cup gives you more control than pouring directly from the saucepan. Use the first coat to cover the contours and the second to finish any thin spots. Gentle tilting preserves the ridges; spreading can smear white buttercream into the chocolate.
Troubleshooting Common Bumpy Cake Mistakes
Most frosting problems come from temperature or consistency. Check those before changing the ingredients.
- Fudge runs off the bumps: The glaze may still be too hot, or you may have poured too much at once. Let it cool until slightly warm, then use the two-coat method with a freezer pause between coats. It should flow without looking watery.
- Buttercream ridges slump: Soft frosting or a cake that hasn’t chilled thoroughly can lose its shape under the glaze. Complete both freezer rests and keep the cake cold until you’re ready to pour. Don’t try to rescue soft ridges by spreading chocolate over them.
- The second coat becomes too thick: The reserved fudge can thicken while the first layer sets. Use the brief microwave bursts described above, stirring each time, and stop as soon as it pours smoothly. Heating it until hot creates the opposite problem.
- White lumps appear in the fudge: Unsifted confectioners’ sugar can leave dry clumps. Sift before cooking, then whisk thoroughly over low heat so the sugar incorporates before you cool the glaze.
- The strips look uneven: Use steady pressure and keep the opening close to the cake. Without a round tip, cut a 1/2-inch opening in a sturdy zip-top freezer bag. Stop squeezing before lifting away at the end of each row.
Variations and Ingredient Substitutions
Keep these optional changes separate from the ingredient list and method above. They change the flavor or finish rather than reproducing the same result.
- Soured-milk alternative: Milk mixed with distilled white vinegar can substitute for cultured buttermilk in the cake batter. Let it sour before using, and expect a thinner consistency; cultured buttermilk remains the better choice for the cooked glaze.
- Deeper coffee flavor: Add a pinch of espresso powder to the hot liquid used to bloom the cocoa.
- Optional syrup: A light brushing of vanilla-coffee syrup on the warm cake can add moisture before cooling and freezing. Use restraint so the surface doesn’t become soggy.
For another cake built around tangy dairy, try this kefir sheet cake.
Boiled Poured Fudge vs. Quick Chocolate Ganache
- Boiled fudge: Buttermilk, corn syrup, butter, cocoa, and confectioners’ sugar produce the characteristic glossy, fudgy coating. It requires cooking, cooling, and controlled pouring.
- Quick ganache: Heavy cream and bittersweet chocolate offer an alternative without cooking the fudge mixture. Pour it only when slightly warm over frozen ridges; expect a different set and chocolate flavor rather than the same fudge shell.
Shortening-Stabilized and Hand-Rolled Bumps
Replacing part of the butter with vegetable shortening can create firmer vanilla icing, though it reduces the buttery flavor. Chill that stiffer icing until workable, then roll it into seven logs and arrange them across the cake. Freeze the shaped ridges before glazing, just as you would piped strips.
Storage and Serving Tips
Keep the finished cake covered and refrigerated. Protect the surface with a cover that clears the bumps rather than pressing wrapping directly against the fudge.
The freezer rests above are assembly steps, not directions for long-term frozen storage. Once the final coating sets, return the cake to the refrigerator.
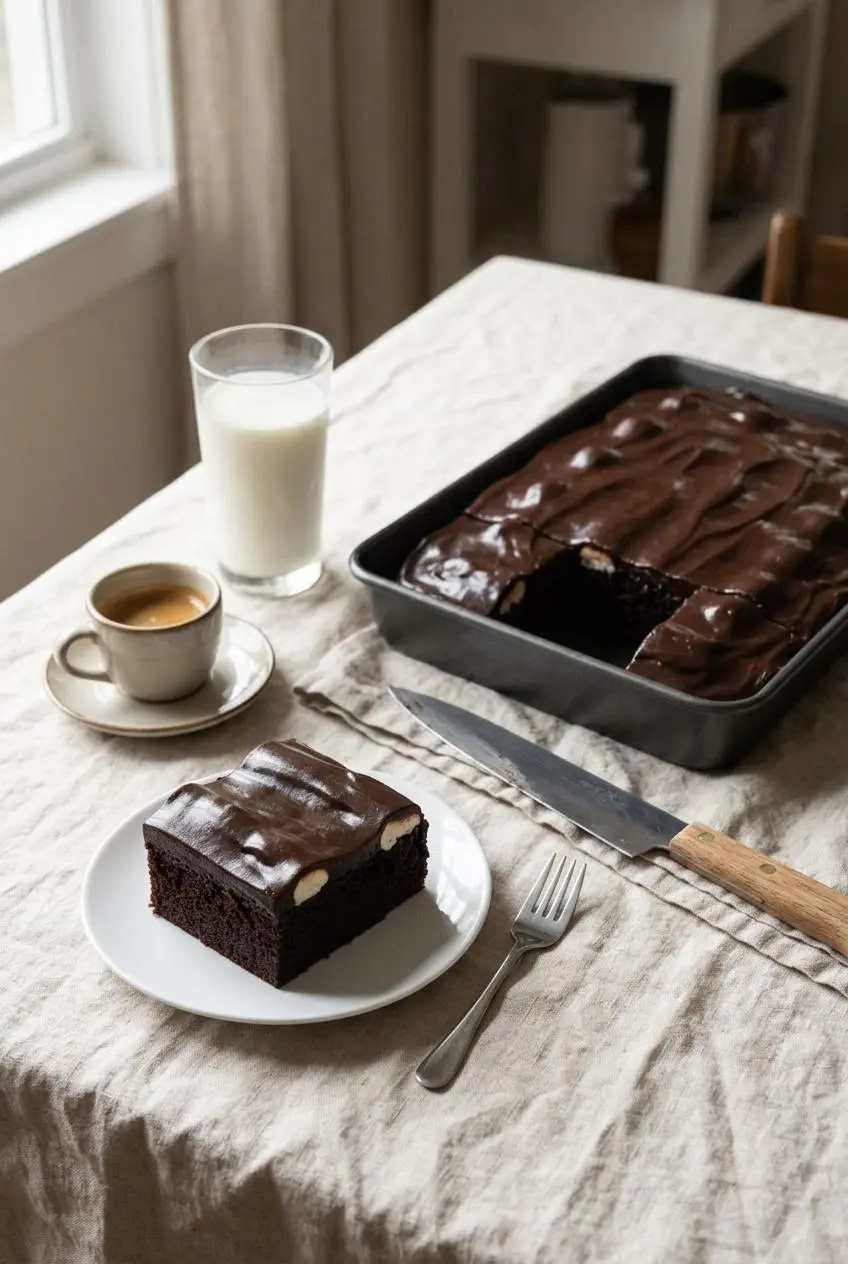
For neat slices, cut the cake while chilled. Warm a sharp knife under hot water, wipe it dry, and clean the blade between cuts. This helps prevent dark fudge from dragging through the white buttercream centers.
Serve slightly chilled for the clearest contrast between cake, buttercream, and fudge, or let individual slices lose a little of their chill before eating. Cold milk balances the rich frosting, hot espresso emphasizes the chocolate, and vanilla ice cream makes a celebratory pairing.
Conclusion
Detroit bumpy cake brings together soft chocolate cake, generous vanilla ridges, and a smooth fudge coating in one memorable slice.
Give the freezer pauses their full time and pour the glaze in two coats. Those patient steps help the bumps hold their shape, right through the first satisfying cut.
Frequently Asked Questions
What Is a Michigan Bumpy Cake?
It’s a Detroit chocolate cake topped with rounded vanilla buttercream strips. Poured chocolate fudge covers the strips, creating its distinctive bumpy surface.
Who Made the Original Bumpy Cake?
Fred Sanders Confectionery in Detroit created the cake in the early 1900s. The company first sold it as Sanders Devil’s Food Buttercream Cake.
Why Did My Chocolate Fudge Frosting Turn Out Too Thin or Runny?
The fudge may have been too hot when poured, especially if the buttercream wasn’t firmly frozen. Cool it until slightly warm, then apply two separate coats with the freezer pause between them.
Can I Make Bumpy Cake Without a Piping Bag?
Yes. Cut a 1/2-inch opening in the corner of a sturdy zip-top bag and use it to pipe the seven rows. For hand-shaped ridges, use the firmer shortening variation described above and chill the icing until you can roll it into logs.
Bumpy Cake Recipe

Equipment
- 9 x 13 pan
- Large Mixing Bowl
- piping bag with a 1/2″ round tip
- medium saucepan with a heavy bottom
- large glass measuring cup
Ingredients
- 1/2 cup (43g) Dutch-process cocoa
- 1/2 cup (113g) brewed coffee or water hot
- 1/2 cup (99g) vegetable oil
- 1 cup (227g) buttermilk at room temperature
- 1 1/2 teaspoons baking soda
- 1/2 teaspoon table salt
- 2 teaspoons King Arthur Pure Vanilla Extract
- 2 large eggs at room temperature
- 1 3/4 cups (347g) granulated sugar
- 2 cups (240g) King Arthur Unbleached All-Purpose Flour
- 6 tablespoons (85g) unsalted butter at room temperature
- 1/8 teaspoon table salt
- 2 cups (227g) confectioners’ sugar sifted
- 1 teaspoon King Arthur Pure Vanilla Extract
- 1 to 2 tablespoons (14g to 28g) milk or half-and-half as needed
- 1/2 cup (113g) buttermilk
- 2 tablespoons (39g) dark corn syrup
- 8 tablespoons (113g) unsalted butter
- 1/2 cup (43g) Dutch-process cocoa
- 1/4 teaspoon table salt
- 4 cups (454g) confectioners’ sugar sifted
- 1 teaspoon King Arthur Pure Vanilla Extract
Instructions
- Set the oven to 350°F and grease a 9″ x 13″ baking pan. Coat the corners as well as the bottom to help the finished slices release.
- Stir the hot coffee or water into the cocoa in a large bowl, then incorporate the oil and buttermilk. Work out any dry cocoa pockets so the mixture looks evenly dark and smooth.
- Beat in the baking soda and salt for 30 seconds, blend in the vanilla and eggs, then add the sugar and flour and mix at medium speed for 2 minutes before scraping the bowl, beating another 30 seconds, and transferring the batter to the pan. The finished batter should look uniform, with no flour clinging to the bowl.
- Bake for 33 to 35 minutes, rest the pan on a rack for 30 minutes, then freeze the cake for at least 1 hour. Before removing it from the oven, check that a gentle press rebounds and a slight gap has begun to form along the pan edges.
- Whip the butter and salt until light, beat in the confectioners’ sugar and vanilla until fluffy, then add milk or half-and-half as needed, starting with 1 tablespoon, and fill a piping bag fitted with a 1/2-inch round tip. The icing should hold its shape while remaining smooth enough to pipe; refrigerate it for 5 to 10 minutes if it feels overly soft.
- Pipe seven edge-to-edge buttercream strips across the cake’s shorter, 9-inch dimension, making each strip 1/2 inch in diameter with 1 inch between lines, then freeze for at least 30 minutes. Keep steady pressure on the bag for rounded ridges that become firm before coating.
- Heat the buttermilk, corn syrup, butter, cocoa, and salt in a medium heavy-bottomed saucepan over medium heat, boil for 2 to 3 minutes, reduce to low, whisk in the confectioners’ sugar until dissolved, then remove from the heat, stir in vanilla, and transfer to a large glass measuring cup to cool. Listen for sharp snaps from the bursting bubbles during the boil, and wait until the finished glossy glaze feels only slightly warm before pouring.
- Pour half the fudge over the frozen cake in steady passes, gently tipping the pan wherever the coating needs help reaching. Let the flowing glaze surround the buttercream ridges rather than dragging a knife across them.
- Freeze the first coating for 5 to 10 minutes, pour on the remaining fudge, and refrigerate the cake for 20 minutes before cutting. If the reserved glaze stops flowing smoothly, microwave it in 5-second bursts with stirring between each burst.
- Keep the finished cake covered in the refrigerator until serving. A chilled coating and firm buttercream centers make the slices easier to handle.