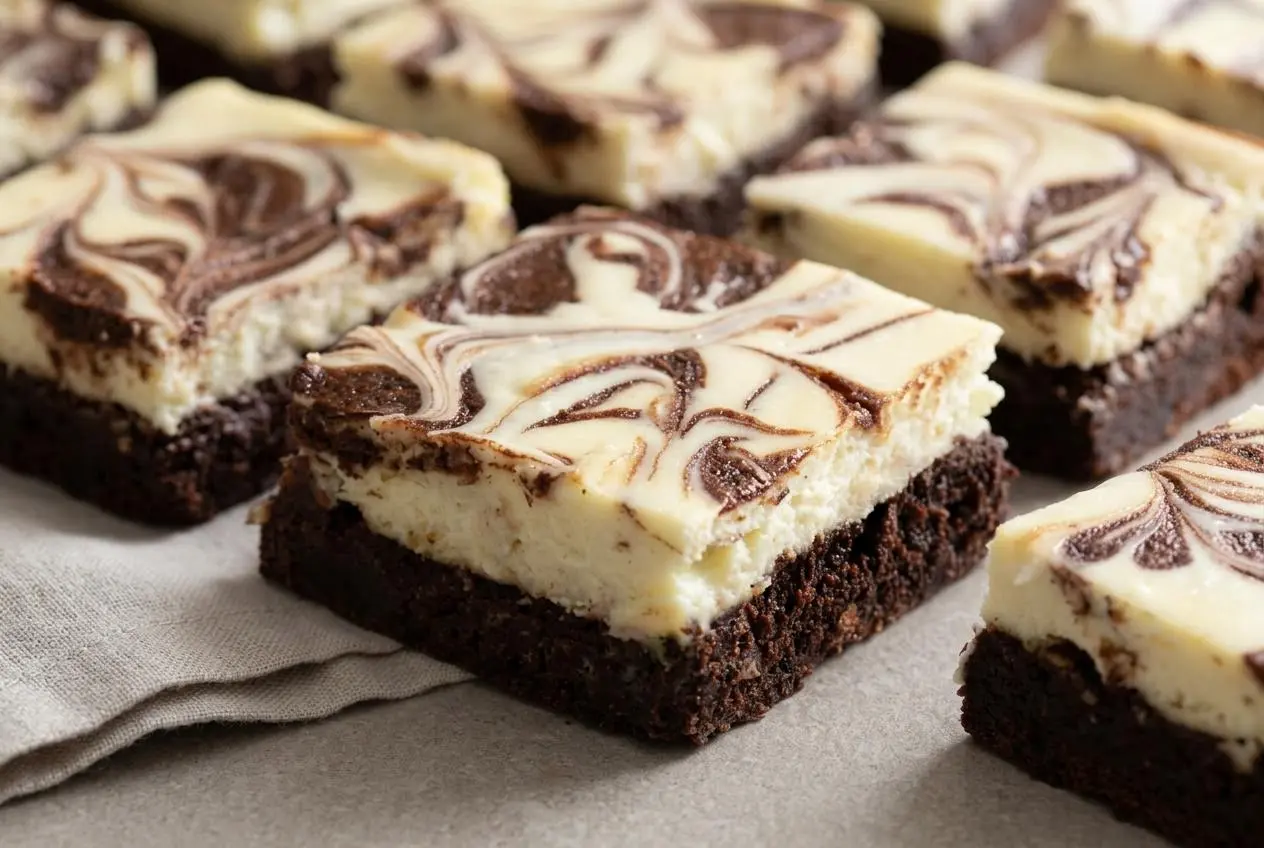
Cheesecake brownie bars combine a rich, fudgy chocolate brownie bottom with a tangy cream cheese swirl on top, baked in layers so each bite stays distinct, creamy, and deeply chocolatey.
Cheesecake Brownie Bars hit that perfect middle ground between dense brownies and classic cheesecake. The dark chocolate base stays rich and soft, while the vanilla-scented top bakes into a smooth, tangy layer with dramatic swirls.
They’re especially worth making if you want a dessert that looks polished but still feels comforting. A few small texture cues make all the difference here.
Set the cream cheese and eggs out early so the topping blends smooth and bakes evenly.
Key Ingredients and Why They Matter
Each ingredient pulls real weight here, shaping the bars’ color, structure, richness, moisture, and that clean contrast between fudgy brownie and creamy topping.
For the Brownie Base
- 1 cup unsalted butter, cubed (227g)
- 1⅓ cups semisweet chocolate chips, divided (240g)
- ¾ cup Dutch-processed cocoa powder
- 1 cup granulated sugar (200g)
- 1 cup brown sugar (220g)
- 2 large eggs, room temperature
- 1 yolk, room temperature
- 1 tablespoon brewed coffee
- 1 tablespoon vanilla extract
- 1 cup all-purpose flour (120g)
- 1 teaspoon salt
- 1 tablespoon hot water, plus more if needed
For the Cheesecake Topping
- 2 (8-ounce/227g) blocks cream cheese, room temperature
- ½ cup granulated sugar (100g)
- 1 pinch salt
- 2 large eggs, room temperature
- 1 tablespoon vanilla extract
Unsalted butter gives you full control over the salt level, which matters in a dessert with both cocoa and cream cheese. Brown sugar adds moisture and chew, coffee quietly deepens the chocolate, and the extra yolk helps the brownie base stay dense instead of cakey.
The cream cheese topping is intentionally clean and classic. Sugar softens the tang, eggs help it set into a custardy layer, and vanilla rounds out the flavor so the swirl tastes creamy instead of flat.
I always prefer weighing the flour at 120 g when I can, because even a slightly heavy cup can push these bars from fudgy to thicker and drier than intended.
The Role of Dutch-Processed Cocoa
Dutch-processed cocoa gives these bars a darker color and a smoother, deeper chocolate flavor than natural cocoa. It also tastes less sharp, which works beautifully with the tang of the cream cheese layer.
Whisking the cocoa into the warm butter and melted chocolate blooms it in fat, which helps the flavor open up more fully. That one move makes the brownie base taste rounder, darker, and more intense.
Why Room Temperature Cream Cheese Is Non-Negotiable
Cold cream cheese resists mixing, so it breaks into tiny white lumps that tend to stay put even after beating. Once those lumps are in the batter, they bake right into the swirl.
Room temperature cream cheese blends smoothly with the sugar, then accepts the eggs more evenly. That gives you a silkier topping and a more even bake across the pan.
How to Make Cheesecake Brownie Bars
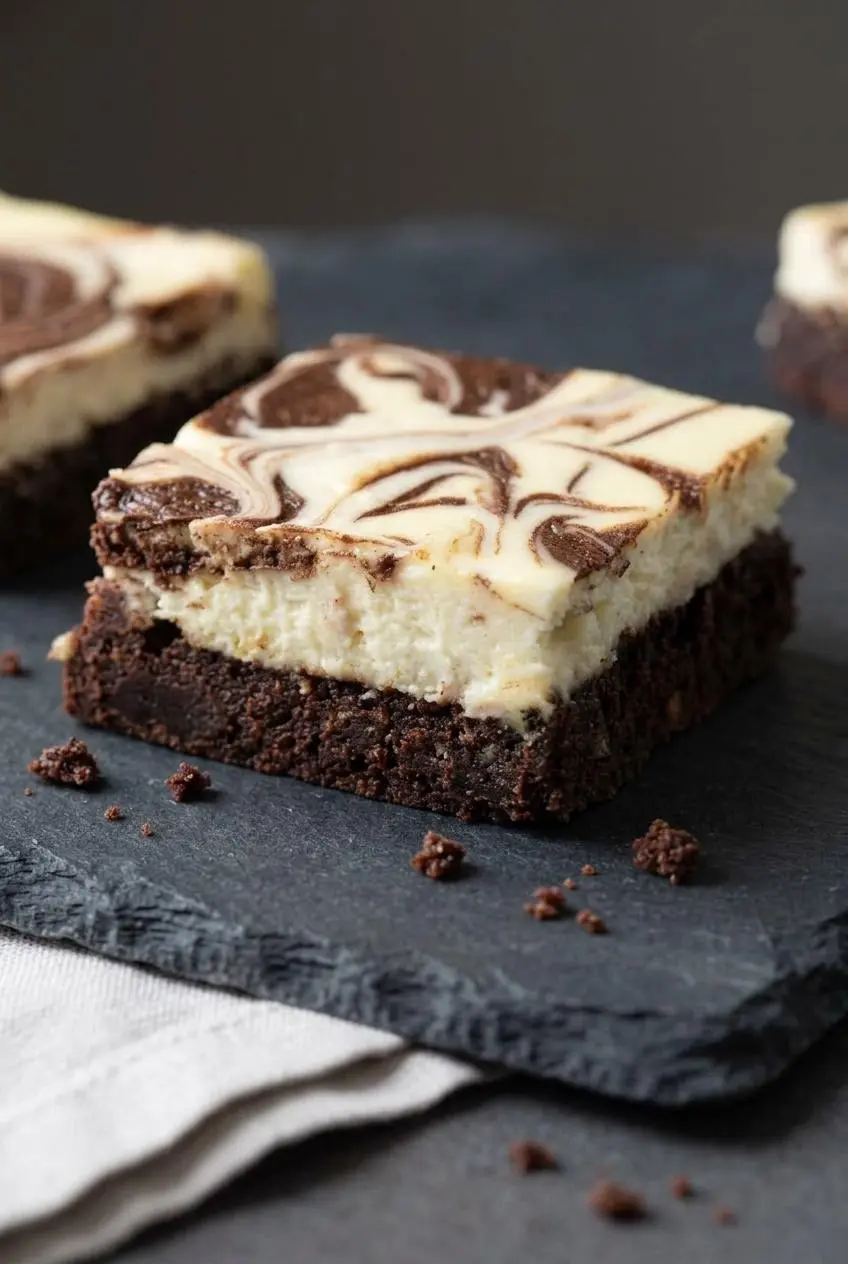
These bars come together in clear stages, and each one protects the final texture. The par-baked base keeps the layers separate, and the thinned swirl batter gives you those clean, graceful lines instead of heavy blotches.
For the Brownie Base
- Heat the oven to 350°F, lightly grease a 9-inch square baking pan, and line it with parchment paper.
The parchment should cover the bottom and make lifting the chilled bars out of the pan much easier later. - Place the butter and 1 cup of chocolate chips in a large microwave-safe bowl and melt them in 20-second bursts, stirring after each round, until smooth and fully combined, about 2 minutes total.
Stop as soon as the mixture is glossy and fluid so the chocolate does not scorch or separate. - Whisk the cocoa powder into the warm chocolate mixture, then add the granulated sugar, brown sugar, eggs, egg yolk, brewed coffee, and vanilla extract.
The batter should look dark, thick, and shiny once everything is evenly mixed. - Fold in the flour and salt with a spatula just until no dry streaks remain, then scoop ½ cup of batter into a small bowl.
Keep the mixing brief here so the brownie layer stays dense and fudgy instead of tough. - Stir the remaining ⅓ cup of chocolate chips into the main batter and spread it into the prepared pan.
The layer will be thick, and smoothing it into the corners helps the base bake evenly. - Bake the brownie base for 20 minutes for a very fudgy result or 30 minutes for a more cakey result.
While it bakes, stir the hot water into the reserved batter until it is still thick but slowly drips from a spoon like loose cake batter, adding a bit more water if needed.
For the Cheesecake Topping
- While the base bakes, beat the cream cheese, sugar, and salt in a large bowl with a hand mixer or stand mixer on medium speed for about 2 minutes.
The mixture should look very smooth, light, and free of stubborn lumps before the eggs go in. - Turn the mixer to low, add the eggs one at a time, scrape the bowl, and mix in the vanilla extract.
Keep the speed gentle so you do not whip in excess air that can make the topping puff and crack. - Pour the cheesecake topping over the hot par-baked brownie base without cooling the pan first.
The warm base helps the layers bond while still staying distinct. - Dollop the thinned reserved brownie batter over the cheesecake layer and swirl it with a skewer or the tip of a knife.
Use a light hand so the pattern stays defined instead of blending into a muddy top. - Return the pan to the oven and bake for 10 minutes at 350°F.
This short stretch gives the topping an early set before the lower finishing temperature. - Reduce the oven temperature to 325°F and bake for 20 to 25 minutes more, then cool the pan completely on a wire rack and refrigerate for 1 hour before slicing.
The edges should be slightly puffed, and when you gently tap the pan, the center should wobble softly like set pudding rather than slosh.
The Box Mix Shortcut: Easy Swirled Cheesecake Bars
If you want the cheesecake swirl without making the brownie base from scratch, a boxed mix works well here too. Prepare a standard 18-ounce brownie mix as directed, then reserve about ½ cup of the batter and stir in 1 tablespoon of water to loosen it for swirling.
Spread the remaining batter in the lined pan, bake the base briefly so it starts to set, then pour on the homemade cream cheese topping and swirl with the thinned batter before finishing the bake. If shortcut bakes are your thing, cake mix brownies are another fun way to keep dessert low effort.
Watch texture more than branding. Some mixes run thinner than scratch batter, so the reserved swirl portion may need only a small splash of water to reach that slow-ribbon consistency.
Troubleshooting Common Cheesecake Bar Mistakes
Most problems with these bars come down to air, temperature, or moisture balance. Once you know what each layer is trying to do, the fixes get much easier.
- If the cheesecake layer looks grainy, the cream cheese was likely too cold. Start with fully softened blocks so the topping turns smooth before the eggs go in.
- If the layers blur together, the brownie base probably needed more structure. Par-baking gives it enough lift and firmness to support the creamy top.
- If the bottom turns dry, the base may have baked too long before the topping was added. For the fudgiest bars, lean toward the shorter par-bake time.
- If slicing gets messy, the bars are still too warm inside. A deeper chill firms both layers and keeps the swirl pattern sharp.
For a good comparison point on how classic cream cheese fillings behave as they cool and set, classic cheesecake bars are useful to study side by side.
How to Prevent Your Cheesecake Layer from Cracking
Cracks usually start with too much air. When the eggs are beaten aggressively into the cream cheese mixture, the topping rises more than it should, then sinks and splits as it cools.
Beat the cream cheese well before adding the eggs, then switch to low speed and mix just until combined. That keeps the texture creamy and custardy instead of puffy like a soufflé.
Avoiding a Soggy Bottom: The Importance of Par-Baking
The cheesecake layer carries a lot of moisture and weight. If it goes straight onto raw brownie batter, it can sink in and leave the bottom dense in the wrong way, with a muddy seam between layers.
Par-baking solves that by creating an early crust barrier. The brownie base sets enough to hold its shape, while the final bake still keeps it soft and fudgy in the center.
Gourmet Swaps: Oreo and Cookie Crust Options
If you want more crunch and a sharper cookie contrast, you can add a cookie crumb crust under the brownie layer. An Oreo base gives the bars a firmer bottom and a more dramatic cookies-and-cream vibe than the classic all-brownie foundation.
Because that extra crust adds another layer to heat through, expect the bars to feel slightly thicker and to bake a little differently depending on how compactly the crumbs are pressed. Keep an eye on the same doneness signs: lightly puffed edges and a softly wobbly center.
Swirled tops look more classic and elegant, while a more layered or chunked topping style feels richer and more rustic. If you love that chocolate-cookie-and-cheesecake pairing, oreo cheesecake bites carry the same flavor idea in a smaller format.
Gluten-Free and Dietary Adjustments
You can make this recipe gluten-free by swapping the all-purpose flour in the brownie base for a good 1:1 gluten-free baking flour. Choose one that is meant for baking, since the brownie layer still needs structure strong enough to support the cheesecake topping.
Cornstarch is another optional path if you prefer an especially chewy, dense brownie texture. The crumb turns tighter and more modern in style, with a little less of the classic brownie softness.
Any flour change can shift the batter thickness, so pay attention to the reserved swirl portion. You still want it thick enough to sit on top, but loose enough to trail off the spoon in a slow ribbon.
Elegant Customizations and Serving Ideas
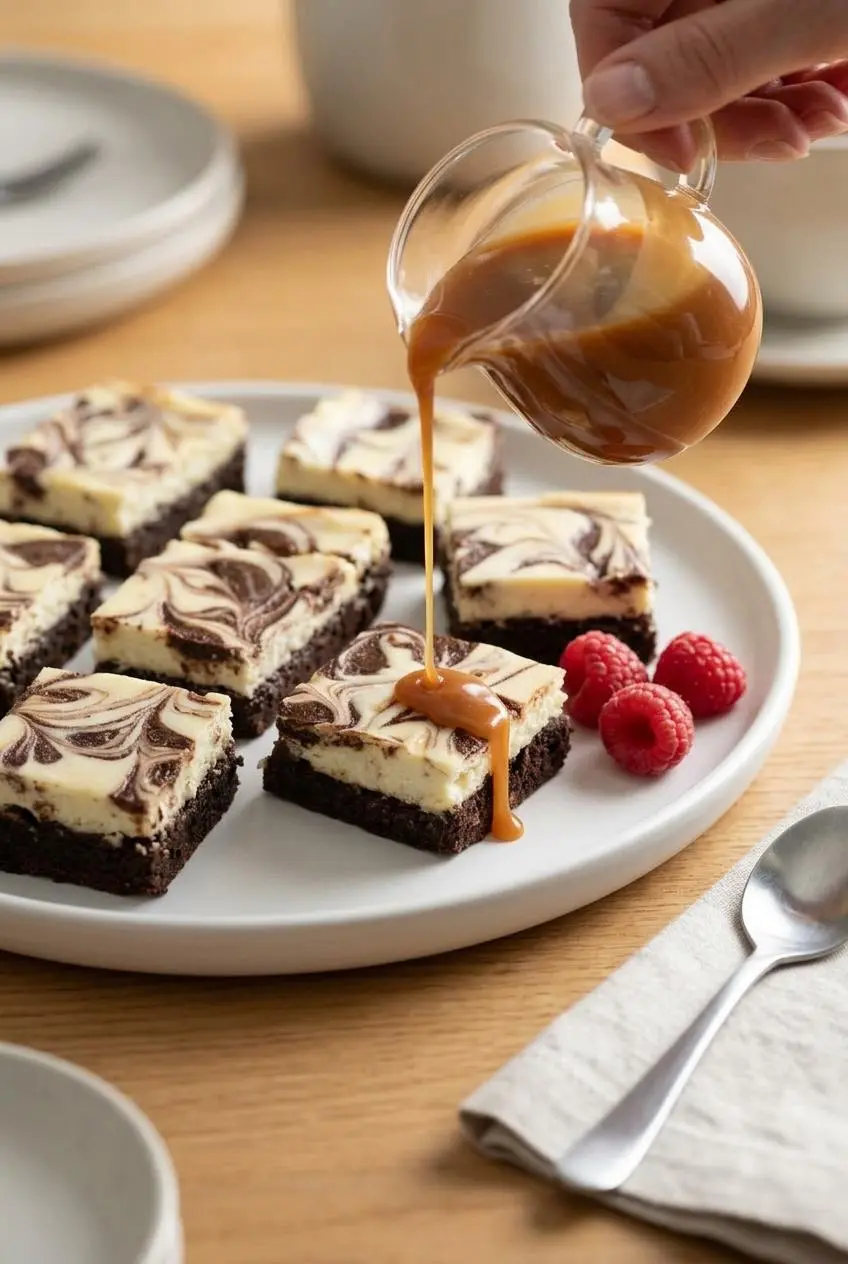
A pinch of espresso powder melted into the chocolate base can deepen the cocoa flavor without making the bars taste like coffee. You can also swirl in a ribbon of dark chocolate hazelnut spread for a nuttier aroma and a slightly more dessert-shop finish.
For serving, cut them into neat squares once fully chilled, or go smaller and make 1-inch bites for a dessert tray. A drizzle of salted caramel and a few fresh raspberries are especially nice here, and if that flavor combination is already calling your name, caramel brownie cheesecake is a natural next bake.
For the cleanest presentation, use a sharp knife, warm it briefly, and wipe it between cuts. Rich bars reward patience.
Storage and Make-Ahead Guide
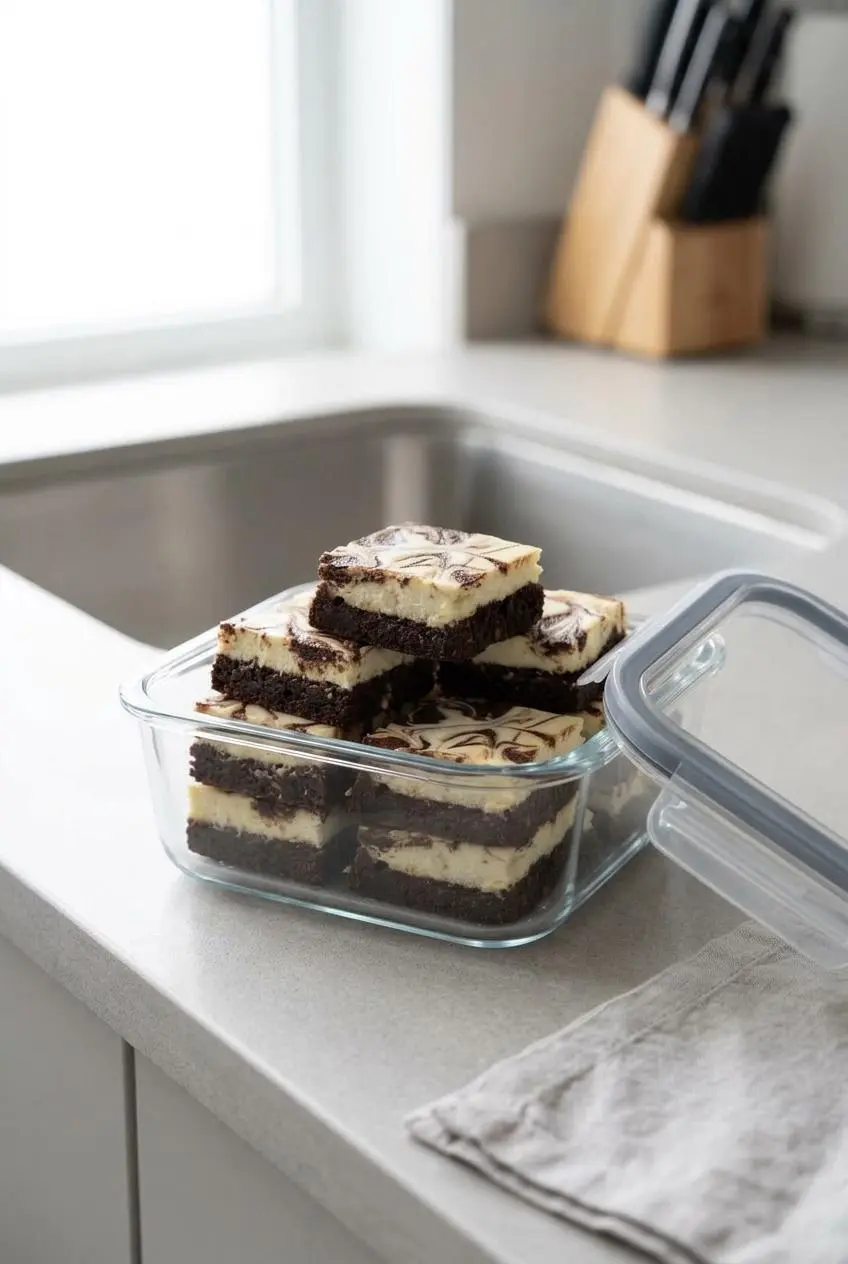
Because these bars contain cream cheese, store them chilled in an airtight container. For best texture and food safety, keep them in the refrigerator, and a refrigerator set to 40°F or below is the safest place for dairy-based desserts.
They keep fresh for up to 4 days. If you want the neatest slices for serving, chill the bars thoroughly before cutting, and keep them cold again until you’re ready to plate them.
These also work well as a make-ahead dessert because the texture improves after a longer chill. Just keep the pan or slices well covered so the top does not dry out or pick up fridge odors.
Conclusion
These bars really shine when you protect the contrast between the layers: bloom the cocoa in the warm chocolate mixture, par-bake the base, and keep the cheesecake batter smooth and low in air.
Once they’re fully chilled, the slices turn cleaner, the swirl looks sharper, and the whole dessert feels richer. Save a little patience for the fridge and the payoff is big.
Frequently Asked Questions
Do cheesecake brownies need to be refrigerated?
Yes. Because they contain real cream cheese, keep them in an airtight container in the refrigerator. Cold storage also helps the bars stay firm and dense instead of soft and smeary at room temperature.
Can I make these bars using a boxed brownie mix?
Absolutely. Prepare the mix as directed, reserve about ½ cup of batter, and thin that portion with a little water for the swirl. Par-bake the main brownie layer first, then add the cheesecake topping and swirl as usual.
How do I get perfectly clean cuts on my dessert bars?
Let the bars cool completely, then refrigerate them for at least 3 hours before slicing. That extra chill firms both layers enough for tidy edges. Use a sharp knife, dip or warm it in hot water, and wipe it clean between every cut.
Why did my cheesecake layer puff up and crack?
This usually happens when too much air gets beaten in after the eggs are added. The topping rises too fast, then cracks as it settles. Mix the eggs on low speed and stop as soon as the batter looks smooth and combined.
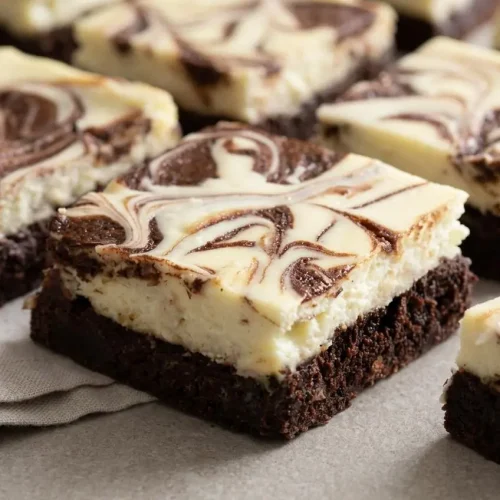
Cheesecake Brownie Bars

Equipment
- 9 inch square baking pan
- Mixing Bowls
- Electric hand or stand mixer
Ingredients
For the Brownie Base
- 1 cup unsalted butter, cubed (227g)
- 1 1/3 cups semisweet chocolate chips, divided (240g)
- 3/4 cup Dutch-processed cocoa powder
- 1 cup granulated sugar (200g)
- 1 cup brown sugar (220g)
- 2 large eggs, room temperature
- 1 yolk, room temperature
- 1 tablespoon brewed coffee
- 1 tablespoon vanilla extract
- 1 cup all-purpose flour (120g)
- 1 teaspoon salt
- 1 tablespoon hot water, plus more if needed
For the Cheesecake Topping
- 2 (8-ounce/227g) blocks cream cheese, room temperature
- 1/2 cup granulated sugar (100g)
- 1 pinch salt
- 2 large eggs, room temperature
- 1 tablespoon vanilla extract
Instructions
For the Brownie Base
- Heat the oven to 350°F, lightly grease a 9-inch square baking pan, and line it with parchment paper. The parchment should cover the bottom and make lifting the chilled bars out of the pan much easier later.
- Place the butter and 1 cup of chocolate chips in a large microwave-safe bowl and melt them in 20-second bursts, stirring after each round, until smooth and fully combined, about 2 minutes total. Stop as soon as the mixture is glossy and fluid so the chocolate does not scorch or separate.
- Whisk the cocoa powder into the warm chocolate mixture, then add the granulated sugar, brown sugar, eggs, egg yolk, brewed coffee, and vanilla extract. The batter should look dark, thick, and shiny once everything is evenly mixed.
- Fold in the flour and salt with a spatula just until no dry streaks remain, then scoop ½ cup of batter into a small bowl. Keep the mixing brief here so the brownie layer stays dense and fudgy instead of tough.
- Stir the remaining ⅓ cup of chocolate chips into the main batter and spread it into the prepared pan. The layer will be thick, and smoothing it into the corners helps the base bake evenly.
- Bake the brownie base for 20 minutes for a very fudgy result or 30 minutes for a more cakey result. While it bakes, stir the hot water into the reserved batter until it is still thick but slowly drips from a spoon like loose cake batter, adding a bit more water if needed.
For the Cheesecake Topping
- While the base bakes, beat the cream cheese, sugar, and salt in a large bowl with a hand mixer or stand mixer on medium speed for about 2 minutes. The mixture should look very smooth, light, and free of stubborn lumps before the eggs go in.
- Turn the mixer to low, add the eggs one at a time, scrape the bowl, and mix in the vanilla extract. Keep the speed gentle so you do not whip in excess air that can make the topping puff and crack.
- Pour the cheesecake topping over the hot par-baked brownie base without cooling the pan first. The warm base helps the layers bond while still staying distinct.
- Dollop the thinned reserved brownie batter over the cheesecake layer and swirl it with a skewer or the tip of a knife. Use a light hand so the pattern stays defined instead of blending into a muddy top.
- Return the pan to the oven and bake for 10 minutes at 350°F. This short stretch gives the topping an early set before the lower finishing temperature.
- Reduce the oven temperature to 325°F and bake for 20 to 25 minutes more, then cool the pan completely on a wire rack and refrigerate for 1 hour before slicing. The edges should be slightly puffed, and when you gently tap the pan, the center should wobble softly like set pudding rather than slosh.