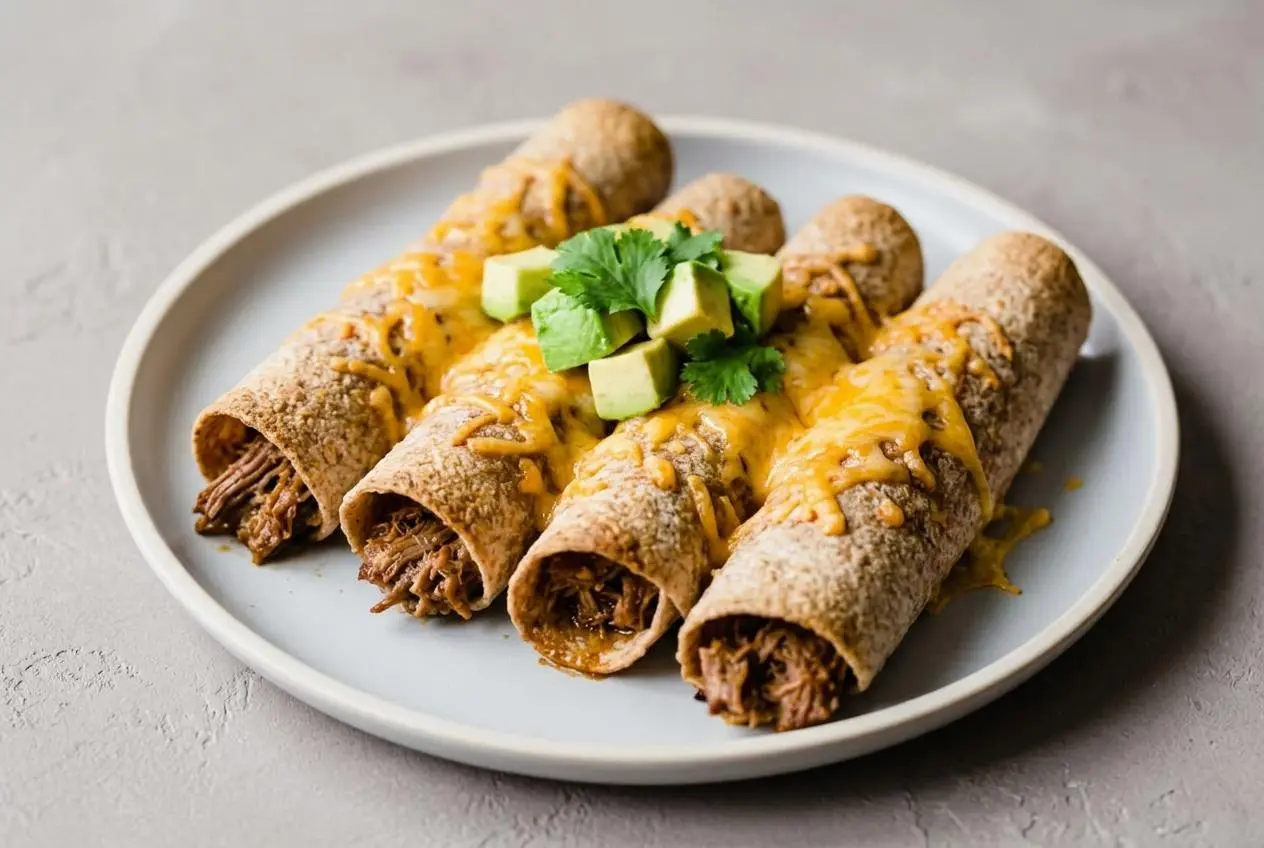
Beef taquitos are easy to make at home with a creamy shredded beef filling, rolled tortillas, and your choice of baking, air frying, or frying for a crisp finish.
These taquitos are crunchy outside, savory and cheesy inside, and flexible enough for a weekend batch or a make-ahead dinner. The main version uses chuck roast for rich shredded beef, but you’ve got options.
You’ll love how adaptable they are, especially when you want crispy rolled tacos without a lot of last-minute work. The freezer angle is the real win.
Warm the tortillas right before rolling, not all at once, so they stay soft and don’t crack on you.
Why This Beef Taquito Recipe Is the Best
This version gives you the classic taquito texture with a filling that stays moist instead of dry and crumbly. The chuck roast cooks until tender, then gets mixed with cream cheese and salsa so every bite tastes rich, tangy, and well seasoned.
It’s also built to work with real life. You can bake them, air fry them, or fry them the traditional way, and you can freeze them before cooking so future-you gets a very good dinner with almost no effort.
Ingredients You’ll Need
Each ingredient pulls its weight here, from the broth and seasoning that build flavor to the cream cheese, salsa, and cheddar that keep the filling creamy, melty, and balanced.
- 1 cup beef broth
- 6 tablespoons taco seasoning
- 3 pounds boneless beef chuck roast (trimmed of excess fat)
- 4 ounces cream cheese
- 1 cup salsa (medium or hot)
- 16 tortillas (I prefer whole wheat for more fiber, but gluten-free, and flour will work also.)
- 3 cups shredded cheddar cheese
- cooking spray
- Optional toppings: salsa, guacamole, sour cream, or plain Greek yogurt
I like to let the cream cheese sit out while the beef cooks so it melts into the shredded meat faster and more evenly.
How to Make Beef Taquitos
Step 1: Make the Beef Filling
- Whisk the beef broth and taco seasoning together in a slow cooker or Instant Pot, then add the beef and turn it to coat well.
If you’re using the Instant Pot, cut the roast into 2-inch pieces first so it cooks evenly under pressure. - Cook the beef until it shreds easily.
Use Low for 8 to 10 hours or High for 5 to 6 hours in the slow cooker, or pressure cook on high for 30 minutes in the Instant Pot with a 10-minute natural release before releasing the rest. - Move the cooked beef to a board, pour off most of the liquid, and leave a little behind in the cooker before shredding the meat with two forks.
The filling should look juicy but not soupy when the beef goes back into the cooker. - Stir the cream cheese and salsa into the shredded beef until everything is melted and evenly combined.
The finished filling should be creamy, savory, and thick enough to spoon without running.
Step 2: Assemble the Taquitos
- Set the tortillas on a clean work surface and spoon 1/4 cup of beef filling onto each one, leaving the edges mostly clear.
This little border helps keep the filling from squeezing out as you roll. - Top each tortilla with 2 to 3 tablespoons of shredded cheddar, then roll each taquito up as tightly as you can.
A snug roll gives you neat taquitos that hold together better and crisp more evenly.
Step 3: Cook the Taquitos
- For the oven, heat it to 400°F and place racks in the upper and lower thirds, then arrange the taquitos seam-side down on two sprayed or lined rimmed baking sheets and coat the tops lightly with cooking spray.
Bake for 15 to 20 minutes, switching the pans halfway through, until the cheese is melted and the tortillas turn golden. - For the air fryer, preheat it to 375°F, spray the taquitos and the basket lightly, then place the taquitos seam-side down in a single layer.
Cook in batches for 6 to 8 minutes until they are browned, crisp, and heated through. - Serve the taquitos hot with any toppings you like.
The best texture is right away, when the outside still crackles and the cheese is melty.
Those are the official bake and air fryer paths for the main recipe. If you want to choose between shredded beef and a quicker ground beef version first, the next section will help.
Choosing Your Beef Filling: Shredded vs. Ground
This choice changes both the texture and the timeline. The main recipe uses shredded chuck roast because it gives you that classic taquito filling with long, tender strands of beef and deeper flavor, but ground beef is a smart option when dinner needs to move faster.
| Filling | Best Cut | Texture | Best For |
|---|---|---|---|
| Shredded beef | Chuck roast | Tender, juicy strands | Classic taquitos and make-ahead batches |
| Ground beef | Ground beef | More even, crumbly filling | Weeknight cooking |
| Carne asada | Skirt or flank steak | Chunky, smoky bites | A steakhouse-style variation |
Shredded beef wins for richness and that classic rolled taco feel. Because chuck roast has time to break down, it stays tender and mixes beautifully with cream cheese and salsa. It does take longer, though, so it’s more of a plan-ahead filling.
Ground beef is faster and easier to manage if you want a same-day dinner. It browns quickly, takes seasoning well, and gives a more uniform bite. If you often make ground beef tacos, think of this as that same practical weeknight energy in crispy rolled form.
Carne asada sits in the middle as the splurge option. It’s great when you want a beefier chew and charred steak flavor, but it won’t be as creamy or cohesive unless you chop it small and keep the filling from getting too dry.
Tips for Perfect Taquitos (No More Cracking!)
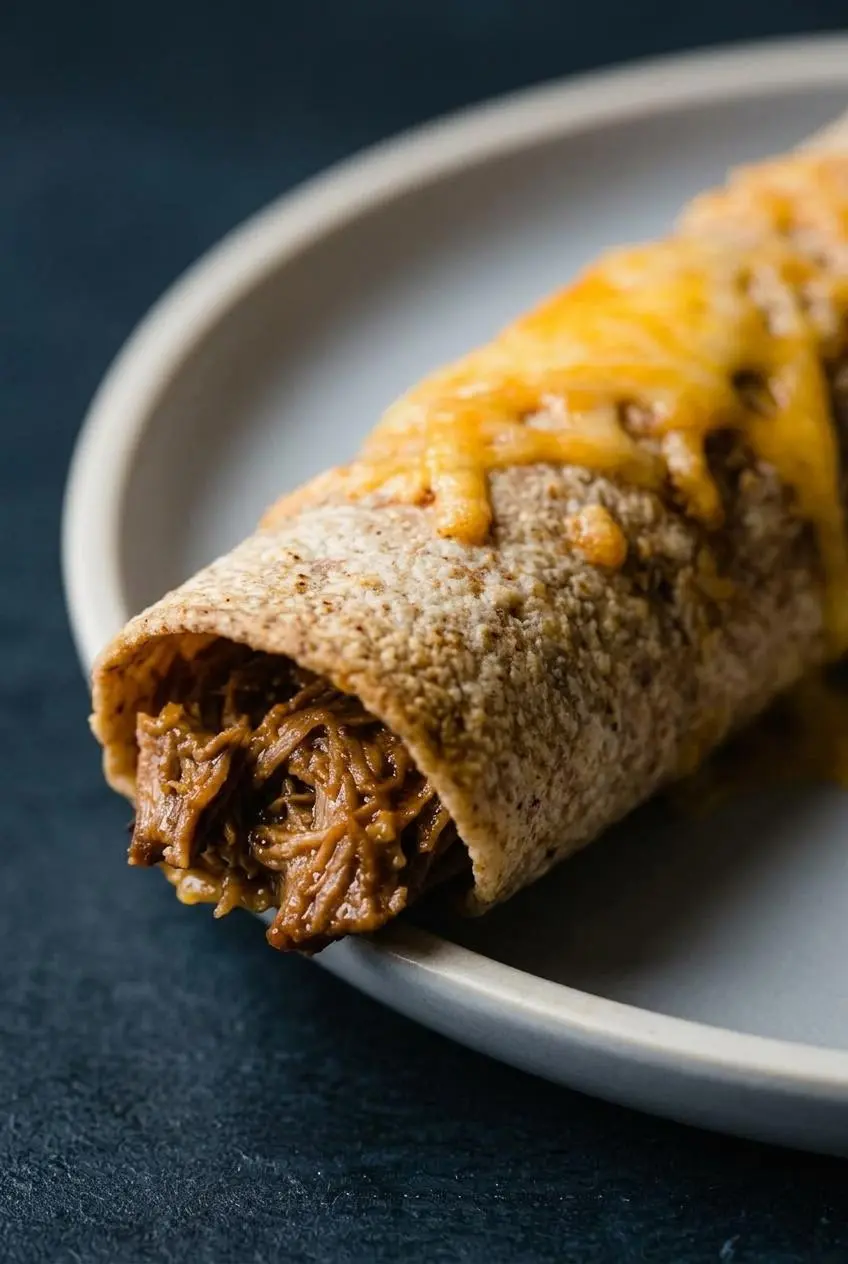
A lot of home cooks get stuck at the rolling stage. The biggest issue is almost always the tortillas, and a few small adjustments make a huge difference.
- Warm corn tortillas before rolling them. Cold tortillas crack because they’re stiff, not because you did anything wrong.
- Use the microwave for speed. Wrap a stack in damp paper towels and heat until soft and pliable.
- Use a hot, dry skillet if you want more control. Warm each tortilla briefly on both sides just until flexible.
- Roll tightly, but don’t overfill. Too much filling makes the tortilla split and pushes cheese out during cooking.
- Keep the seam underneath. Seam-side down helps the taquitos stay closed in the oven, air fryer, or skillet.
- Assemble in batches. If warmed tortillas sit too long, they can dry out, tear, or turn gummy.
- Use a slotted spoon if your filling looks very wet. A soggy filling can soften the tortilla before it has a chance to crisp.
- Secure with toothpicks for frying if needed. Just remove them before serving.
| Problem | Likely Cause | Fix |
|---|---|---|
| Tortillas crack | They were too cool or too dry | Warm them more thoroughly and roll right away |
| Filling spills out | Too much filling | Leave the edges clearer and roll more snugly |
| Taquitos unroll | Loose rolling or seam facing up | Place seam-side down and use toothpicks for frying |
| Taquitos get soggy | Filling was too wet or pan was crowded | Drain excess liquid and leave space around each taquito |
| Filling tastes dry | Too much cooking liquid was discarded | Leave a little liquid with the shredded beef before mixing |
Honestly, the best trick is to work with six or so tortillas at a time instead of all sixteen. It feels slower for about one minute, then saves the whole batch.
Cooking Methods: A Full Comparison (Fried, Baked, and Air Fryer)
All three methods work, but they give you slightly different results. If you want the crunchiest shell, fry them. If you want the easiest batch method, bake them. If you want a fast balance of crispiness and convenience, the air fryer is hard to beat.
Method 1: Deep-Frying (Classic & Crispiest)
Heat a few inches of oil in a deep skillet or heavy pot until it’s ready for frying, then lower in the taquitos seam-side down in small batches. Fry until the shells are deeply golden and crisp, turning as needed, then drain on paper towels.
This gives you the most traditional result and the loudest crunch. You know the texture is right when the outside has tiny bubbles and makes that satisfying crackle when you tap it with tongs.
Method 2: Baking (Easy & Healthier)
Baking is the best choice for a full batch. Arrange the taquitos with space between them, spray the tops well, and use a hot oven so they crisp instead of steaming.
The texture is a little drier and less blistered than fried taquitos, but the cleanup is much easier. For extra color, make sure the pan isn’t crowded and use the upper and lower racks as directed.
Method 3: Air Frying (Quick & Crispy)
Air frying gives you a crisp shell faster than the oven and with less oil than deep-frying. Keep the taquitos in a single layer, spray lightly, and cook in batches so the hot air can circulate.
This method is great for smaller households or reheating a portion later. The edges usually brown first, which is exactly what you want.
| Method | Crispiness Level | Cook Time | Health/Cleanup |
|---|---|---|---|
| Frying | Highest | Fast once oil is hot | Most oil and the messiest cleanup |
| Baking | Good | 15 to 20 minutes at 400°F | Less oil and easiest for a big batch |
| Air frying | Very good | 6 to 8 minutes at 375°F | Low oil with easy cleanup, but smaller batches |
So which one is best? Frying gives the most classic taquito experience. Baking is the easiest for feeding people. Air frying lands right in the sweet spot if you want crisp results without heating the whole kitchen.
Recipe Variations to Try
Once you’ve got the basic method down, it’s easy to change the filling without losing that crispy taquito payoff.
Quick & Creamy Ground Beef Filling
Brown ground beef in a skillet, drain off excess grease, then stir in taco seasoning, cream cheese, and salsa until the mixture is thick and creamy. If you make this version, cook the beef thoroughly and use official guidance for the 160°F final temperature.
This version is faster than chuck roast and a great answer to the “what’s the easiest way to make taquitos?” question. It’s especially good for weeknights because the filling comes together in one pan.
Creamy Beef and Cheese Filling
The main recipe already leans creamy thanks to the cream cheese and salsa, but you can push that texture a bit further by making sure the beef stays moist before mixing. Leave a small amount of cooking liquid with the shredded meat so the filling stays lush instead of tight and dry.
If you like a softer, richer center, this is the move. It also helps the filling cling together better when you roll the tortillas.
Gourmet Carne Asada Filling
Use grilled and finely diced skirt or flank steak for a smokier, steak-forward taquito. Keep the pieces small so the tortillas roll neatly, and add enough salsa or creamy element to keep the filling from feeling too firm.
If you already love bold steak flavors, beef steak fajitas use a similar cut and flavor profile. This variation tastes especially good with bright toppings like guacamole or pico de gallo.
Flavor Boosters
For a smokier filling, stir smoked paprika and a small splash of liquid smoke into the beef mixture. It adds a deeper, almost grilled flavor without changing the method.
You can also turn the quick ground beef version into a beef-and-bean filling by folding in refried beans until the mixture is spreadable and not overly loose. And if you swap to flour tortillas, you’ll end up with something closer to flautas: a little softer, a little chewier, and easier to roll.
What to Serve with Taquitos
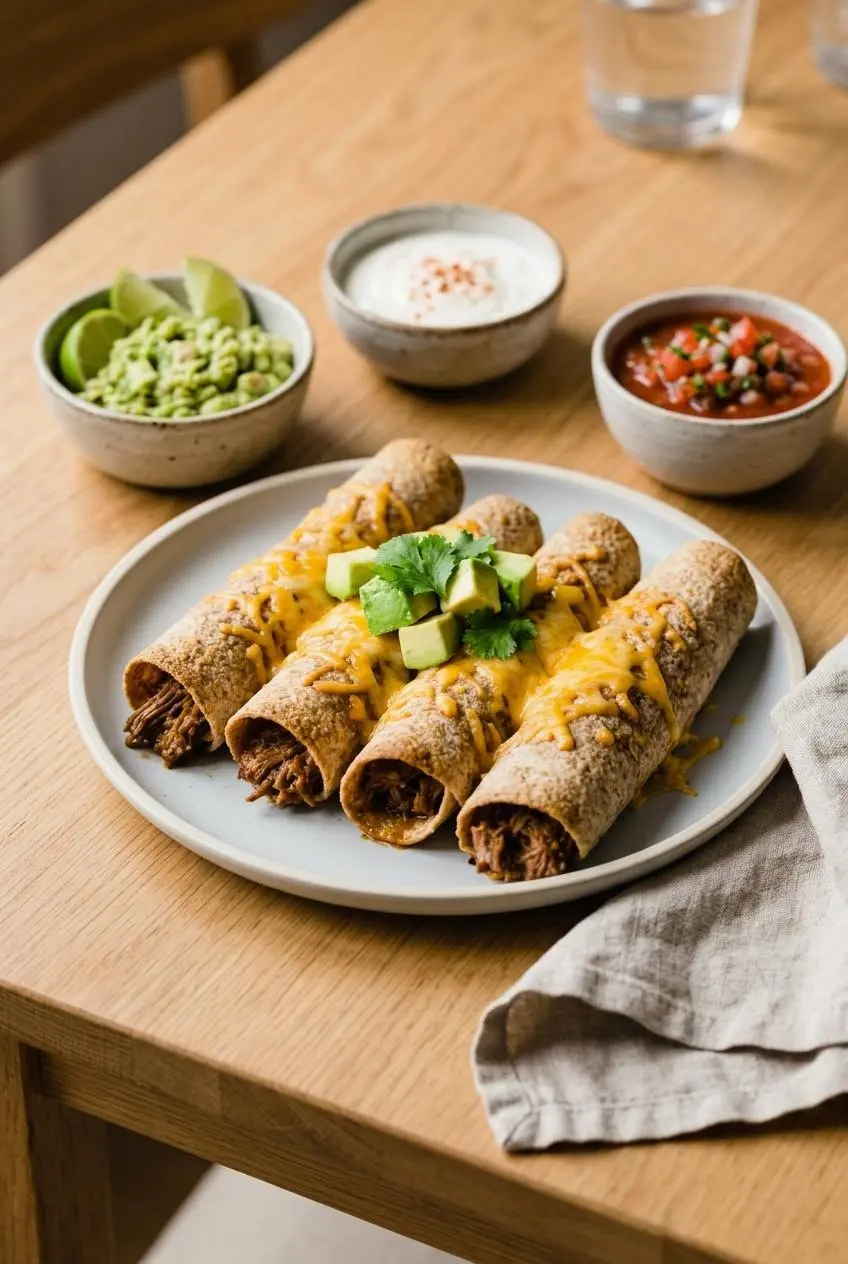
Taquitos are happiest with cool, creamy, crunchy toppings. Set out a few and dinner basically takes care of itself.
- Guacamole
- Sour cream or plain Greek yogurt
- Salsa or pico de gallo
- Shredded lettuce
- Crumbled cotija cheese
For sides, Mexican rice and black beans make the meal feel complete without much extra work. A crisp salad with lime dressing also works well if you want something lighter next to the cheesy filling.
If taco-night dinners are already popular at your house, ground beef quesadillas are another easy tortilla-and-beef favorite to keep in rotation.
The Ultimate Make-Ahead and Freezing Guide
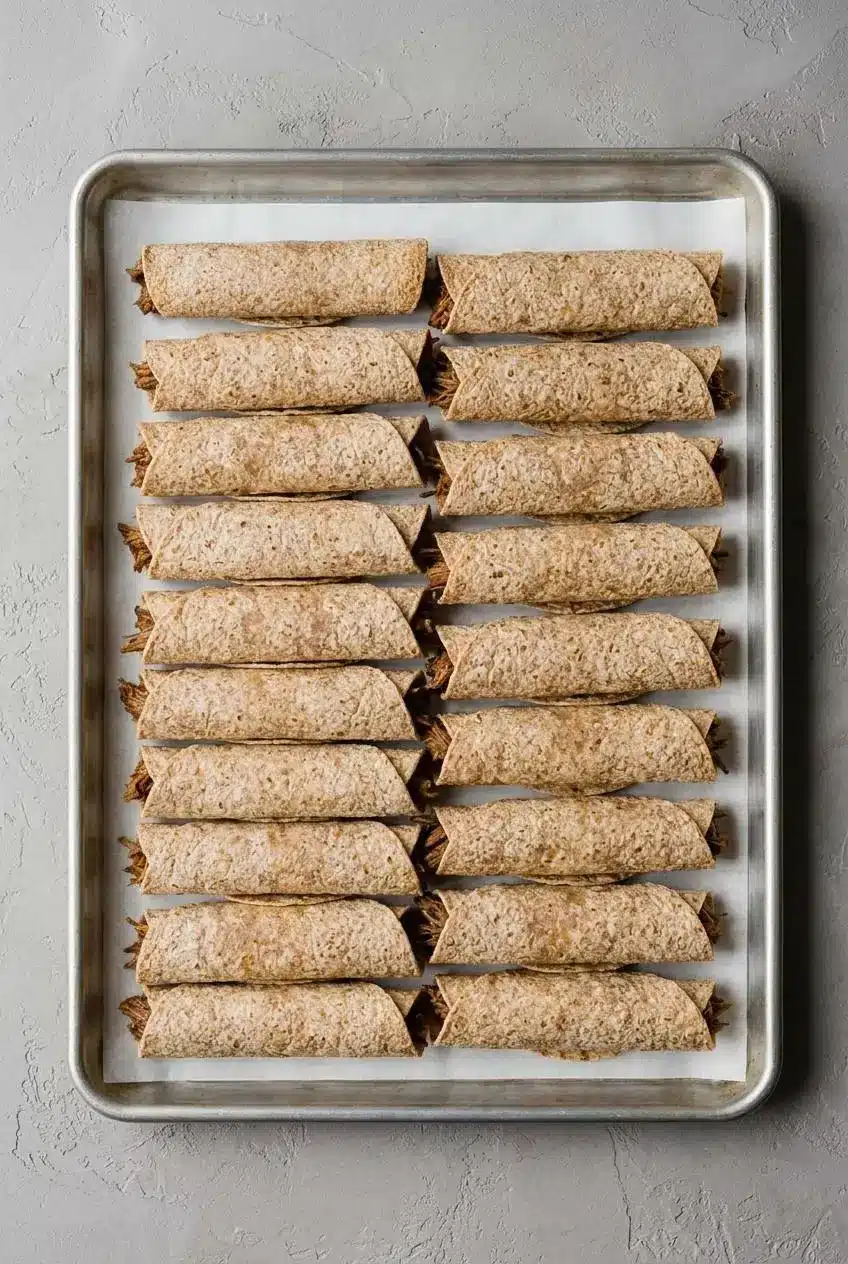
If you want the best freezer results, freeze the taquitos before cooking them. That keeps the shells from going limp later and lets you cook only what you need.
To do it, assemble the taquitos, place them in a single layer on a baking sheet, and freeze until firm. Once solid, transfer them to a freezer-safe bag or container so they’re easy to grab later.
You can cook them straight from frozen. For the oven, keep the same 400°F temperature and add extra time until the taquitos are hot in the center and crisp outside. For the air fryer, cook from frozen in batches until browned and heated through, adding a few extra minutes as needed.
For cooked leftovers, let them cool before refrigerating in a covered container. For best food safety, keep leftovers within official guidance of 3 to 4 days, and reheat until hot and crisp again.
The oven or air fryer brings back the shell best. The microwave works in a pinch, but the tortillas soften, so it’s better for speed than crunch.
Conclusion
These taquitos deliver everything you want: crispy edges, a creamy beefy center, and enough flexibility to match your schedule and your favorite cooking method.
Make a batch now, freeze some for later, and enjoy the fact that homemade taquitos can be very doable on a busy week. Future dinner looks good.
Frequently Asked Questions
How do I keep my corn tortillas from cracking when I roll them?
Warm them first until they’re soft and flexible. Wrap a stack in damp paper towels and microwave briefly, or heat them one at a time in a dry skillet. Roll while they’re still warm. Work in small batches so the tortillas don’t dry out while they wait.
What’s the best way to cook taquitos: frying, baking, or air frying?
Frying gives the crispiest, most traditional finish. Baking is easiest for a full batch and uses less oil. Air frying is a great middle ground with fast cook time and very crisp edges. If you’re unsure, start with the air fryer for the best balance.
Can I make taquitos ahead of time and freeze them?
Yes, and freezing them before cooking gives the best texture later. Arrange the assembled taquitos on a sheet pan first so they don’t stick together. Once frozen solid, move them to a freezer-safe bag or container. Cook them straight from frozen in the oven or air fryer.
What is the difference between a taquito and a flauta?
Taquitos are traditionally made with corn tortillas. Flautas are usually made with flour tortillas. Both are rolled and filled, but flour tortillas give a softer, slightly chewier bite. This recipe works with either tortilla style.
What kind of beef is best for taquitos?
Chuck roast is the best choice for classic shredded beef taquitos. Ground beef is the quickest option for a weeknight version. Skirt or flank steak works well for a carne asada-style filling. The best choice depends on whether you want deep flavor, speed, or a steakier bite.
How do I get my baked or air-fried taquitos extra crispy?
Spray the outsides lightly with cooking oil before cooking. Don’t crowd the pan or basket. Keep them seam-side down so they hold their shape as they crisp. Use a hot oven or a fully preheated air fryer for the best texture.
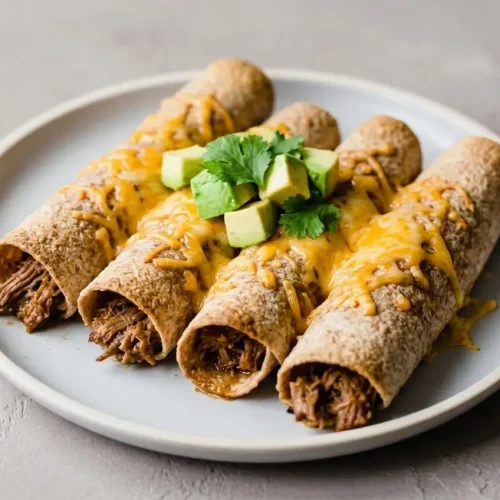
Beef Taquitos

Equipment
- Slow cooker or Instant Pot
- Baking Sheets
- Air fryer
Ingredients
- 1 cup beef broth
- 6 tablespoons taco seasoning
- 3 pounds boneless beef chuck roast (trimmed of excess fat)
- 4 ounces cream cheese
- 1 cup salsa (medium or hot)
- 16 tortillas I prefer whole wheat for more fiber, but gluten-free, and flour will work also.
- 3 cups shredded cheddar cheese
- cooking spray
- Optional toppings: salsa, guacamole, sour cream, or plain Greek yogurt
Instructions
Step 1: Make the Beef Filling
- Whisk the beef broth and taco seasoning together in a slow cooker or Instant Pot, then add the beef and turn it to coat well. If you’re using the Instant Pot, cut the roast into 2-inch pieces first so it cooks evenly under pressure.
- Cook the beef until it shreds easily. Use Low for 8 to 10 hours or High for 5 to 6 hours in the slow cooker, or pressure cook on high for 30 minutes in the Instant Pot with a 10-minute natural release before releasing the rest.
- Move the cooked beef to a board, pour off most of the liquid, and leave a little behind in the cooker before shredding the meat with two forks. The filling should look juicy but not soupy when the beef goes back into the cooker.
- Stir the cream cheese and salsa into the shredded beef until everything is melted and evenly combined. The finished filling should be creamy, savory, and thick enough to spoon without running.
Step 2: Assemble the Taquitos
- Set the tortillas on a clean work surface and spoon 1/4 cup of beef filling onto each one, leaving the edges mostly clear. This little border helps keep the filling from squeezing out as you roll.
- Top each tortilla with 2 to 3 tablespoons of shredded cheddar, then roll each taquito up as tightly as you can. A snug roll gives you neat taquitos that hold together better and crisp more evenly.
Step 3: Cook the Taquitos
- For the oven, heat it to 400°F and place racks in the upper and lower thirds, then arrange the taquitos seam-side down on two sprayed or lined rimmed baking sheets and coat the tops lightly with cooking spray. Bake for 15 to 20 minutes, switching the pans halfway through, until the cheese is melted and the tortillas turn golden.
- For the air fryer, preheat it to 375°F, spray the taquitos and the basket lightly, then place the taquitos seam-side down in a single layer. Cook in batches for 6 to 8 minutes until they are browned, crisp, and heated through.
- Serve the taquitos hot with any toppings you like. The best texture is right away, when the outside still crackles and the cheese is melty.