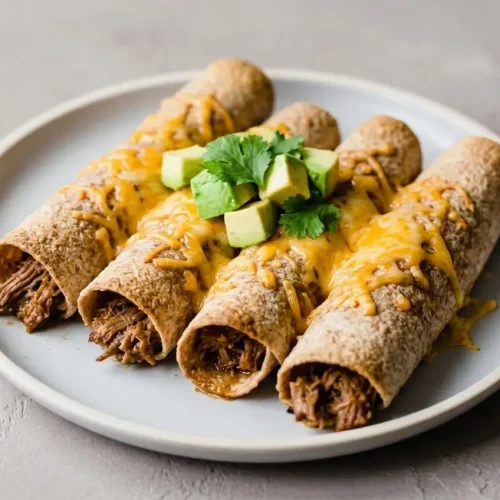
Beef Taquitos

Crispy on the outside, creamy and savory on the inside, these homemade beef taquitos are a freezer-friendly dream. Perfect for baking, air frying, or frying!
Equipment
- Slow cooker or Instant Pot
- Baking Sheets
- Air fryer
Ingredients
- 1 cup beef broth
- 6 tablespoons taco seasoning
- 3 pounds boneless beef chuck roast (trimmed of excess fat)
- 4 ounces cream cheese
- 1 cup salsa (medium or hot)
- 16 tortillas I prefer whole wheat for more fiber, but gluten-free, and flour will work also.
- 3 cups shredded cheddar cheese
- cooking spray
- Optional toppings: salsa, guacamole, sour cream, or plain Greek yogurt
Instructions
Step 1: Make the Beef Filling
- Whisk the beef broth and taco seasoning together in a slow cooker or Instant Pot, then add the beef and turn it to coat well. If you’re using the Instant Pot, cut the roast into 2-inch pieces first so it cooks evenly under pressure.
- Cook the beef until it shreds easily. Use Low for 8 to 10 hours or High for 5 to 6 hours in the slow cooker, or pressure cook on high for 30 minutes in the Instant Pot with a 10-minute natural release before releasing the rest.
- Move the cooked beef to a board, pour off most of the liquid, and leave a little behind in the cooker before shredding the meat with two forks. The filling should look juicy but not soupy when the beef goes back into the cooker.
- Stir the cream cheese and salsa into the shredded beef until everything is melted and evenly combined. The finished filling should be creamy, savory, and thick enough to spoon without running.
Step 2: Assemble the Taquitos
- Set the tortillas on a clean work surface and spoon 1/4 cup of beef filling onto each one, leaving the edges mostly clear. This little border helps keep the filling from squeezing out as you roll.
- Top each tortilla with 2 to 3 tablespoons of shredded cheddar, then roll each taquito up as tightly as you can. A snug roll gives you neat taquitos that hold together better and crisp more evenly.
Step 3: Cook the Taquitos
- For the oven, heat it to 400°F and place racks in the upper and lower thirds, then arrange the taquitos seam-side down on two sprayed or lined rimmed baking sheets and coat the tops lightly with cooking spray. Bake for 15 to 20 minutes, switching the pans halfway through, until the cheese is melted and the tortillas turn golden.
- For the air fryer, preheat it to 375°F, spray the taquitos and the basket lightly, then place the taquitos seam-side down in a single layer. Cook in batches for 6 to 8 minutes until they are browned, crisp, and heated through.
- Serve the taquitos hot with any toppings you like. The best texture is right away, when the outside still crackles and the cheese is melty.
Notes
Rolling Tip: To prevent tortillas from cracking, warm them right before rolling. You can wrap a stack in damp paper towels and microwave them briefly, or heat them one by one in a dry skillet until pliable.
Freezer Guide: For best results, freeze the taquitos before cooking. Arrange them in a single layer on a baking sheet and freeze until solid. Then, transfer them to a freezer-safe bag. They can be cooked directly from frozen in the oven or air fryer; just add a few extra minutes to the cooking time.
Cooking Methods: Frying will yield the crispiest, most traditional result. Baking is the easiest method for large batches. The air fryer offers a great balance of crispiness and convenience with less oil.
Nutrition information is an estimate based on common ingredients and serving sizes. Values may vary depending on brands, portions, and substitutions.