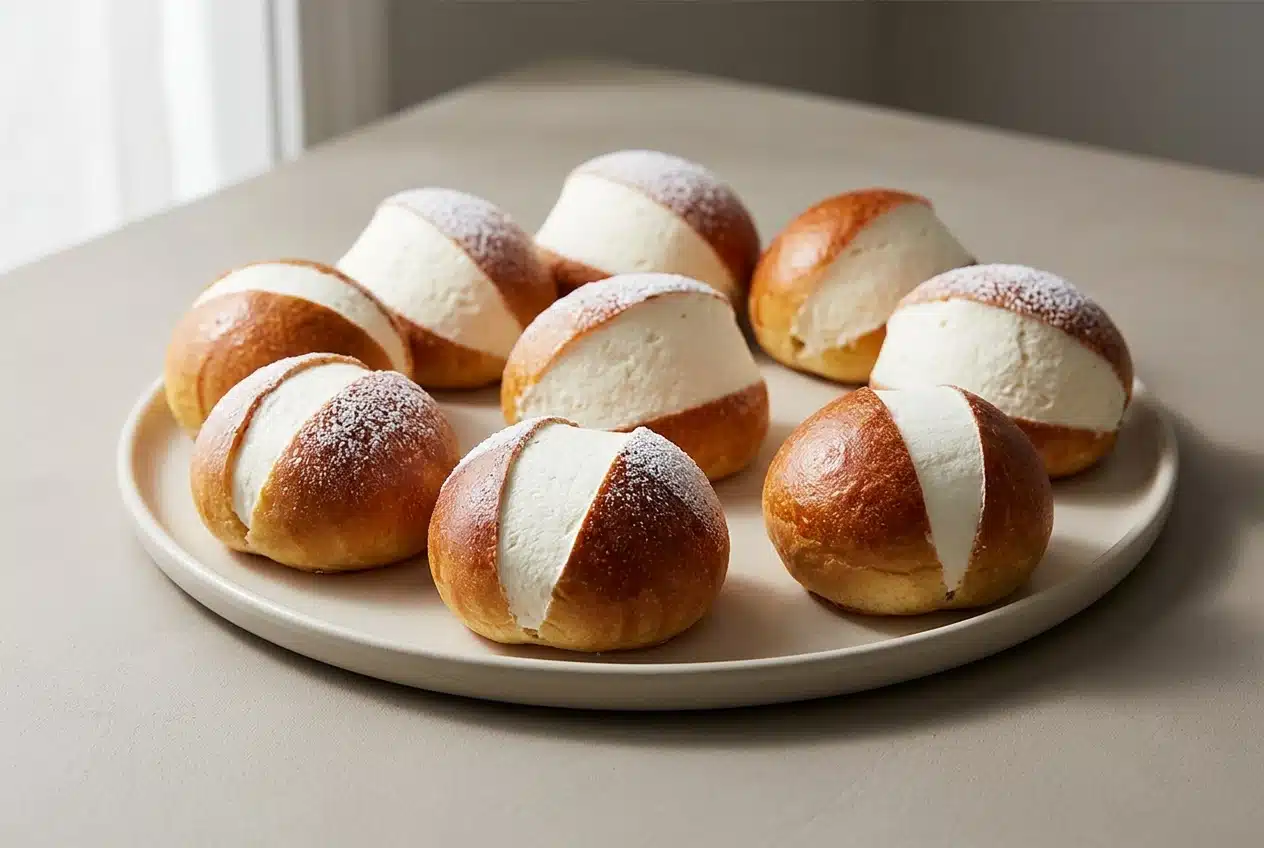
Maritozzi are lightly sweet Roman buns split lengthwise and filled with whipped cream. This maritozzi recipe makes 12 pillowy buns with golden brioche, cloud-like cream, and a smooth bakery-style finish. One bun is a maritozzo; several are maritozzi.
The contrast makes these pastries special: buttery bread with a delicate crumb, cool cream, and a snowy dusting of confectioners’ sugar. They’re generous without needing a complicated filling.
A stand mixer handles the enriched dough, and a refrigerator rest makes shaping much more manageable. You can spread the work across two days. The finishing trick is one clean spatula pass.
Keep the butter cool but pliable, not shiny or melting, before you begin mixing.
Key Ingredients & Why Each Matters
Flour gives the buns structure, eggs and butter enrich the crumb, and dry milk supports tenderness and browning. Sugar and salt balance the dough, while whipped cream supplies the airy filling and confectioners’ sugar adds delicate sweetness.
- 2 3/4 cups (330g) King Arthur Unbleached All-Purpose Flour
- 1/4 cup (28g) King Arthur Baker’s Special Dry Milk or nonfat dry milk
- 3 tablespoons (35g) granulated sugar
- 1 1/4 teaspoons (8g) table salt
- 1 tablespoon instant yeast
- 3 large eggs, cold from the refrigerator
- 1/4 cup (57g) water, cool
- 10 tablespoons (142g) unsalted butter, at cool room temperature; divided into 5 equal pieces
- 1 large egg, beaten with 1 tablespoon water (egg wash)
- 1 cup (227g) heavy cream or whipping cream
- 2 1/2 tablespoons (35g) confectioners’ sugar, plus more for finishing
All-purpose flour develops the elastic network that holds the rising dough. Dry milk contributes milk solids without extra liquid, helping create a tender, golden bun. Granulated sugar lightly sweetens the bread; salt keeps that sweetness balanced, and instant yeast provides the lift.
Cold eggs and cool water help offset the warmth generated during extended mixing. Eggs also provide moisture, richness, and structure. Cool room-temperature butter incorporates gradually without turning the mixture greasy, while the separate egg wash adds shine and color.
Heavy cream or whipping cream provides the body of the filling. Confectioners’ sugar sweetens it smoothly and supplies the final dusting. Keep these filling ingredients separate from the dough ingredients during setup.
How to Make Maritozzi
This recipe yields 12 maritozzi. Allow 30 minutes of active preparation, up to 20 minutes for baking, and ample rising, chilling, and cooling time; the listed total is 7 hours 6 minutes, with an overnight chilling option.
- Measure the flour by weight, or spoon it gently into a measuring cup and level the surface.
Avoid packing the cup, which can leave the dough with too much flour. - Fit a stand mixer with its dough hook and knead the flour, dry milk, granulated sugar, salt, instant yeast, cold eggs, and cool water at medium speed for 7 to 10 minutes.
The mixture should become elastic and smooth, pulling away from the bowl’s sides rather than remaining a rough paste. - Work in the first butter piece at medium speed for 1 to 2 minutes, then incorporate the remaining pieces individually, scraping the bowl as needed and allowing another 5 to 10 minutes of kneading.
Wait until each addition disappears before adding the next, and finish with a smooth, soft ball of dough. - Gather the dough into a ball, transfer it to a greased bowl, cover, and leave at room temperature for 1 hour before refrigerating for several hours or overnight.
The dough will feel very soft initially, then become firmer and easier to handle as the butter chills. - Divide the cold dough on a work surface into 12 portions weighing 60g to 65g each, then round each under a cupped hand using circular movements.
Let the edges of your thumb and pinky skim the work surface as the dough tightens into a smooth ball. - Arrange the rounds with even spacing on two greased or parchment-lined baking sheets, cover loosely, and allow 2 1/2 to 3 hours for the second rise.
Look for doubled volume and a distinctly puffy appearance before moving on. - Heat the oven to 375°F as the rise nears completion, and gently apply the egg wash just before baking if desired.
Use a light touch so the airy buns retain their shape. - Nest each loaded baking sheet inside another baking sheet, bake for 15 to 20 minutes, and tent after 10 minutes if the tops darken too quickly.
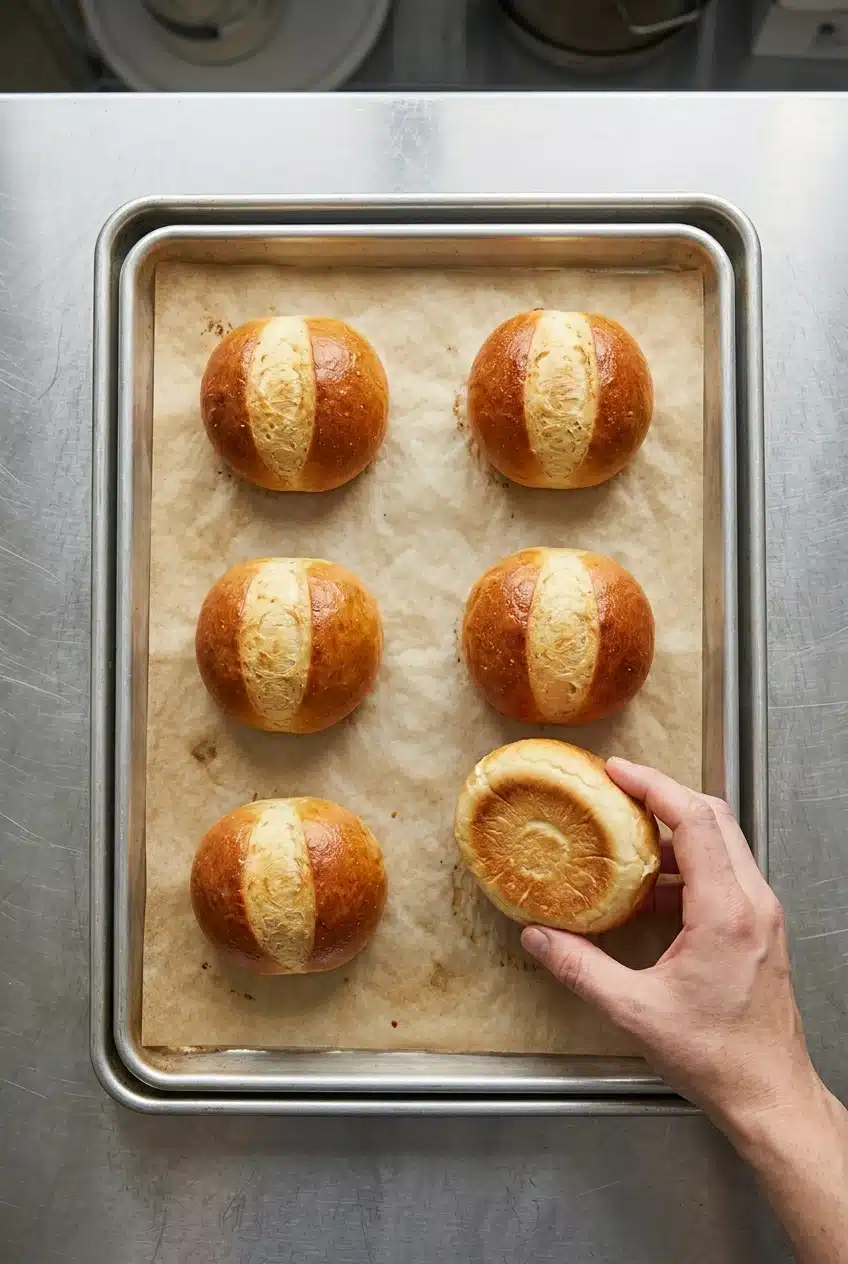
Fully baked buns should have golden-brown tops and a well-risen shape, with the extra pan shielding their bottoms from excessive browning. - Leave the baked buns on their sheets for 5 minutes, then transfer them to a rack to cool completely.
No warmth should remain when you begin filling them, or the cream can soften and slip. - Whisk the cream in a large bowl or a stand mixer fitted with the whisk attachment to soft peaks, then beat in the confectioners’ sugar until stiff peaks form.
Stop when the cream holds an upright peak and still looks smooth, before it becomes grainy. - Cut a lengthwise opening through the top center of each bun with a serrated knife, leaving the bottom connected.
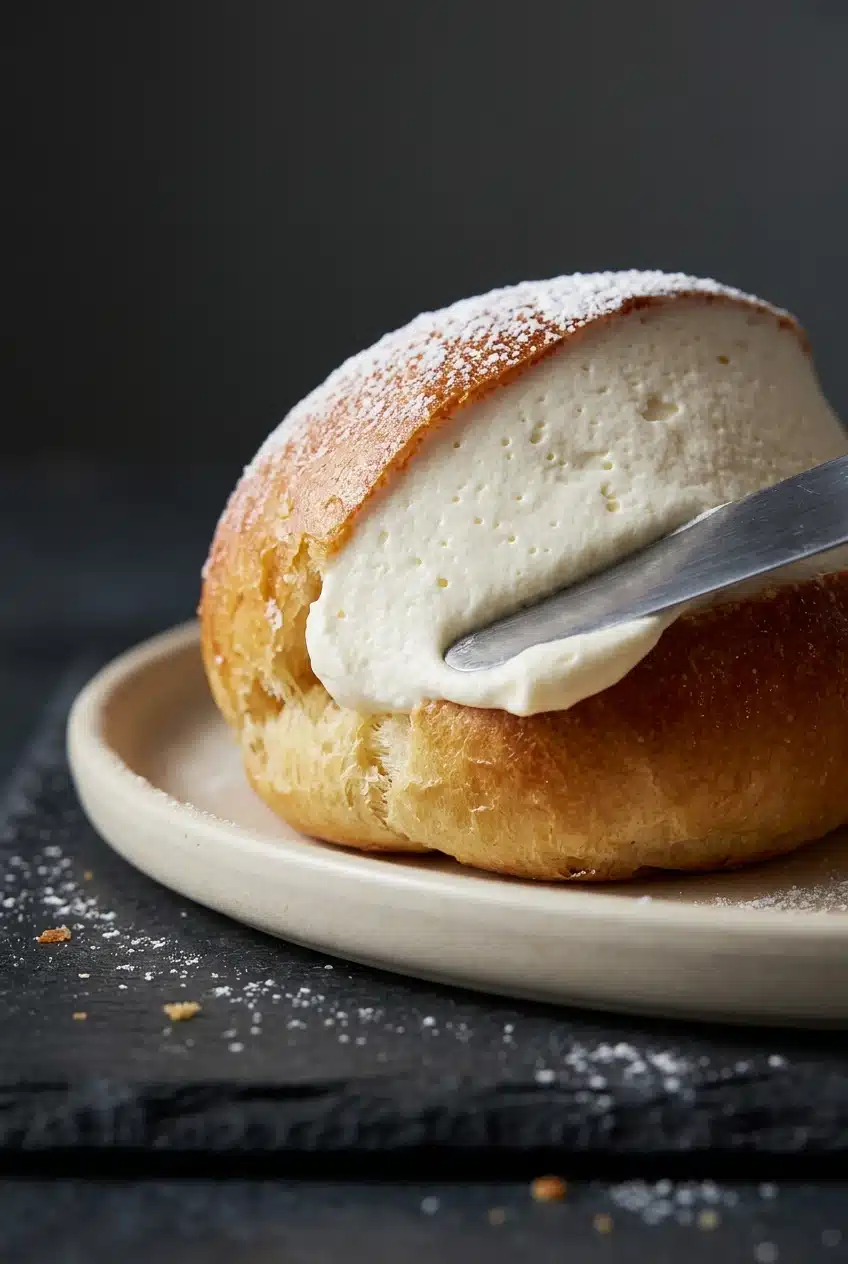
The intact base should act as a hinge rather than separating into two halves. - Ease each opening apart, add 2 to 3 tablespoons of whipped cream for a center about 1 1/2 inches wide, level it against the bread with an offset spatula, and finish with a generous dusting of confectioners’ sugar.
Follow the bun’s contour with the spatula to remove overflow and leave a clean cream edge flush with the crust.
Mixing the Dough & Emulsifying the Butter
Use the stand mixer rather than attempting this dough by hand. Early on, the mixture may cling to the bowl’s bottom; developing elasticity before adding butter gives it the strength to hold that enrichment. Butter should disappear into the dough, not remain as slippery streaks.
Cold Fermentation, Shaping & Second Rise
The refrigerator rest slows fermentation and firms the butter. That changes a tacky, very soft dough into something pliable enough to round neatly. After shaping, judge readiness by doubled, puffy buns as well as the stated rising time.
Baking With Nested Pans for Soft Bottoms
Double-panning adds a layer of protection beneath the buns, especially useful with strong bottom heat. It addresses the undersides; tenting addresses tops that color too quickly. Neither replaces watching for golden color and good rise.
Slicing, Filling & Leveling the Cream
The bottom hinge supports the filling, so resist cutting through it. Keep the offset spatula close to the bread’s curved edge as you smooth the cream. A flush finish comes from removing excess, not piling on more.
What Are Maritozzi? Rome’s Iconic Cream Buns
Maritozzi con la panna are Roman enriched buns with a generous center of whipped cream. This version uses buttery brioche; other Roman bakery styles use olive oil, sometimes with honey, for a different richness and crumb.
The name connects to marito, Italian for “husband.” Courtship folklore links the pastries to gifts from suitors, sometimes with a ring hidden inside. Treat that as pastry lore rather than a documented origin story. The pronunciation is roughly mah-ree-TOHT-see.
Pro Tips & Troubleshooting for Pillowy Buns
Texture cues are more helpful than trying to force soft enriched dough into behaving like lean bread dough.
- Sticky dough: Warm butter-rich dough naturally feels tacky. Use the prescribed chill rather than adding excess flour, which can make the buns dry and dense.
- Greasy dough during mixing: Butter added before the dough develops elasticity can be difficult to incorporate. Build the initial smooth, stretchy dough first, then let each butter piece disappear completely.
- A slow-looking second rise: Chilled dough needs time to become puffy. Follow the rising window and look for doubled volume rather than baking compact rounds.
- Dark bottoms or tops: Use nested sheets beneath the buns and the specified tenting safeguard above them. These solve different browning problems.
- Grainy cream or leaking filling: Stop whipping at smooth, stiff peaks, cool the bread completely, and preserve the bottom hinge when slicing.
I’d prioritize smooth, upright cream peaks over maximum volume; that texture makes a clean spatula finish much easier.
Flavor Variations & Creative Fillings
Keep the classic dough and cream as written, then choose an optional flavor direction. A quicker burger-bun-style foundation is another possibility, though it won’t have this brioche’s buttery character.
Pistachio & Nut-Crusted Maritozzi
An optional crushed-pistachio finish adds green color and nutty crunch against the smooth cream. Other chopped nuts offer the same textural contrast with a different flavor.
Hidden Jam, Lemon Curd, or Chocolate Ganache Center
- Raspberry jam: A hidden layer beneath the cream gives the rich bun a tart fruit contrast.
- Lemon curd: Citrus sharpness creates a brighter filling.
- Chocolate ganache: A chocolate center brings deeper richness without changing the cream’s airy texture.
- Homemade peach jam: This optional fruit layer offers a mellow stone-fruit alternative to raspberry.
Roman Citrus Zest, Raisin & Pine Nut Tradition
- Orange or lemon zest: Optional citrus aromatics brighten the buttery bread and cream.
- Vanilla: A soft aromatic direction that complements the dairy filling.
- Raisins and pine nuts: These recall traditional Roman-style buns, adding chewy sweetness and nutty texture.
- Candied citrus peel: A bittersweet citrus finish offers a more pronounced contrast.
Fresh Strawberry & Shaved Chocolate Finishes
- Strawberries: Fresh berry sweetness and red color make a lively contrast with white cream.
- Other fresh berries: Their tartness balances the richness of the brioche.
- Shaved chocolate: Delicate chocolate flakes add flavor without the density of a ganache center.
How to Serve & Eat Maritozzi Like a Roman
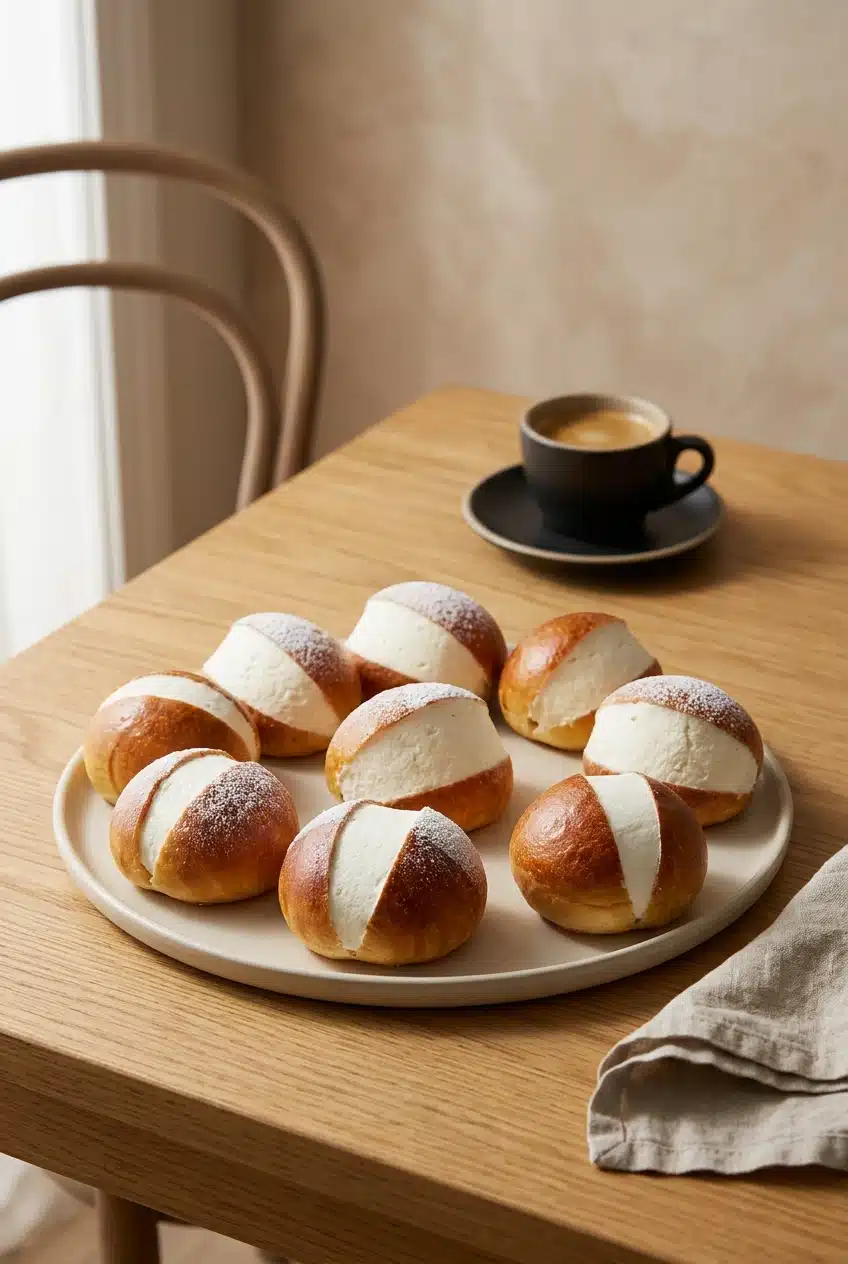
Serve a freshly filled maritozzo with espresso or cappuccino for a Roman-style breakfast. Thick Italian hot chocolate also suits an afternoon pastry break.
Hold the bun gently around its intact bottom hinge and bite through bread and cream together. Avoid squeezing the sides. For fruit- or curd-filled versions, a dessert plate makes the inevitable crumbs and cream easier to manage.
Make-Ahead Timeline, Storage & Freezing
The overnight dough chill provides a natural stopping point: mix and begin fermentation first, then shape, proof, bake, and cool after the refrigerator rest. Remember that the second rise still needs its full allowance; chilled dough doesn’t become breakfast instantly.
For a smaller serving batch, halve both whipped-cream ingredients to fill six buns. Freeze the extra cooled, unfilled buns for future maritozzi or sandwiches rather than filling everything at once.
Filled buns taste best immediately or on the day of assembly. Keep cream-filled leftovers covered and chilled as a precaution, and avoid treating that same-day quality recommendation as a room-temperature holding allowance.
Final Thoughts on Homemade Roman Maritozzi
Tender brioche and freshly whipped cream do the work here. Give the dough time to develop, chill it for manageable shaping, and aim for that clean, flush cream edge.
Start with the classic confectioners’ sugar finish, then explore fruit, citrus, chocolate, or nuts when you want a change. Keep the bread soft and the filling airy.
Frequently Asked Questions
What Is the Difference Between Maritozzo and Maritozzi?
Maritozzo means one bun; maritozzi means more than one. They describe the same pastry, not different fillings or dough styles.
What Does Maritozzi Mean in Italian and How Is It Pronounced?
The name derives from marito, meaning “husband,” and connects to Roman courtship folklore. Say mah-ree-TOHT-see for maritozzi and mah-ree-TOHT-soh for maritozzo.
What Is Inside a Traditional Maritozzo?
A maritozzo con la panna contains a generous filling of whipped cream. Here, confectioners’ sugar lightly sweetens the cream and provides the finishing dusting; fruit or chocolate additions remain optional.
How Do You Eat a Maritozzo?
Hold the connected bottom lightly and bite through the bun and cream together. Keep a napkin or dessert plate nearby, especially with additional toppings.
How Are Maritozzi Different From Regular Brioche Buns?
This version starts with brioche, but its hinged opening and generous, leveled cream filling make it a maritozzo. Other Roman versions use olive-oil-enriched dough, so maritozzi don’t always have the same bread texture.
Can I Make Maritozzi Ahead of Time and How Should I Store Leftovers?
Yes, use the dough’s refrigerator rest to divide the work, and keep spare baked buns unfilled for freezing. Assemble only what you plan to serve, and keep any cream-filled leftovers covered and chilled.

Maritozzi Recipe

Equipment
- Stand mixer with dough hook and whisk attachment
- Baking Sheets
- Wire cooling rack
- Serrated Knife
- Offset spatula
Ingredients
- 2 3/4 cups King Arthur Unbleached All-Purpose Flour (330g)
- 1/4 cup King Arthur Baker’s Special Dry Milk or nonfat dry milk (28g)
- 3 tablespoons granulated sugar (35g)
- 1 1/4 teaspoons table salt (8g)
- 1 tablespoon instant yeast
- 3 large eggs cold from the refrigerator
- 1/4 cup water (57g), cool
- 10 tablespoons unsalted butter (142g), at cool room temperature; divided into 5 equal pieces
- 1 large egg beaten with 1 tablespoon water (egg wash)
- 1 cup heavy cream or whipping cream (227g)
- 2 1/2 tablespoons confectioners’ sugar (35g), plus more for finishing
Instructions
- Measure the flour by weight, or spoon it gently into a measuring cup and level the surface. Avoid packing the cup, which can leave the dough with too much flour.
- Fit a stand mixer with its dough hook and knead the flour, dry milk, granulated sugar, salt, instant yeast, cold eggs, and cool water at medium speed for 7 to 10 minutes. The mixture should become elastic and smooth, pulling away from the bowl’s sides rather than remaining a rough paste.
- Work in the first butter piece at medium speed for 1 to 2 minutes, then incorporate the remaining pieces individually, scraping the bowl as needed and allowing another 5 to 10 minutes of kneading. Wait until each addition disappears before adding the next, and finish with a smooth, soft ball of dough.
- Gather the dough into a ball, transfer it to a greased bowl, cover, and leave at room temperature for 1 hour before refrigerating for several hours or overnight. The dough will feel very soft initially, then become firmer and easier to handle as the butter chills.
- Divide the cold dough on a work surface into 12 portions weighing 60g to 65g each, then round each under a cupped hand using circular movements. Let the edges of your thumb and pinky skim the work surface as the dough tightens into a smooth ball.
- Arrange the rounds with even spacing on two greased or parchment-lined baking sheets, cover loosely, and allow 2 1/2 to 3 hours for the second rise. Look for doubled volume and a distinctly puffy appearance before moving on.
- Heat the oven to 375°F as the rise nears completion, and gently apply the egg wash just before baking if desired. Use a light touch so the airy buns retain their shape.
- Nest each loaded baking sheet inside another baking sheet, bake for 15 to 20 minutes, and tent after 10 minutes if the tops darken too quickly. Fully baked buns should have golden-brown tops and a well-risen shape, with the extra pan shielding their bottoms from excessive browning.
- Leave the baked buns on their sheets for 5 minutes, then transfer them to a rack to cool completely. No warmth should remain when you begin filling them, or the cream can soften and slip.
- Whisk the cream in a large bowl or a stand mixer fitted with the whisk attachment to soft peaks, then beat in the confectioners’ sugar until stiff peaks form. Stop when the cream holds an upright peak and still looks smooth, before it becomes grainy.
- Cut a lengthwise opening through the top center of each bun with a serrated knife, leaving the bottom connected. The intact base should act as a hinge rather than separating into two halves.
- Ease each opening apart, add 2 to 3 tablespoons of whipped cream for a center about 1 1/2 inches wide, level it against the bread with an offset spatula, and finish with a generous dusting of confectioners’ sugar. Follow the bun’s contour with the spatula to remove overflow and leave a clean cream edge flush with the crust.