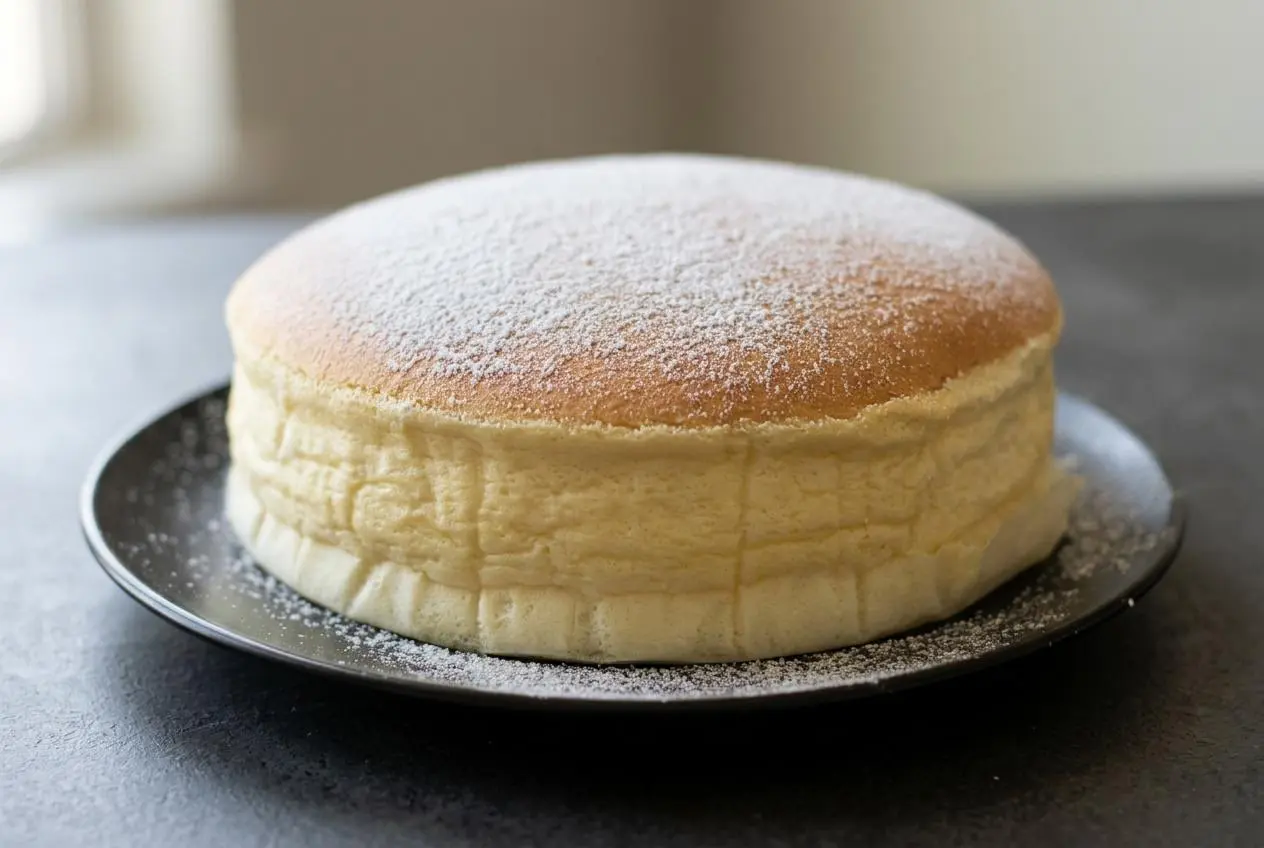
Japanese cotton cheesecake is an airy, crustless soufflé cheesecake made by folding whipped egg whites into cream cheese batter. A two-stage water bath bake creates a lightly tangy, creamy crumb with a delicate bounce when warm.
The fresh-from-the-oven wobble is part of the appeal of japanese cotton cheesecake. Its texture sits between tender chiffon cake and creamy soufflé, rather than the heavy richness of a traditional cheesecake.
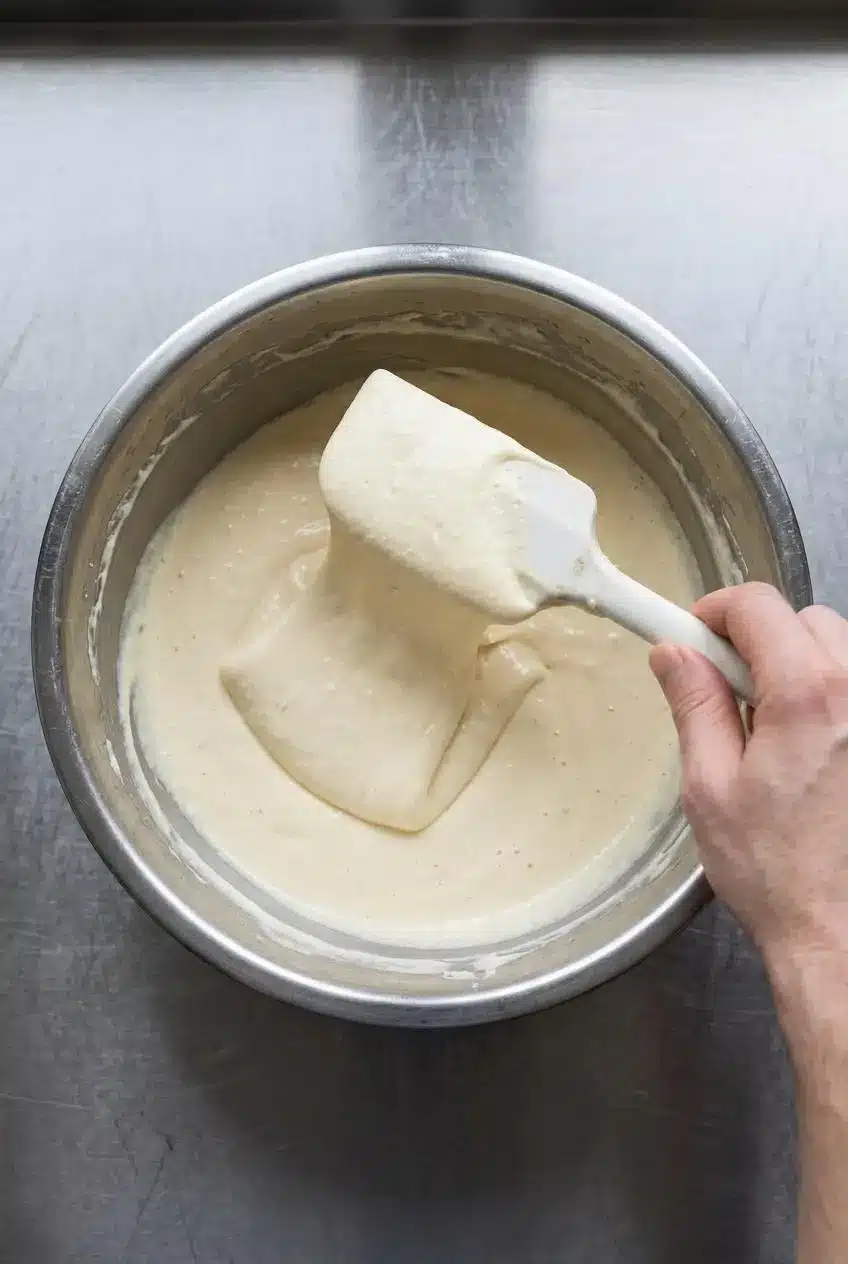
This version uses a smooth melted cream cheese mixture, glossy meringue, and a controlled temperature drop. The technique takes attention, but clear texture cues make it easier to follow. Watch for the milkshake stage.
Set out parchment paper for both the pan bottoms and sides before you start mixing; wax paper isn’t a substitute.
What Makes Japanese Cotton Cheesecake Different
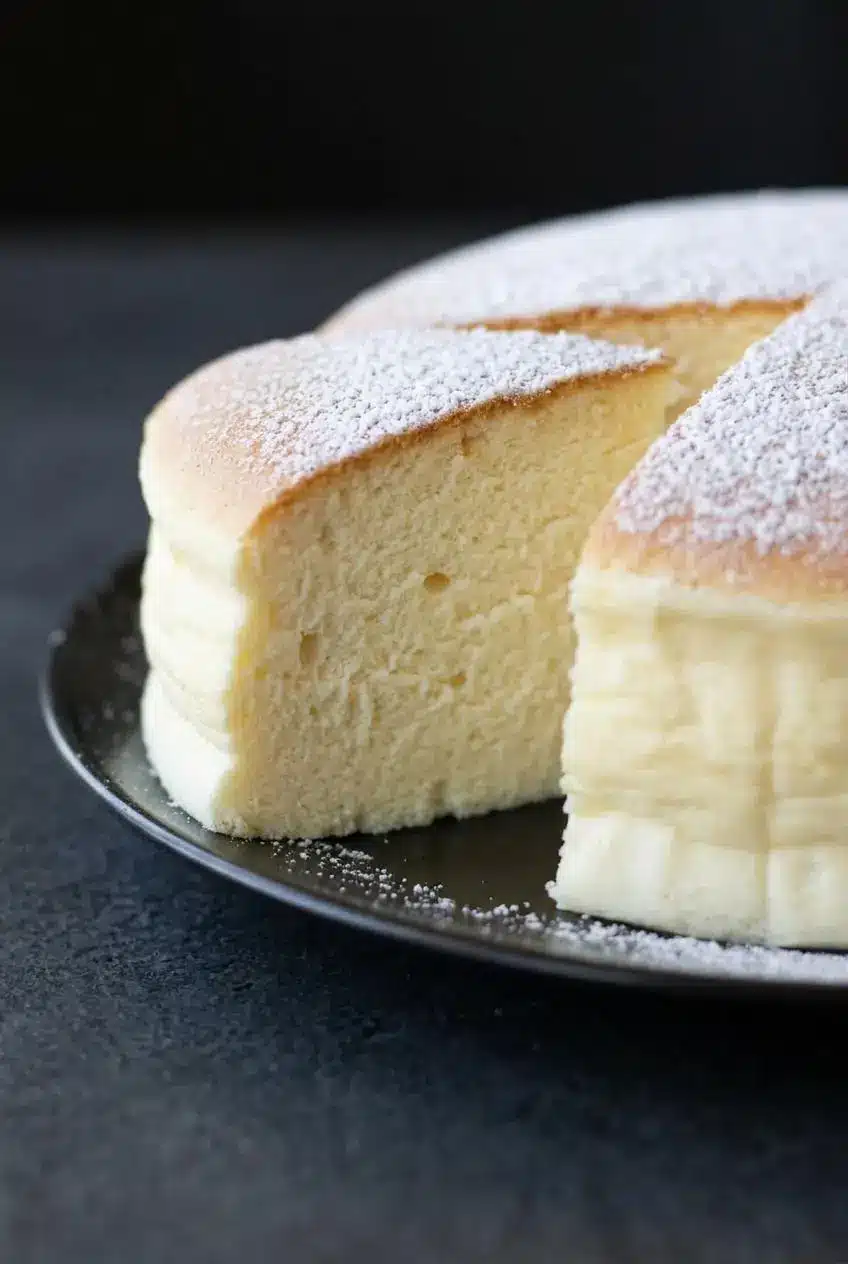
Choose this cheesecake when you want mild sweetness, milky richness, and a lightly tangy finish without a heavy bite. Whipped egg whites give the crumb its airy, melt-in-your-mouth character.
- Japanese cotton cheesecake: This crustless cake gets its lift from meringue and bakes in a water bath for a soft, soufflé-like texture.
- New York cheesecake: Typically dense and rich, with a compact, creamy filling and often a crumb crust.
- Basque cheesecake: A crustless Basque cheesecake has a deeply browned top and custardy interior rather than a meringue-lightened crumb.
Serving temperature changes the experience. Warm cake has the most dramatic jiggle; chilled cake feels firmer and more mousse-like as the butter and cream cheese set.
Key Ingredients and Their Roles
Cream cheese brings tang, butter and yolks add richness, and milk supplies moisture. Whipped whites create lift, while flour and cornstarch support the delicate crumb; sugar balances flavor and helps the meringue hold its shape.
Egg White Meringue (Stiff Peaks)
- 5 egg whites
- 1/4 tsp cream of tartar (or vinegar or lemon juice)
- 1/4 cup (50g) fine (granulated) sugar (Not Confectioner sugar)
Cake Batter
- 5 egg yolks
- 8 oz cream cheese (1 bar)
- 1/4 cup (55g) butter
- 1/2 cup (125ml) milk
- 1/4 cup (50g) fine (granulated) sugar
- 2 tbsp (15g) corn starch (magic ingredient)
- 1/4 cup (34g) flour (use rice flour or Mochiko instead to make a gluten-free Japanese Cheesecake) (Vanilla extract or powder or lemon juice for extra flavoring are all optional)
- Optional toppings: strawberries, confectioner sugar, fruits of your choice, honey, matcha powder, etc…
Keep the sugar portions separate: one belongs to the cream cheese mixture, the other to the meringue. Fine granulated sugar incorporates more readily than coarse crystals, while cream of tartar helps support a stable foam. The goal is glossy peaks, not dry clumps.
Yolks help bind the batter as well as enrich it. Cornstarch and flour provide structure around the air bubbles, but cornstarch can’t prevent collapse caused by weak foam, excessive mixing, or insufficient baking.
Gently warming the cream cheese with butter helps eliminate lumps before the delicate whites enter the mixture. The flour-line rice flour or Mochiko option changes that structural component; see the dietary and texture details below.
I prefer separating each egg over a small bowl before transferring its white to the mixer bowl, so a broken yolk doesn’t spoil the whole batch.
How to Make Japanese Cotton Cheesecake Step by Step
This makes one 8-inch cake or two 6-inch cakes, serving 6 to 8. Allow about 20 minutes for preparation, 70 minutes for baking, and an additional 10-minute oven rest.
- Divide the 5 eggs between a yolk bowl and a mixer bowl for the whites.
Keep the whites free of yolk so they can whip properly. - Warm the cream cheese, butter, and the batter’s 1/4 cup sugar together in a pot over low heat, stirring gently.
Continue until the mixture has an even consistency without visible cream cheese lumps. - Take the pot off the heat and gently work in the yolks.
The mixture should look uniform, with no separate streaks of yolk. - Stir the cornstarch and flour into the yolk mixture until incorporated.
Break up any pockets of dry flour before proceeding. - Blend in the milk and any optional flavoring you choose to use.
The finished yolk batter should flow easily and look smooth, without needing a straining step. - Set the yolk batter aside and beat the egg white meringue ingredients to stiff peaks.
Look for glossy foam whose peaks stand upright when you lift the beater. - Heat the oven to 330°F and place a deep rectangular baking dish containing water inside it.
This dish will hold the cake pan or pans for the bain-marie bake. - Fit parchment circles into the bottoms of one 8-inch pan or two 6-inch pans, then line the inner walls with parchment strips.
Use parchment paper, not wax paper, for the bottom liners and side collars. - Mix a portion of meringue into the yolk batter, then repeat with two more portions.
These three additions lighten the batter before the final folding stage. - Transfer the lightened batter into the remaining meringue and fold gently until evenly combined.
The mixture should resemble a thick milkshake with no white streaks, rather than separate foam and liquid layers. - Pour the folded mixture into the prepared pan or pans.
It should remain airy and evenly blended as it settles. - Place the cake pans in the water bath and bake at 330°F for 25 minutes.
If the cake isn’t rising because the oven runs cool, a 10°F increase may be needed. - Check for a clear rise before changing the heat, allowing more time at the first temperature if necessary.
The cake should have lifted noticeably before the second baking stage begins. - Open the oven door slightly for approximately 10 seconds, keeping your face clear of escaping steam, then lower the setting to 245–265°F and bake for another 45 minutes.
Choose within that range to suit your oven, since excessive second-stage heat can split the surface. - Leave the cake in the oven for about 10 minutes after baking, then remove it carefully with oven mitts.
The delicate cake benefits from this rest before handling. - Cover the cake with parchment and a plate, invert the assembly, and ease the pan away by sliding or gently shaking it loose.
The cake’s top should now rest against the parchment-covered plate. - Peel away the damp lining and replace the parchment on the exposed cake bottom.
Remove the wet paper gently to avoid pulling away the tender crumb. - Position the serving plate against the cake bottom and carefully invert everything again.
The cake should now sit upright, with its rounded top facing upward. - Serve the cake warm or refrigerate it for a chilled texture.
Expect a bouncy warm crumb and a firmer, less jiggly chilled slice.
Melting the Cream Cheese Batter Smoothly
Keep the heat low and stir through the softened cream cheese rather than rushing it over stronger heat. Remove the pot from the burner before adding yolks, then incorporate the starches before the milk. At this stage, the batter is fluid, not fluffy.
Whipping Glossy Stiff-Peak Meringue
Cold eggs generally separate more easily, while whites become easier to whip as they lose their chill. A gradual increase in mixer speed can help you approach the stiff-peak stage without overshooting it. Stop when the peaks hold upright but the foam still looks glossy, not rough or clumpy.
Folding Without Deflating the Batter
After the three initial meringue additions, fold through the remaining whites by lifting batter from the bottom and turning it over the top. Rotate the bowl to reach unmixed pockets. Stop once the mixture looks like a thick, streak-free milkshake: visible white patches mean more folding, while prolonged stirring sacrifices lift.
Two-Stage Water Bath Baking and Unmolding
The water bath moderates heat around the cake, while the lower second stage lets its delicate structure set more gently. Use the rise, not the clock alone, to judge the transition. During unmolding, keep each plate close against the cake so it stays supported through both flips.
Troubleshooting Common Japanese Cheesecake Problems
A finished cake can offer clues, though appearance alone won’t identify every cause. Use these corrections to guide the next bake.
- Surface cracks: Excessive second-stage heat can make the top expand too quickly. Use a gentler setting within the supplied range next time; an existing crack won’t close, but fruit can cover it for serving.
- Poor rise: Lost meringue volume or insufficient oven heat may be responsible. Check for glossy stiff peaks, avoid prolonged folding, and follow the first-stage heat adjustment only when needed.
- Dense bottom and foamy top: Incomplete folding can leave the mixtures unevenly combined. Reach the bottom of the bowl and remove visible white streaks before filling the pan; baking won’t blend separated layers.
- Major collapse: Weak foam, overmixing, or underbaking can contribute. Preserve meringue volume and complete the baking sequence and oven rest; modest cooling shrinkage is normal.
- Pale top: Middle-rack placement may improve browning next time. Optional broiling can add surface color under close supervision, but it cannot finish an underbaked center.
The same need to preserve whipped-white volume applies to Japanese soufflé pancakes: gentle folding matters, but stopping before the mixtures combine causes its own problems.
Keeping Water Out of a Springform Pan
A solid cake pan is the simpler choice for this crustless batter because it has no opening seam. If you choose a springform pan, wrap its exterior with overlapping, intact foil layers extending above the bath’s waterline. Foil can still leak, so don’t treat it as a waterproof guarantee.
Japanese Cheesecake Flavors, Mochiko, Cupcakes, and Serving Ideas
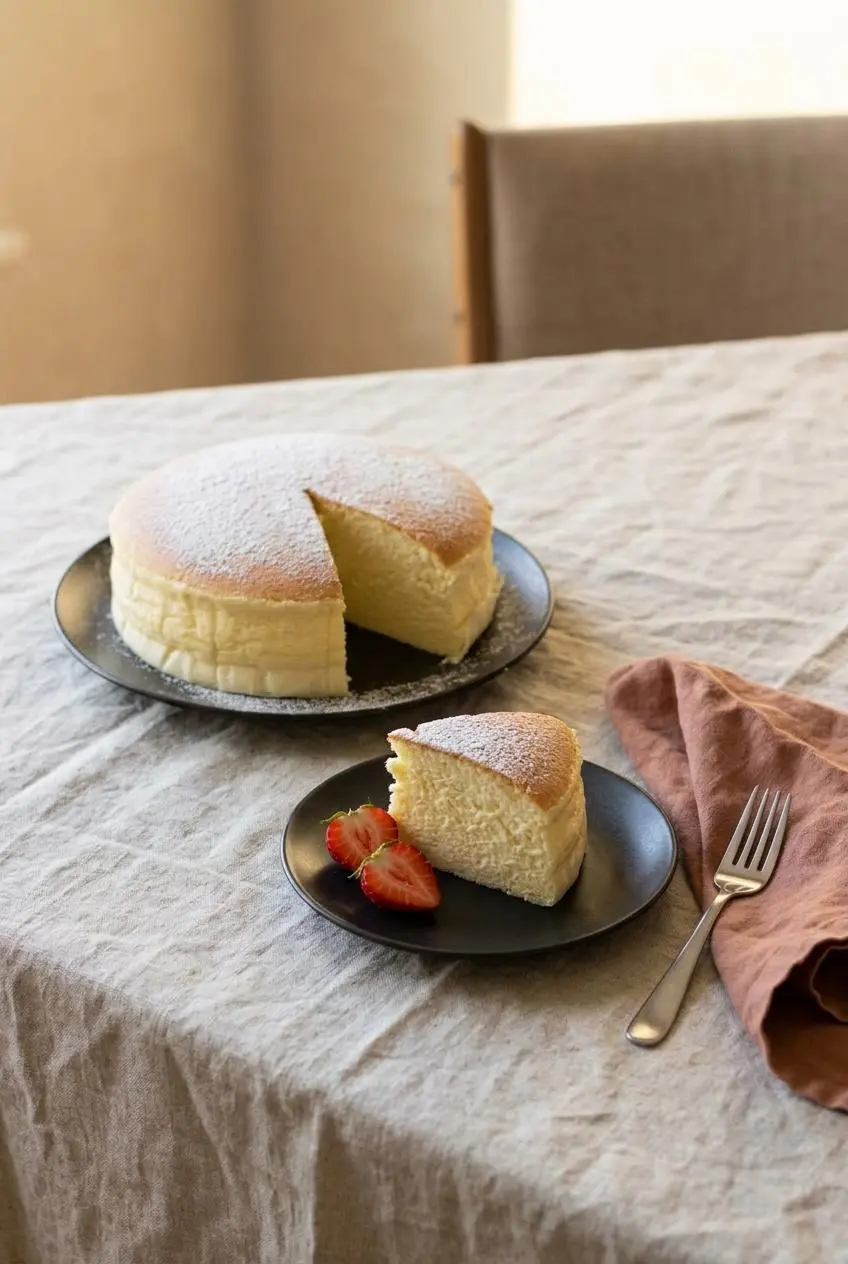
Keep adaptations separate from the main method, especially when they change the batter’s structure or pan size.
Matcha and Chocolate Variations
- Matcha: Optionally sift 2 tablespoons of matcha powder into the yolk batter for green tea flavor and color.
- Chocolate: Alternatively, sift 2 tablespoons of cocoa powder into the yolk batter for a cocoa-flavored version.
Choose either flavor rather than treating both as required additions. Added powders may change the crumb, so don’t expect an identical texture or improvise compensating liquid and flour changes.
Gluten-Free Swap With Mochiko Rice Flour
The flour option uses 1/4 cup (34g) rice flour or Mochiko in place of the flour. Mochiko is sweet rice flour made from glutinous rice; “glutinous” describes its sticky character, not gluten content. Ordinary rice flour behaves differently, so their results aren’t interchangeable in texture.
If avoiding gluten, check all ingredient packaging and cross-contact risks rather than assuming the substitution alone makes the finished cake suitable.
Japanese Cotton Cheesecake Cupcakes
Lined cupcake tins offer an individual-portion possibility, but the baking schedule here applies only to the listed full-size pans. Use a tested cotton-cheesecake cupcake schedule before choosing fill levels or baking times; smaller portions shouldn’t automatically receive the full-size bake.
For a dedicated individual cheesecake option instead, try cherry cheesecake cupcakes.
Optional Lemon and Vanilla Flavor
For an optional aromatic variation, consider 1 teaspoon freshly grated lemon zest and 1/2 teaspoon pure vanilla bean paste in the yolk batter. The zest adds citrus fragrance, while vanilla rounds out the cream cheese flavor. These additions aren’t required.
Warm Jiggle or Chilled Creaminess
Serve warm when the soufflé-like bounce matters most, or choose chilled slices for a firmer dessert plate.
- Strawberries or other fruit: Add freshness alongside either serving style.
- Confectioners’ sugar or matcha powder: Dust lightly just before serving.
- Honey: Drizzle over individual slices for extra sweetness.
Keeping Japanese Cheesecake Fresh Without Losing Track of Texture
Making this cake ahead means choosing chilled creaminess over its fresh-baked wobble. Refrigeration firms the crumb, so plan warm serving around baking rather than expecting a cold cake to bounce the same way.
Let excess heat and steam escape before covering, then refrigerate promptly in an airtight container. Avoid leaving this egg-and-dairy dessert on the counter while waiting indefinitely for it to cool completely.
For optional freezing, protect individual slices with parchment and freezer-safe wrapping to limit drying and surface damage. Expect possible texture changes rather than an exact copy of the freshly baked crumb.
To soften a chilled slice, warm it gently in short microwave bursts, checking between them. Stop before it becomes hot or rubbery. Reheating may soften the texture, but it won’t reliably recreate the original rise or dramatic jiggle.
Conclusion
A good cotton cheesecake balances airy lift with a creamy, delicate crumb. Glossy meringue, complete but gentle folding, and the two-stage water bath give that balance its best chance.
Choose warm slices for bounce or chilled slices for velvety creaminess. Let the texture cues guide you, and give the delicate cake patient handling.
Frequently Asked Questions
What Does Japanese Cotton Cheesecake Taste Like?
It tastes mildly sweet and milky, with a gentle cream cheese tang. Warm cake has an airy, soufflé-like crumb; chilled cake feels firmer and creamier.
What Makes Japanese Cheesecake Different From Regular Cheesecake?
This crustless version uses whipped egg whites to create lift and an airy crumb. A typical New York cheesecake is denser and richer, often with a crumb crust.
Why Did My Japanese Cheesecake Deflate or Crack?
Excessive heat or unstable meringue can contribute to cracks. Overmixing, underbaking, or abrupt cooling can contribute to substantial collapse; follow the staged bake and oven rest. A little shrinkage during cooling is normal and doesn’t mean the cake failed.
Does Japanese Cotton Cheesecake Stay Jiggly After Chilling in the Fridge?
No, it loses its dramatic warm jiggle as the butter and cream cheese firm up. The chilled texture becomes more compact and mousse-like. Gentle warming may soften a slice, but it doesn’t guarantee the original bounce.
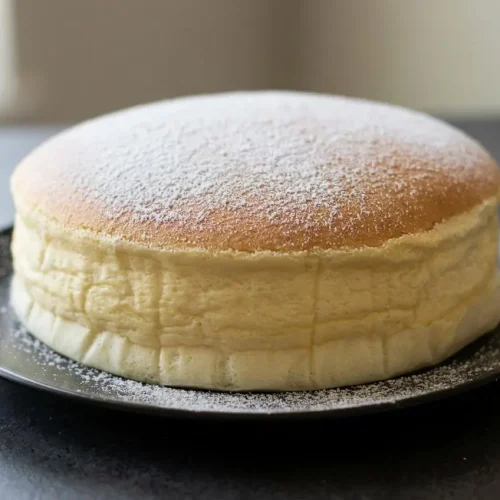
Japanese Cotton Cheesecake

Equipment
- mixer bowl
- Pot
- deep rectangular baking pan or dish
- 8-inch cake pan or two 6-inch cake pans
- Parchment Paper
Ingredients
Egg White Meringue (Stiff Peaks)
- 5 egg whites
- 1/4 tsp cream of tartar (or vinegar or lemon juice)
- 1/4 cup (50g) fine (granulated) sugar (Not Confectioner sugar)
Cake Batter
- 5 egg yolks
- 8 oz cream cheese (1 bar)
- 1/4 cup (55g) butter
- 1/2 cup (125ml) milk
- 1/4 cup (50g) fine (granulated) sugar
- 2 tbsp (15g) corn starch (magic ingredient)
- 1/4 cup (34g) flour (use rice flour or Mochiko instead to make a gluten-free Japanese Cheesecake) (Vanilla extract or powder or lemon juice for extra flavoring are all optional)
- Optional toppings: strawberries, confectioner sugar, fruits of your choice, honey, matcha powder, etc…
Instructions
- Divide the 5 eggs between a yolk bowl and a mixer bowl for the whites. Keep the whites free of yolk so they can whip properly.
- Warm the cream cheese, butter, and the batter’s 1/4 cup sugar together in a pot over low heat, stirring gently. Continue until the mixture has an even consistency without visible cream cheese lumps.
- Take the pot off the heat and gently work in the yolks. The mixture should look uniform, with no separate streaks of yolk.
- Stir the cornstarch and flour into the yolk mixture until incorporated. Break up any pockets of dry flour before proceeding.
- Blend in the milk and any optional flavoring you choose to use. The finished yolk batter should flow easily and look smooth, without needing a straining step.
- Set the yolk batter aside and beat the egg white meringue ingredients to stiff peaks. Look for glossy foam whose peaks stand upright when you lift the beater.
- Heat the oven to 330°F and place a deep rectangular baking dish containing water inside it. This dish will hold the cake pan or pans for the bain-marie bake.
- Fit parchment circles into the bottoms of one 8-inch pan or two 6-inch pans, then line the inner walls with parchment strips. Use parchment paper, not wax paper, for the bottom liners and side collars.
- Mix a portion of meringue into the yolk batter, then repeat with two more portions. These three additions lighten the batter before the final folding stage.
- Transfer the lightened batter into the remaining meringue and fold gently until evenly combined. The mixture should resemble a thick milkshake with no white streaks, rather than separate foam and liquid layers.
- Pour the folded mixture into the prepared pan or pans. It should remain airy and evenly blended as it settles.
- Place the cake pans in the water bath and bake at 330°F for 25 minutes. If the cake isn’t rising because the oven runs cool, a 10°F increase may be needed.
- Check for a clear rise before changing the heat, allowing more time at the first temperature if necessary. The cake should have lifted noticeably before the second baking stage begins.
- Open the oven door slightly for approximately 10 seconds, keeping your face clear of escaping steam, then lower the setting to 245–265°F and bake for another 45 minutes. Choose within that range to suit your oven, since excessive second-stage heat can split the surface.
- Leave the cake in the oven for about 10 minutes after baking, then remove it carefully with oven mitts. The delicate cake benefits from this rest before handling.
- Cover the cake with parchment and a plate, invert the assembly, and ease the pan away by sliding or gently shaking it loose. The cake’s top should now rest against the parchment-covered plate.
- Peel away the damp lining and replace the parchment on the exposed cake bottom. Remove the wet paper gently to avoid pulling away the tender crumb.
- Position the serving plate against the cake bottom and carefully invert everything again. The cake should now sit upright, with its rounded top facing upward.
- Serve the cake warm or refrigerate it for a chilled texture. Expect a bouncy warm crumb and a firmer, less jiggly chilled slice.