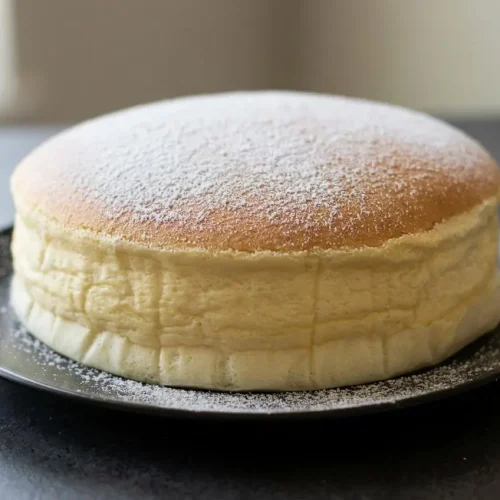
Japanese Cotton Cheesecake

This crustless Japanese cotton cheesecake folds glossy stiff-peak meringue into a warm cream cheese batter, then bakes in a two-stage water bath for an airy, lightly tangy crumb with a gentle bounce.
Equipment
- mixer bowl
- Pot
- deep rectangular baking pan or dish
- 8-inch cake pan or two 6-inch cake pans
- Parchment Paper
Ingredients
Egg White Meringue (Stiff Peaks)
- 5 egg whites
- 1/4 tsp cream of tartar (or vinegar or lemon juice)
- 1/4 cup (50g) fine (granulated) sugar (Not Confectioner sugar)
Cake Batter
- 5 egg yolks
- 8 oz cream cheese (1 bar)
- 1/4 cup (55g) butter
- 1/2 cup (125ml) milk
- 1/4 cup (50g) fine (granulated) sugar
- 2 tbsp (15g) corn starch (magic ingredient)
- 1/4 cup (34g) flour (use rice flour or Mochiko instead to make a gluten-free Japanese Cheesecake) (Vanilla extract or powder or lemon juice for extra flavoring are all optional)
- Optional toppings: strawberries, confectioner sugar, fruits of your choice, honey, matcha powder, etc...
Instructions
- Divide the 5 eggs between a yolk bowl and a mixer bowl for the whites. Keep the whites free of yolk so they can whip properly.
- Warm the cream cheese, butter, and the batter's 1/4 cup sugar together in a pot over low heat, stirring gently. Continue until the mixture has an even consistency without visible cream cheese lumps.
- Take the pot off the heat and gently work in the yolks. The mixture should look uniform, with no separate streaks of yolk.
- Stir the cornstarch and flour into the yolk mixture until incorporated. Break up any pockets of dry flour before proceeding.
- Blend in the milk and any optional flavoring you choose to use. The finished yolk batter should flow easily and look smooth, without needing a straining step.
- Set the yolk batter aside and beat the egg white meringue ingredients to stiff peaks. Look for glossy foam whose peaks stand upright when you lift the beater.
- Heat the oven to 330°F and place a deep rectangular baking dish containing water inside it. This dish will hold the cake pan or pans for the bain-marie bake.
- Fit parchment circles into the bottoms of one 8-inch pan or two 6-inch pans, then line the inner walls with parchment strips. Use parchment paper, not wax paper, for the bottom liners and side collars.
- Mix a portion of meringue into the yolk batter, then repeat with two more portions. These three additions lighten the batter before the final folding stage.
- Transfer the lightened batter into the remaining meringue and fold gently until evenly combined. The mixture should resemble a thick milkshake with no white streaks, rather than separate foam and liquid layers.
- Pour the folded mixture into the prepared pan or pans. It should remain airy and evenly blended as it settles.
- Place the cake pans in the water bath and bake at 330°F for 25 minutes. If the cake isn't rising because the oven runs cool, a 10°F increase may be needed.
- Check for a clear rise before changing the heat, allowing more time at the first temperature if necessary. The cake should have lifted noticeably before the second baking stage begins.
- Open the oven door slightly for approximately 10 seconds, keeping your face clear of escaping steam, then lower the setting to 245–265°F and bake for another 45 minutes. Choose within that range to suit your oven, since excessive second-stage heat can split the surface.
- Leave the cake in the oven for about 10 minutes after baking, then remove it carefully with oven mitts. The delicate cake benefits from this rest before handling.
- Cover the cake with parchment and a plate, invert the assembly, and ease the pan away by sliding or gently shaking it loose. The cake's top should now rest against the parchment-covered plate.
- Peel away the damp lining and replace the parchment on the exposed cake bottom. Remove the wet paper gently to avoid pulling away the tender crumb.
- Position the serving plate against the cake bottom and carefully invert everything again. The cake should now sit upright, with its rounded top facing upward.
- Serve the cake warm or refrigerate it for a chilled texture. Expect a bouncy warm crumb and a firmer, less jiggly chilled slice.
Notes
Texture tip: Fold the lightened batter and meringue until the mixture looks like a thick, streak-free milkshake. Leaving white streaks can cause a foamy top and dense bottom, while overmixing deflates the lift.
Pan preparation: Line both the bottom and sides of your baking pan with parchment paper, never wax paper. A solid cake pan is simpler for a water bath, while a springform pan needs overlapping foil layers above the waterline.
Baking cue: Wait for a visible rise after the first 25-minute stage before cracking the oven door for about 10 seconds and lowering the heat to 245 to 265°F so the top does not split.
Serving tip: Serve the cake warm for the signature soufflé-like jiggle, or chill it in an airtight container for a firmer, mousse-like slice.
Nutrition information is an estimate based on common ingredients and serving sizes. Values may vary depending on brands, portions, and substitutions.