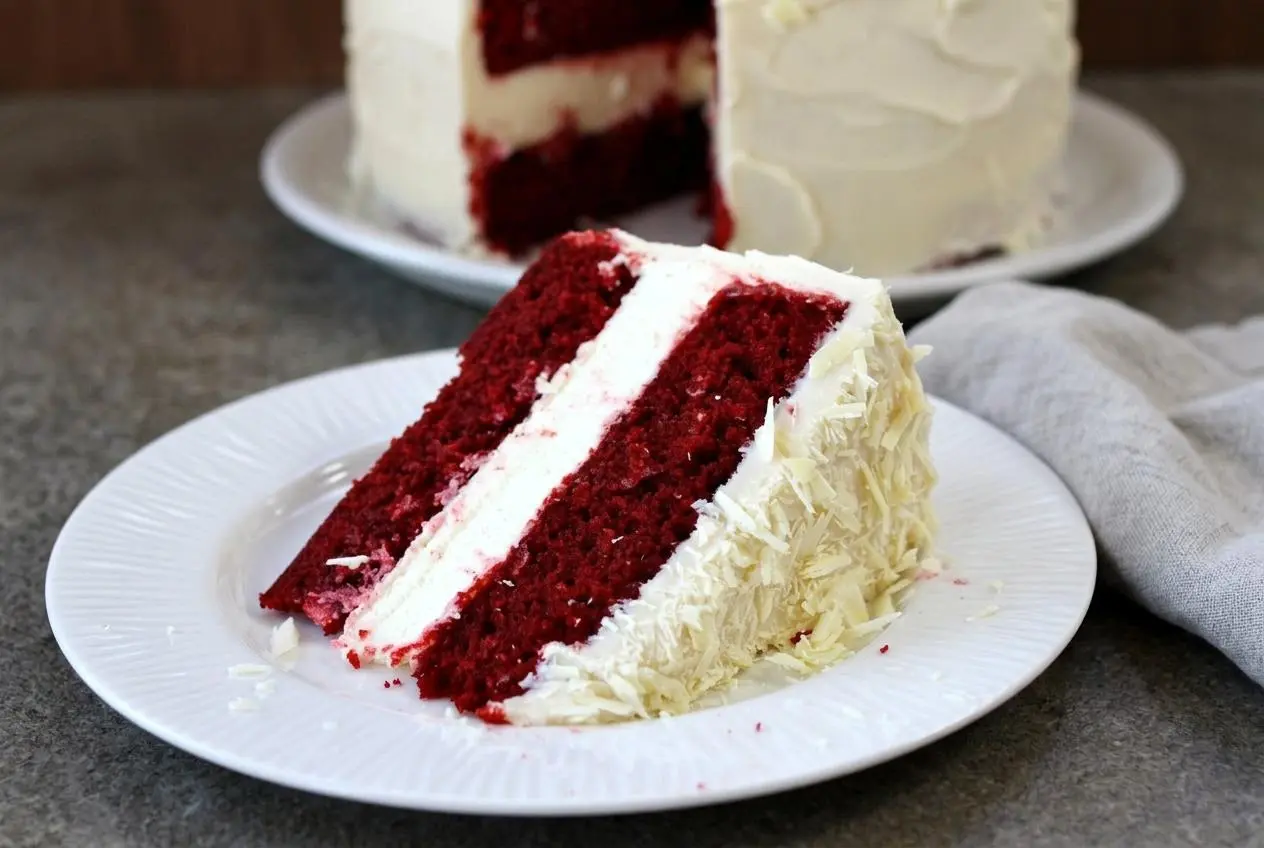
Slice into this tall, bakery-style dessert to reveal a baked cheesecake center between two moist red velvet layers. Freeze the cheesecake solid before stacking, then finish with tangy cream cheese frosting and optional white chocolate curls.
This red velvet cheesecake cake combines the soft crumb of a layer cake with the rich, velvety texture of cheesecake. Unlike a marbled cheesecake, each component bakes separately, giving you three distinct layers and a creamy filling that needs no extra frosting between the cakes.
It’s a celebration cake worth planning ahead for, especially when you divide the baking and decorating into separate sessions. Most of the waiting happens while the layers cool and the cheesecake freezes. The payoff is that clean red-and-white slice.
Clear space in the freezer for a 9-inch springform pan before you begin mixing.
Key Ingredients and Why Each One Matters
Each ingredient supports the cake’s balance: cream cheese brings richness and tang, eggs provide structure, oil keeps the cake tender, and buttermilk, cocoa, and vinegar build its characteristic flavor. Powdered sugar and butter turn the outer frosting smooth and spreadable.
CHEESECAKE
- Two 8-ounce packages cream cheese, at room temperature
- ⅔ cup granulated white sugar
- pinch of salt
- 2 large eggs
- ⅓ cup sour cream
- ⅓ cup heavy whipping cream
- 1 teaspoon vanilla extract
RED VELVET CAKE
- 2½ cups all purpose flour
- 1½ cups granulated white sugar
- 2 tablespoons unsweetened cocoa powder
- 1½ teaspoons baking soda
- 1 teaspoon salt
- 2 large eggs, at room temperature
- 1½ cups vegetable or canola oil
- 1 cup buttermilk
- ¼ cup (two 1-ounce bottles) red food coloring
- 2 teaspoons vanilla extract
- 2 teaspoons white vinegar
CREAM CHEESE FROSTING
- 2½ cups powdered sugar, sifted to remove lumps
- Two 8-ounce packages cream cheese, at room temperature
- ½ cup (1 stick) unsalted butter, at room temperature
- 1 tablespoon vanilla extract
For the Creamy Baked Cheesecake Layer
Choose full-fat brick cream cheese for a firm, rich center. Whipped cream cheese contains added air, while tub-style spreads can have a softer consistency that changes how the batter sets. The same brick-style choice works best for the frosting.
Room-temperature cream cheese blends more readily with sugar, so you won’t need prolonged mixing to chase down lumps. Scrape the bowl carefully before adding the eggs. Eggs give the cheesecake its baked structure, while sour cream adds tang and heavy whipping cream softens the texture. Together, they create a creamy layer that still holds its shape when sliced.
For the One-Bowl Red Velvet Cake Layers
Use natural unsweetened cocoa rather than Dutch-process cocoa here. Natural cocoa contributes mild chocolate flavor and acidity; buttermilk and white vinegar also supply acid that reacts with baking soda to help the cake rise. Buttermilk adds its own tang and contributes to a tender crumb.
Vegetable or canola oil helps the cake stay soft when chilled. Unlike butter, these oils remain fluid in the refrigerator, a useful quality in a dessert that needs cold storage. Flour and eggs provide the structure around that moisture.
The listed food coloring is liquid coloring. Concentrated gel coloring isn’t a volume-for-volume replacement, so don’t substitute the same measured amount of gel. Vanilla rounds out the cocoa flavor, while salt keeps the sweetness from tasting flat.
For the Tangy Cream Cheese Frosting
Sift the powdered sugar before mixing. Breaking up dry lumps first helps you get smooth frosting without excessive beating. Softened butter contributes body, while cream cheese provides the tang that balances the sweet cake.
The butter should yield to gentle pressure without looking melted or oily. Cream cheese should feel pliable throughout, rather than soft outside with a cold center. Stop mixing once the frosting looks uniform and creamy; extra beating can make it looser instead of fluffier.
I check the center of the cream cheese before mixing; a cool, firm middle can leave little lumps even when the outside feels soft.
How to Make the Red Velvet Cheesecake Cake Step by Step
Prepare the cheesecake first so it can freeze while you bake and cool the cake rounds. This recipe makes 16 servings, with about 1 hour of preparation and an estimated total time of 8 hours 15 minutes, including cooling and freezing.
Step 1: Bake and Freeze the Cheesecake Center
PREPARE THE CHEESECAKE LAYER
- Heat the oven to 325 °F, position a roasting pan on the lower-third rack, and bring a kettle of water to a boil.
The roasting pan must have enough room around the springform pan to hold the water bath. - Coat a 9-inch springform pan with nonstick spray, fit parchment over its base, and wrap its exterior bottom and sides with two layers of foil.
Keep the foil intact and raised along the sides to help block water from reaching the seams. - Beat the cream cheese until creamy, then mix in the sugar and salt for 2 minutes, scraping the bowl as needed.
The mixture should look even, with no firm cream cheese pieces remaining. - Blend in the eggs individually, followed by the sour cream, whipping cream, and vanilla, then transfer the batter to the prepared pan.
Stop once the batter looks smooth rather than continuing to whip air into it. - Set the springform inside the roasting pan, carefully add boiling water to a depth of about 1 inch around it, and bake for 45 minutes.
The cheesecake should feel set to a gentle touch and should not jiggle. - Lift the cheesecake pan out of the water bath, cool it on a rack for at least an hour, then freeze it completely in its pan.
Allow several hours or overnight for a firm disk that can be handled without bending.
Step 2: Mix and Bake the Red Velvet Cake Rounds
PREPARE THE CAKE LAYERS
- Raise the oven temperature to 350 °F and grease and flour two 9-inch round metal pans, or coat them with baking spray containing flour.
Cover the pan corners as well as the bases to help the cakes release cleanly. - Whisk the flour, sugar, cocoa, baking soda, and salt together, then add the eggs, oil, buttermilk, coloring, vanilla, and vinegar.
The dry mixture should have an even cocoa tint before the wet ingredients go in. - Mix on medium-low for 1 minute, scrape the bowl’s sides and bottom, then beat on high for 2 minutes.
The finished batter should look evenly colored without dry pockets underneath. - Divide the batter equally between the pans and bake for 30 to 35 minutes.
A toothpick inserted into the middle should carry moist crumbs rather than wet batter. - Cool the cakes in their pans on a rack for 10 minutes, loosen their edges with a knife, and turn them onto racks to finish cooling.
The layers must feel completely cool before assembly so they don’t soften the filling or frosting.
Step 3: Whip the Cream Cheese Frosting
PREPARE THE FROSTING
- Combine the sifted powdered sugar, softened cream cheese, butter, and vanilla in a large bowl and beat on medium-high just until blended.
Stop when the frosting looks creamy and spreads smoothly without visible lumps.
Step 4: Trim, Stack, and Crumb Coat the Cake
ASSEMBLE THE CAKE
- Center one cake round on a platter, then release the frozen cheesecake from its springform ring and base, using a knife beneath the parchment to loosen it.
Peel away all the paper while the cheesecake is still firm. - Compare the cheesecake diameter with the cake rounds and, if necessary, shave its perimeter on a cutting board before stacking it between the cakes.
The edges should line up, with no frosting between the layers because the cheesecake supplies the filling.
FROST THE CAKE
- Spread a thin coat of frosting over the assembled cake with a long, narrow spatula, wiping the blade clean before taking more frosting, then refrigerate for 30 minutes.
Visible crumbs are fine in this first coat, which should feel set before the final frosting goes on.
Step 5: Apply the Final Frosting and Garnish
- Spoon frosting onto the chilled cake’s top and spread it outward and down the sides, then decorate as desired and keep refrigerated.
The set crumb coat helps the outer frosting stay white, and optional white chocolate shavings add a delicate finish.
Expert Tips and Troubleshooting for Perfect Layers
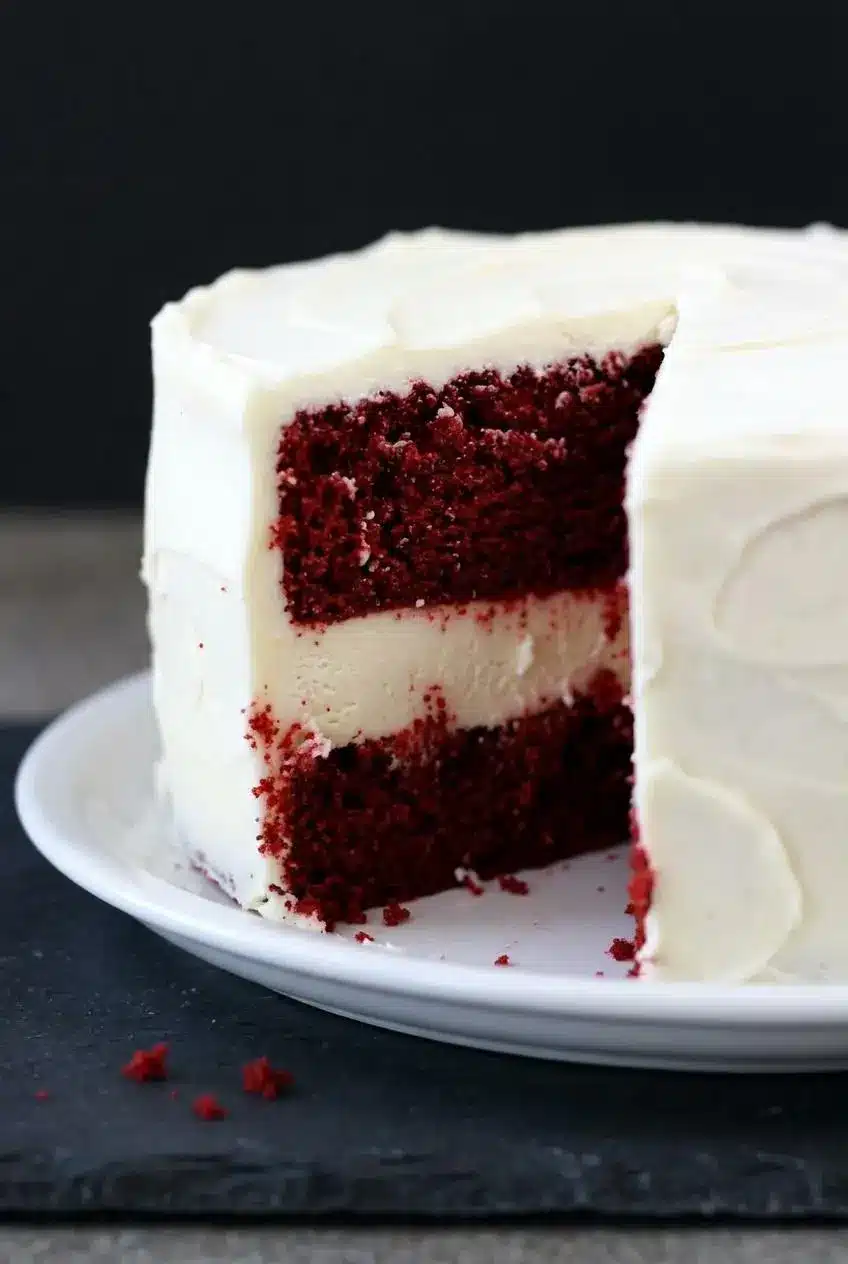
Flat layers and a firm cheesecake center matter more than elaborate decorating. They give the cake even support and make the outer frosting easier to smooth.
Foil vs. Pan-in-Pan Leakproof Water Bath
A water bath moderates the heat around the cheesecake, helping it bake evenly with a flatter surface. For the foil method, use wide, heavy-duty sheets and avoid puncturing them against the springform latch. Double wrapping helps, but seams and tears can still let water through.
As an optional alternative, set the 9-inch springform inside a slightly larger, solid 10-inch cake pan, then place that pan in the roasting pan. Check the fit before mixing: pan rims and handles vary. Keep bath water below the solid pan’s rim so it acts as a barrier around the springform.
Use the set-to-the-touch cue in the method rather than relying on the clock alone. If the center still moves like liquid, it hasn’t reached the intended texture.
How to Fix Size Differences Between Pans
Two pans labeled 9 inches may not produce identical rounds. Cake can also shrink slightly as it cools. Compare the layers before stacking and shave the frozen cheesecake edge gradually, keeping the knife upright for straight sides.
Optional soaked fabric cake strips can help the cake rounds bake more evenly and reduce doming. Follow the strip manufacturer’s directions and check doneness rather than assuming they won’t affect baking time. If the cooled cakes still have domes, level them with a serrated knife so the cheesecake rests on a flat surface.
Common Mistakes to Avoid
- Cracked cheesecake: Excessive mixing after adding eggs can trap air; blend only until incorporated.
- A broken center: Partially frozen cheesecake can bend during transfer; wait until it is solid before unmolding.
- Loose frosting: Warm ingredients or prolonged beating can soften it; use pliable, not melted, butter and stop promptly.
- Red-speckled icing: Skipping the chilled crumb coat or returning a dirty spatula to the bowl spreads crumbs; wipe the blade on a clean damp towel between passes.
- Excess moisture: Freezing a warm cheesecake traps steam; complete the rack-cooling stage first.
A simple no-bake cheesecake has a different structure from this baked center. Don’t assume a softer chilled filling will support a heavy top cake layer.
Decorating, Variations, and Helpful Shortcuts
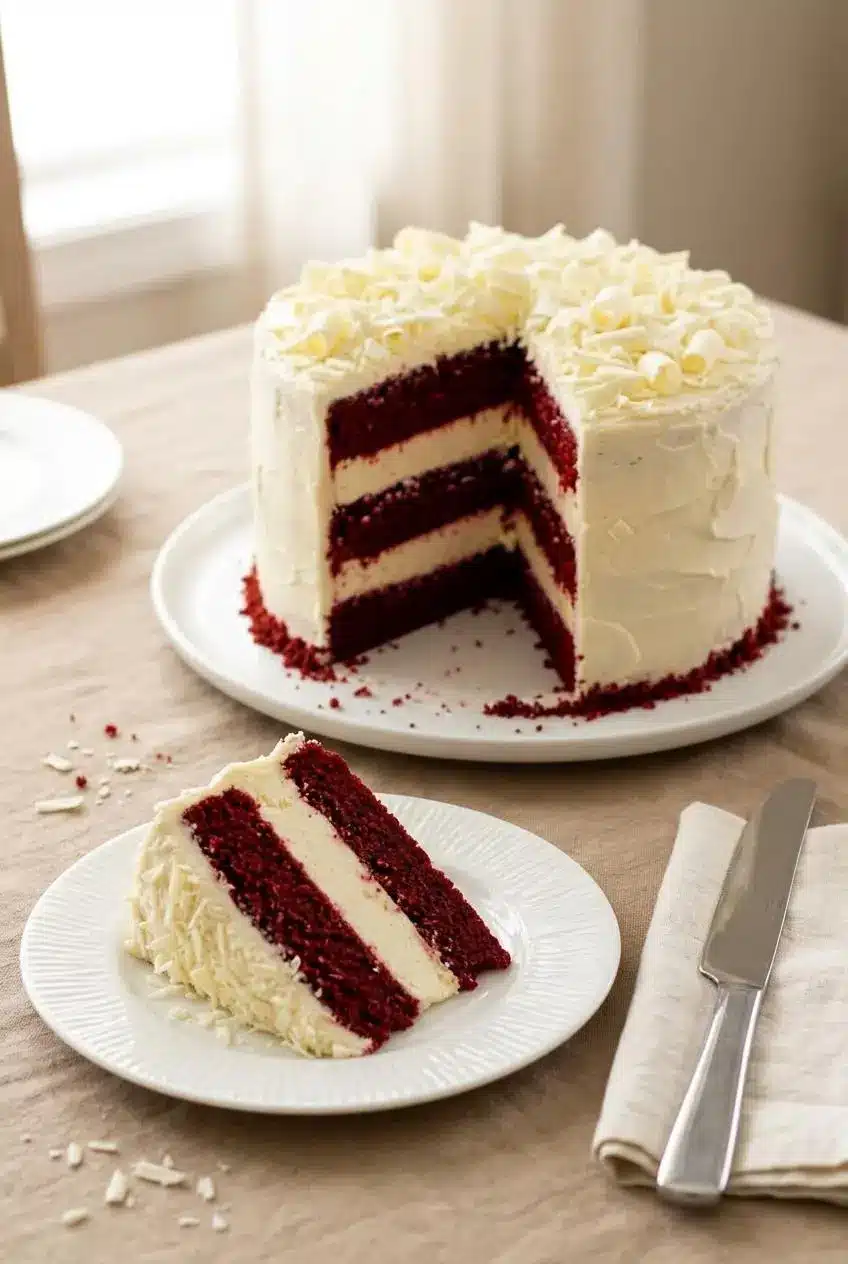
Keep adaptations separate from the scratch recipe so the cake’s structure stays predictable. A garnish changes the finish; changing how the batters bake creates a different dessert.
How to Make White Chocolate Curls Like The Cheesecake Factory
For optional white chocolate curls, warm a thick block of white chocolate in the microwave for about 15 to 20 seconds, just until barely softened. Draw a vegetable peeler across an edge with steady pressure. The chocolate should curl rather than crumble, but it shouldn’t feel melted or greasy.
For a contrasting red border, crumble reserved cake trimmings and press them gently around the top rim or bottom edge. You can toast the crumbs for a drier texture, then cool them completely before decorating. Don’t press so firmly that you dent the frosting.
Serve the cake chilled for distinct layers. Use a long, sharp knife that can reach through the whole stack, dipping it in hot water and wiping it completely dry before each cut. Remove cake and frosting from both sides of the blade between slices so red crumbs don’t streak the cheesecake.
Boxed Red Velvet Cake Mix Shortcut
A boxed mix can replace the scratch cake layers while you still make the cheesecake and frosting as written. Choose a mix with package directions for two 9-inch rounds, and follow its ingredient amounts and baking guidance rather than applying this scratch batter’s mixing schedule.
The oil-and-buttermilk layers here provide a moist, supportive crumb. For more detail on that texture, see this classic red velvet cake. Handle boxed layers carefully, particularly if their crumb feels delicate.
Swirled Single-Pan and Oreo Crust Variations
- Swirled cheesecake: Alternating and lightly swirling cake and cheesecake batters creates a marbled dessert, not separate stacked layers.
- Oreo crust cheesecake: A red-velvet-flavored cheesecake over a chocolate sandwich cookie crust emphasizes creamy filling and cookie crunch rather than cake.
Both styles need a formula developed for that format. Don’t pour all the batter from this recipe into one springform pan or assume its baking time will transfer.
Make-Ahead Timeline, Storage, and Freezing Guide
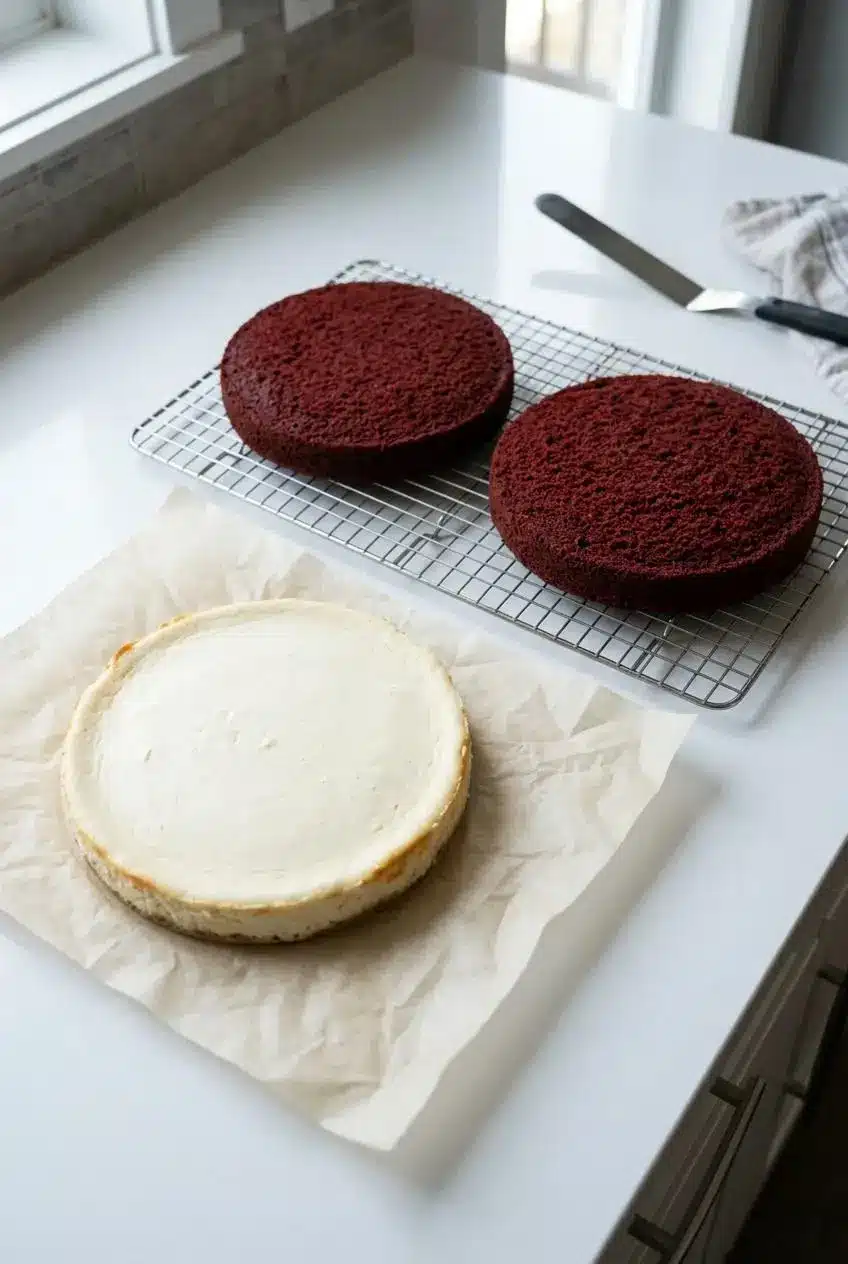
Use the cheesecake’s overnight freezing option to divide the work into two manageable sessions. Treat the listed total time as a planning estimate: the center needs to freeze completely, regardless of the clock.
- First baking session: Bake the cheesecake at 325 °F, remove it from the water bath, and complete its rack cooling before freezing it in the pan overnight.
- While the cheesecake freezes: Raise the oven to 350 °F and bake the cake rounds, then cool them completely before wrapping to prevent drying.
- Assembly session: Make the frosting, unmold and trim the frozen cheesecake, stack the layers, and apply the crumb coat.
- Finish: Complete the 30-minute crumb-coat chill, add the final frosting and garnish, and refrigerate.
Keep the finished cake covered in the refrigerator. A tall cake carrier protects the frosting without pressing wrapping against it. After serving, cover the cut surfaces to limit drying and return leftovers to the refrigerator promptly rather than leaving the whole cake on a party table.
For advance preparation, the cheesecake layer is the most practical component to freeze because freezing is already part of assembly. Once firm, protect it from freezer odors and exposed surfaces with snug wrapping, taking care not to crush its edges. Keep it frozen until you’re ready to stack.
Chill the assembled cake before serving so the frozen center can soften to a sliceable texture. Don’t use a warm counter as a shortcut. This dessert should cut like cheesecake, not resist the knife like a frozen block.
Conclusion
A tall slice with tender red velvet cake, creamy cheesecake, and tangy frosting makes a generous celebration dessert. The contrasting layers do most of the decorating for you.
Freeze the cheesecake solid before stacking, then give the crumb coat its full chill before finishing. Add white chocolate shavings if you like, and let those clean layers be the centerpiece.
Frequently Asked Questions
How Far Ahead Can You Bake the Cheesecake Before Assembling the Cake?
Bake it in your first preparation session, cool it as directed, and freeze it overnight before assembling. Keep it protected in its pan, then stack directly from the freezer. Longer advance-storage limits aren’t established for this complete cake, so avoid planning around an extended holding period.
Can I Use Boxed Cake Mix to Make Red Velvet Cheesecake Cake?
Yes, choose a boxed mix that makes two 9-inch rounds and follow its package instructions. Keep the baked cheesecake center and frosting unchanged. Cool the cake layers completely, and handle them gently if they feel softer or more fragile than the scratch layers.
Can a No-Bake Cheesecake Be Used in the Middle of the Cake?
A baked cheesecake is the better choice for this stacked cake because it provides a firm, sliceable center. A no-bake substitution needs a formula specifically developed to support cake layers. Freezing a soft filling alone doesn’t establish that it will hold its shape after chilling.
When Using Cake Strips on the Red Velvet Layers or Skipping the Water Bath, Does the Bake Time Change?
Cake strips can affect baking time, so check the rounds using the moist-crumb toothpick test rather than adding a fixed number of minutes. Keep the water bath for the cheesecake. Its baking guidance assumes that method, and removing it changes how heat reaches the center.
What Is the Best Way to Cut Clean Slices of Red Velvet Cheesecake Cake?
Chill the assembled cake until the layers hold firmly but the center is sliceable. Dip a long, sharp knife into hot water and wipe it completely dry before cutting. Clean and rewarm the blade between every cut to keep red crumbs from streaking the white filling.
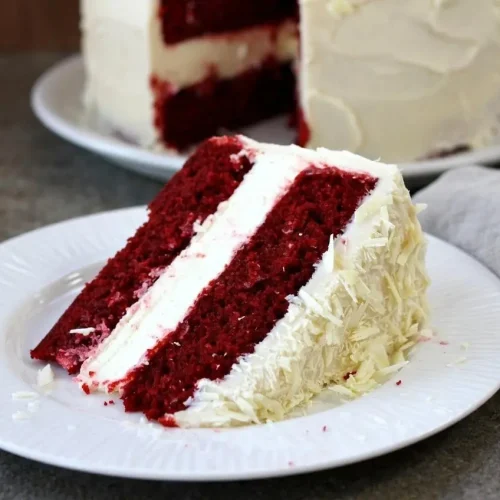
Red Velvet Cheesecake Cake

Equipment
- Large roasting pan
- 9-inch Springform Pan
- Electric Mixer
- two 9-inch round metal baking pans
- Wire rack
- Rubber spatula
- long, thin spatula
Ingredients
CHEESECAKE
- Two 8-ounce packages cream cheese at room temperature
- ⅔ cup granulated white sugar
- pinch of salt
- 2 large eggs
- ⅓ cup sour cream
- ⅓ cup heavy whipping cream
- 1 teaspoon vanilla extract
RED VELVET CAKE
- 2½ cups all purpose flour
- 1½ cups granulated white sugar
- 2 tablespoons unsweetened cocoa powder
- 1½ teaspoons baking soda
- 1 teaspoon salt
- 2 large eggs at room temperature
- 1½ cups vegetable or canola oil
- 1 cup buttermilk
- ¼ cup red food coloring (two 1-ounce bottles)
- 2 teaspoons vanilla extract
- 2 teaspoons white vinegar
CREAM CHEESE FROSTING
- 2½ cups powdered sugar sifted to remove lumps
- Two 8-ounce packages cream cheese at room temperature
- ½ cup unsalted butter (1 stick), at room temperature
- 1 tablespoon vanilla extract
Instructions
PREPARE THE CHEESECAKE LAYER
- Heat the oven to 325 °F, position a roasting pan on the lower-third rack, and bring a kettle of water to a boil. The roasting pan must have enough room around the springform pan to hold the water bath.
- Coat a 9-inch springform pan with nonstick spray, fit parchment over its base, and wrap its exterior bottom and sides with two layers of foil. Keep the foil intact and raised along the sides to help block water from reaching the seams.
- Beat the cream cheese until creamy, then mix in the sugar and salt for 2 minutes, scraping the bowl as needed. The mixture should look even, with no firm cream cheese pieces remaining.
- Blend in the eggs individually, followed by the sour cream, whipping cream, and vanilla, then transfer the batter to the prepared pan. Stop once the batter looks smooth rather than continuing to whip air into it.
- Set the springform inside the roasting pan, carefully add boiling water to a depth of about 1 inch around it, and bake for 45 minutes. The cheesecake should feel set to a gentle touch and should not jiggle.
- Lift the cheesecake pan out of the water bath, cool it on a rack for at least an hour, then freeze it completely in its pan. Allow several hours or overnight for a firm disk that can be handled without bending.
PREPARE THE CAKE LAYERS
- Raise the oven temperature to 350 °F and grease and flour two 9-inch round metal pans, or coat them with baking spray containing flour. Cover the pan corners as well as the bases to help the cakes release cleanly.
- Whisk the flour, sugar, cocoa, baking soda, and salt together, then add the eggs, oil, buttermilk, coloring, vanilla, and vinegar. The dry mixture should have an even cocoa tint before the wet ingredients go in.
- Mix on medium-low for 1 minute, scrape the bowl’s sides and bottom, then beat on high for 2 minutes. The finished batter should look evenly colored without dry pockets underneath.
- Divide the batter equally between the pans and bake for 30 to 35 minutes. A toothpick inserted into the middle should carry moist crumbs rather than wet batter.
- Cool the cakes in their pans on a rack for 10 minutes, loosen their edges with a knife, and turn them onto racks to finish cooling. The layers must feel completely cool before assembly so they don’t soften the filling or frosting.
PREPARE THE FROSTING
- Combine the sifted powdered sugar, softened cream cheese, butter, and vanilla in a large bowl and beat on medium-high just until blended. Stop when the frosting looks creamy and spreads smoothly without visible lumps.
ASSEMBLE THE CAKE
- Center one cake round on a platter, then release the frozen cheesecake from its springform ring and base, using a knife beneath the parchment to loosen it. Peel away all the paper while the cheesecake is still firm.
- Compare the cheesecake diameter with the cake rounds and, if necessary, shave its perimeter on a cutting board before stacking it between the cakes. The edges should line up, with no frosting between the layers because the cheesecake supplies the filling.
FROST THE CAKE
- Spread a thin coat of frosting over the assembled cake with a long, narrow spatula, wiping the blade clean before taking more frosting, then refrigerate for 30 minutes. Visible crumbs are fine in this first coat, which should feel set before the final frosting goes on.
- Spoon frosting onto the chilled cake’s top and spread it outward and down the sides, then decorate as desired and keep refrigerated. The set crumb coat helps the outer frosting stay white, and optional white chocolate shavings add a delicate finish.