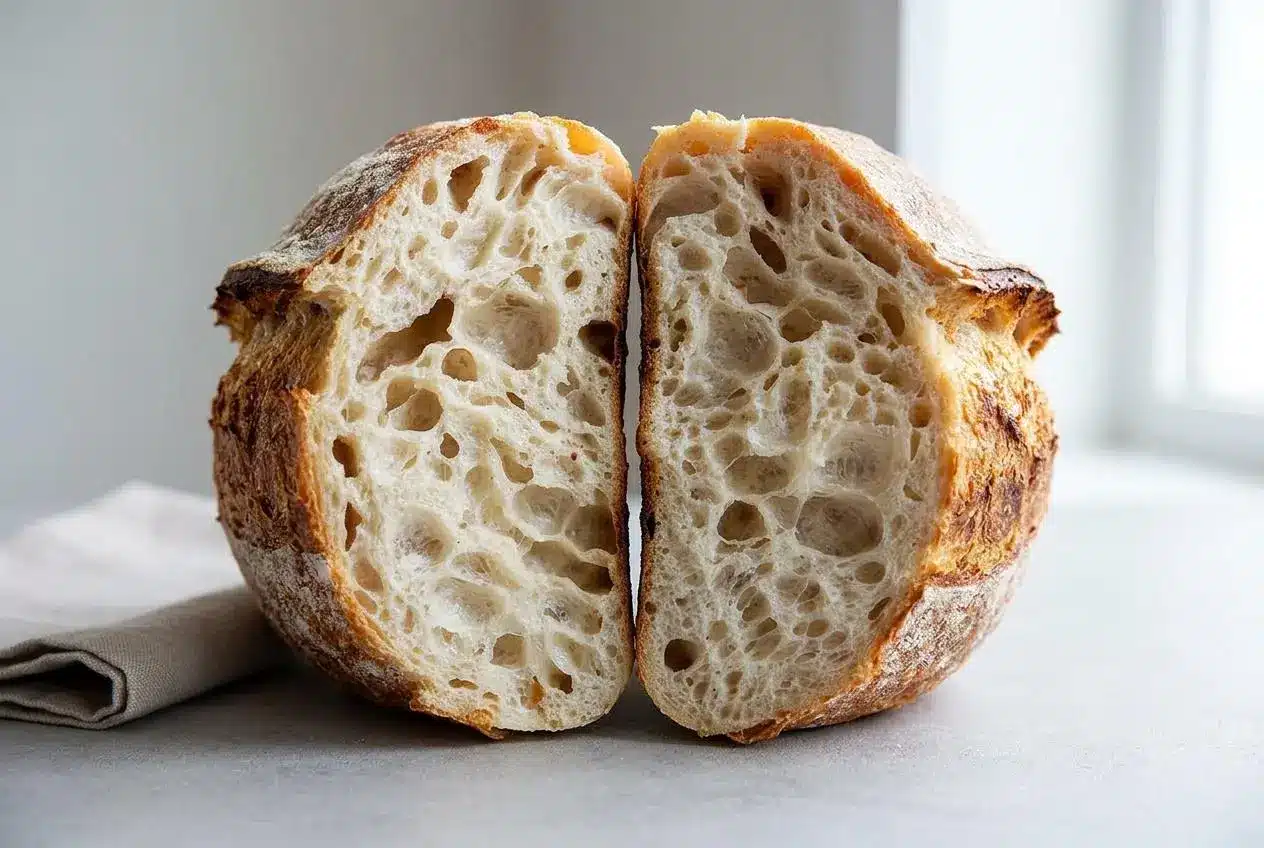
Baking authentic artisan sourdough bread requires only active starter, warm water, bread flour, and fine salt. By developing gluten through periodic stretch and fold cycles, fermenting until airy, and baking inside a preheated lidded Dutch oven, you achieve maximum rise, an open crumb, and a crisp, blistered crust. Baking a rustic loaf at home transforms four basic elements into an aromatic centerpiece with a crackling golden exterior and a tender, open interior.
Naturally fermented dough relies on wild yeast and beneficial bacteria to build remarkable depth of flavor, gentle tang, and a resilient, chewy texture. Working with wild yeast connects you directly to the rhythm of natural fermentation, where tactile dough cues matter far more than rigid kitchen timers. Once you hear that first triumphant loaf sing as it crackles on the cooling rack, you will never look at store-bought sandwich loaves the same way again.
Dough temperature significantly influences fermentation speed, so using comfortably warm water between 78°F and 82°F gives your wild yeast an ideal, active start.
Essential Ingredients and Starter Readiness
Every component in this formula serves a distinct structural and biochemical purpose, balancing hydration, gluten elasticity, fermentation vigor, and seasoning to build a resilient, flavorful artisan loaf.
- 50 – 100 g (1⁄4 – 1/2 cup) bubbly, active starter
- 375 g (1 1/2 cups plus 1 tbsp) warm water
- 500 g (4 cups plus 2 tbsp) bread flour
- 9 to 12 g (1.5 – 2.5 teaspoons) fine sea salt
Bread flour provides the high protein matrix needed to trap expanding carbon dioxide gases, while water hydrates the starch proteins to initiate enzymatic activity. Active starter introduces the live wild yeast cultures and lactic acid bacteria necessary for natural leavening and complex flavor.
Sea salt regulates fermentation speed, tightens the gluten mesh, and brings out the grain’s natural sweetness. If you have unfed starter leftover from feedings, save it to bake a soft loaf of sourdough discard sandwich bread rather than letting it go to waste.
I always keep a dedicated jar spatula nearby to scrape down the starter sides cleanly so I can judge the rise without dried crust interfering.
Evaluating Flour Protein and Hydration Ratios
Flour choice determines the structural integrity of your finished loaf. Unbleached white bread flour with a protein content between 12% and 14% absorbs water efficiently and develops a strong gluten network.
This high protein content ensures the dough expands upward during baking rather than slumping sideways across your work surface. Lower protein all-purpose flours can yield a softer bite, but they often struggle to support the open, airy crumb characteristic of rustic loaves.
This master formula operates at a moderate hydration level of roughly 65% to 75%, depending on the exact starter and water measurements used. This hydration range gives beginners ample moisture for an open crumb while keeping the dough manageable during handling, preventing excessive stickiness on the counter.
Conducting the Float Test and Feeding at Peak
Timing your starter at its peak rise is essential for vigorous dough expansion. Feed your mother culture 4 to 8 hours before mixing, keeping it in a warm environment until it doubles or triples in volume. The surface should look aerated, domed, and webbed with active bubbles.
To verify readiness, gently drop a teaspoon of starter into a glass of room temperature water. If it bobs buoyantly on the surface, the culture contains enough trapped carbon dioxide to aerate your bread dough. If it sinks to the bottom, the starter is either under-developed or past its peak and requires another feeding cycle before mixing.
How to Make Sourdough Bread
Make the Dough
- Whisk the active starter and warm water together in a large mixing bowl until fully dispersed and milky.
The liquid will turn evenly cloudy with a frothy, aerated surface. - Add the bread flour and fine sea salt, mixing thoroughly with a spatula or your hands until no dry flour patches remain.
A rough, shaggy mass forms with no loose powder left at the bottom of the bowl. - Cover the bowl securely with a damp kitchen towel and let the mixture rest undisturbed for 30 minutes.
The flour hydrates fully while the gluten begins relaxing into a cohesive dough.
Stretch and Fold
- Wet your clean hands with cool water, reach under one edge of the dough, pull it upward, and fold it across the center.
The dough stretches smoothly without tearing while offering gentle resistance. - Rotate the bowl a quarter turn and repeat the lifting and folding motion four to five times around the perimeter.
A smoother, firmer round forms in the center of the bowl. - Cover the bowl and rest the dough for 30 minutes between cycles, completing four total sets over a two-hour window.
The dough transforms from a lumpy, fragile mass into a silky, elastic, and structured ball.
Bulk Fermentation
- Seal the bowl with an airtight lid or damp towel to trap internal humidity during the primary rise.
The dough surface remains supple and protected from developing a dry, leathery skin. - Let the dough ferment at ambient room temperature until it expands noticeably and develops visible bubbles.
The mass increases by 50% to 75% in volume, showing domed edges and scattered surface aeration.
Shape and Rest
- Tip the fermented dough gently onto a lightly floured work surface and pull the edges into the center to create a loose round.
The dough releases cleanly from the bowl while retaining its delicate internal aeration. - Use a bench scraper to roll and cup the dough against the counter surface to generate exterior skin tension.
A taut, smooth outer surface develops across the top of the round. - Allow the round to rest seam side up on the counter for 30 minutes to relax the gluten network.
The dough settles slightly without losing its upright, domed posture. - Dust a cloth-lined proofing basket generously with white rice flour before the final shaping.
The flour coating provides a barrier that prevents sticking during the cold rest. - Perform a final envelope fold to tighten the round and transfer it seam side up into the prepared basket.
The dough sits neatly centered with a firm, taut base facing upward.
Cold Proof
- Cover the proofing basket securely with a reusable shower cap or clean towel.
The protective wrap prevents surface evaporation in the refrigerator. - Refrigerate the basket for 1 hour or up to 48 hours for extended cold retardation.
The dough firms up significantly while developing deep, lactic acid tang and complex flavor.
Score and Bake
- Place your heavy Dutch oven with its lid inside the oven and preheat thoroughly to 550°F (290°C).
The cast iron accumulates intense radiant heat necessary for explosive oven spring. - Invert the chilled dough onto a sheet of parchment paper and score the top with a sharp razor blade at a shallow angle.
A clean, decisive incision opens across the taut skin without snagging. - Lower the dough using the parchment corners into the preheated Dutch oven, seal the lid, and reduce oven heat to 450°F (230°C).
Trapped internal steam keeps the exterior soft, allowing the loaf to expand rapidly. - Bake covered for 30 minutes, then remove the lid, reduce heat to 400°F (200°C), and bake 10 to 15 minutes more.
The crust turns a deep golden brown with blistered micro-bubbles and a crisp texture. - Transfer the loaf to a wire cooling rack and leave it undisturbed for at least 1 hour before slicing.
Internal steam settles into the crumb structure, preventing gumminess upon slicing. - Keep the cooled loaf in an airtight container at room temperature for up to 3 days or slice and freeze for longer storage.
The bread retains its moist interior crumb and toasts evenly from frozen.
Mastering Bulk Fermentation and Dough Development
Bulk fermentation is the most critical phase of artisan bread making. During this primary rise, wild yeast consumes accessible carbohydrates to produce carbon dioxide gas, while lactic and acetic acid bacteria generate complex aromas and strengthen the protein matrix. Mastering this stage requires learning how to handle wet dough and recognizing visual signs of maturity rather than watching the clock.
The Four-Cycle Stretch and Fold Routine
Traditional kneading can be clumsy with hydrated dough, but periodic stretching builds incredible gluten strength with minimal effort. Spacing four stretch and fold cycles roughly 30 minutes apart allows the gluten strands to align naturally.
Always wet your hands with cold water before touching the dough. Water creates a slick barrier that prevents the dough from clinging to your fingers without altering the formula’s hydration balance. Lift the dough upward from underneath, stretching it gently until you feel resistance, then fold it cleanly over its center. By the fourth set, the dough will feel noticeably bouncy, elastic, and smooth.
Reading Sensory Cues: Volume, Dome, and Jiggle
Relying solely on fixed time estimates often leads to under-fermented or over-proofed dough. Because wild yeast activity varies based on ambient conditions, monitor specific visual and tactile milestones:
- Volume Growth: The dough should increase by roughly 50% to 75% in size, never completely doubling or tripling, which exhausts gluten strength.
- Domed Top: The edges where the dough meets the bowl will curve downward into a soft, rounded dome rather than sitting completely flat.
- Aeration: Large, delicate translucent bubbles will gather just beneath the top surface and along the sides of a clear container.
- The Jiggle: When you gently shake the bowl, the entire dough mass should wobble smoothly like set gelatin.
Adjusting Rise Times for Kitchen Temperature
Ambient kitchen temperature dictates yeast metabolism. At a standard room temperature of 70°F (21°C), bulk fermentation generally requires 8 to 10 hours following your stretch and fold sets. In a warm summer kitchen reaching 78°F to 80°F (26°C), fermentation accelerates dramatically and can conclude in as little as 4 to 5 hours.
Conversely, cool winter rooms hovering near 65°F (18°C) slow yeast activity, extending bulk fermentation past 12 hours. If your kitchen runs cold, place the covered bowl inside an unheated oven with the interior light turned on to create a cozy, consistent proofing chamber.
Step-by-Step Shaping and Surface Tension Techniques
Proper shaping converts an airy dough mass into a tight, structurally sound round that rises tall in the oven instead of spreading flat across the baking surface. Generating surface tension without deflating internal air pockets is the primary goal.
Pre-Shaping and the Critical Bench Rest
Tip the aerated dough gently onto an unfloured or extremely lightly dusted work station. Use a bench scraper to draw the edges into the center, creating a loose, round ball. Flip the dough seam side down.
Allow the dough round to rest uncovered on the counter for 30 minutes. This bench rest allows the tight gluten matrix to relax slightly, making the final shaping sequence smooth and preventing the outer skin from tearing under tension.
Envelope Folding and Cupping for Surface Tension
After the bench rest, lightly dust the top of the dough round and flip it over so the sticky side faces upward. Gently pull the bottom edge down, then fold it up over the middle third. Stretch the left and right sides outward and fold them across each other like a business letter. Finally, pull the top edge down over the folded package to create a snug cylinder.
Place your hands behind the dough parcel in a cupped position. Pull the dough gently toward your body across the counter surface. The friction against the un-floured worktop pulls the outer gluten sheath taut. Rotate the dough ninety degrees and repeat this pulling motion three to four times until a smooth, spherical skin forms across the exterior.
Cold Retardation in the Banneton
Dust an 8-inch proofing basket generously with white rice flour. Unlike regular wheat flour, rice flour contains no gluten and will not absorb moisture or bond to the wet dough, ensuring a clean release when inverted.
Carefully transfer the shaped dough seam side up into the basket, pinch the base seam closed if it loosens, and cover the basket securely. Chilling the dough in the refrigerator for 1 to 48 hours halts yeast activity while allowing bacterial fermentation to continue. This extended cold rest develops deep flavor, firms the dough butter-soft for effortless scoring, and creates micro-blisters on the baked crust.
Baking Method and Oven Spring Secrets
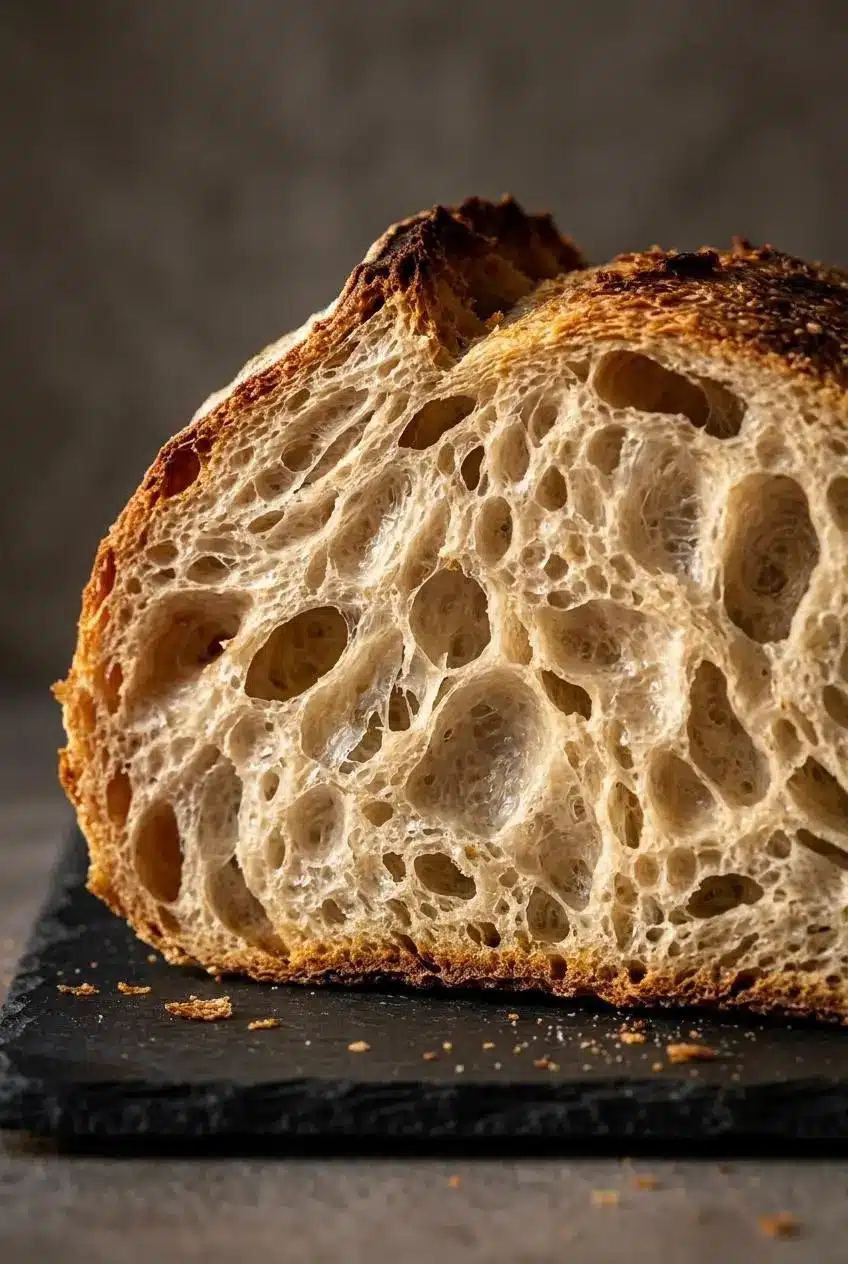
The transformation from pale dough to an artisan loaf relies on intense heat management and moisture retention. Baking inside a heavy enclosed vessel replicates commercial steam-injected deck ovens at home.
Scoring for Controlled Expansion
Uncontrolled steam will rupture the weakest seam of your loaf if the top is left un-slit. Scoring creates an intentional opening that directs the expanding steam upward, producing a dramatic artisan ear.
Invert your chilled dough onto a sheet of parchment paper. Hold a razor blade or bread lame at a shallow 30-degree angle relative to the dough surface. Make a single, confident curved slash roughly half an inch deep from top to bottom. The angled cut creates an upper lip that peels back and crisps under oven heat to form a prominent, jagged ridge.
Steam Trapping in the Dutch Oven
Steam keeps the outer dough skin supple and elastic during the first 20 to 30 minutes of baking, allowing the loaf to expand to its maximum physical height before setting. In an open oven, moisture evaporates quickly, causing the crust to harden prematurely into a thick, stunted shell.
A heavy cast iron Dutch oven traps evaporating moisture from the wet dough inside its compact chamber, surrounding the loaf in dense steam. This steam gelatinizes surface starches, producing a glossy sheen and micro-blisters.
The principle of enclosed steam baking works similarly when producing crusty artisan bread with commercial yeast, showing how essential humidity is for exceptional crust texture. Once you remove the lid for the final baking phase, direct dry heat caramelizes sugars across the crust into a deep amber hue.
Cooling Science: Why Waiting Prevents Gummy Crumb
Resist the urge to slice into a steaming loaf straight from the oven. Bread continues cooking internally through starch retrogradation as it rests on a wire cooling rack. Slicing too early allows essential steam to escape abruptly, causing the delicate internal crumb structure to collapse into a wet, gummy texture.
A fully baked lean artisan loaf sounds hollow and resonant when you tap its bottom crust. Let the loaf cool completely for at least 1 to 2 hours. This resting window allows the internal starches to set firmly, ensuring clean, airy, and tender slices with every cut.
Artisan Variations and Flavor Inclusions
Once you feel comfortable with the master recipe, fold savory inclusions into the dough to create specialty artisan loaves. Always incorporate add-ins during your final stretch and fold cycle so the ingredients distribute evenly without tearing the developing gluten mesh.
Roasted Garlic and Rosemary Loaf
Tender roasted garlic cloves and fresh herbs lend rich aroma and buttery sweetness to the tangy crumb:
- Roast a whole head of garlic wrapped in foil until the cloves are golden and completely soft.
- Finely mince 1 to 2 tablespoons of fresh rosemary leaves.
- Gently press the cooled cloves and rosemary across the flattened dough during the fourth stretch and fold, sealing them inside the folds.
Sharp Cheddar and Pickled Jalapeno Loaf
Pockets of melted cheese and spicy acidity create a bold, savory profile perfect for toasting:
- Cut 100 grams of sharp aged cheddar into small quarter-inch cubes.
- Thoroughly drain and pat dry 50 grams of sliced pickled jalapenos to avoid adding excess moisture.
- Scatter the cheese cubes and jalapeno slices evenly across the dough during the final fold before bulk fermentation finishes.
Rustic Rye and Seeded Grain Blends
Earthier grains and toasted seeds add hearty chew and rich, nutty flavor notes:
- Substitute 50 to 100 grams of the bread flour with stone-ground dark rye or whole wheat flour during the initial mix.
- Toast a mixture of sesame, flax, and sunflower seeds in a dry skillet until fragrant and let them cool completely.
- Laminate the toasted seeds into the dough during the bench rest or roll the damp, shaped loaf directly in seeds before placing it in the proofing basket.
Sourdough Troubleshooting and Common Mistakes
Baking with wild yeast involves living ecosystems and variable kitchen conditions. Use these practical diagnostic cues to pinpoint and correct common baking hiccups.
Fixing Dense, Gummy, or Flat Loaves
Dense crumb and flat loaf profiles usually stem from fermentation timing errors rather than recipe formulation:
- Under-Fermented Dough: If the crumb shows huge tunneling holes surrounded by tight, dense, gummy dough, the bulk fermentation ended too soon. Extend the room temperature rise until the dough looks aerated and domed.
- Over-Fermented Dough: If the loaf collapses flat with a pale, dull crust and fragile crumb, the yeast consumed all available sugars and degraded the gluten. Shorten the primary rise or use cooler water during mixing.
- Weak Starter Culture: Using refrigerated discard instead of a bubbly, refreshed starter leads to sluggish rises. Always verify your starter floats before mixing the dough.
Managing Overly Sticky or Slumping Dough
High humidity and weak gluten development can cause dough to spread out across your worktop:
- Avoid Dumping Raw Flour: Adding excessive raw flour during shaping throws off the hydration balance and creates dry pockets in the baked loaf. Use wet hands and a metal bench scraper instead.
- Improve Surface Tension: Spend extra care during the pre-shaping and final envelope folds to build a taut exterior skin that holds its shape.
- Utilize the Cold Retard: Chilling your shaped dough in the refrigerator firms the fats and starches, making slumping impossible when turning the loaf out to score.
Correcting Pale or Scorched Crusts
Crust color issues relate directly to oven heat distribution and vessel preheating:
- Pale, Soft Crust: Ensure your Dutch oven preheats for a full 45 to 60 minutes at high heat, and leave the loaf uncovered for at least 10 to 15 minutes to caramelize surface sugars.
- Scorched Bottom Crust: Intense base heat from oven elements can burn the bottom of your loaf before the top browns. Place a rimmed baking sheet on the oven rack directly beneath your Dutch oven to deflect harsh radiant heat.
Storage, Freezing, and Refreshing Techniques
Because naturally leavened artisan bread contains natural acids that inhibit mold growth, it stays fresh longer than commercial sandwich loaves when handled properly.
Room Temperature Preservation and Freezing Slices
Store your uncut or partially sliced artisan bread at room temperature, resting it cut-side down on a wooden cutting board or inside a breathable paper bag or wooden bread box. Avoid storing rustic loaves in the refrigerator, as cool refrigeration temperatures accelerate starch retrogradation, causing the crumb to stale rapidly.
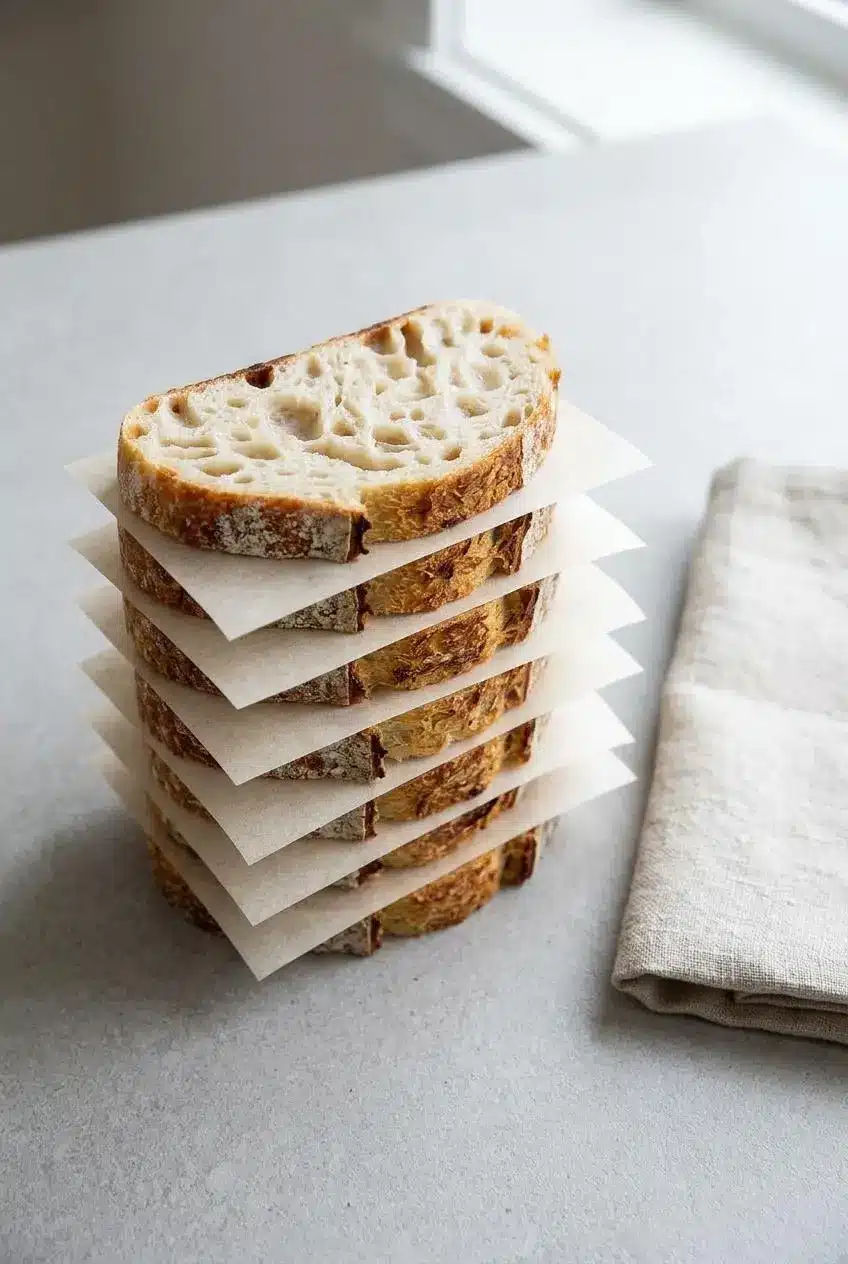
For long-term preservation, slice the completely cooled loaf into individual portions. Layer small squares of parchment paper between the slices, seal them inside a freezer-safe bag, and freeze. You can place frozen slices directly into a wide-slot toaster for fresh, warm artisan bread on demand. If you find yourself with hardened end crusts, process them in a blender to make crunchy homemade breadcrumbs for topping gratins and pastas.
The Water Refresh Trick for Day-Old Crusts
If an uncut artisan loaf becomes hard and dry after a few days on the counter, you can restore its original oven-fresh texture:
- Preheat your oven to 375°F (190°C).
- Run the entire uncut stale loaf quickly under a running cold water tap for 2 to 3 seconds until the crust is damp.
- Place the wet loaf directly onto the center oven rack and heat for 8 to 10 minutes.
- The trapped moisture turns to steam, softening the internal crumb while recrisping the outer crust to bakery-quality crunch.
Serving Ideas for Artisan Sourdough
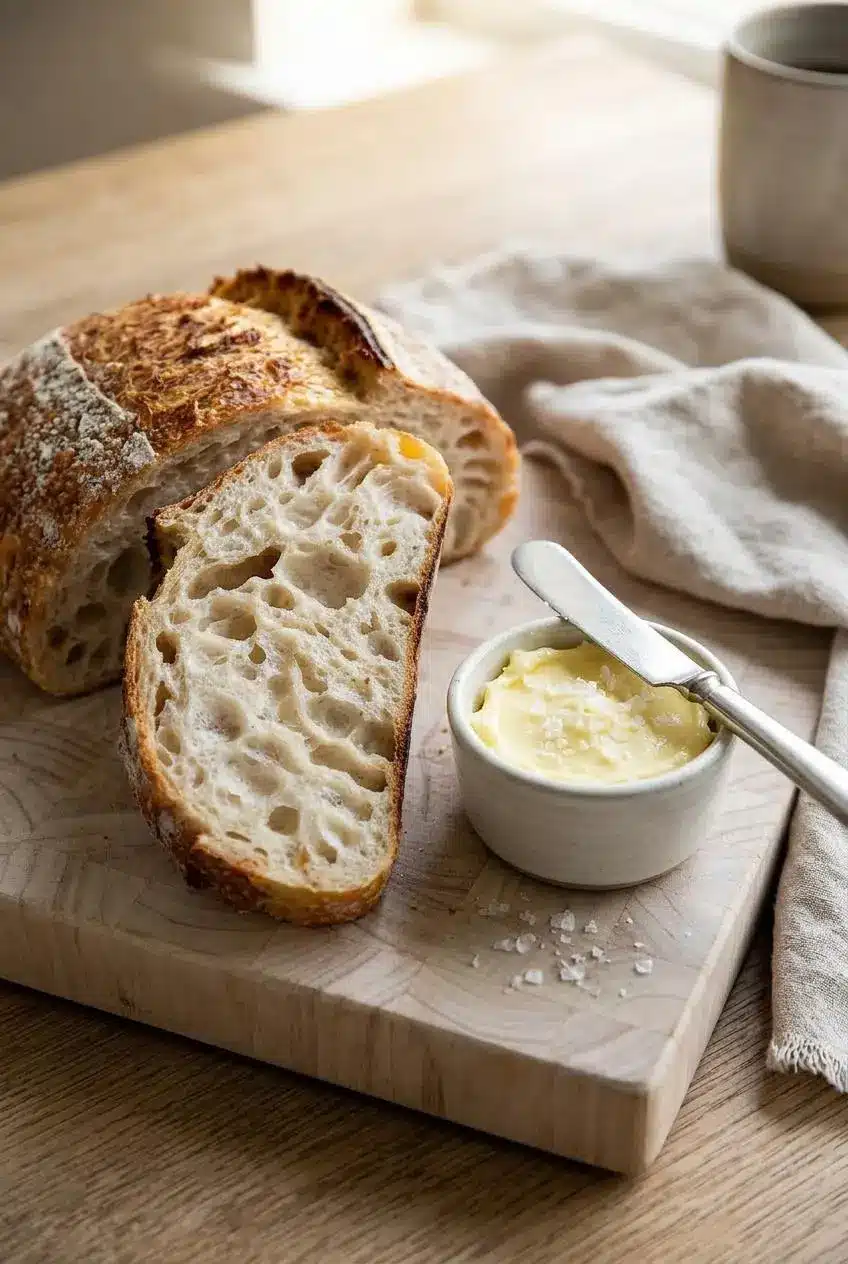
Thickly sliced artisan bread provides a hearty foundation for everyday meals and simple culinary pairings. Cut generous slices and toast them until golden brown, spreading them liberally with cultured salted butter and a light pinch of flaky sea salt to showcase the bread’s natural tang.
Warm, crusty slices pair effortlessly alongside a shallow bowl of seasoned olive oil bread dip loaded with cracked black pepper, crushed garlic, and fresh herbs. Use sturdy, open-crumb slices to build open-faced avocado tartines, hearty breakfast melts, or golden grilled cheese sandwiches that maintain their satisfying crunch.
Conclusion
Baking artisan bread at home is a deeply satisfying craft that rewards patience, attentive observation, and gentle handling. By learning to read your dough’s visual cues during bulk fermentation and harnessing the power of steam inside a hot Dutch oven, you can consistently achieve loaves with stunning oven spring, an airy interior, and a blistered crust.
Keep your starter vibrant, take your time building surface tension during shaping, and give your finished bread the cooling rest it needs to set its open crumb. With practice, you will turn four basic ingredients into memorable artisan loaves that bring warmth to your home table.
Frequently Asked Questions
How can I tell when bulk fermentation is officially finished?
The dough expands roughly 50% to 75% in total volume rather than completely doubling. The top surface forms a soft, rounded dome with visible aerated bubbles beneath the skin. The entire dough mass jiggles cohesively like set gelatin when the bowl is gently shaken.
What is the best flour type for baking sourdough at home?
Unbleached white bread flour with a 12% to 14% protein content provides the best gluten strength and chewy crumb. Standard all-purpose flour can be used in a pinch, but it produces a softer bite and less upright oven spring. Whole wheat or dark rye flours can replace up to 20% of the bread flour for added earthy flavor.
Why is my sourdough dough sticky and difficult to shape?
High hydration, warm ambient room temperatures, or underdeveloped gluten networks increase stickiness. Moisten your hands with cool water and use a metal bench scraper rather than adding excess dry flour to your counter. Ensure your dough completes several stretch and fold cycles to build sufficient structural elasticity before shaping.
How long does sourdough bread stay fresh at room temperature?
Artisan sourdough stays fresh at room temperature for several days when stored cut-side down in a breathable paper bag or bread box. Natural fermentation acids protect the bread from spoiling as quickly as commercial yeast bread. Never refrigerate baked loaves, as cold temperatures cause the crumb starches to stale prematurely.
Can I bake sourdough bread without a Dutch oven?
Yes, preheat a heavy baking steel or pizza stone on the middle oven rack. Place a deep, preheated cast iron skillet or roasting pan on the bottom rack filled with lava rocks or rolled damp towels to generate steam. Slide your scored loaf onto the hot stone on parchment paper and pour boiling water into the lower pan to create instant baking steam.
Sourdough Bread

Equipment
- Dutch oven
- Digital kitchen scale
- 8-inch proofing basket or bowl
- Flour sack towel
- Bench scraper
- Bread lame or razor blade
- Parchment Paper
Ingredients
- 50-100 g bubbly, active starter (1/4 – 1/2 cup)
- 375 g warm water (1 1/2 cups plus 1 tbsp)
- 500 g bread flour (4 cups plus 2 tbsp)
- 9-12 g fine sea salt (1.5 – 2.5 teaspoons)
Instructions
Make the Dough
- Whisk the active starter and warm water together in a large mixing bowl until fully dispersed and milky. The liquid will turn evenly cloudy with a frothy, aerated surface.
- Add the bread flour and fine sea salt, mixing thoroughly with a spatula or your hands until no dry flour patches remain. A rough, shaggy mass forms with no loose powder left at the bottom of the bowl.
- Cover the bowl securely with a damp kitchen towel and let the mixture rest undisturbed for 30 minutes. The flour hydrates fully while the gluten begins relaxing into a cohesive dough.
Stretch and Fold
- Wet your clean hands with cool water, reach under one edge of the dough, pull it upward, and fold it across the center. The dough stretches smoothly without tearing while offering gentle resistance.
- Rotate the bowl a quarter turn and repeat the lifting and folding motion four to five times around the perimeter. A smoother, firmer round forms in the center of the bowl.
- Cover the bowl and rest the dough for 30 minutes between cycles, completing four total sets over a two-hour window. The dough transforms from a lumpy, fragile mass into a silky, elastic, and structured ball.
Bulk Fermentation
- Seal the bowl with an airtight lid or damp towel to trap internal humidity during the primary rise. The dough surface remains supple and protected from developing a dry, leathery skin.
- Let the dough ferment at ambient room temperature until it expands noticeably and develops visible bubbles. The mass increases by 50% to 75% in volume, showing domed edges and scattered surface aeration.
Shape and Rest
- Tip the fermented dough gently onto a lightly floured work surface and pull the edges into the center to create a loose round. The dough releases cleanly from the bowl while retaining its delicate internal aeration.
- Use a bench scraper to roll and cup the dough against the counter surface to generate exterior skin tension. A taut, smooth outer surface develops across the top of the round.
- Allow the round to rest seam side up on the counter for 30 minutes to relax the gluten network. The dough settles slightly without losing its upright, domed posture.
- Dust a cloth-lined proofing basket generously with white rice flour before the final shaping. The flour coating provides a barrier that prevents sticking during the cold rest.
- Perform a final envelope fold to tighten the round and transfer it seam side up into the prepared basket. The dough sits neatly centered with a firm, taut base facing upward.
Cold Proof
- Cover the proofing basket securely with a reusable shower cap or clean towel. The protective wrap prevents surface evaporation in the refrigerator.
- Refrigerate the basket for 1 hour or up to 48 hours for extended cold retardation. The dough firms up significantly while developing deep, lactic acid tang and complex flavor.
Score and Bake
- Place your heavy Dutch oven with its lid inside the oven and preheat thoroughly to 550°F (290°C). The cast iron accumulates intense radiant heat necessary for explosive oven spring.
- Invert the chilled dough onto a sheet of parchment paper and score the top with a sharp razor blade at a shallow angle. A clean, decisive incision opens across the taut skin without snagging.
- Lower the dough using the parchment corners into the preheated Dutch oven, seal the lid, and reduce oven heat to 450°F (230°C). Trapped internal steam keeps the exterior soft, allowing the loaf to expand rapidly.
- Bake covered for 30 minutes, then remove the lid, reduce heat to 400°F (200°C), and bake 10 to 15 minutes more. The crust turns a deep golden brown with blistered micro-bubbles and a crisp texture.
- Transfer the loaf to a wire cooling rack and leave it undisturbed for at least 1 hour before slicing. Internal steam settles into the crumb structure, preventing gumminess upon slicing.
- Keep the cooled loaf in an airtight container at room temperature for up to 3 days or slice and freeze for longer storage. The bread retains its moist interior crumb and toasts evenly from frozen.