
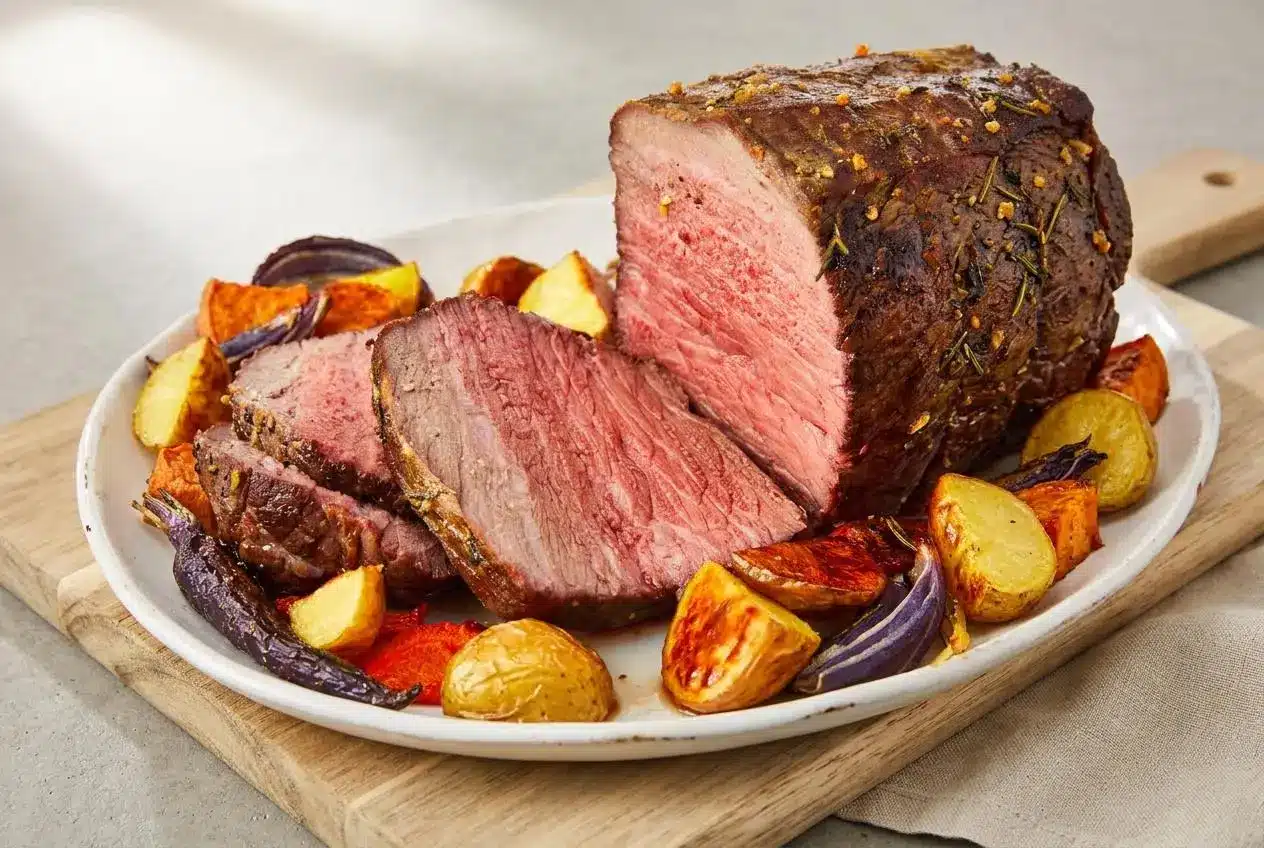
For tender roast beef, coat a 3 to 4 pound round roast in garlic-herb seasoning, roast at 450°F for 15 minutes, then lower the oven to 325°F and monitor the center with a thermometer. Rest it before slicing thinly against the grain.
This roast beef has a deeply browned, aromatic crust and a rosy, juicy center. The high-to-low oven method gives lean round roast the contrast it needs: bold exterior flavor without pushing the middle too far.
A thermometer and a sharp knife do most of the heavy lifting here. The crust is the bonus.
Set the roast on its rack before heating the oven so air can circulate around the meat and the bottom does not steam in its own juices.
Choosing the Best Cut of Beef for Roasting
Lean, evenly shaped roasts are the best choice for this style of oven cooking because they cook predictably and carve into neat slices. Look for a compact roast with a visible grain and only a modest exterior fat cap.
Top round, bottom round, eye of round, and sirloin tip all work well for dry roasting. They have a beefy flavor and firm structure, but they need careful temperature control and thin cross-grain carving to feel tender. Chuck roast and short ribs have more connective tissue and suit moist, slow cooking, such as classic beef stew, rather than a dry oven roast.
Trim away any very thick or hard exterior fat that will not render pleasantly. Leave a thin layer where possible for flavor and protection. If the roast is loose or uneven, tie it at intervals with kitchen twine so it holds a more uniform shape and cooks more evenly.
Top Round vs Eye of Round
Top round is often the most dependable choice for roast beef. It has a broader shape, a little more tenderness, and a clear grain that makes thin slicing easy. It is a practical balance of flavor, value, and texture.
Eye of round is more cylindrical and notably leaner. It makes attractive deli-style slices, but it can become chewy faster if it overshoots the target temperature. Keep a close eye on the thermometer and carve it especially thin.
Bottom round is also flavorful and economical, though its grain can be more pronounced. Treat it much like top round: roast gently after the initial browning stage and slice across the visible muscle lines.
Budget-Friendly vs Premium Cuts
Round roasts are economical, lean, and ideal when you want thin slices for a family dinner or sandwiches. Their modest marbling means they benefit from a flavorful crust, a measured roast, and a proper rest.
Top sirloin brings a little more tenderness and fat, while rib roast is richer and more forgiving because its marbling renders as it cooks. Those premium cuts are delicious, but they do not need the same paper-thin carving strategy that makes round roast shine.
Key Ingredients and Seasoning Strategy
Each ingredient supports the roast in a specific way: the beef provides structure, salt seasons deeply, oil carries the aromatics, and herbs, garlic, and pepper create a fragrant, savory crust.
- 1 (4-lb.) round roast
- 3 cloves garlic, finely chopped
- 1/4 c. extra-virgin olive oil
- 4 tsp. kosher salt
- 1 tbsp. finely chopped fresh rosemary
- 1 tbsp. finely chopped fresh thyme leaves
- 1 tsp. freshly ground black pepper
The seasoning follows a useful ratio: 1 teaspoon of kosher salt per pound of meat. Salt helps season the roast beyond its surface and encourages a well-browned exterior. Olive oil helps the garlic, rosemary, thyme, and pepper cling evenly while the roast heats.
Fresh rosemary brings piney depth, thyme adds a softer earthy note, and freshly ground pepper gives the crust a savory bite. Finely chopped garlic spreads through the oil rather than sitting in thick pieces that may brown too quickly.
I chop the herbs finely and rub the paste into every side of the roast, including the ends, because those smaller surfaces are easy to underseason.
How to Roast Beef to Perfection Step by Step
This method begins with intense heat for browning, then shifts to gentler heat so the center cooks more evenly. Use a roasting pan with a rack and an instant-read thermometer placed in the thickest central section, away from the rack or any large seam of fat.
- Set the roast on a wire rack over a baking sheet and refrigerate it uncovered for at least 1 hour and up to overnight.
The exposed surface will feel dry rather than tacky, which helps the roast brown more effectively. - Heat the oven to 450°F with a rack positioned in the center, then stir the garlic, olive oil, salt, rosemary, thyme, and pepper together in a small bowl.
The mixture should form a loose, fragrant paste that coats the roast without sliding off. - Rub the herb paste over the beef and place it on a rack inside a large roasting pan.
Cover the top, sides, and ends so the seasoning develops into an even crust. - Roast for 15 minutes, then reduce the oven to 325°F and continue cooking until the center reaches 135°F for medium, about 1 hour 20 to 30 minutes more.
The exterior should be deep brown and smell strongly of toasted garlic and herbs while the center remains the best measure of doneness. - For medium-well, continue roasting until the thermometer reaches 145°F, about 2 hours total.
The roast will feel firmer when gently pressed and will continue to rise in temperature as it rests. - Move the roast to a cutting board and rest it for 15 to 30 minutes before carving.
Loosely tent it with foil if needed, leaving room for steam to escape so the crust stays intact.
Dry Brining for a Crisp Crust
The uncovered chill is optional, but it makes a visible difference on lean beef. The rack lifts the roast above the baking sheet, allowing surface moisture to dry instead of collecting underneath. A drier exterior browns more readily, so you get a flavorful herb crust without stovetop searing.
Do not cover the roast tightly during this stage. A covered roast traps moisture and can leave the surface damp, which slows browning when it enters the hot oven.
The Two-Stage Heat Roasting Method
The first 15 minutes at 450°F quickly set the garlic-herb coating and start the rich brown crust. You should notice an active sizzle and an herbal aroma as the oil heats around the roast.
Lowering the oven to 325°F keeps the outside from racing ahead of the middle. This gentler finish gives the heat more time to move inward, which matters with a lean cut that can become dry around its edges if roasted aggressively throughout.
Resting and Juice Redistribution
Resting is part of the cooking process, not an optional pause. As the roast sits, its muscle fibers relax and retain more of their juices, so less moisture runs onto the cutting board when you slice.
Do not cut into it immediately. A rested medium-rare roast should feel firm but springy when pressed, and the crust should remain dry and well set beneath the loose foil.
Cooking Times and Internal Temperature Doneness Guide
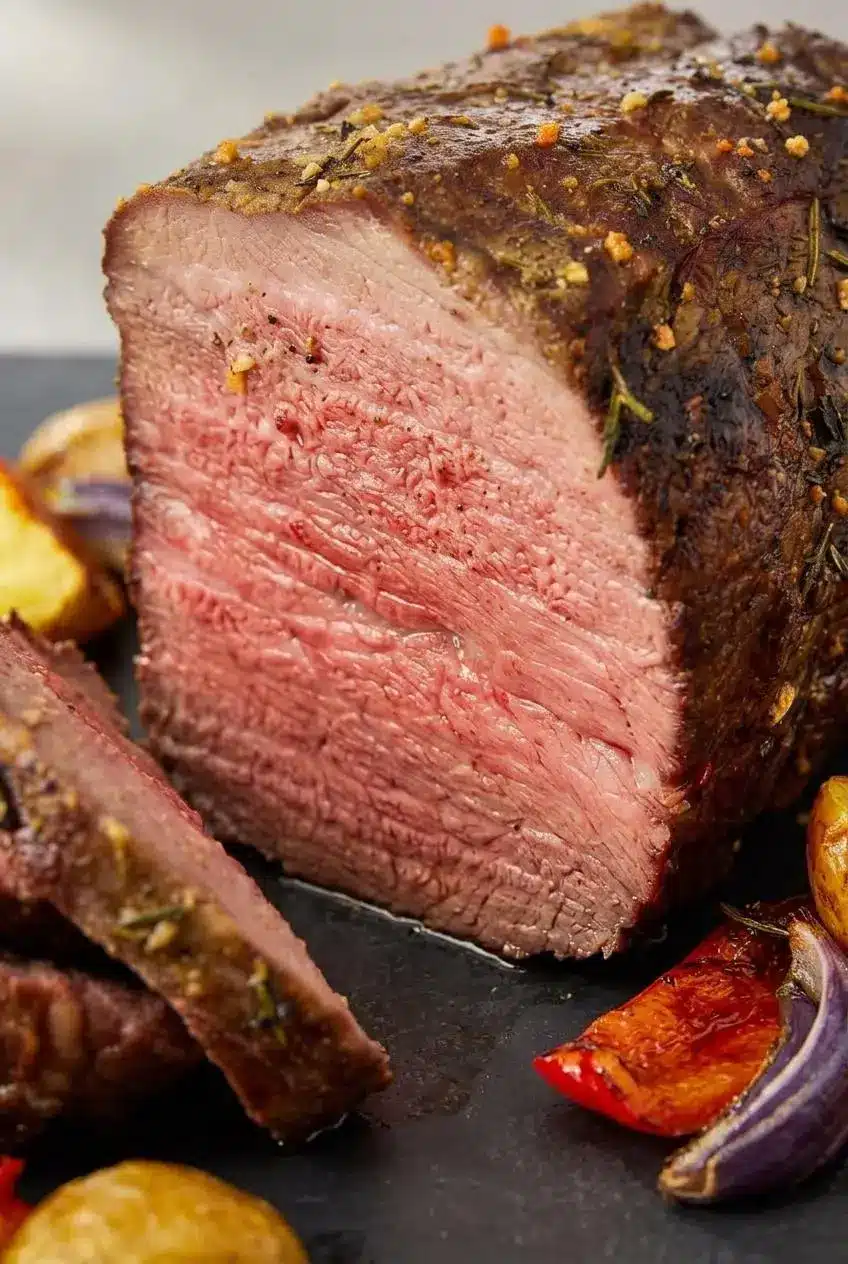
Cooking time is a useful estimate, but internal temperature is the reliable test. After the initial high-heat stage, a round roast often needs about 20 to 25 minutes per pound at 325°F for medium-rare territory, though roast thickness and shape can change that pace.
- Rare: remove at 120°F, then rest to about 125°F. The center will be deep red and very soft.
- Medium-rare: remove at 130°F, then rest to about 135°F. The center will be warm pink-red with a tender, springy texture.
- Medium: remove at 140°F, then rest to about 145°F. The center will be pink with firmer slices.
Carryover cooking is more noticeable in larger roasts because stored heat continues moving toward the center during the rest. Insert the probe from the side into the thickest middle section for the most useful reading. Lean round roast cooked beyond medium can still be served, but expect a firmer, drier texture.
For a government minimum-temperature target for whole beef roasts, cook to 145°F and allow a 3-minute rest, using a food thermometer to check the minimum internal temperature.
Expert Tips for Slicing and Serving
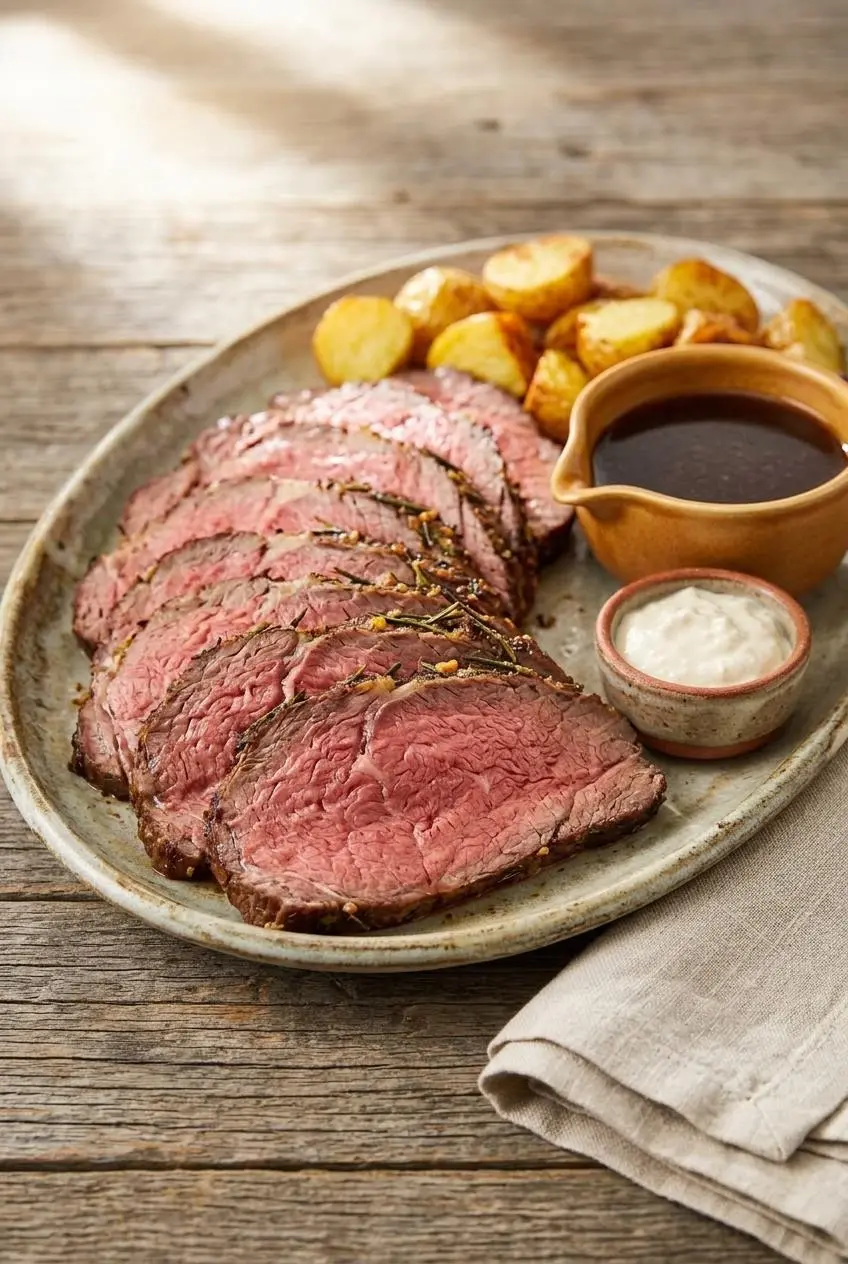
Thin, cross-grain carving is what turns a lean roast from potentially chewy to genuinely tender. Look closely at the cut surface for the long muscle striations. Position the knife perpendicular to those lines, then slice in smooth, deliberate strokes.
Use a sharp carving knife or long slicing knife. Avoid pressing down hard or sawing back and forth, which can tear the slices and squeeze out moisture. For deli-style roast beef, aim for slices thin enough to fold easily.
- Save the resting juices and whisk them with warm broth for a quick au jus.
- Serve slices with creamy horseradish sauce and roasted potatoes for a classic dinner plate.
- Layer the beef on crusty bread and dip it in warm juices for a French dip-style sandwich.
- For a spicier sandwich direction, borrow the saucy, shredded-beef flavor profile of Instant Pot Italian beef.
Custom Seasoning Options
The garlic-herb coating above is the main seasoning method. These ideas are optional alternatives for a different crust, and they should be used in place of the core seasoning paste rather than added on top of it.
Garlic Butter Herb Crust
For a richer finish, combine softened butter with minced garlic, rosemary, and thyme, then spread it over the roast before cooking. Butter encourages deeper browning and a fuller, more rounded flavor, though it can make the crust softer than the olive-oil version.
Keep the herb layer thin and even so it browns rather than forming thick patches that may darken too fast during the 450°F stage.
Deli-Style Cracked Peppercorn Rub
For a bolder sandwich-style crust, use coarsely cracked black peppercorns with coriander and mustard seed. The pepper gives the exterior a pronounced bite, while coriander adds citrusy warmth and mustard seed brings a gentle toasted edge.
Press the rub onto the surface firmly before roasting. Slice the finished beef very thin so the peppery crust complements each bite instead of overwhelming it.
Slow-Roasted Low-Temperature Method
A 250°F roast can produce more even pinkness from edge to center, especially with a uniform round roast. It skips the initial high-heat blast, so the crust will be lighter and less aggressively browned.
Use the same thermometer targets and rest the roast before carving. This approach suits anyone who prefers a softer exterior and a more uniformly pink interior, but it requires patience and close temperature monitoring.
Storage, Reheating, and Leftover Ideas
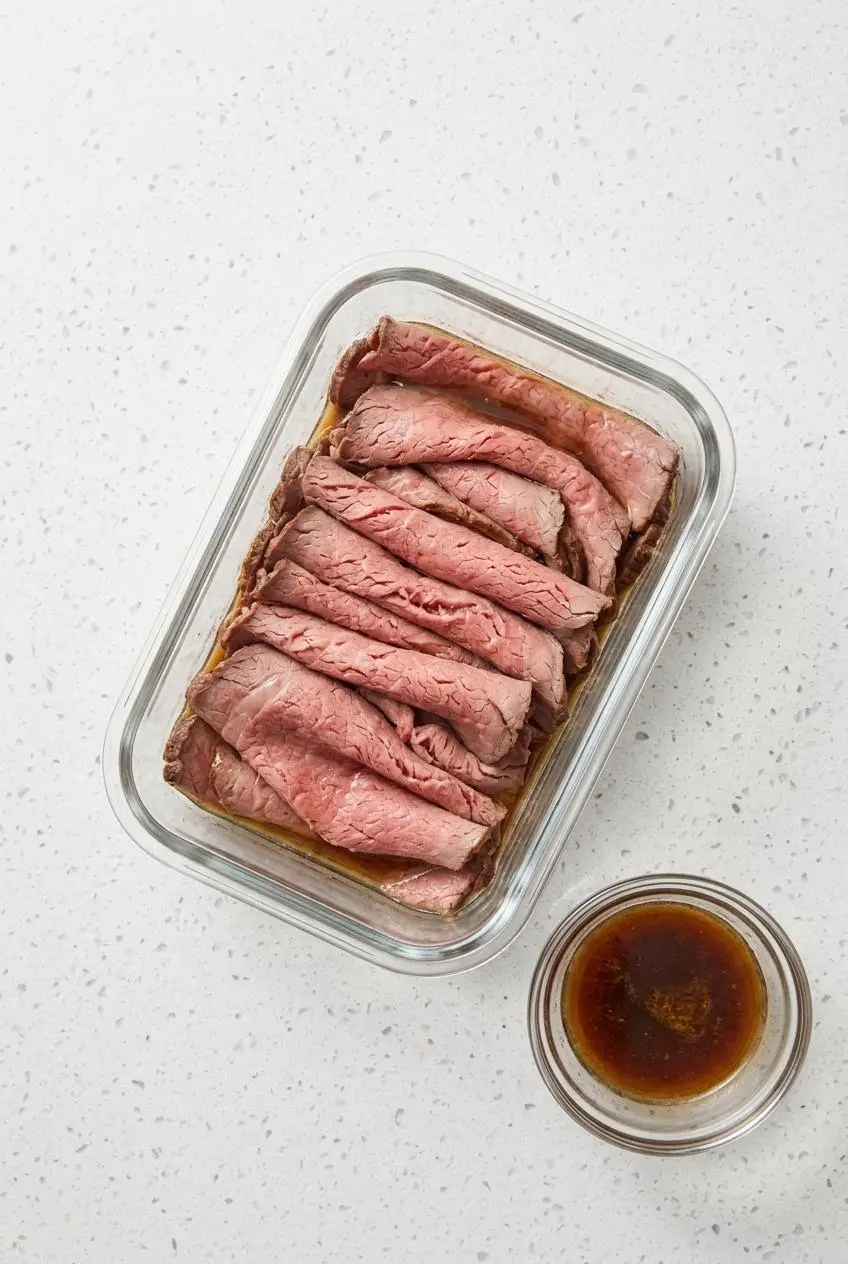
Cool leftover beef promptly, transfer it to shallow airtight containers, and keep it chilled. For safer handling, refrigerate perishable foods at 40°F or below within 2 hours, as outlined in refrigeration and reheating food safety practices.
Keep sliced roast beef with any collected juices or a little broth to protect it from drying out. Reheat only the portion you plan to serve. Warm thin slices gently in hot au jus until heated through, rather than blasting them in a high-power microwave, which can turn the edges gray and chewy.
Leftovers make excellent French dip sandwiches, cold deli-style salads, or steak-and-cheese sandwiches. For a creamy skillet meal, add strips near the end of cooking in this quick beef stroganoff so the already-cooked beef does not become tough.
Conclusion
A well-made oven roast comes down to a lean, even cut, a seasoned crust, and a thermometer that tells you what the clock cannot. The 450°F-to-325°F approach builds deep color while giving the center time to cook steadily.
Let the roast rest, find the grain, and slice thinly across it. Those small choices make every serving more tender and satisfying.
Frequently Asked Questions
What Is the Best Cut of Beef for Roast Beef?
Top round offers the best balance of shape, beefy flavor, tenderness, and value. Eye of round is leaner and works especially well for deli-thin slices. Sirloin tip is another dependable option with a little more natural tenderness.
How Long Do You Cook Roast Beef per Pound?
After the 15-minute roast at 450°F, plan on roughly 20 to 25 minutes per pound at 325°F for medium-rare territory. Roast shape affects timing, so use that estimate only as a planning guide. Pull based on the thermometer reading, not the clock alone.
Why Is My Roast Beef Tough and How Do I Fix It?
Lean round roast can become tough when cooked past medium, so begin checking the internal temperature before the estimated finish time. Slicing with the grain leaves long muscle fibers intact, which creates chewy bites. Use a sharp knife and carve paper-thin slices perpendicular to the grain.
How Do You Reheat Leftover Roast Beef Without Overcooking It?
Warm thin slices gently in hot au jus or broth until heated through. Keep the meat covered with moisture rather than reheating it uncovered. Heat only what you need so the remaining slices stay tender for another meal.
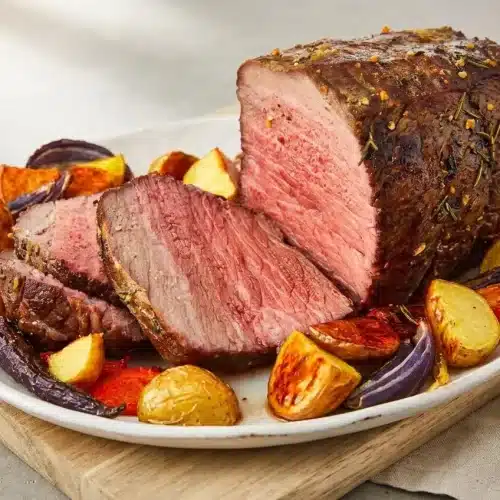
Roast Beef

Equipment
- Wire rack
- Baking Sheet
- Small bowl
- large roasting pan fitted with a rack
- Instant-read thermometer
- Cutting board
Ingredients
- 1 (4-lb.) round roast
- 3 cloves garlic finely chopped
- 1/4 c. extra-virgin olive oil
- 4 tsp. kosher salt
- 1 tbsp. fresh rosemary finely chopped
- 1 tbsp. fresh thyme leaves finely chopped
- 1 tsp. freshly ground black pepper
Instructions
- Set the roast on a wire rack over a baking sheet and refrigerate it uncovered for at least 1 hour and up to overnight. The exposed surface will feel dry rather than tacky, which helps the roast brown more effectively.
- Heat the oven to 450°F with a rack positioned in the center, then stir the garlic, olive oil, salt, rosemary, thyme, and pepper together in a small bowl. The mixture should form a loose, fragrant paste that coats the roast without sliding off.
- Rub the herb paste over the beef and place it on a rack inside a large roasting pan. Cover the top, sides, and ends so the seasoning develops into an even crust.
- Roast for 15 minutes, then reduce the oven to 325°F and continue cooking until the center reaches 135°F for medium, about 1 hour 20 to 30 minutes more. The exterior should be deep brown and smell strongly of toasted garlic and herbs while the center remains the best measure of doneness.
- For medium-well, continue roasting until the thermometer reaches 145°F, about 2 hours total. The roast will feel firmer when gently pressed and will continue to rise in temperature as it rests.
- Move the roast to a cutting board and rest it for 15 to 30 minutes before carving. Loosely tent it with foil if needed, leaving room for steam to escape so the crust stays intact.




1 thought on “Roast Beef”