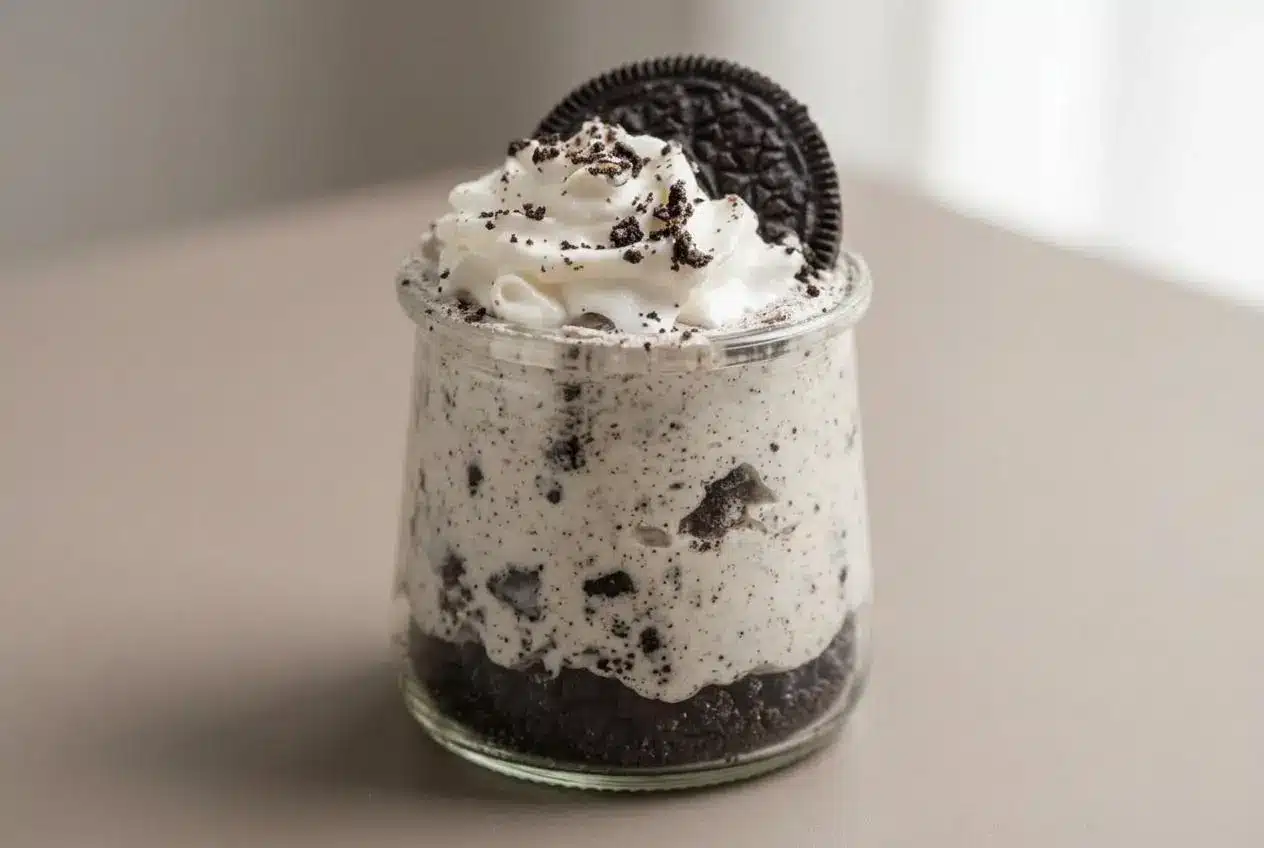
Oreo cheesecake cups are individual no-bake desserts layered with crushed cookies and a fluffy cream cheese filling, then chilled until set and topped just before serving.
Oreo Cheesecake Cups land right in the sweet spot between creamy cheesecake and crunchy cookies. They’re rich enough to feel like dessert-table material, but easy enough for a weeknight treat.
You get a cool, airy filling, plenty of cookie crunch, and no need to turn on the oven. The best part is how neatly they portion out in little cups.
Use fully softened brick cream cheese before you start, or the filling can stay stubbornly lumpy.
Why You Will Love These No-Bake Oreo Cups
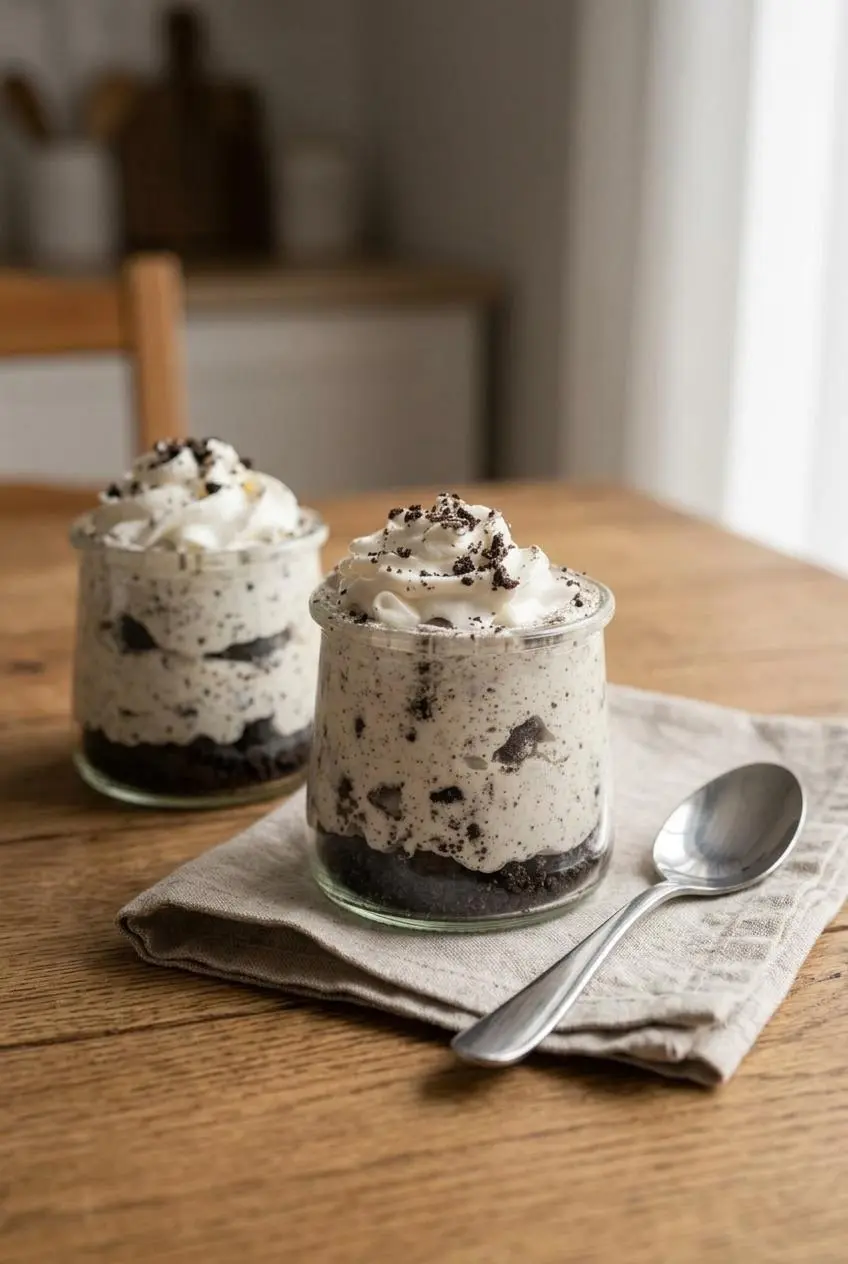
These cups work so well because they solve a lot of dessert problems at once. You need only five ingredients, the whole recipe is oven-free, and each serving is already portioned for parties, showers, birthdays, or a low-effort Friday night dessert.
They’re also especially handy in warm weather when turning on the oven sounds like a terrible plan. Just crush, mix, layer, and chill. Cleanup stays manageable too since everything goes straight into individual dishes instead of one big pan.
The texture is the real payoff. The filling stays creamy and light, while the Oreo base gives each bite a little snap and crunch. If you like desserts that look polished without much fuss, this one earns its spot fast.
Baked vs. No-Bake: What Is the Difference?
Baked cheesecake is denser, richer, and more custardy. It slices cleanly and has that classic firm structure from eggs and oven time.
These no-bake cups are lighter and more whipped in texture. The filling feels airy rather than dense, and the whole dessert comes together much faster. That makes this version especially nice for hot days, quick entertaining, or any time you want cheesecake flavor without the full baking project.
Ingredients
Each ingredient pulls its weight here, building richness, sweetness, structure, aroma, and the cookie crunch that makes these cups so satisfying.
- 1 8 oz block of cream cheese, softened
- 1 8 oz. Cool Whip or whipped topping
- 2/3 c powdered sugar
- 1 tsp vanilla
- 24-26 Oreo cookies
Cream cheese gives the filling its tangy richness and the body that helps it hold shape in the cups. Powdered sugar sweetens the filling, but it also helps it stay smooth and a little more stable than granulated sugar would. Vanilla rounds out the dairy flavor, and the crushed Oreos bring both chocolate flavor and that essential contrast in texture.
Whipped topping keeps the filling light and airy without extra whipping steps. It folds in easily and softens the cheesecake base into something closer to mousse than dense cake.
I like to press the wrapped cream cheese block gently before unwrapping it. If it still feels firm in the center, I give it more time so the filling mixes silky instead of bumpy.
Essential Ingredients and Substitutions
This recipe is very forgiving in some ways, but the texture depends on a few smart ingredient choices. If you want cups that set nicely and stay fluffy, these details matter.
Powdered sugar is especially useful in a no-bake filling because it dissolves quickly and helps the mixture stay smooth. It also adds a bit of structure, so the filling is less likely to feel loose or gritty. Granulated sugar can leave a sandy texture and does not blend as gracefully into cream cheese.
For a lighter dessert comparison, a cookies and cream mousse has an even softer, airier finish. These cups are still fluffy, but the cream cheese gives them more body and cheesecake flavor.
The Role of Cream Cheese
Use full-fat brick cream cheese here, not whipped tubs or spreadable cream cheese from a plastic container. Brick cream cheese has the fat and firmness that give no-bake cheesecake its structure.
Tub versions usually contain more water and a softer stabilizer balance, which can leave the filling loose. That means the cups may not set as well, especially after layering with the crushed cookies.
If you forgot to soften the cream cheese, cut it into small cubes and let it sit at room temperature until it feels pliable all the way through. It should press easily with a finger and lose that cold, tight feel before it goes into the bowl.
Whipped Topping vs Heavy Cream
Whipped topping is the easiest option because it is already stable and fluffy. It folds into the sweetened cream cheese without much effort, and it helps the filling keep that light, spoonable shape after chilling.
You can substitute heavy cream if you prefer, but it changes the process a bit. Whip the heavy cream separately to stiff peaks first, then fold it into the cream cheese mixture gently. The final texture is a little fresher and less sweet, but it can also be easier to deflate if you overmix.
Once whipped topping or whipped cream is added, stop beating and switch to folding. That is the stage where over-whipping can flatten the mixture and rob it of the airy texture that makes these cups feel special.
How to Make Oreo Cheesecake Cups
This method is straightforward, but a few visual cues make all the difference. The cookie crumbs should have some texture, the cream cheese mixture should be completely smooth before folding, and the finished filling should look fluffy enough to mound softly in the cups.
- Seal the Oreo cookies in a plastic bag and crush them with a rolling pin or sturdy wooden spoon, then spoon 1 1/2 – 2 tablespoons into each of 6 small dessert dishes that hold at least 3/4 cup-1 cup.
The crumbs should be a mix of fine bits and coarse pieces so the base stays textured instead of turning uniformly soft. - Beat the softened cream cheese with the powdered sugar using a hand mixer or stand mixer until the mixture is fully smooth, then mix in the vanilla.
When it is ready, it should look creamy and even, with no small white lumps clinging to the bowl or beaters. - Fold in the Cool Whip gently, then fold in the remaining crushed Oreos once the filling is light and combined.
The mixture should smell sweet and creamy, and it should hold soft swoops instead of looking thin or deflated. - Divide the filling evenly among the prepared dishes and lightly press it over the cookie layer, then chill for about 1 hour or until ready to serve.
The cups are set when the surface feels cool and softly firm to the touch rather than loose or wobbly. - Finish each cup with whipped cream and extra crushed Oreos right before serving.
The topping should sit neatly on the chilled filling without sinking, which tells you the cups are properly set.
If you want an especially tidy layered look, use a spoon to spread the filling gently toward the edges of each cup. Mini glass jars also work well for serving and travel neatly to potlucks or dessert tables.
Key Texture Tips and Troubleshooting
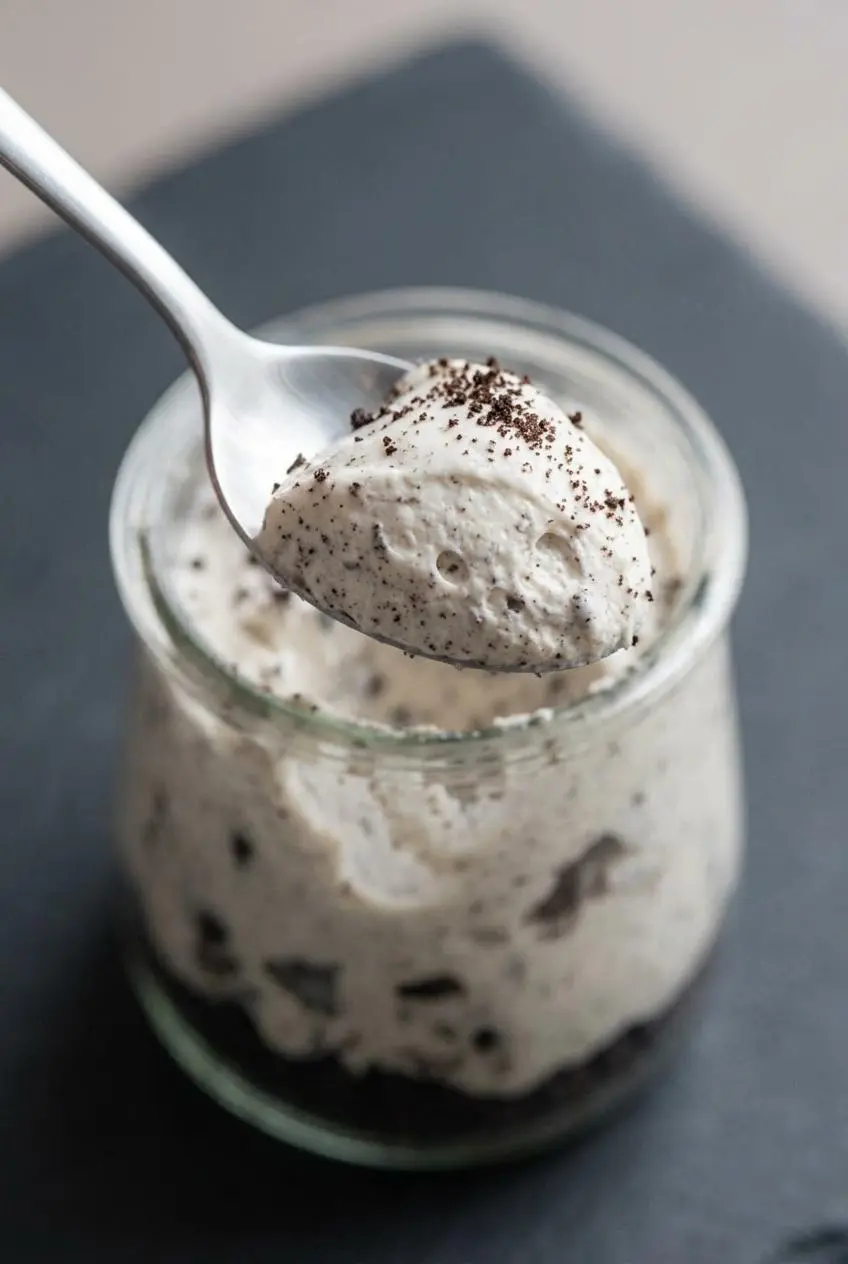
If your cups do not come out as smooth or as set as you hoped, the fix is usually simple. Most texture issues come down to temperature, mixing, or crumb size.
- Lumpy filling usually starts with cold cream cheese. Beat the cream cheese by itself first if needed, and if it is still too firm, let it warm a bit longer before adding the sugar.
- If the room is very warm, the filling can loosen faster and the whipped topping can sag. Keep the ingredients chilled until needed, and get the cups into the refrigerator soon after assembling.
- A runny texture often means the filling was overmixed after the whipped topping went in. Fold with a spatula instead of beating, and stop as soon as the streaks disappear.
- A soggy cookie base usually comes from crumbs that are crushed too fine. Leave some larger pieces so you keep a little crunch under the creamy layer.
- If you love playing with crumb texture, this guide to Oreo pie crust is helpful for understanding how crumb size changes the final bite.
The filling is perfectly folded when it looks billowy and evenly speckled with cookie bits. It should not look dense, glossy, or beaten flat. That soft cloudlike stage is where you want to stop.
Storage and Make-Ahead Guide
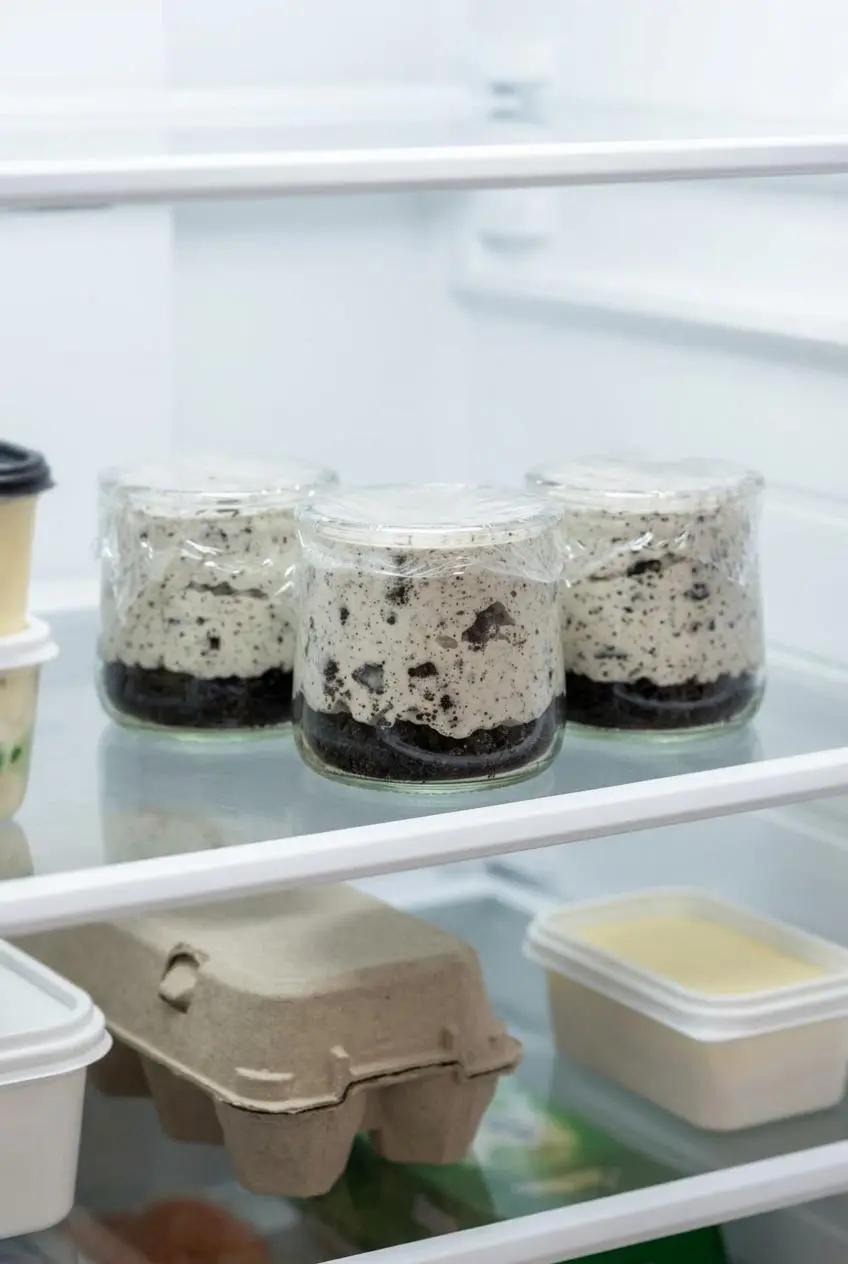
Because these cups are dairy-based, keep them covered and refrigerated until serving. For best texture, add the final whipped cream and extra cookie topping just before serving so the tops stay fresh and the crumbs do not soften too much.
You can make the cups ahead and chill them until needed. That works especially well for parties because the filling firms up nicely in the fridge, and all that is left at serving time is the topping.
If the cups sit out too long at room temperature, the filling can soften and the dairy becomes more vulnerable. In the US, cream cheese and cheesecake should be discarded if held above 40 °F for more than two hours, as outlined here for cream cheese and cheesecake held above 40 °F for more than two hours.
How to Scale the Recipe for Large Crowds
This recipe doubles and triples very easily because the method stays the same. Multiply each ingredient by the same amount, keep the mixing bowl large enough to fold comfortably, and divide the filling only after it is fully combined.
For parties, mini jars or small clear cups make serving simple and tidy. If you use smaller vessels, portion a thinner cookie layer and a smaller scoop of filling so the dessert still feels balanced. If you use larger cups, keep some extra crushed Oreos for topping so each serving still gets that crunchy finish.
Delightful Recipe Variations
Once you have the main method down, this dessert is easy to customize without changing the structure. Keep the same filling approach, then swap cookies or add a small flavor accent so the cups still chill and set the same way.
A tiny pinch of fresh orange zest folded into the cream cheese mixture can brighten the sweetness and cut through the richness nicely. Add just enough to notice a fresh citrus edge, not enough to take over the cookies-and-cream flavor.
If you want another party-friendly Oreo dessert with a different shape, Oreo cheesecake bites are a fun option to keep in mind.
Gluten-Free Oreo Cups
Yes, this recipe can be made gluten-free by using certified gluten-free sandwich cookies in place of standard Oreos. The filling ingredients stay the same, so you do not need to adjust the mixing method.
The main thing to watch is the cookie label. If you are serving someone with a strict gluten-free need, choose a certified product rather than assuming every chocolate sandwich cookie will work.
Mint Chocolate Oreo Cups
For a cool mint version, swap in mint-flavored cookies and add a tiny splash of peppermint extract to the filling. Go lightly with the extract because it can overpower the cheesecake base fast.
This variation is especially good for winter holidays, but it also works when you want the dessert to taste a little brighter and less rich.
Golden Oreo Dessert Cups
Golden Oreos give these cups a softer vanilla-cookie flavor and a lighter color. They’re a great choice if you want the same creamy texture without the deeper chocolate note.
A drizzle of white chocolate on top fits naturally here, and fresh berries also pair well with the vanilla profile. If fruit sounds good, a few finely chopped strawberries or raspberries on top can add freshness without changing the base recipe.
Conclusion
These cups are quick, chilled, and easy to portion, which makes them just as useful for parties as they are for casual dessert cravings. You get creamy cheesecake texture, crunchy cookies, and no oven heat to deal with.
If you remember one thing, let it be this: start with fully softened brick cream cheese. Then try the variation that sounds most like your kind of dessert.
Frequently Asked Questions
Can I freeze Oreo cheesecake cups?
Yes, they can be frozen if you leave off the final toppings. Wrap the cups tightly so the filling does not pick up freezer odors or dry out. Thaw them in the refrigerator before serving, then add whipped cream and extra crushed cookies at the end. For the best texture, freeze only the plain assembled cups rather than fully garnished ones.
How Do I Prevent Lumps in My No-Bake Cheesecake?
Start with fully softened cream cheese, not cool cream cheese straight from the fridge. Beat the cream cheese smooth before adding anything else so you can break up lumps early. Use powdered sugar instead of granulated sugar for a smoother blend. Once the whipped topping goes in, fold gently instead of beating.
Can I Make This Recipe Gluten-Free?
Yes, just swap the regular Oreos for certified gluten-free sandwich cookies. The filling ingredients can stay exactly the same. That means you get the same creamy texture and layered look without changing the method.
What Is the Best Way to Crush Oreos?
Put the cookies in a sealed plastic bag before crushing. Use a rolling pin or a sturdy wooden spoon so you can control the texture. A mix of fine crumbs and bigger chunks works best for these cups. That varied texture gives you better crunch in the base and nicer cookie pieces in the filling.
Oreo Cheesecake Cups

Equipment
- Hand mixer
- Mixing Bowls
- Silicone Spatulas
Ingredients
- 1 8 oz block cream cheese softened
- 1 8 oz. Cool Whip or whipped topping
- 2/3 c powdered sugar
- 1 tsp vanilla
- 24-26 Oreo cookies
Instructions
- Seal the Oreo cookies in a plastic bag and crush them with a rolling pin or sturdy wooden spoon, then spoon 1 1/2 – 2 tablespoons into each of 6 small dessert dishes that hold at least 3/4 cup-1 cup. The crumbs should be a mix of fine bits and coarse pieces so the base stays textured instead of turning uniformly soft.
- Beat the softened cream cheese with the powdered sugar using a hand mixer or stand mixer until the mixture is fully smooth, then mix in the vanilla. When it is ready, it should look creamy and even, with no small white lumps clinging to the bowl or beaters.
- Fold in the Cool Whip gently, then fold in the remaining crushed Oreos once the filling is light and combined. The mixture should smell sweet and creamy, and it should hold soft swoops instead of looking thin or deflated.
- Divide the filling evenly among the prepared dishes and lightly press it over the cookie layer, then chill for about 1 hour or until ready to serve. The cups are set when the surface feels cool and softly firm to the touch rather than loose or wobbly.
- Finish each cup with whipped cream and extra crushed Oreos right before serving. The topping should sit neatly on the chilled filling without sinking, which tells you the cups are properly set.