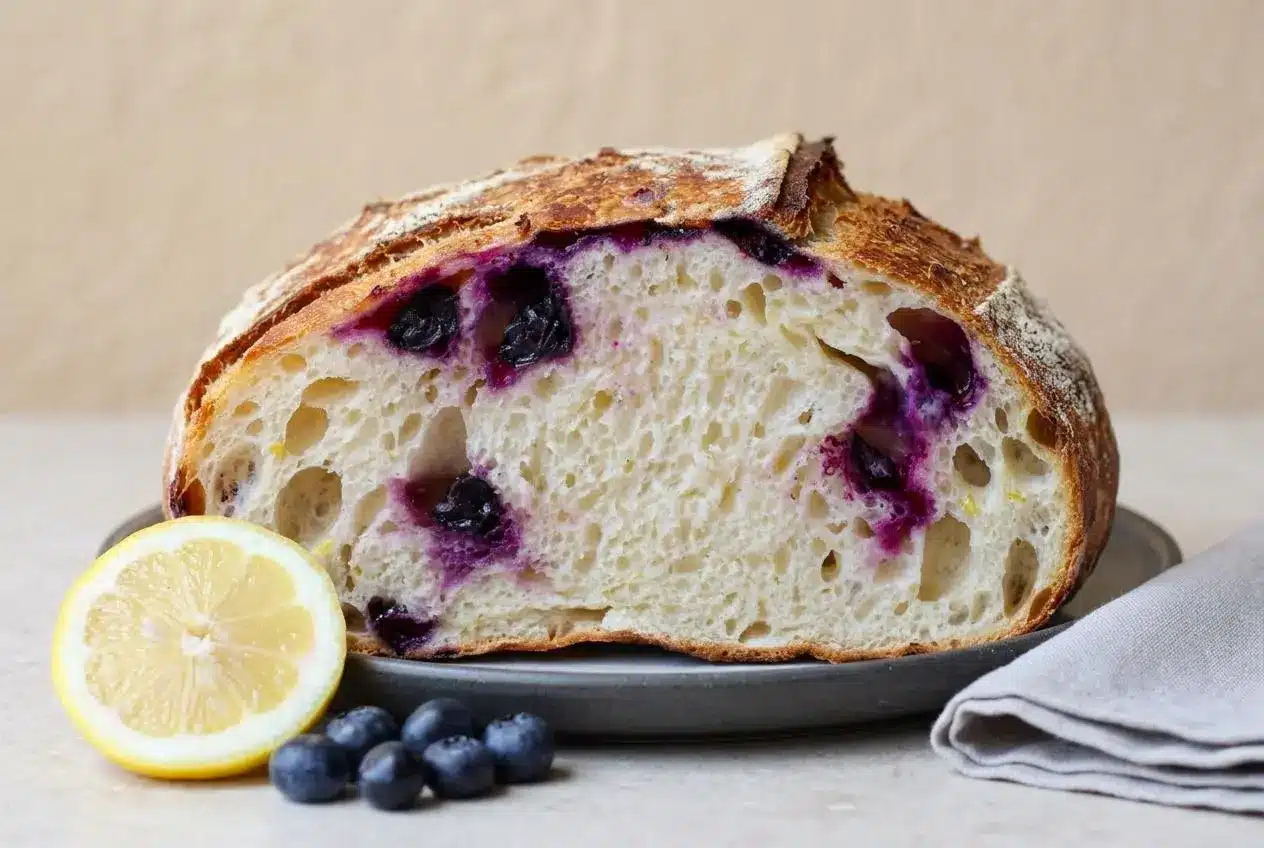
Lemon blueberry sourdough bread is a naturally leavened artisan loaf made with active starter, lemon zest, lemon juice, and whole blueberries. Gently fold the fruit into developed dough, then cold-proof and bake in a preheated Dutch oven for a golden, crackly crust.
This lemon blueberry sourdough bread brings bright citrus fragrance and soft berry pockets to a chewy hearth loaf. As it bakes, the lemon aroma fills the kitchen; on the cooling rack, the crust settles with little crackles.
The dough needs more patience than hands-on work. Gentle folds keep the berries intact, while a chilled proof makes the loaf easier to score. The real trick is keeping the fruit tucked inside.
After washing fresh blueberries, spread them on a towel and dry them thoroughly before folding them into the dough.
Ingredients for Lemon Blueberry Sourdough Bread
Water hydrates the flour, starter lifts the loaf, and salt balances its flavor. Bread flour provides structure, sugar softens the citrus edge, lemon zest and juice add brightness, and blueberries bring moist, sweet pockets throughout the crumb.
- 330 grams water (1⅓ cups)
- 20 grams lemon juice (1½ Tablespoons)
- 50 grams sourdough starter (¼ cup)
- 500 grams bread flour (3½ cups)
- 10 grams salt (1½ teaspoons)
- 50 grams sugar (¼ cup)
- 1 Tablespoon lemon zest
- 200 grams blueberries (1¼ cup)
Use active starter that has risen after feeding and looks well aerated. This loaf relies on the starter for its rise, so unfed discard isn’t a direct substitute. A kitchen scale helps keep the water, flour, and fruit in balance.
I favor firm, intact blueberries here because they’re easier to fold into the dough without leaving streaks of juice.
Flour Selection and Gluten Structure
Strong bread flour helps the dough hold its shape around the fruit. Its higher protein content supports gluten development, giving the loaf enough stretch to expand without spreading flat. Unbleached bread flour is a good choice for this style of sourdough.
All-purpose flour may absorb water differently and produce a softer dough. If you experiment with it, hold back some water initially rather than assuming it will behave like bread flour. The listed formula uses bread flour.
Citrus Sugar and Natural Lemon Zest
Grate the yellow outer peel, avoiding the bitter white pith. Rub the zest into the sugar with clean fingertips until the grains feel slightly damp and the citrus scent becomes pronounced. The sugar catches the aromatic oils instead of leaving the zest in little clumps.
Keep the lemon juice at the listed amount. More juice changes the dough’s acidity and liquid balance, so it isn’t a dependable way to strengthen the lemon flavor. Zest supplies the most fragrant citrus character without adding more liquid.
Blueberry Selection Across Fresh, Frozen, and Dried
- Fresh: Choose firm berries and dry them thoroughly after washing so surface water doesn’t make the dough slippery.
- Frozen: Add them while still frozen and handle gently; softened berries release juice more readily and can streak the dough purple.
- Dried: These give concentrated berry flavor and a chewier bite, but they absorb moisture rather than behaving like fresh fruit.
Fresh berries suit the listed formula particularly well. Dried berries are an optional variation, not a precise weight-for-weight replacement with identical results.
How to Make the Lemon Blueberry Sourdough Bread
Develop the dough before introducing the berries. That first fruit-free fold gives you a more elastic dough to work with, so the later fold can distribute the fruit without aggressive mixing.
- Pour the water and lemon juice into a large mixing bowl.
This forms the liquid mixture for dispersing the starter. - Stir the active sourdough starter through the liquids until evenly dispersed.
The mixture should look cloudy, with no large clumps of starter remaining. - Work the lemon zest into the sugar in a separate bowl with your fingertips for a few seconds.
Stop when the sugar smells distinctly citrusy and feels lightly moistened. - Mix the flour, salt, and lemon sugar into the starter mixture until no dry flour remains.
Expect a rough, sticky dough rather than a smooth ball at this stage. - After 30 minutes, use a damp hand to lift and fold sections of dough over the center, then cover the bowl.
Stretch only as far as the dough comfortably allows, looking for increasing elasticity rather than forcing it to tear. - After another 30 minutes to 1 hour, distribute the blueberries through a second gentle set of stretch and folds, then cover and leave the bowl at room temperature.
The berries should sit within the folds without being squeezed or crushed. - Allow bulk fermentation to continue until the dough has expanded about 75%, typically roughly 10–14 hours later.
A rounded top, bubbles along the bowl’s sides, and a softly aerated jiggle signal readiness for shaping. - Turn the dough onto an unfloured counter, flip it, and ease it into a broad rectangle before folding the bottom toward the center, each side across the middle, and the top down over the folded dough.
Use gentle outward stretches before each fold to create tension without tearing around the berries. - Roll the folded dough over, then cup your hands around it and draw it toward you while rotating counterclockwise before placing it seam-side up in a banneton or a floured, towel-lined bowl and covering it to retain moisture.
The finished round should have a taut outer surface with the berries tucked beneath it. - Refrigerate the covered dough for at least about 8 hours, or up to 2 days.
The chilled dough should feel firmer and easier to handle when turned out. - Heat the oven to 450°F with the Dutch oven inside.
The pot needs to be fully preheated before the dough goes in. - Turn the chilled loaf onto parchment, score the top with a bread lame or sharp knife, and carefully lower it into the hot Dutch oven.
A clean cut gives the expanding loaf a controlled place to open. - Bake with the lid in place for 25 minutes, then remove it and continue baking for 10–15 minutes.
Look for a golden crust, a hollow sound when the underside is tapped, and an internal temperature of 205°F. - Transfer the baked loaf to a wire rack and wait at least 2 hours before slicing.
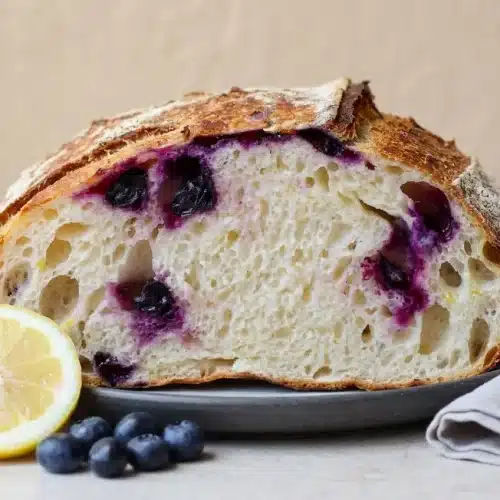
The crumb will cut more cleanly after the loaf releases its heat and steam.
Sample Baking Schedule and Fermentation Timeline
Plan around the dough’s condition rather than expecting every loaf to follow the same clock. Kitchen temperature and starter strength affect the rise, and the refrigerator proof comes after bulk fermentation, not in place of it.
- Day 1, morning: Feed your starter so it’s active and aerated when you’re ready to mix.
- Day 1, afternoon: Mix the dough, rest it for 30 minutes, and complete the first fold.
- Day 1, later afternoon: Add the berries at the next fold, 30 minutes to 1 hour later, then continue bulk fermentation.
- Day 2, morning: Check for the rise and aeration cues before shaping; bulk fermentation commonly takes roughly 10–14 hours with this formula.
- Day 2, evening or Day 3, morning: Bake after the shaped loaf has completed its refrigerator proof.
In a warmer kitchen, the dough may reach shaping readiness sooner. In a cool room, it may need longer. Mark the starting dough level on the bowl so you can judge its growth instead of trying to remember how full the bowl looked.
If your goal is a morning bake, allow for both the room-temperature rise and the cold proof. Mixing the previous afternoon doesn’t necessarily leave enough time for both stages before breakfast.
Mastering Fruit Inclusions: Folding Versus Lamination
The easiest approach is the second bowl fold used in the method. By then, the dough has gained some strength, and you can enclose the berries without kneading them into the flour mixture.
For bowl folding: Scatter the berries across the dough. With a damp hand, lift an edge and drape it toward the center, trapping fruit between layers. Work around the bowl gently, stopping short of stretches that split the dough or squash a berry.
For optional lamination: At the berry-addition stage, gently ease the dough across a lightly dampened counter into a broad sheet. Scatter the berries evenly, leaving the edges clear, then fold the sheet inward like a letter to enclose them. Use this instead of the berry fold, not as an extra required stage.
Lamination can improve distribution, but don’t chase a paper-thin sheet. If the dough resists or starts tearing, keep it thicker. A strong, intact sheet matters more than spreading every berry perfectly.
A few purple streaks are cosmetic. Widespread juice and slippery patches usually mean the fruit has ruptured. Stop handling rather than folding repeatedly in an attempt to make the color disappear.
Shaping, Cold Proofing, and Dutch Oven Baking Success
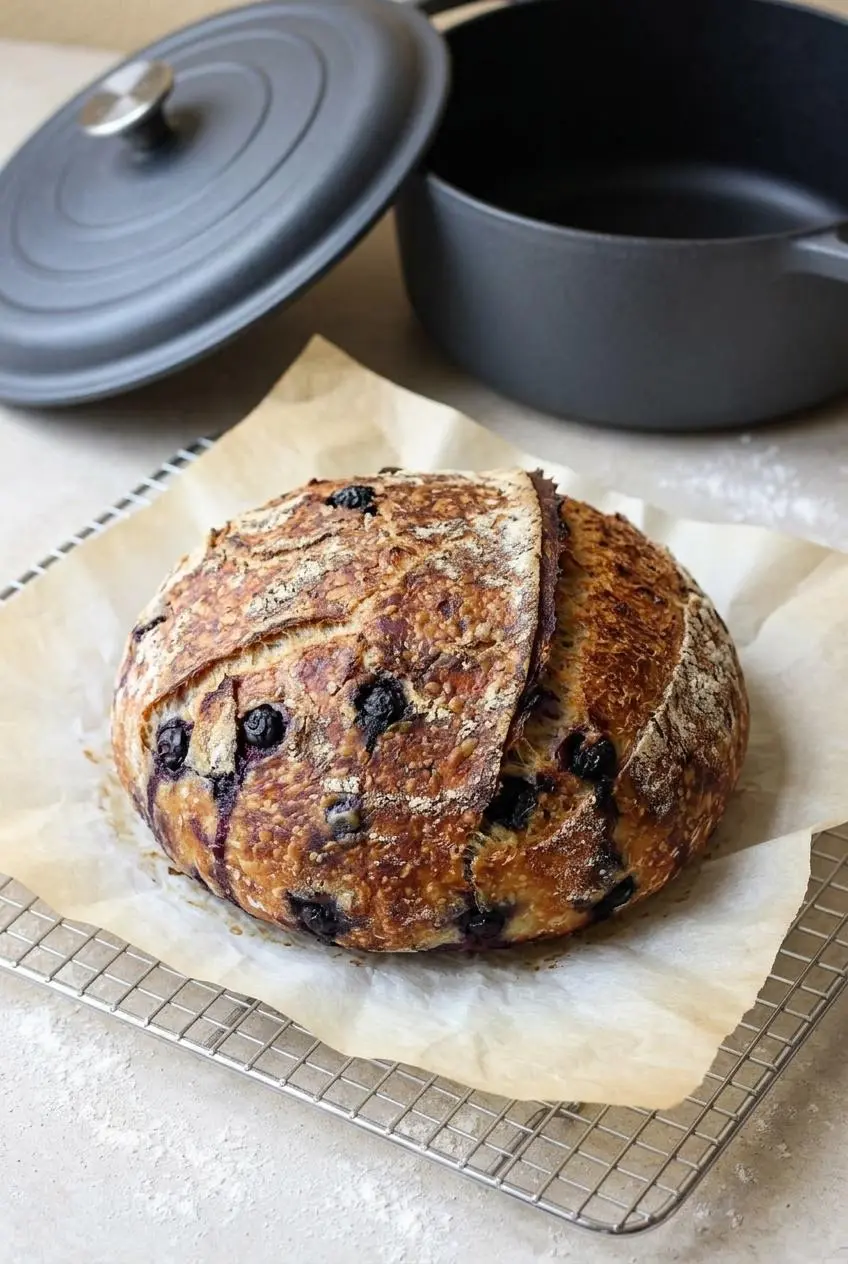
Shape for an intact outer skin, not a tightly compressed center. Envelope folds organize the dough, while the final cupping motion creates enough surface tension to hold a rounded loaf.
As you shape, guide exposed berries into the folds and draw dough over them. Don’t push hard enough to burst them. Fruit sitting directly against hot cast iron can scorch, so a dough-covered exterior is worth the extra care.
The banneton supports the loaf during cold proofing. A floured towel-lined bowl works too. Refrigeration firms the dough and develops flavor, while the cold surface makes scoring easier and can encourage a blistered crust.
Preheat the Dutch oven thoroughly. The covered portion of baking traps moisture around the expanding loaf; removing the lid afterward lets the crust color and dry.
If your oven tends to burn loaf bottoms, place a rimmed baking sheet on the rack beneath the Dutch oven to buffer direct heat. Keep parchment within its manufacturer’s temperature limits, and trim excessive overhang so it doesn’t reach toward an oven element.
Troubleshooting Common Inclusion Bread Mistakes
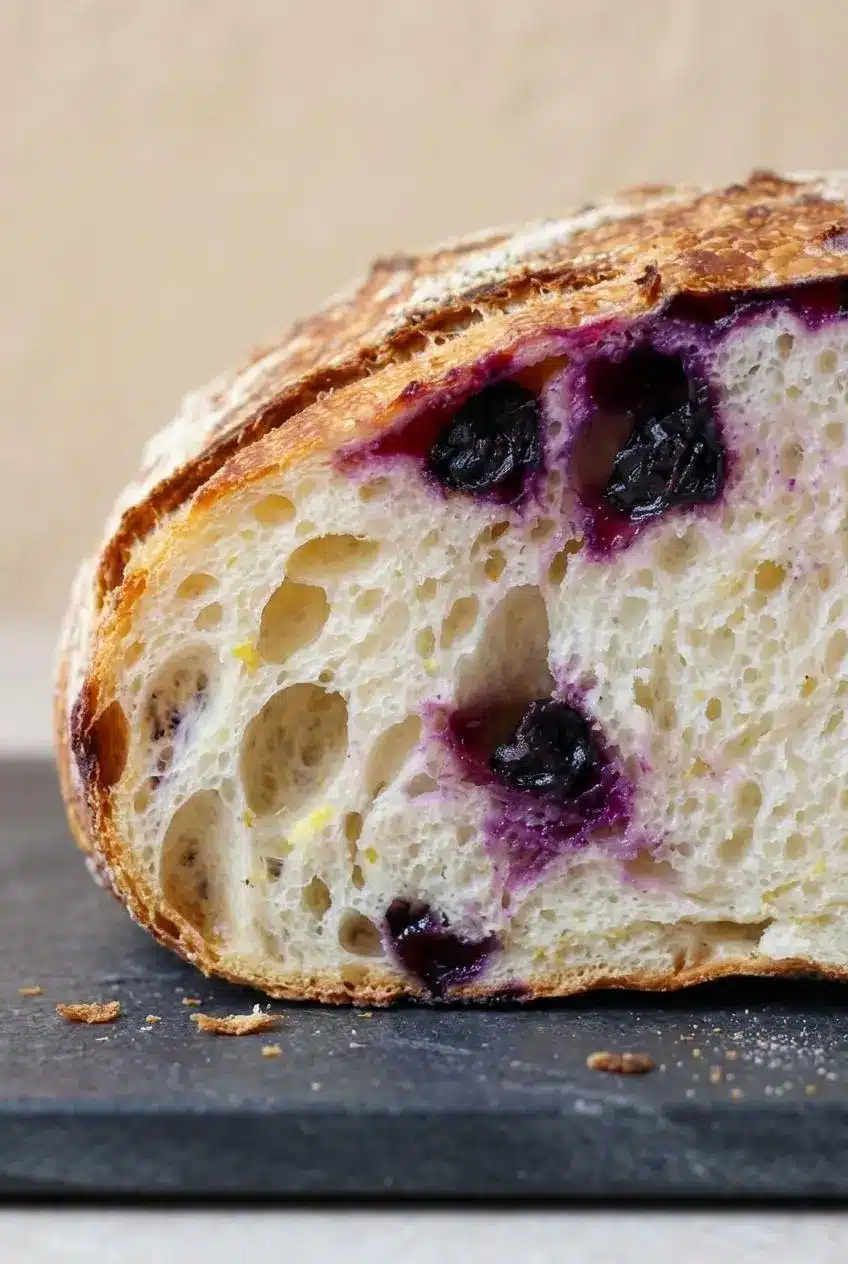
Separate fermentation problems from fruit-handling problems before making adjustments. A dough that hasn’t risen enough needs a different response from one made slippery by crushed berries.
- Sticky, purple dough: Wet or broken berries can release liquid during folding; handle less, use damp hands, and dry fresh fruit thoroughly next time rather than kneading in extra flour.
- Dough tears around berries: The stretches may be too forceful; lift smaller sections and fold within the dough’s comfortable reach.
- Dense dough with little rise: A cool kitchen or weak starter may be slowing fermentation; wait for visible expansion and bubbles instead of shaping because the clock says to.
- Dough spreads during shaping: It may lack strength or have fermented beyond its useful shaping window; avoid repeated rough tightening and check rise cues earlier on the next bake.
- Gummy slices: Early cutting or incomplete baking may be responsible; check the baking cues in the method and let the loaf cool fully on a rack.
- Burnt berry spots: Fruit likely remained exposed; tuck it beneath the outer dough skin during shaping.
- Dark bottom with a lighter top: Strong bottom heat may be the issue; use the baking-sheet buffer beneath the Dutch oven.
- Pale crust: The loaf may need the longer end of the uncovered bake; judge color alongside the other doneness cues.
If you’re learning to judge dough strength, classic sourdough bread offers a useful comparison without fruit pockets interrupting the dough’s surface.
Flavor Variations and Dough Variations
These optional ideas change the flavor or style of the loaf. Keep them separate from the listed formula, and avoid combining several changes while you’re still learning how this dough behaves.
Dried Wild Blueberry Loaf
Dried wild blueberries create concentrated, chewy berry pockets. You can soften them in warm water, then drain and blot them thoroughly before folding them into the dough.
Dry fruit absorbs dough moisture; soaked fruit carries some moisture back in. Neither behaves exactly like fresh berries, so don’t assume an identical substitution will give the same crumb or handling.
Lemon Curd Swirl Sourdough
Thick, chilled lemon curd can create a sweet citrus ribbon when enclosed in a gentle lamination fold. Keep the layer restrained and away from the edges so it’s easier to seal inside the dough.
Curd adds moisture and sweetness, which can make shaping messier and leaked filling prone to darkening. Treat this as an experiment rather than assuming the filling leaves baking behavior unchanged.
Quick Loaf Variation: Using Sourdough Discard
A discard quick bread is a different bake: soft, sweet, and closer to a cake loaf than a chewy artisan boule. Baking powder supplies the lift, while unfed discard contributes flavor; a lemon streusel can add a crumbly topping.
You’ll need a dedicated quick-bread formula rather than replacing the active starter in this dough with discard. For another berry bake without this long fermentation schedule, try sourdough blueberry muffins.
Subtle Lavender Citrus Infusion
For an optional floral accent, rub a restrained pinch of culinary dried lavender into the lemon sugar. Choose lavender labeled for culinary use and keep its flavor in the background; too much can overpower both the citrus and berries.
Storage and Serving Ideas
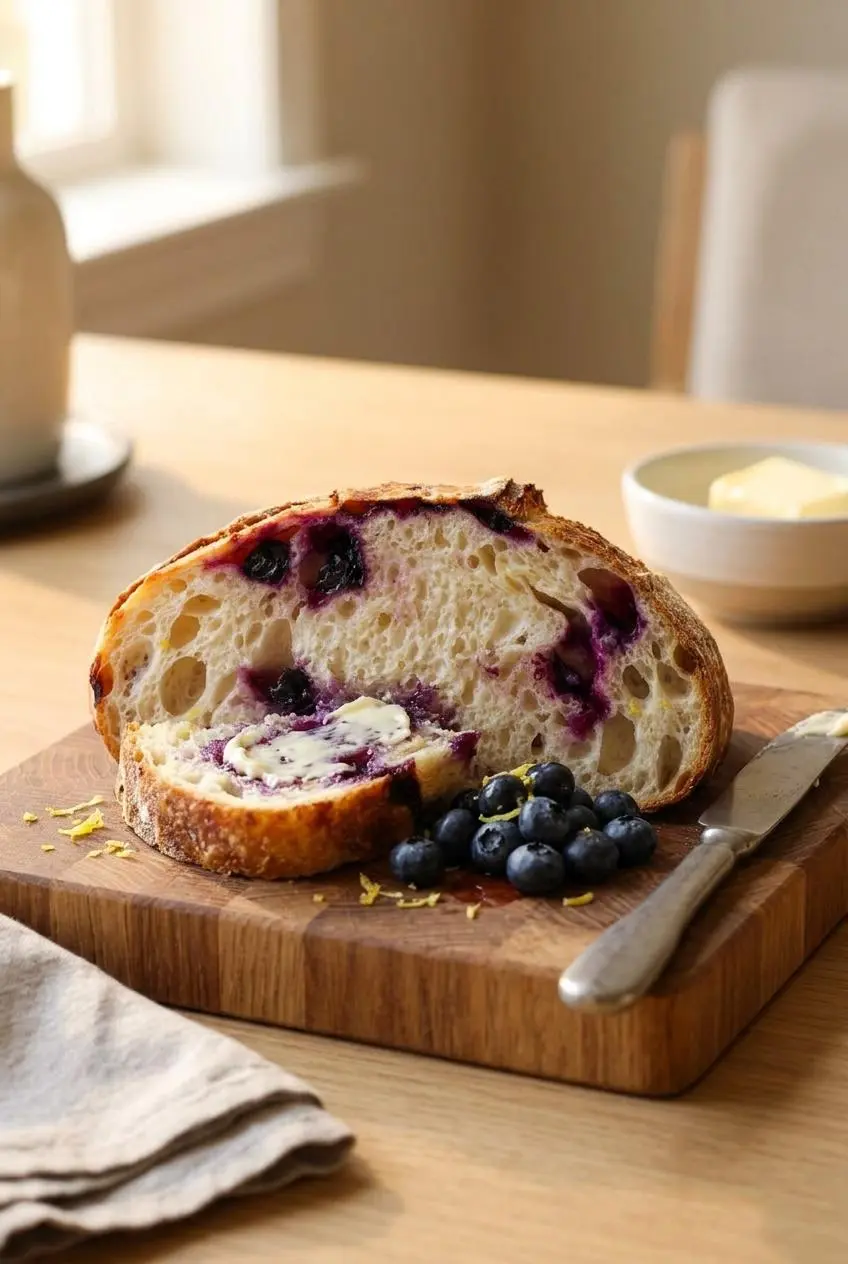
Let the loaf cool completely before putting it away. Covering warm bread traps moisture and softens the crust, especially around juicy fruit pockets.
For crust texture, keep the cooled loaf in a bread box or paper bag in a cool, dry spot. A cut loaf can rest cut-side down on a clean board while you’re serving it. These approaches protect texture but don’t establish a storage deadline for a fruit-filled loaf.
Slice only what you need, then toast individual portions when you want a crisp edge. Toasting also makes the citrus aroma more noticeable and gives soft berry pockets a pleasant contrast.
- Breakfast toast: Spread with salted butter or honey butter for a sweet-salty finish.
- Brunch slices: Add whipped ricotta, mascarpone, or sweet cream cheese for a creamy contrast.
- French toast: Use firm, fully cooled slices that can hold together when dipped and cooked.
Conclusion
Bright lemon, whole blueberries, and a crackly crust make this loaf worth the patient rise. Gentle fruit handling and a supported cold proof help the dough stay manageable from bowl to Dutch oven.
Tuck the berries inside, buffer strong bottom heat when needed, and give the loaf time to cool. That patience pays off in clean slices with soft berry pockets.
Frequently Asked Questions
Can I Use Frozen Blueberries in Lemon Blueberry Sourdough Bread?
Yes, add them while still frozen at the berry-fold stage. Fold gently because softened berries release juice more easily. Some purple streaking is normal and doesn’t mean the loaf has failed.
Why Does Adding Lemon Juice Slow Down Sourdough Fermentation?
Extra juice changes the dough’s acidity and liquid balance, which may affect how it develops and rises. Stick with the measured amount rather than using additional juice for stronger lemon flavor. Check starter activity and kitchen temperature too; lemon juice isn’t the only possible reason for a slow rise.
How Do I Prevent the Bottom of My Sourdough Loaf From Burning?
Place a rimmed baking sheet on the rack beneath the Dutch oven to buffer direct bottom heat. Use parchment rated for the baking temperature; an additional layer may provide a modest buffer. Tuck berries beneath the dough surface so leaked fruit doesn’t sit against the hot pot.
How Long Must Lemon Blueberry Sourdough Cool Before Slicing?
Wait at least 2 hours on a wire rack before slicing. Cooling lets heat and steam escape so the crumb cuts more cleanly. If the center still feels warm, give it more time rather than risking sticky slices.
Lemon Blueberry Sourdough Bread

Equipment
- Proofing Basket Kit
- Kitchen scale
- Dutch oven
- Parchment Paper
- Bread lame
Ingredients
- 330 grams water 1⅓ cups
- 20 grams lemon juice 1½ Tablespoons
- 50 grams sourdough starter ¼ cup
- 500 grams bread flour 3½ cups
- 10 grams salt 1½ teaspoons
- 50 grams sugar ¼ cup
- 1 Tablespoon lemon zest
- 200 grams blueberries 1¼ cup
Instructions
- Pour the water and lemon juice into a large mixing bowl. This forms the liquid mixture for dispersing the starter.
- Stir the active sourdough starter through the liquids until evenly dispersed. The mixture should look cloudy, with no large clumps of starter remaining.
- Work the lemon zest into the sugar in a separate bowl with your fingertips for a few seconds. Stop when the sugar smells distinctly citrusy and feels lightly moistened.
- Mix the flour, salt, and lemon sugar into the starter mixture until no dry flour remains. Expect a rough, sticky dough rather than a smooth ball at this stage.
- After 30 minutes, use a damp hand to lift and fold sections of dough over the center, then cover the bowl. Stretch only as far as the dough comfortably allows, looking for increasing elasticity rather than forcing it to tear.
- After another 30 minutes to 1 hour, distribute the blueberries through a second gentle set of stretch and folds, then cover and leave the bowl at room temperature. The berries should sit within the folds without being squeezed or crushed.
- Allow bulk fermentation to continue until the dough has expanded about 75%, typically roughly 10-14 hours later. A rounded top, bubbles along the bowl’s sides, and a softly aerated jiggle signal readiness for shaping.
- Turn the dough onto an unfloured counter, flip it, and ease it into a broad rectangle before folding the bottom toward the center, each side across the middle, and the top down over the folded dough. Use gentle outward stretches before each fold to create tension without tearing around the berries.
- Roll the folded dough over, then cup your hands around it and draw it toward you while rotating counterclockwise before placing it seam-side up in a banneton or a floured, towel-lined bowl and covering it to retain moisture. The finished round should have a taut outer surface with the berries tucked beneath it.
- Refrigerate the covered dough for at least about 8 hours, or up to 2 days. The chilled dough should feel firmer and easier to handle when turned out.
- Heat the oven to 450°F with the Dutch oven inside. The pot needs to be fully preheated before the dough goes in.
- Turn the chilled loaf onto parchment, score the top with a bread lame or sharp knife, and carefully lower it into the hot Dutch oven. A clean cut gives the expanding loaf a controlled place to open.
- Bake with the lid in place for 25 minutes, then remove it and continue baking for 10-15 minutes. Look for a golden crust, a hollow sound when the underside is tapped, and an internal temperature of 205°F.
- Transfer the baked loaf to a wire rack and wait at least 2 hours before slicing. The crumb will cut more cleanly after the loaf releases its heat and steam.