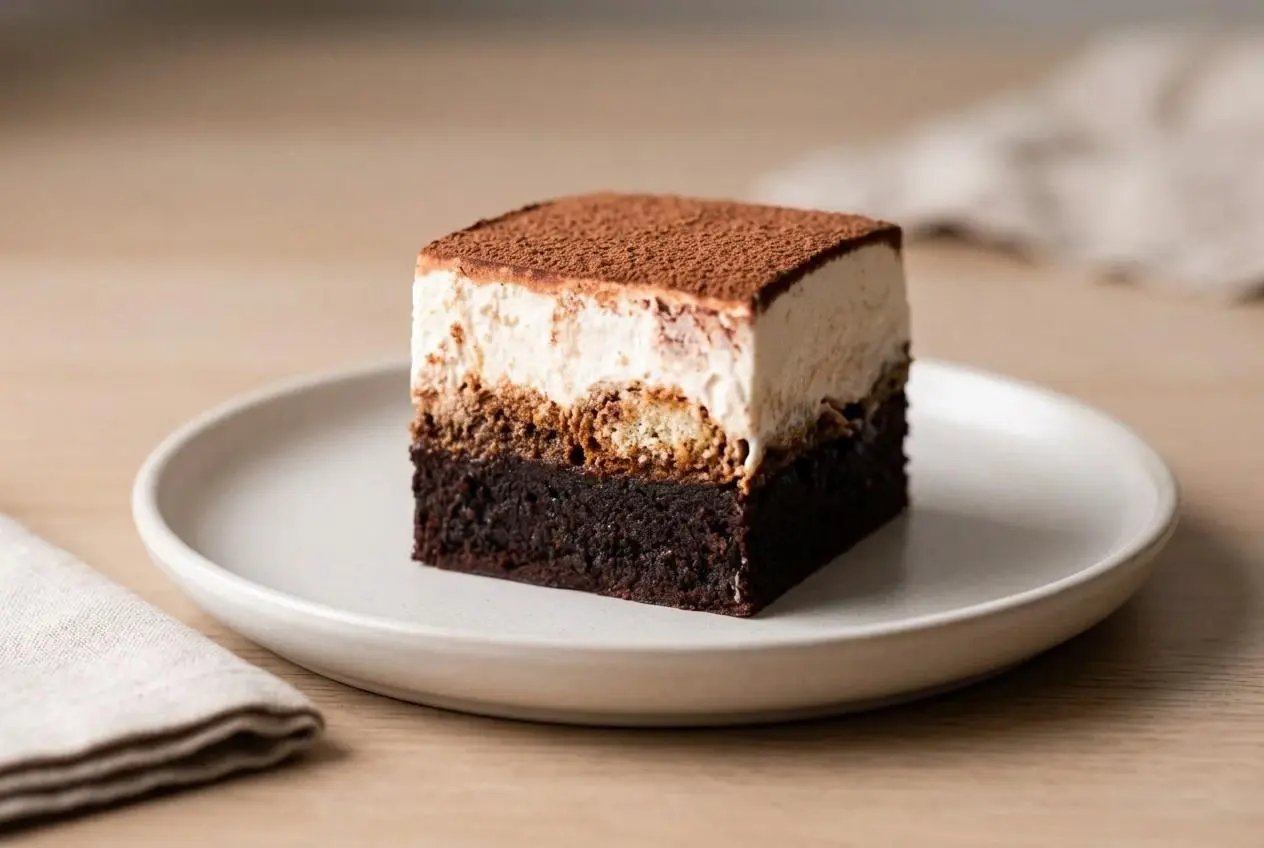
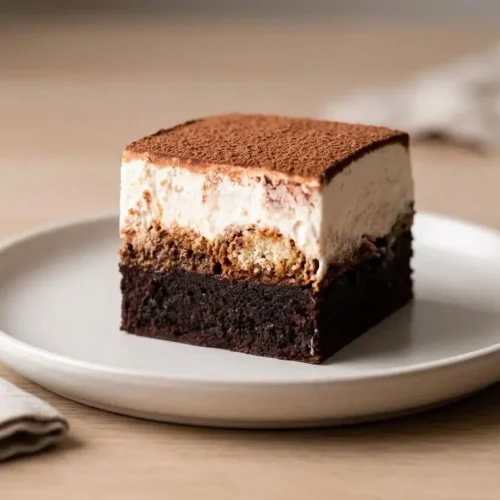
Fudgy chocolate, roasted coffee, and cool cream meet in tiramisu brownies, a layered dessert made with an espresso brownie bottom, quickly dipped ladyfingers, and whipped mascarpone. Bake and cool the brownie, assemble the toppings, then chill until the cream holds its shape.
These tiramisu brownies bring classic tiramisu flavors to a chewy chocolate square. The espresso blooms in the hot butter and melted chocolate, giving the kitchen a roasted aroma before the biscuits or cream even enter the picture.
The contrast makes every bite satisfying: dense brownie, tender coffee-soaked biscuit, and a silky topping that balances the chocolate. The assembly rewards patience more than fancy equipment. The trick is in the dip.
Clear space in the refrigerator for your 8×8-inch pan before you begin assembling the layers.
Essential Ingredients for Tiramisu Brownies
Chocolate and cocoa build depth, butter and oil keep the brownie moist, and eggs and flour provide structure. Espresso adds roasted aroma, ladyfingers carry the coffee layer, and mascarpone with cold cream creates a rich topping balanced by sugar, vanilla, and salt.
For the espresso brownie bottom
- 1/2 cup (115g) unsalted butter
- 6 oz (170g) semi-sweet chocolate, chopped
- 1 tablespoon espresso powder
- 1 1/4 cups (250g) granulated sugar
- 3 large eggs, at room temperature
- 1 teaspoon pure vanilla extract
- 3 tablespoons vegetable oil
- 1/2 cup (40g) unsweetened cocoa powder
- 1/4 teaspoon salt
- 1/2 cup (65g) all-purpose flour, spooned and leveled
For the coffee soaked lady fingers
- 2/3 cup (160mL) boiling water
- 1 tablespoon espresso powder
- 1 tablespoon granulated sugar
- 12 Savoiardi lady fingers
For the mascarpone cream topping
- 8 oz (225g) cold mascarpone cheese
- 1/3 cup (45g) powdered sugar
- 1 teaspoon pure vanilla extract
- 1 cup (240mL) cold heavy whipping cream
- cocoa powder (for dusting on top)
Room-temperature eggs blend readily into the chocolate mixture and contribute structure with a little aeration. Oil helps the cooled brownie stay tender, while the modest flour proportion supports a dense, fudgy crumb rather than a cake-like texture. Spoon and level the flour so an overfilled measuring cup doesn’t dry out the bottom layer.
I keep the mascarpone and heavy cream chilled until the moment I’m ready to mix the topping.
Choosing the Right Chocolate and Cocoa
Melted semi-sweet chocolate contributes both cocoa flavor and cocoa butter, giving the brownie its rich body. Unsweetened cocoa adds chocolate intensity without adding more sugar. Use chocolate you enjoy eating, and chop it evenly so the hot butter can melt it smoothly.
Either natural or Dutch-processed unsweetened cocoa works here because the batter contains no baking soda or baking powder. Natural cocoa tastes brighter and sharper; Dutch cocoa powder gives a darker color and a rounder flavor. The latter makes a particularly mellow finish for the cream topping.
Espresso powder reinforces the roasted notes in chocolate. It adds flavor, not chewiness: the fat, sugar, eggs, flour balance, and baking time determine that texture. Avoid replacing the powder with brewed coffee in the brownie batter, which would introduce extra liquid.
Mascarpone vs Cream Cheese Dynamics
Mascarpone cheese tastes mild and buttery, so it lets the coffee and chocolate stand out. Cream cheese brings more tang and a firmer consistency. Both can make a tasty topping, but they won’t produce an identical flavor or texture.
Handle mascarpone gently. Start by smoothing it with the powdered sugar and vanilla, then introduce the cream gradually. Cold heavy whipping cream helps the mixture whip into a structured topping; prolonged beating can make that smooth texture turn grainy.
Selecting Ladyfingers: Savoiardi vs Soft Sponge
Choose crisp, sugar-crusted Savoiardi ladyfingers for this dessert. Their dry interior absorbs coffee quickly while the biscuit retains enough shape to form a distinct middle layer.
Soft sponge ladyfingers already contain more moisture and can collapse during dipping. They aren’t a direct match for the specified dunking method. If you’re shopping for the recipe, look for the firm biscuits rather than the soft cake-style fingers.
How to Make the Tiramisu Brownies
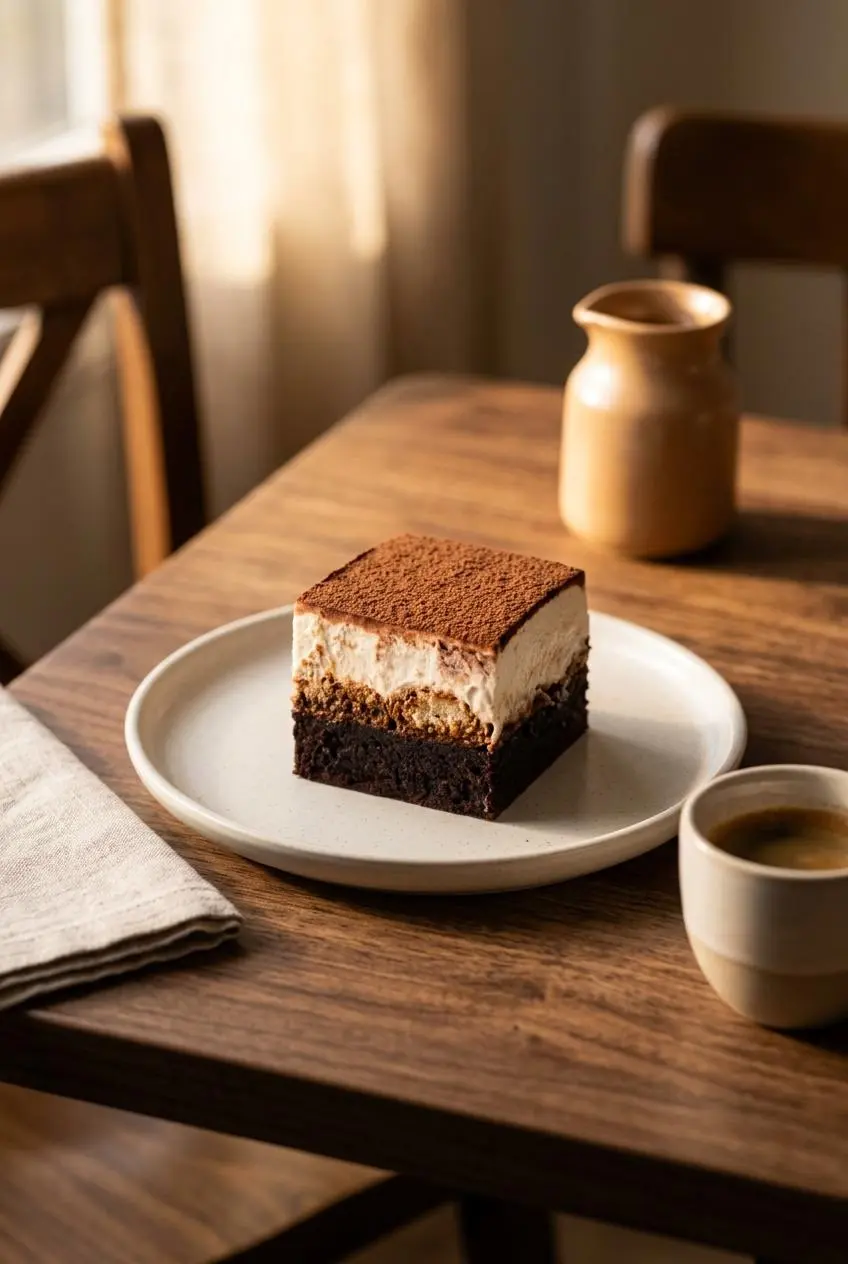
Make the chocolate layer first and let it cool completely before adding anything on top. This recipe yields 9 large bars. Have an 8×8-inch baking pan, parchment paper, mixing bowls, a medium pot, and an electric mixer ready.
Make the espresso brownie
- Set the oven to 350°F, butter an 8×8-inch pan, and fit parchment across its bottom and sides with excess extending above the rim.
The overhanging paper will provide handles for lifting the finished dessert. - Heat the butter in a medium pot over medium heat until it becomes liquid and begins to sizzle.
Stop at the first sizzling sounds rather than letting the butter brown. - Move the pot off the burner and whisk the chopped chocolate and espresso powder into the hot butter immediately.
Continue until the chocolate disappears into a smooth mixture with a roasted coffee aroma. - Transfer the chocolate mixture to a large bowl and whisk in the granulated sugar while the mixture is still hot.
A sandy appearance at this stage is expected. - Incorporate the eggs individually with a whisk, then blend in the vanilla, vegetable oil, cocoa powder, and salt.
The batter should become glossy and fall from the whisk in thick ribbons. - Fold in the flour, stopping as soon as it blends into the chocolate batter.
No dry pockets should remain, but additional stirring can toughen the crumb. - Scrape the batter into the lined pan and level it across the corners.
An even depth helps the center and edges bake more consistently. - Bake on the center rack for 27 to 32 minutes, checking the middle with a skewer.
The top should look softly matte rather than wet, and the skewer should carry moist crumbs without liquid batter. - Leave the brownie in its pan until it reaches room temperature throughout.
The center must feel completely cool before it can support the biscuit and cream layers.
Make the lady finger layer
- Stir the boiling water, espresso powder, and granulated sugar together in a wide bowl, then let the mixture reach room temperature.
The powder and sugar should dissolve completely before the coffee cools. - Dip each ladyfinger briefly into the cooled coffee for no more than about one second total, then place it over the cooled brownie, trimming biscuits where needed.
The biscuits should feel damp on the surface while remaining firm enough to move intact. - Keep the biscuit-covered brownie in the pan while you prepare the topping.
The ladyfingers should form an even layer without a pool of coffee around them.
Make the mascarpone cream topping
- Briefly beat the cold mascarpone, powdered sugar, and vanilla in a large bowl using an electric mixer or a stand mixer with its paddle attachment.
Stop once the mixture looks smooth and evenly blended. - Run the mixer on low and feed in the cold cream slowly, scraping the bowl after each 1/4 cup; alternatively, incorporate 1 to 2 tablespoons at a time on low.
Each addition should blend smoothly before more cream enters the bowl. - Increase the speed to high after all the cream is incorporated and whip for about 1 to 2 minutes.
Stop as soon as the topping forms billowy stiff peaks that stay upright. - Distribute spoonfuls of topping across the ladyfingers and gently connect them into an even layer.
Light spreading keeps the biscuits in place and preserves the cream’s airy texture. - Refrigerate the assembled dessert for at least 1 hour, continuing until the topping feels firm.
The cream should hold its shape rather than shift when the pan moves. - Lift the dessert onto a cutting board using the parchment handles, sift cocoa over the cream, and cut into bars.
The chilled layers should remain distinct as the knife passes through them.
Baking the Espresso Fudge Bottom
A clean, dry tester isn’t the goal for these brownies. Look for sticky, moist crumbs, which indicate a set but still fudgy center. Liquid batter means the middle needs more baking; a completely dry tester may signal a drier result.
Check the center rather than relying on the edges, which set first. Keep the brownie in its pan as it cools so the parchment and pan support the tender crumb.
Mastering the Rapid Coffee Dunk
Think “in and out,” not “soak.” The brief dip is about one second total, not one second per side. Don’t leave biscuits floating in the bowl while you arrange the previous ones.
Trim any pieces needed to fill gaps before dipping them. That reduces handling once they’re damp and helps you build a level layer without crushing the biscuits.
Whipping a Stable Mascarpone Cream
Low speed matters during incorporation because it gives the cream time to blend evenly into the mascarpone. Scrape the bottom of the bowl as well as the sides; thick mascarpone can hide beneath a looser mixture.
Once all the cream is incorporated, watch closely during the high-speed stage. The mixture changes from loose to billowy, then holds a pointed peak. Stop there. Extra beating after that point can turn a smooth topping grainy.
Troubleshooting Common Baking and Assembly Issues
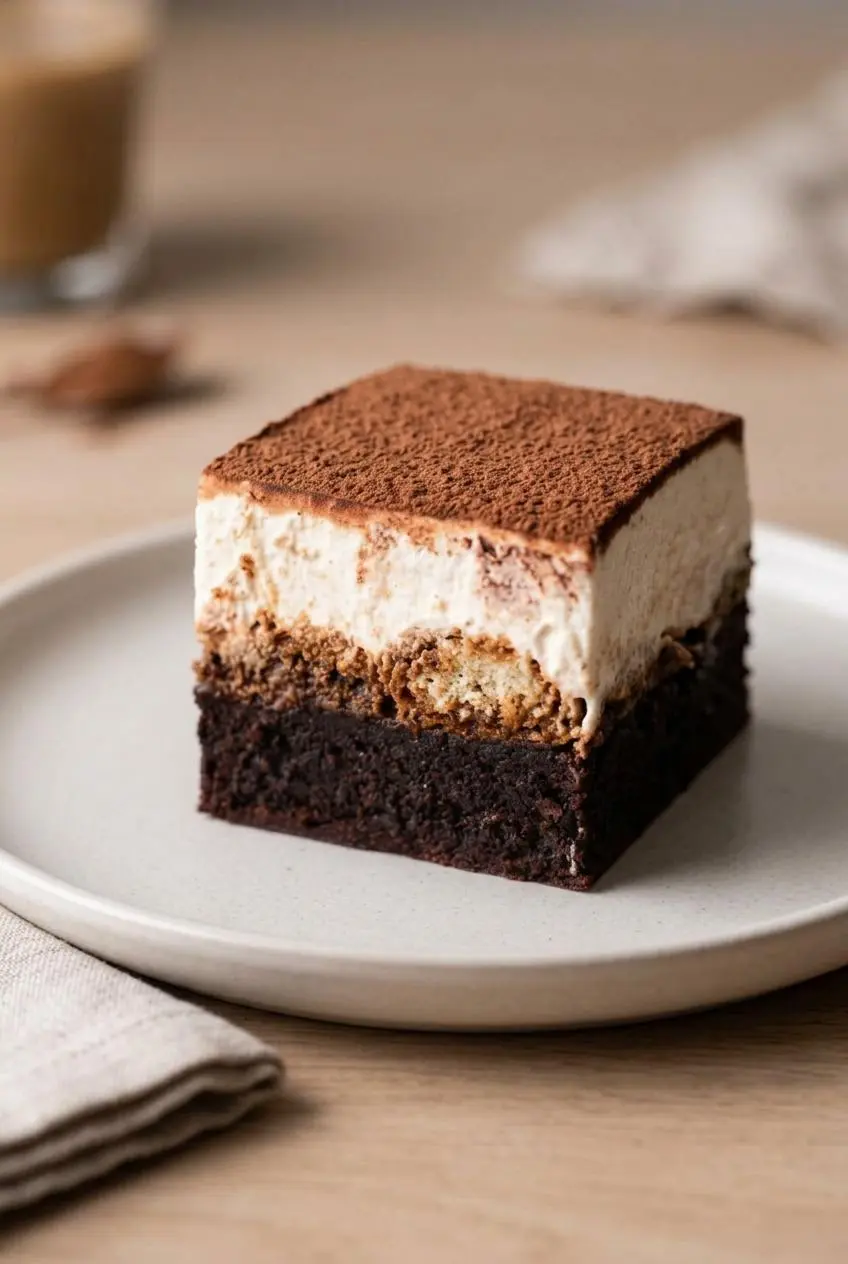
Texture problems usually come from mixing too far, adding too much moisture, or assembling before the brownie cools. Identify which layer is struggling before trying to correct the whole dessert.
Rescuing Runny or Curdled Mascarpone Cream
- Smooth but loose: If the dairy has warmed, chill the bowl before continuing, then beat briefly and check frequently for peaks.
- Clumpy during cream addition: Stop adding liquid, scrape the bowl thoroughly, and blend gently on low until the mixture becomes more uniform.
- Slightly grainy after whipping: Stop beating and gently fold in a little cold, unwhipped heavy cream; this may soften mild overwhipping, though it isn’t a guaranteed repair.
- Clearly separated into liquid and fat: Avoid vigorous beating, which can worsen the separation; a fresh topping is the more dependable choice when gentle mixing doesn’t restore it.
Preventing Tough or Sunken Brownies
- Tough crumb: Excess flour or prolonged mixing after flour goes in can make the brownie firm; spoon and level the flour and stop stirring once dry streaks disappear.
- Deeply sunken center: An underbaked middle can collapse as it cools; check for moist crumbs rather than removing the pan while the tester still carries liquid batter.
- Dry edges: Overbaking or changing the pan size can dry the perimeter; use the specified pan and begin checking within the stated baking window.
A slight settling as a fudgy brownie cools is different from a wet, collapsed center. Don’t try to correct ordinary settling by baking until the entire crumb becomes dry.
Warm Knife Slicing for Bakery-Style Squares
Cut only after the cream firms up. Lift with both parchment handles and place the whole slab on a sturdy cutting board; flipping the pan would damage the topping.
Run a large chef’s knife under hot tap water, then wipe it completely dry. Press straight down in a smooth motion instead of sawing through the cream. Clean, warm, and dry the blade between cuts to keep chocolate crumbs from streaking the pale topping.
Chilling and Storage Guidelines
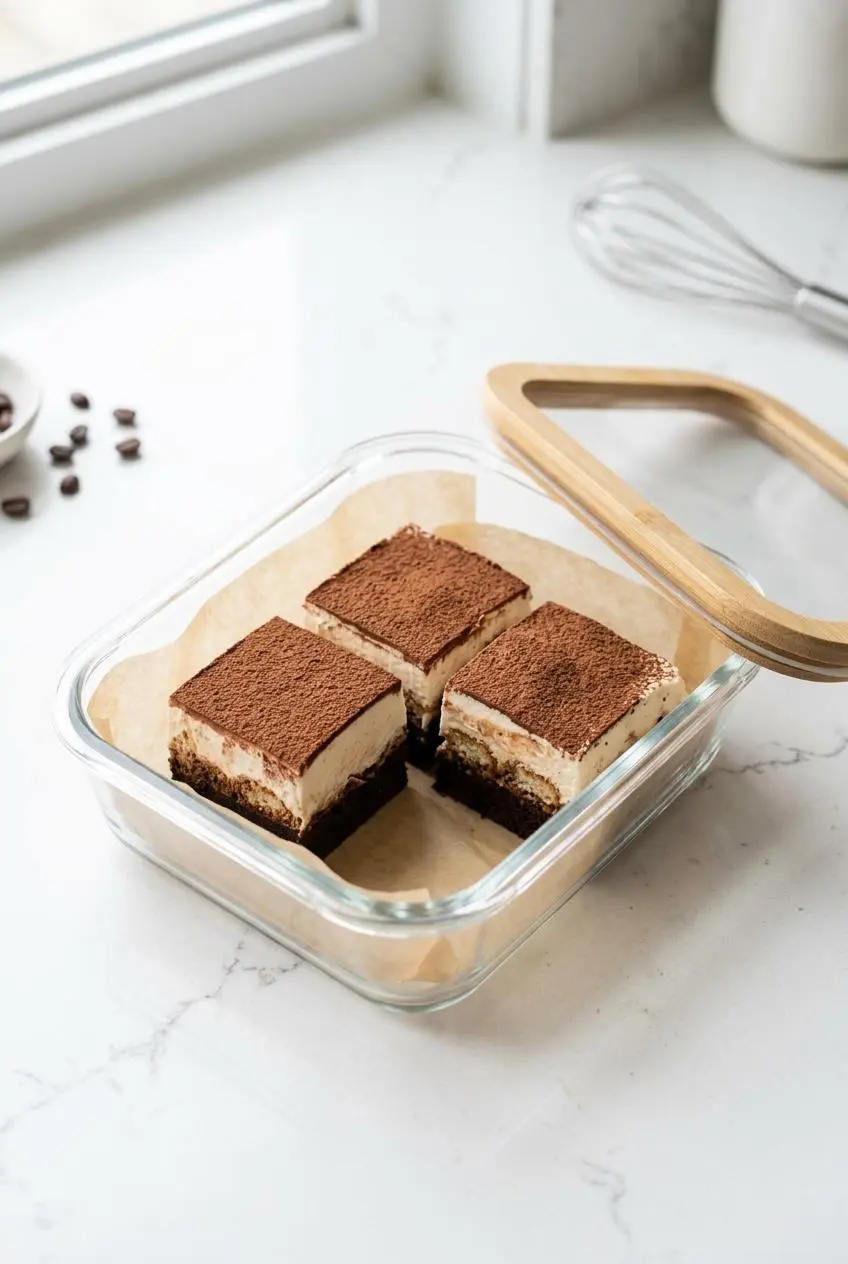
Keep this dairy-topped dessert chilled and protect the cream from drying out. The firm topping and supported biscuit layer matter more for serving than simply watching the clock.
Refrigeration and Layer Setting
Cover the pan without pressing the cover into the cream, or transfer cut bars to an airtight container. Return portions you aren’t serving to the refrigerator rather than leaving the whole batch on the table.
The biscuits soften as they absorb moisture from the coffee and topping. For neat portions, let the cream’s firmness guide your cutting time and reserve the cocoa dusting for serving.
Protecting Layered Brownie Bars
Arrange bars in a single layer whenever possible. Stacking can flatten the mascarpone and transfer cocoa onto the surrounding pieces. Use a container with enough headroom to keep the lid away from the topping.
Move each portion with a broad spatula supporting the brownie bottom. Keep cut edges covered to limit drying, and avoid placing absorbent wrapping directly against the cream.
Creative Variations for Every Kitchen
These optional changes create different desserts while leaving the listed recipe unchanged. Choose the variation that suits your ingredients and preferred texture.
The No-Ladyfinger Alternative
Skip the biscuits and spread the mascarpone topping directly over the completely cooled brownie. You’ll get a two-layer dessert with a stronger emphasis on chocolate and cream rather than the tender coffee-soaked middle.
The espresso in the brownie still supplies coffee flavor. Keep the cream topping as written rather than pouring the unused coffee soak into it, which would loosen its structure.
Fudge Box Mix Shortcut
Use a fudge brownie mix that gives baking directions for an 8×8-inch pan, following its own ingredient amounts and baking instructions. Let the finished brownie cool completely before adding the ladyfingers and mascarpone topping described above.
For another packaged-mix approach, cake mix brownies offer an alternative starting point. Whichever bottom layer you choose, avoid an underbaked center that can’t support the toppings.
Mascarpone Cheese Substitutions
- Full-fat brick cream cheese: Use it as an optional replacement for mascarpone, expecting a tangier, firmer topping; smooth it before gradually incorporating the cream.
- Sweetness adjustment: Taste the cream cheese mixture before whipping and adjust the powdered sugar to your preference rather than assuming it needs a fixed extra amount.
- Spreadable cream cheese: Avoid treating tub-style spreads as an interchangeable choice, since their softer consistency can make the topping less predictable.
Conclusion
Rich espresso brownies, tender coffee-dipped ladyfingers, and cool mascarpone cream make a satisfying layered square. Complete cooling and a brief biscuit dip give each layer the best chance to hold its texture.
Serve the bars chilled with espresso or cappuccino, and dust the cocoa just before cutting. A clean knife and a firm topping make that first slice worth the wait.
Frequently Asked Questions
How Long Do Tiramisu Brownies Keep in the Refrigerator?
Keep them covered in an airtight container in the refrigerator. There isn’t a verified storage duration for this recipe, so avoid relying on a fixed shelf life. Store the bars in one layer to protect the cream.
Can I Substitute Cream Cheese for Mascarpone?
Yes, full-fat brick cream cheese is an optional substitute, but it makes the topping tangier and firmer. Smooth it before adding the cream gradually, and adjust the powdered sugar to taste.
Why Did My Mascarpone Cream Turn Runny or Curdle?
Warm dairy, rapid cream addition, or beating beyond stiff peaks can cause problems. Start with cold ingredients, incorporate the cream on low speed, and stop the final whipping as soon as the peaks hold. A heavily separated mixture may not recover.
How Should I Protect Leftover Tiramisu Brownies?
Place them in a single layer in a covered container with space above the cream. Keep them chilled and lift individual bars with a broad spatula so the brownie supports the softer layers.
Tiramisu Brownies

Equipment
- 8×8-inch baking pan
- Hand mixer
- Mixing Bowls
Ingredients
For the espresso brownie bottom
- 1/2 cup unsalted butter (115g)
- 6 oz semi-sweet chocolate (170g), chopped
- 1 tablespoon espresso powder
- 1 1/4 cups granulated sugar (250g)
- 3 large eggs at room temperature
- 1 teaspoon pure vanilla extract
- 3 tablespoons vegetable oil
- 1/2 cup unsweetened cocoa powder (40g)
- 1/4 teaspoon salt
- 1/2 cup all-purpose flour (65g), spooned and leveled
For the coffee soaked lady fingers
- 2/3 cup boiling water (160mL)
- 1 tablespoon espresso powder
- 1 tablespoon granulated sugar
- 12 Savoiardi lady fingers
For the mascarpone cream topping
- 8 oz cold mascarpone cheese (225g)
- 1/3 cup powdered sugar (45g)
- 1 teaspoon pure vanilla extract
- 1 cup cold heavy whipping cream (240mL)
- cocoa powder (for dusting on top)
Instructions
Make the espresso brownie
- Set the oven to 350°F, butter an 8×8-inch pan, and fit parchment across its bottom and sides with excess extending above the rim. The overhanging paper will provide handles for lifting the finished dessert.
- Heat the butter in a medium pot over medium heat until it becomes liquid and begins to sizzle. Stop at the first sizzling sounds rather than letting the butter brown.
- Move the pot off the burner and whisk the chopped chocolate and espresso powder into the hot butter immediately. Continue until the chocolate disappears into a smooth mixture with a roasted coffee aroma.
- Transfer the chocolate mixture to a large bowl and whisk in the granulated sugar while the mixture is still hot. A sandy appearance at this stage is expected.
- Incorporate the eggs individually with a whisk, then blend in the vanilla, vegetable oil, cocoa powder, and salt. The batter should become glossy and fall from the whisk in thick ribbons.
- Fold in the flour, stopping as soon as it blends into the chocolate batter. No dry pockets should remain, but additional stirring can toughen the crumb.
- Scrape the batter into the lined pan and level it across the corners. An even depth helps the center and edges bake more consistently.
- Bake on the center rack for 27 to 32 minutes, checking the middle with a skewer. The top should look softly matte rather than wet, and the skewer should carry moist crumbs without liquid batter.
- Leave the brownie in its pan until it reaches room temperature throughout. The center must feel completely cool before it can support the biscuit and cream layers.
Make the lady finger layer
- Stir the boiling water, espresso powder, and granulated sugar together in a wide bowl, then let the mixture reach room temperature. The powder and sugar should dissolve completely before the coffee cools.
- Dip each ladyfinger briefly into the cooled coffee for no more than about one second total, then place it over the cooled brownie, trimming biscuits where needed. The biscuits should feel damp on the surface while remaining firm enough to move intact.
- Keep the biscuit-covered brownie in the pan while you prepare the topping. The ladyfingers should form an even layer without a pool of coffee around them.
Make the mascarpone cream topping
- Briefly beat the cold mascarpone, powdered sugar, and vanilla in a large bowl using an electric mixer or a stand mixer with its paddle attachment. Stop once the mixture looks smooth and evenly blended.
- Run the mixer on low and feed in the cold cream slowly, scraping the bowl after each 1/4 cup; alternatively, incorporate 1 to 2 tablespoons at a time on low. Each addition should blend smoothly before more cream enters the bowl.
- Increase the speed to high after all the cream is incorporated and whip for about 1 to 2 minutes. Stop as soon as the topping forms billowy stiff peaks that stay upright.
- Distribute spoonfuls of topping across the ladyfingers and gently connect them into an even layer. Light spreading keeps the biscuits in place and preserves the cream’s airy texture.
- Refrigerate the assembled dessert for at least 1 hour, continuing until the topping feels firm. The cream should hold its shape rather than shift when the pan moves.
- Lift the dessert onto a cutting board using the parchment handles, sift cocoa over the cream, and cut into bars. The chilled layers should remain distinct as the knife passes through them.