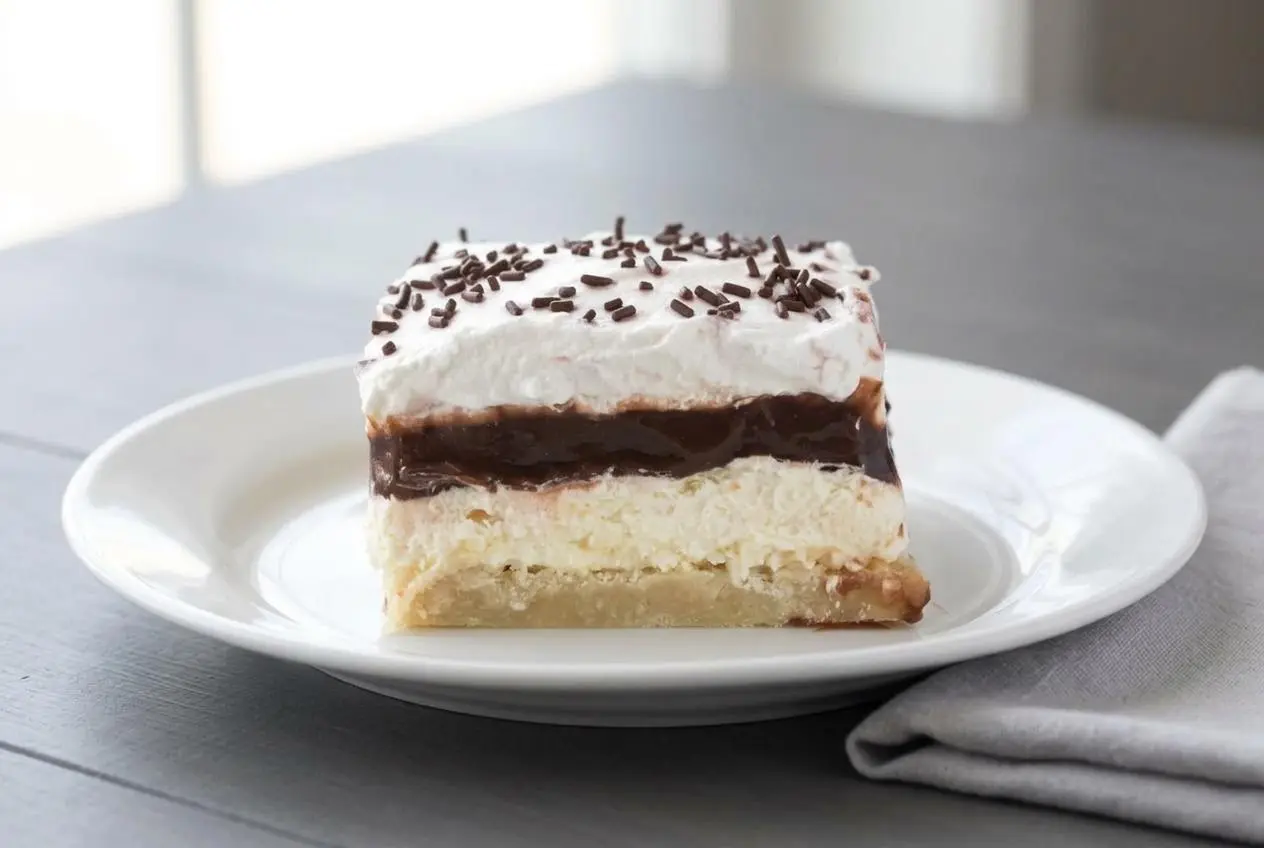
A Layered Chocolate Pudding Dessert is a chilled pan dessert with a baked crust, a fluffy cream cheese layer, mixed vanilla and chocolate instant pudding, and a whipped topping finish.
Layered Chocolate Pudding Dessert is the kind of classic treat that always looks a little extra on the table, even though the method is very straightforward. You get cool creamy layers, a soft chocolate center, and a sweet baked base that holds everything up.
It’s especially good for holidays, potlucks, and family gatherings because it slices neatly when chilled well and tastes even better cold. The biggest trick is giving each layer time to settle.
Let the crust cool all the way before adding anything creamy, or the layers can soften and slide.
Why This Layered Dessert Works
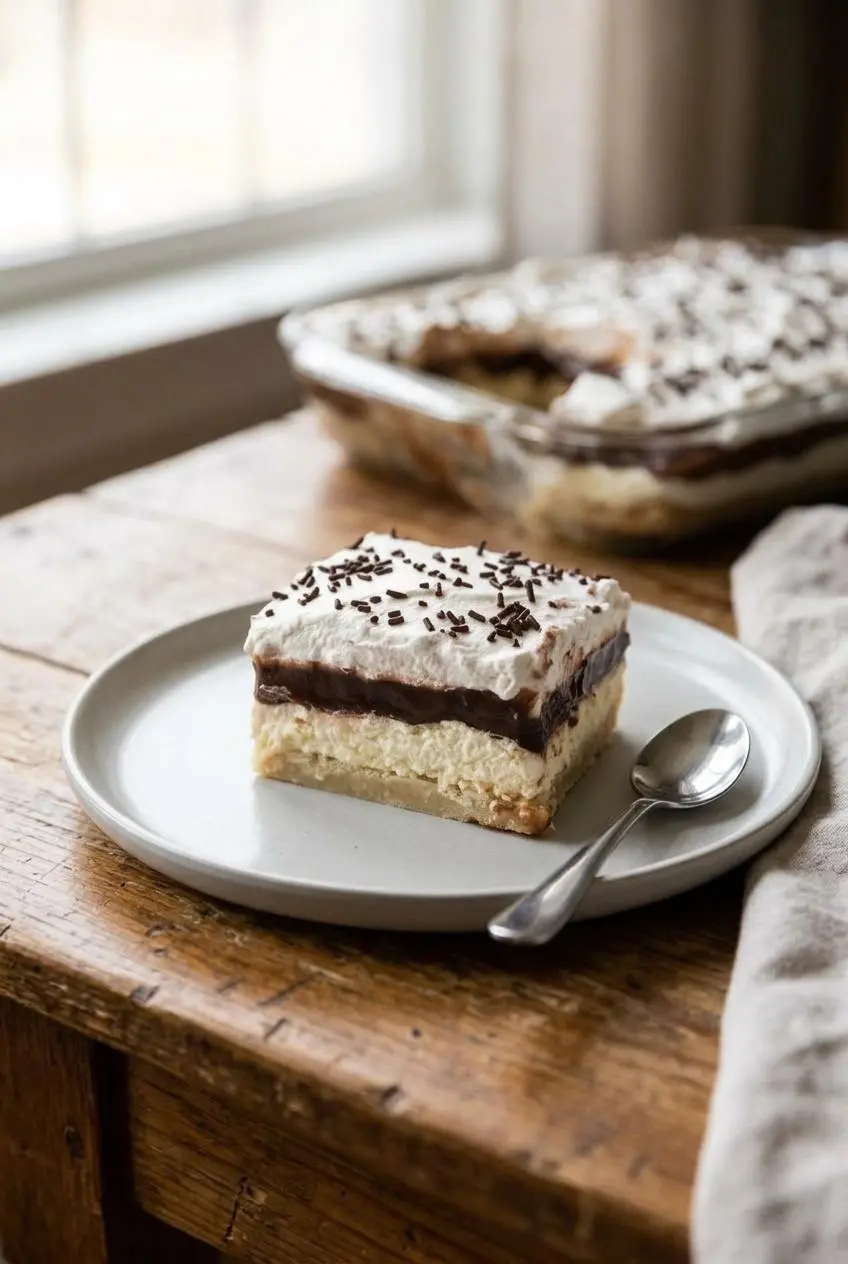
This dessert works because each layer has a specific job. The baked crust creates a firm foundation, the cream cheese mixture adds body, the pudding layer brings the soft chocolate center, and the topping keeps the finish light.
The butter and flour in the crust bake into a tender, cookie-like base that can support the dairy layers without turning mushy right away. It should come out lightly browned and look slightly underdone in the center, which keeps it from baking up dry or crumbly.
Powdered sugar does more than sweeten the cream cheese layer. It also helps it stay smooth and hold its shape, so that middle layer spreads like a soft mousse instead of sinking into the crust. Block cream cheese matters here because it has a denser structure than tub-style cream cheese, which often contains extra moisture and can make the layer looser.
Instant pudding is also key. It thickens quickly with cold milk, so you can build the dessert without adding heat. Cook-and-serve pudding behaves differently because it needs to be boiled first, then cooled, which changes the timing and can soften the cream cheese layer if you rush it. If you enjoy chilled desserts that rely on that same easy-set texture, chocolate eclair cake is another good one to keep in mind.
Key Ingredients and Easy Substitutions
Each ingredient brings something useful here, from structure in the crust to lift in the topping and a smooth, sliceable center in the dairy layers.
Crust Layer
- 1 cup all-purpose flour
- 1 cup powdered sugar
- 1 stick butter, melted
2nd Layer
- 1 cup powdered sugar
- 8 ounces cream cheese
- 8 ounces of whipped topping (1/2 of a large 16 ounce container)
3rd Layer
- 1 (3.4 ounce) box vanilla instant pudding
- 1 (3.4 ounce) box chocolate instant pudding
- 3 cups cold milk
Topping
- 8 ounces whipped topping (remaining 1/2 of a large 16 ounce container)
- chocolate sprinkles
The flour, sugar, and butter bake into a soft shortbread-style crust that supports the chilled filling. Cream cheese gives the second layer its tang and structure, while whipped topping keeps it airy. The two pudding mixes create a balanced chocolate flavor with a lighter color and softer sweetness than all-chocolate pudding alone.
I make sure to pull the block cream cheese out of the fridge early because cold cream cheese creates small stubborn lumps that refuse to blend out.
For the cream cheese layer, use block cream cheese rather than tub-style. The block form is much firmer, so the layer stays thick and spreadable instead of turning loose.
Crust Selection: Sweet Cookie vs. Salted Pecan
The official crust is a nut-free sweet base that bakes up like a soft cookie. If you want a little more contrast, a pinch of fine sea salt and a teaspoon of pure vanilla extract can round out the sweetness without changing the overall style of the dessert.
If you love the classic Southern version, you can switch to a pecan shortbread-style crust as an optional variation. Use a flour, melted butter, and finely chopped pecan mixture in place of the standard crust for a toastier flavor and a little more crunch. Keep that change as a variation, not a required step.
To make the crust gluten-free, swap the all-purpose flour for a 1:1 gluten-free baking flour blend. The rest of the dessert can stay the same. If you enjoy this chilled cream cheese dessert style in another flavor direction, pineapple dream dessert is a good party-friendly alternative.
Cool Whip vs. Stabilized Homemade Whipped Cream
Whipped topping is convenient because it holds its shape well in layered desserts. It spreads smoothly, chills evenly, and is less likely to weep if the dessert sits in the refrigerator for a while.
If you prefer real whipped cream, stabilize it so the layers stay defined. A good working ratio is 1 cup cold heavy cream with 2 tablespoons powdered sugar and 1 tablespoon dry milk powder, whipped to stiff peaks. You can also use a little dissolved gelatin as a stabilizer if that is your usual method. Avoid canned spray whipped cream here because it collapses too quickly for clean layers.
How to Make Layered Chocolate Pudding Dessert Step-by-Step
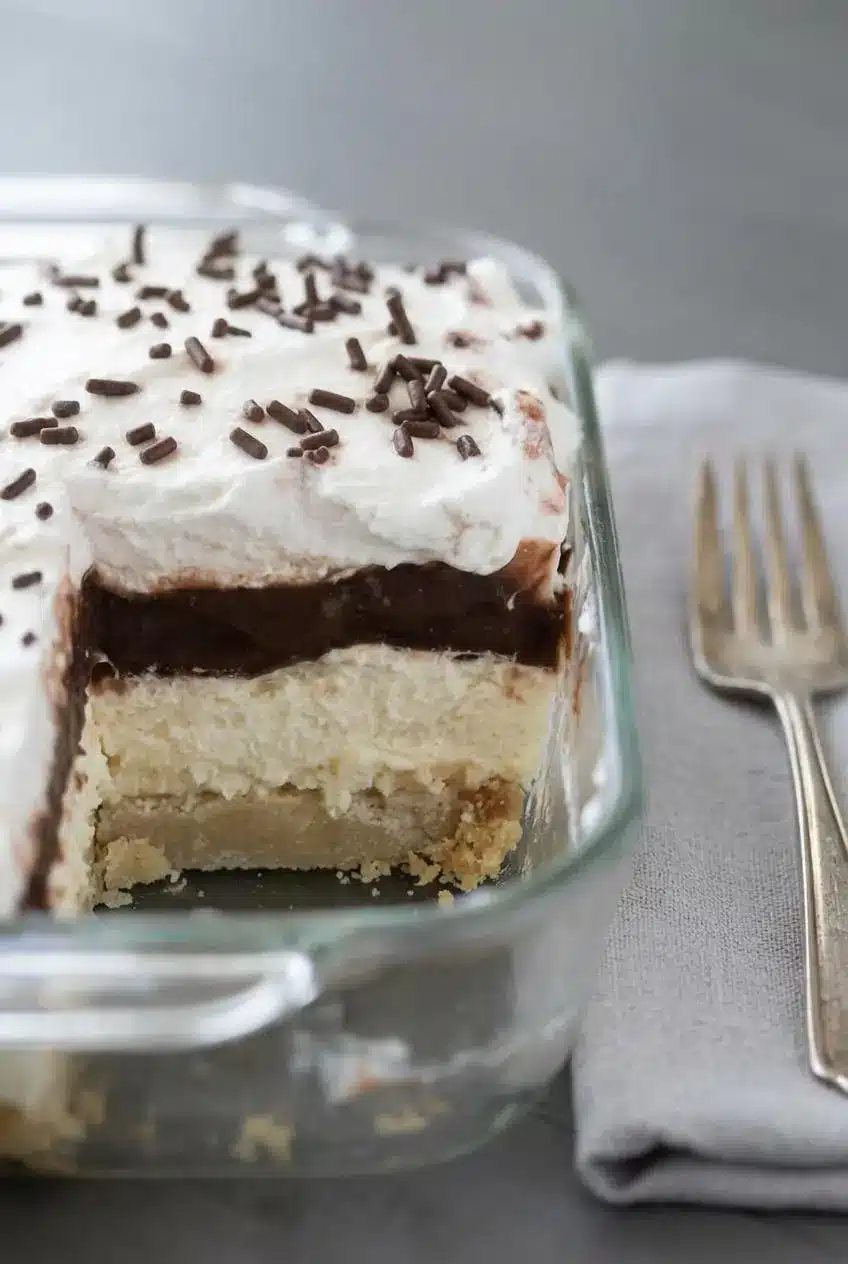
This dessert is easy to assemble, but the texture depends on patience. Cool the crust completely, whisk the pudding until smooth but still pourable, and give the layers time to settle before slicing.
Preparation
- Heat the oven to 350 degrees F and grease a 9×13-inch baking dish with butter or shortening.
The pan should be evenly coated so the crust releases cleanly at the edges.
Crust Layer
- Add the flour, powdered sugar, and melted butter directly to the prepared baking dish, stir with a fork, then work it with your hands until a thick dough forms.
The mixture should come together like soft cookie dough and press easily without dry patches. - Press the dough evenly across the bottom of the dish and bake for 15-18 minutes.
The crust is ready when it is lightly browned and still looks slightly undercooked in the center. - Set the pan aside and cool the crust completely before moving on.
If the crust still feels warm, wait longer so the cream cheese layer stays thick instead of melting.
Cream Cheese and Pudding Layers
- Beat the powdered sugar, cream cheese, and 8 ounces of whipped topping in a large bowl until smooth and creamy, then spread it over the cooled crust.
The layer should look velvety and thick enough to hold soft ridges from the spatula. - Whisk the vanilla instant pudding, chocolate instant pudding, and cold milk together for about 2 minutes.
The pale powders quickly blend into a glossy light-brown chocolate mixture that is smooth and pourable. - Refrigerate the pudding mixture for 5 minutes, then spread it over the cream cheese layer.
It should thicken slightly before spreading so it settles on top instead of soaking downward.
Topping and Storage
- Spread the remaining 8 ounces whipped topping over the pudding layer and finish with chocolate sprinkles.
The top should look smooth and fluffy, with the garnish staying mostly on the surface instead of sinking in. - Refrigerate the dessert until fully chilled before serving.
The layers slice more cleanly once the whole pan is cold and settled.
Mixing and Baking the Crust
Mixing the crust right in the pan keeps cleanup low and helps you judge the texture quickly. Once the butter is worked through, it should feel like thick dough, not loose crumbs. Press it firmly into the corners so the pudding layer does not pool around thin spots.
When baked, the crust should be lightly golden around the edges and still have that slightly undercooked cookie look in the center. That is the sweet spot. If you bake it until it looks fully dry, it can lose that tender bite.
Whipping the Cream Cheese Layer
Softened block cream cheese makes this layer much smoother. Beat it with the powdered sugar first if needed, then finish with the whipped topping until the texture turns thick and silky. Spread gently so you do not tear the crust underneath.
This layer is what gives the dessert its cheesecake-like body. If you enjoy that cream cheese and pudding combination in a richer format, banana pudding cheesecake is another fun direction.
Preparing and Pouring the Pudding
Yes, both pudding packets go into one bowl. The vanilla softens the dark chocolate flavor and creates that classic milk-chocolate color once the powders meet the cold milk.
Whisk until there are no dry pockets left, then let the mixture rest in the refrigerator for 5 minutes. You want it thickened just enough to spread cleanly, but not so firm that it drags and pulls the cream cheese layer underneath.
Gourmet Homemade Pudding Upgrade
If you want a more from-scratch feel, you can make a cooked chocolate custard layer instead of using instant pudding. That version gives a deeper cocoa flavor and a softer, more classic pudding texture.
The important part is cooling it completely to room temperature before layering. Warm custard will loosen the cream cheese layer and blur the lines between layers.
The Final Whipped Layer and Garnish
Spread the top layer with a light hand so the pudding stays in place. An offset spatula helps square off the corners and smooth the surface without digging into the layer below.
Chocolate sprinkles keep the look classic, but shaved dark chocolate curls or toasted pecan pieces work nicely as optional finishing touches. For parties, this dessert also looks great spooned into clear cups as individual parfaits.
The Secret to Perfectly Clean Layers
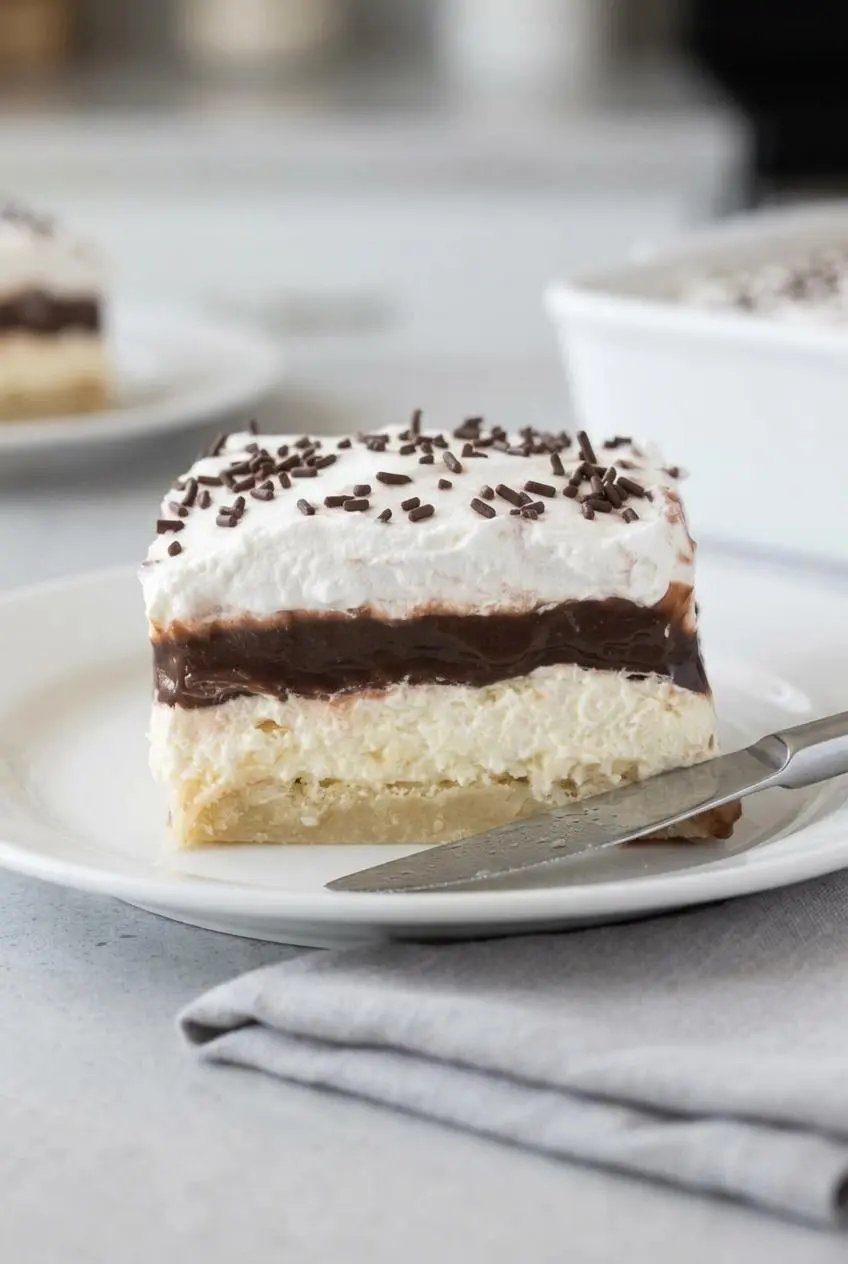
Clean layers come down to temperature and a gentle touch. Once the dessert is fully assembled, pop it in the freezer for 30 minutes before slicing so the layers firm up and hold their shape.
Use a sharp knife dipped in warm water, then wipe it dry before the first cut. After every single slice, clean the blade with a warm, damp paper towel. It feels fussy, but it makes a big difference.
An offset spatula helps when spreading each layer because it pushes filling smoothly from edge to edge without disturbing the layer below. If you want neat, squared slices instead of a soft scoop-out situation, this is the section that pays off.
Troubleshooting Lumpy or Running Layers
Most problems with this dessert come from temperature or ingredient choice, and they are usually easy to avoid.
- If the cream cheese layer is lumpy, the cream cheese was likely too cold. Let block cream cheese soften before mixing, then beat until fully smooth before spreading.
- If the layers seem loose, the crust may have still been warm. Always cool the crust completely before adding the dairy layers.
- If the pudding runs, make sure you used instant pudding, not cook-and-serve. Cook-and-serve pudding needs to be boiled and cooled, so it will not set the same way in this method.
- If the slices smear at serving time, chill the whole dessert longer or give it a brief 20 to 30 minute rest in the freezer before cutting.
- If homemade whipped cream starts to weep, it likely was not whipped to stiff peaks or was not stabilized. Dry milk powder helps it stay fluffy longer.
Storage and Make-Ahead Instructions
Cover the pan tightly with plastic wrap and keep it refrigerated. For the best texture, serve it well chilled and avoid leaving it out longer than needed, especially in a warm room or outdoors.
For a supported storage reference, milk puddings and soft custards are generally kept refrigerated and can hold for several days, with refrigerated storage guidance for milk puddings and soft custards noting 5 to 6 days under proper chilling. Since this dessert includes whipped topping and a soft layered structure, it is best when enjoyed before the layers begin to merge.
How to Freeze and Thaw This Dessert
You can freeze the fully assembled dessert for up to 1 week if it is wrapped tightly in plastic wrap. Thaw it in the refrigerator overnight so the texture stays as smooth as possible.
Freeze it once, then serve it. Repeated freezing and thawing can make the creamy layers separate and turn watery.
Conclusion
This dessert earns its place at the table because it is easy to build, deeply nostalgic, and very good straight from the fridge. The mix of baked crust, fluffy cream cheese, and soft chocolate pudding gives every bite contrast.
Chill the crust fully, let the pudding thicken before spreading, and give the finished pan time to firm up before slicing. That little bit of patience is what makes the layers look as good as they taste.
Frequently Asked Questions
Can I use cook-and-serve pudding instead of instant?
No. Cook-and-serve pudding has to be boiled first, so it does not set the same way with cold milk in this dessert. It also needs cooling time, and any leftover warmth can soften the cream cheese layer. Instant pudding is the right choice for this structure.
How do I make this dessert gluten-free?
Swap the all-purpose flour in the crust for a 1:1 gluten-free baking flour blend. Keep the rest of the ingredient ratios the same. The texture will stay very close to the original as long as the crust is pressed evenly and baked until lightly browned.
How long can layered pudding dessert sit out at a party?
Try to keep it chilled as much as possible since it contains dairy and whipped layers. If you are serving outdoors or over a long stretch, setting the dish over ice helps it stay cold longer. Once it starts warming up and softening, the texture and the clean layers both suffer.
Why did my layers run together when I cut it?
The dessert probably needed more chilling time before slicing, or the knife was not cleaned between cuts. Both issues can smear the layers fast. Give the pan 30 minutes in the freezer before serving, then wipe the knife clean after every slice for sharp, distinct layers.
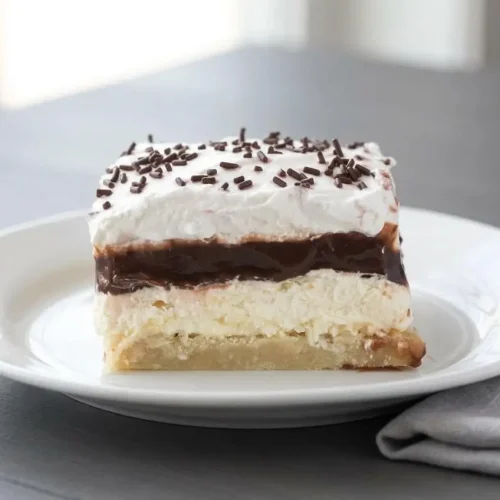
Layered Chocolate Pudding Dessert

Equipment
- 9×13-inch baking dish
- Large Mixing Bowl
- Hand mixer
- Whisk
Ingredients
Crust Layer
- 1 cup all-purpose flour
- 1 cup powdered sugar
- 1 stick butter melted
2nd Layer
- 1 cup powdered sugar
- 8 ounces cream cheese
- 8 ounces whipped topping 1/2 of a large 16 ounce container
3rd Layer
- 1 (3.4 ounce) box vanilla instant pudding
- 1 (3.4 ounce) box chocolate instant pudding
- 3 cups cold milk
Topping
- 8 ounces whipped topping remaining 1/2 of a large 16 ounce container
- chocolate sprinkles
Instructions
Preparation
- Heat the oven to 350 degrees F and grease a 9×13-inch baking dish with butter or shortening. The pan should be evenly coated so the crust releases cleanly at the edges.
Crust Layer
- Add the flour, powdered sugar, and melted butter directly to the prepared baking dish, stir with a fork, then work it with your hands until a thick dough forms. The mixture should come together like soft cookie dough and press easily without dry patches.
- Press the dough evenly across the bottom of the dish and bake for 15-18 minutes. The crust is ready when it is lightly browned and still looks slightly undercooked in the center.
- Set the pan aside and cool the crust completely before moving on. If the crust still feels warm, wait longer so the cream cheese layer stays thick instead of melting.
Cream Cheese and Pudding Layers
- Beat the powdered sugar, cream cheese, and 8 ounces of whipped topping in a large bowl until smooth and creamy, then spread it over the cooled crust. The layer should look velvety and thick enough to hold soft ridges from the spatula.
- Whisk the vanilla instant pudding, chocolate instant pudding, and cold milk together for about 2 minutes. The pale powders quickly blend into a glossy light-brown chocolate mixture that is smooth and pourable.
- Refrigerate the pudding mixture for 5 minutes, then spread it over the cream cheese layer. It should thicken slightly before spreading so it settles on top instead of soaking downward.
Topping and Storage
- Spread the remaining 8 ounces whipped topping over the pudding layer and finish with chocolate sprinkles. The top should look smooth and fluffy, with the garnish staying mostly on the surface instead of sinking in.
- Refrigerate the dessert until fully chilled before serving. The layers slice more cleanly once the whole pan is cold and settled.