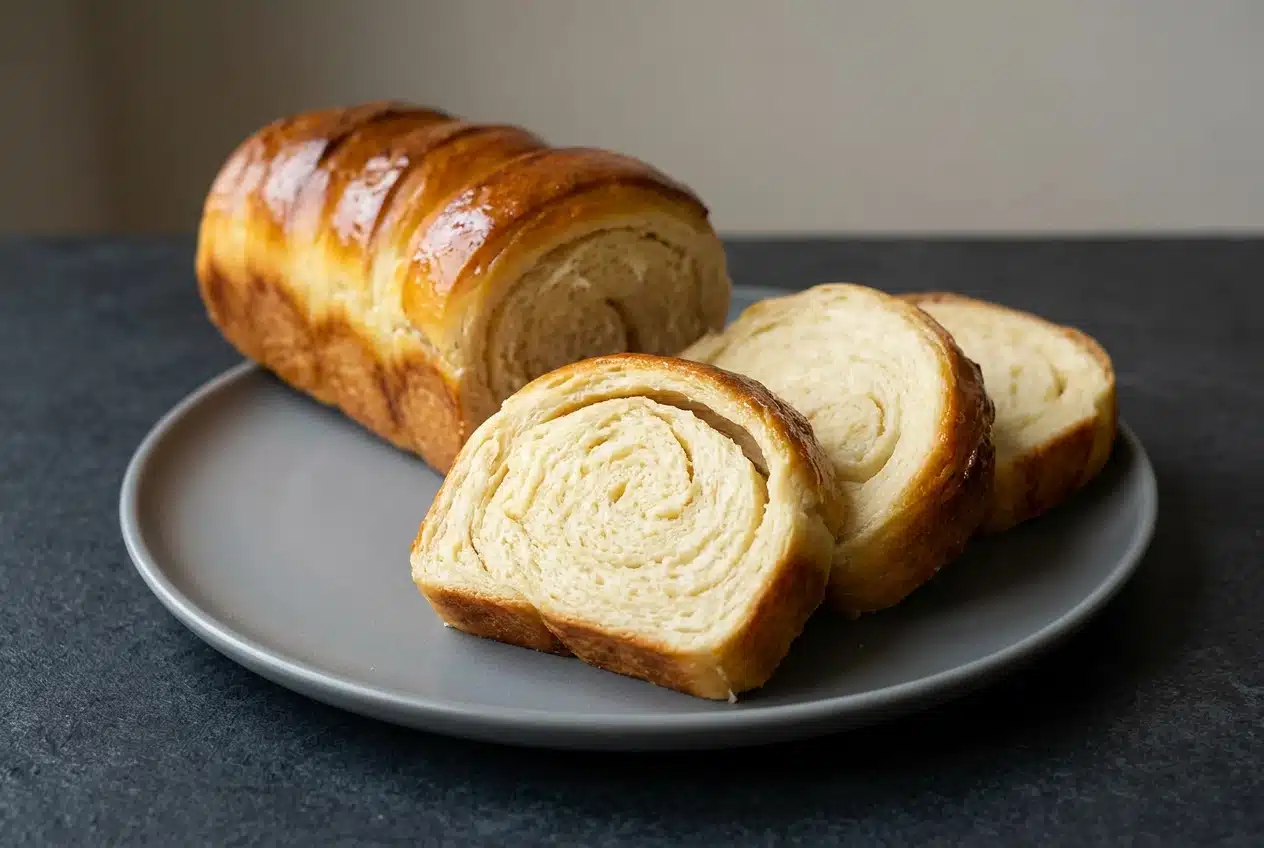
Condensed milk bread is a lightly sweet yeast loaf with a soft, pull-apart crumb. Mix the enriched dough until smooth and elastic, let it rise twice, then bake and brush with condensed milk glaze for a tender, glossy finish.
This condensed milk bread combines cake flour, whole milk, butter, and egg for a pillowy loaf that pulls apart into delicate sections. Sweetened condensed milk adds richness and sweetness without turning the bread into cake.
The hands-on work centers on gradual butter incorporation and careful rolling. Between those stages, the dough needs time to expand. The payoff is in those soft layers.
Have the milk at room temperature and the butter softened before you begin mixing.
Essential Ingredients and Smart Substitutions
Flour gives the loaf structure, yeast provides lift, and salt balances the sweetness. Milk, egg, butter, and sweetened condensed milk contribute moisture, richness, tenderness, and color, while the finishing glaze adds a sweet surface.
- 3.5 c cake flour (see notes for AP flour substitution)
- 1 tbsp instant yeast
- 1/2 tsp salt
- 1 c whole milk (room temperature)
- 1/2 c sweetened condensed milk
- 1 medium egg
- 2 oz unsalted butter (softened, at room temperature, cut into pieces)
- 1 tbsp whole milk
- 3 tbsp sweetened condensed milk
- 1 tbsp unsalted butter (softened, at room temperature)
Why Sweetened Condensed Milk Works in Yeast Dough
Sweetened condensed milk contributes concentrated dairy flavor and sweetness, along with moisture and richness. Plain milk doesn’t do the same job, and adding sugar to milk isn’t an automatic equivalent.
Whole milk supplies liquid for the dough, while butter helps soften the crumb. Egg contributes richness and structure. Cake flour keeps the texture tender rather than emphasizing the chew associated with a crusty bread.
I’d pay particular attention to the butter’s texture: soft pieces incorporate more evenly than firm chunks, especially when you add them gradually.
Flour, Yeast, and Dairy Substitutions
Flour choice changes how this dough feels and how the finished loaf tears. For the intended tenderness, cake flour remains the clearest choice.
- Cake flour: favors a delicate crumb and a softer bite.
- All-purpose flour: generally produces more structure; an all-purpose flour and cornstarch blend is a substitution direction, but no exact blend is specified here.
- Bread flour: gives a more elastic, chewier result, so it isn’t the intended swap for this style.
- Self-rising flour: contains added leavening and salt and isn’t interchangeable with the flour listed here.
Instant yeast goes directly into the dry ingredients in this method. Active dry yeast can require different handling, so consult its package directions rather than assuming it follows the same mixing approach.
Keep whole milk and sweetened condensed milk as separate ingredients. Evaporated milk is unsweetened, plain milk is thinner, and diluted condensed milk remains sweetened. None is a direct replacement for the other here. Water also changes the enriched character of the dough.
How to Make Fluffy Condensed Milk Bread Step by Step
Watch the dough as closely as the clock. It should progress from a rough mixture to a cohesive, elastic mass before rising, then become visibly fuller during both proofs.
The shaping instructions accommodate your chosen baking pan rather than specifying dimensions. Keep the rolled dough’s length within the pan’s length, and preserve the equal thickness of the cut pieces.
Mixing & Kneading by Mixer
- Place the cake flour, instant yeast, and salt in the stand mixer bowl and fit the dough hook.
These dry ingredients form the starting mixture for the dough. - Run the mixer on low while adding the whole milk, sweetened condensed milk, and egg, scraping stray flour down with a rubber spatula as needed.
After approximately 30 seconds to 1 minute, the mixture should begin gathering into a cohesive dough. - Switch to medium speed and work in the softened butter piece by piece, allowing each addition to disappear before adding more.
Continue mixing until the dough looks smooth, stretches elastically, and leaves the bowl’s sides clean.
Extra Kneading by Hands
- Move the dough onto a lightly floured work surface, using about 1 tbsp flour, then fold the far edge inward and push down and away with the heel of your hand.
The folding and pressing should begin rounding the dough into a ball. - Rotate the dough 90 degrees and repeat the fold-and-press motion for approximately 1 to 2 minutes, dusting lightly with flour only if it sticks.
Finish with a smooth, rounded ball rather than a heavily floured exterior.
First Proof
- Set the dough seam-side down in a large, lightly greased mixing bowl, cover tightly, and allow approximately 1.5 to 2 hours for rising.
Look for the dough to reach twice its starting size.
Shaping
- Press the risen dough down to release the gas and move it onto a lightly floured surface.
The dough should settle back down before shaping. - Use your hands and a rolling pin to form a square or rectangle that fits the length of your baking pan.
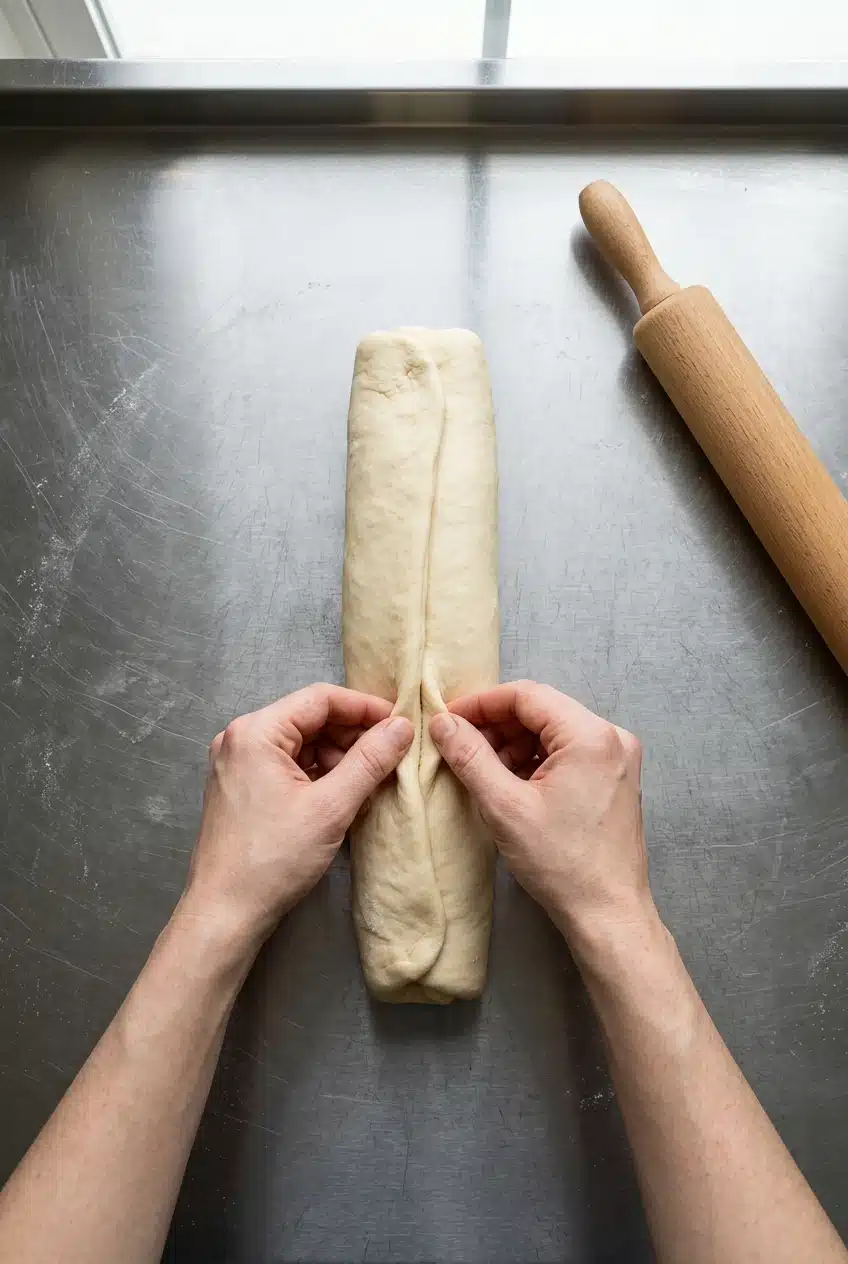
A length that stays within the pan keeps the shaped dough from crowding at the ends. - Roll the near edge away from you into a cylinder, tucking the sides inward as you go and pinching the final seam firmly shut.
The finished roll should have tucked ends and a closed seam. - Slice the cylinder with a serrated knife or a very sharp knife into equally thick pieces.
Keep the pieces consistent so they form an even pull-apart loaf.
Second Proof
- Place the pieces neatly in a lightly greased baking pan with their seams underneath, cover loosely with plastic wrap, and allow approximately 1 to 1.5 hours for rising.
The shaped dough should grow to almost twice its size.
Baking
- Preheat the oven to 350°F.
This is the baking setting for the fully proofed loaf. - Brush a light coating of egg wash over the risen dough.
Keep the coating light across the top surface. - Bake for 35 to 40 minutes, rotating the pan halfway through.
The rotation helps the loaf color more evenly. - Brush the freshly baked bread lightly with condensed milk glaze immediately after removing it from the oven.
The loaf should still be warm when the glaze touches the crust. - Allow the bread to cool completely to room temperature before serving.
The delicate crumb should no longer be warm when you cut or pull it apart.
Pro Tips, Kneading Cues, and Troubleshooting
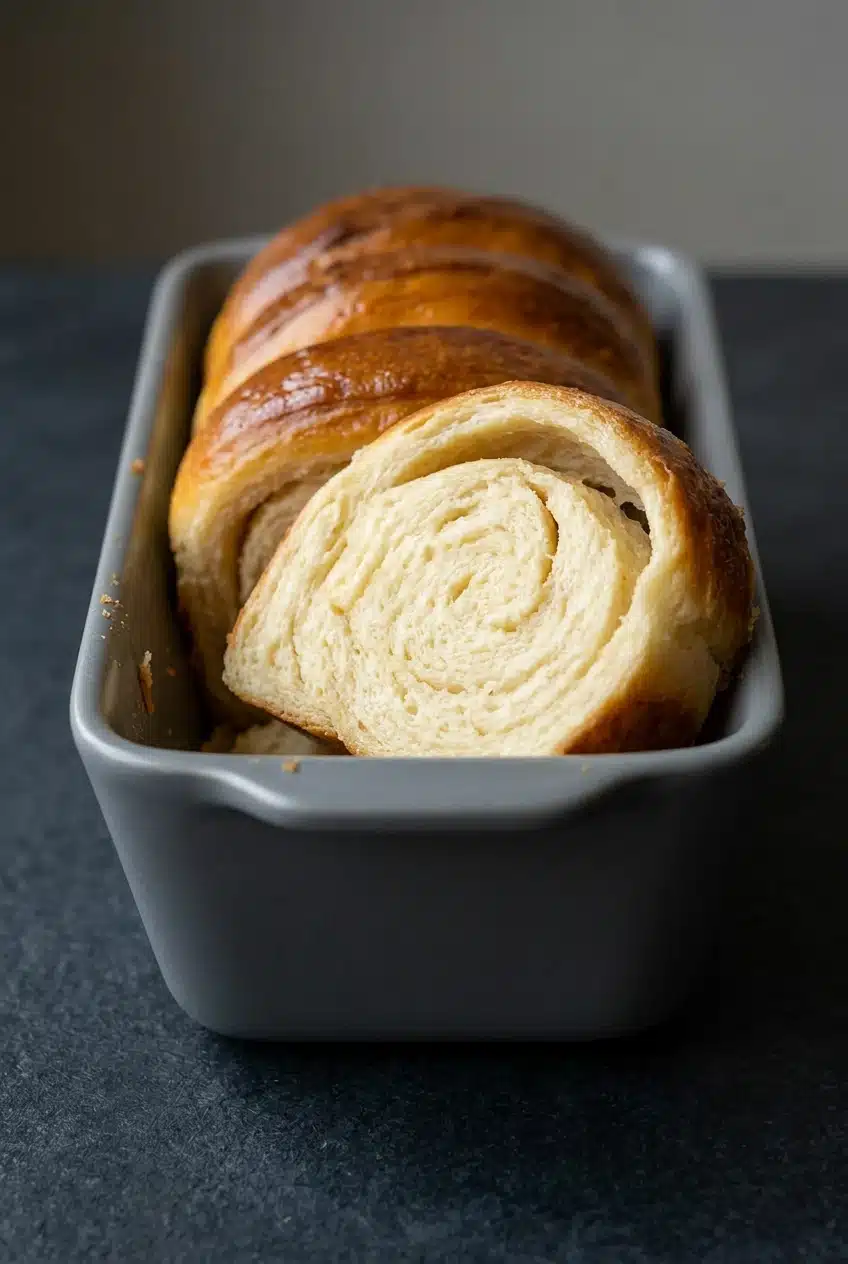
A dense loaf often starts with dough that wasn’t fully developed or hadn’t finished rising. Adding flour too freely can also turn a soft dough into a heavy one.
How to Check Kneading and Proofing Readiness
During mixing, look for three connected signs: a smooth surface, elastic movement, and clean release from the bowl’s sides. After the supplemental hand kneading, the dough should hold a rounded shape.
The windowpane test and finger-poke test are common bread-baking checks for gluten development and proofing. Here, use the stated smoothness, elasticity, and visible rise as your primary checkpoints rather than adding a separate test requirement.
The two rises have different targets: the first reaches doubled volume, while the shaped dough rises to almost doubled. Don’t treat the listed times as permission to ignore a dough that still looks noticeably under-expanded.
No-Mixer Hand-Kneading Method and Common Fixes
The hand work here supplements machine mixing. Its fold, heel-of-hand press, and quarter-turn motion brings the dough into a smooth ball; it doesn’t replace the earlier mixing stage.
- Sticky dough: incomplete mixing can leave the dough difficult to handle; reach the bowl-release cue before transferring it, then use only light flour dusting.
- Slow rise: enriched dough needs patience; follow the room-temperature ingredient directions and watch the stated volume targets before moving on.
- Split seams: a loosely closed cylinder can open during expansion; pinch the seam firmly and arrange it underneath.
- Dense crumb: excess flour, incomplete kneading, or rushed proofs can contribute; prioritize elasticity and visible expansion over speed.
- Uneven color or compressed slices: skipping the pan rotation or cutting warm bread can undermine the finish; rotate as directed and let the loaf cool completely.
No-Mixer Hand-Kneaded Pathway
This method starts with a stand mixer and includes a finishing stage by hand. It doesn’t provide a fully hand-mixed alternative, so the brief hand-kneading stage shouldn’t be treated as a complete mixer-free method.
Popular Variations and Shaping Ideas
Keep adaptations separate from the loaf above, especially when they affect shaping or moisture. These are optional flavor and serving directions, not interchangeable baking instructions.
Warm Condensed Milk Glaze and Flavor Finishes
The condensed milk glaze is the sweet finishing layer applied after baking. Egg wash serves a different purpose: it goes on before baking to finish the crust. One doesn’t replace the other.
The classic finish suits the mildly sweet crumb. For a separate enriched-bread project with a playful shape, try matcha milk bread turtles.
Optional Spiced Glaze and Filling Variations
Warm spices, sweet fillings, and savory accents each take this soft style in a different direction. Choose one direction rather than assuming every addition will suit the same loaf.
An egg-free version involving plain yogurt and milk powder would require a separately developed formula. Those ingredients aren’t established replacements for the egg here.
Condensed Milk Dinner Rolls
Individual dinner rolls offer separate servings instead of sliced pull-apart sections. They suit a dinner basket, but the loaf’s baking directions don’t establish portion sizes or baking adjustments for that shape.
Warm-Spiced Condensed Milk Glaze and Cinnamon Swirl
- Cinnamon glaze: an optional warm, familiar flavor direction for the sweet finish.
- Cardamom glaze: a more floral, aromatic direction that complements dairy richness.
- Cinnamon-sugar swirl: a separate filling concept with sweetness inside the bread rather than only on its surface.
Sweet Stuffed or Savory Add-In Loaves
- Chocolate: offers a richer dessert-style contrast to the mild crumb.
- Fruit preserves: bring fruit flavor and sweetness, though their moisture changes the filling considerations.
- Raisins or red bean paste: suggest distinct sweet-bread directions, with different textures.
- Cheese: offers a savory contrast; a glaze-free direction makes more sense for that style.
Best Ways to Serve Your Loaf
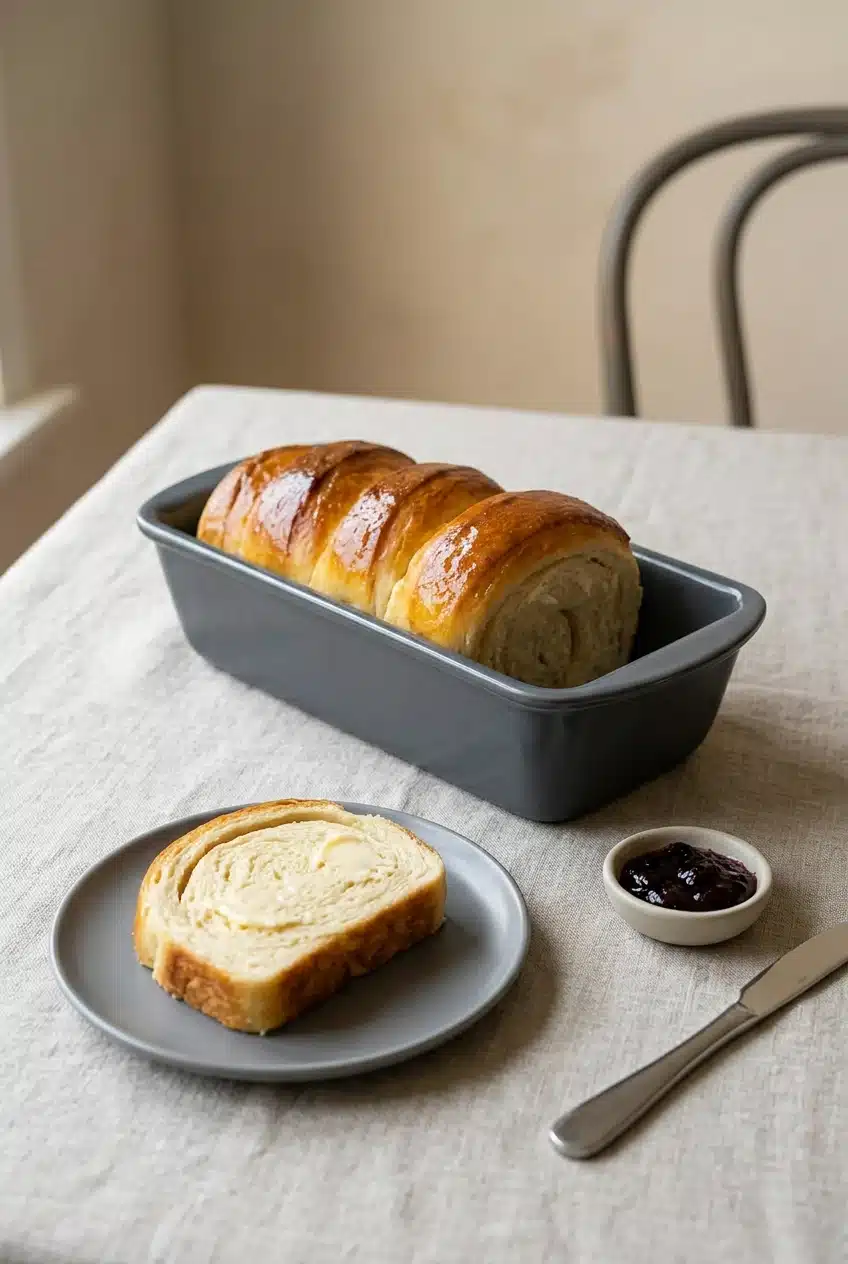
Let the loaf cool fully before serving so its delicate interior has time to settle. Then choose a topping or use that suits its lightly sweet flavor.
- Breakfast slices: pair with butter and honey or fruit preserves.
- Sweet toast: enjoy with chocolate hazelnut spread.
- Soft sandwiches: use the tender bread with savory fillings for a sweet-savory contrast.
- Breakfast or dessert: reserve thick slices for French toast or homemade bread pudding.
Planning Your Bake and Serving
Leave room in your schedule for both rises and complete cooling, not just mixing and oven time. The glaze goes on while the loaf is warm, but serving comes after cooling.
For the most straightforward plan, choose a baking window that lets you finish every stage without rushing. The directions here don’t establish a storage or reheating schedule.
Wrapping Up Your Homemade Loaf
A tender pull-apart loaf depends on patient mixing and proofing. Smooth, elastic dough and visible expansion give you better direction than the clock alone.
Keep the classic condensed milk finish, or consider a warm-spice direction for another bake. Give the loaf its full cooling time, then enjoy those soft sections.
Frequently Asked Questions
Can I Make Condensed Milk Bread Without a Stand Mixer?
This method requires a stand mixer for the initial mixing and butter incorporation. The hand-kneading stage finishes the dough; it isn’t a complete mixer-free alternative.
What Is the Difference Between Using Cake Flour, All-Purpose Flour, and Bread Flour?
Cake flour favors the delicate, tender texture intended here. All-purpose flour gives more structure; the cornstarch substitution concept requires an appropriate blend. Bread flour creates more chew and elasticity.
Can I Use Active Dry Yeast Instead of Instant Yeast?
Instant yeast is the specified choice and mixes with the dry ingredients. Active dry yeast may need different handling, so follow its package directions rather than making an automatic swap.
Can Evaporated Milk or Regular Milk Replace Sweetened Condensed Milk?
No, neither is a direct replacement here. Sweetened condensed milk supplies concentrated sweetness and richness that plain or evaporated milk doesn’t match on its own.
How Many Calories Are in 1 Slice of Milk Bread?
There isn’t a verified per-slice figure here because slice size and slice count aren’t specified. A useful estimate requires the actual ingredient amounts and brands, including the finish, divided by your loaf’s slice yield.
Is Water or Milk Better for Homemade Bread?
It depends on the bread style; this tender, enriched loaf calls for whole milk. Water isn’t an equivalent swap for the dairy richness intended in this dough.
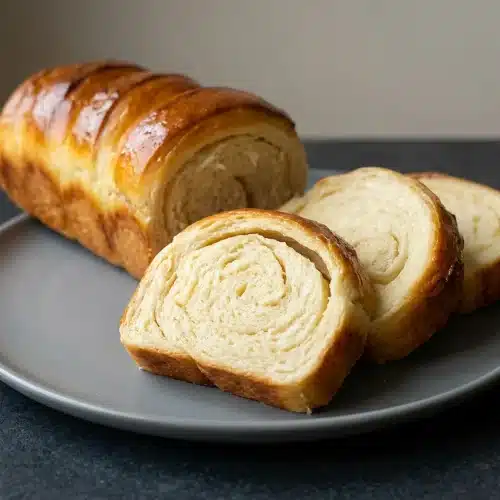
Condensed Milk Bread

Equipment
- Stand mixer with dough hook
- Rubber spatula
- Large Mixing Bowl
- Rolling Pin
- Serrated Knife
- Baking pan
Ingredients
- 3.5 c cake flour see notes for AP flour substitution
- 1 tbsp instant yeast
- 1/2 tsp salt
- 1 c whole milk room temperature
- 1/2 c sweetened condensed milk
- 1 medium egg
- 2 oz unsalted butter softened, at room temperature, cut into pieces
- 1 tbsp whole milk
- 3 tbsp sweetened condensed milk
- 1 tbsp unsalted butter softened, at room temperature
Instructions
Mixing & Kneading by Mixer
- Place the cake flour, instant yeast, and salt in the stand mixer bowl and fit the dough hook. These dry ingredients form the starting mixture for the dough.
- Run the mixer on low while adding the whole milk, sweetened condensed milk, and egg, scraping stray flour down with a rubber spatula as needed. After approximately 30 seconds to 1 minute, the mixture should begin gathering into a cohesive dough.
- Switch to medium speed and work in the softened butter piece by piece, allowing each addition to disappear before adding more. Continue mixing until the dough looks smooth, stretches elastically, and leaves the bowl’s sides clean.
Extra Kneading by Hands
- Move the dough onto a lightly floured work surface, using about 1 tbsp flour, then fold the far edge inward and push down and away with the heel of your hand. The folding and pressing should begin rounding the dough into a ball.
- Rotate the dough 90 degrees and repeat the fold-and-press motion for approximately 1 to 2 minutes, dusting lightly with flour only if it sticks. Finish with a smooth, rounded ball rather than a heavily floured exterior.
First Proof
- Set the dough seam-side down in a large, lightly greased mixing bowl, cover tightly, and allow approximately 1.5 to 2 hours for rising. Look for the dough to reach twice its starting size.
Shaping
- Press the risen dough down to release the gas and move it onto a lightly floured surface. The dough should settle back down before shaping.
- Use your hands and a rolling pin to form a square or rectangle that fits the length of your baking pan. A length that stays within the pan keeps the shaped dough from crowding at the ends.
- Roll the near edge away from you into a cylinder, tucking the sides inward as you go and pinching the final seam firmly shut. The finished roll should have tucked ends and a closed seam.
- Slice the cylinder with a serrated knife or a very sharp knife into equally thick pieces. Keep the pieces consistent so they form an even pull-apart loaf.
Second Proof
- Place the pieces neatly in a lightly greased baking pan with their seams underneath, cover loosely with plastic wrap, and allow approximately 1 to 1.5 hours for rising. The shaped dough should grow to almost twice its size.
Baking
- Preheat the oven to 350°F. This is the baking setting for the fully proofed loaf.
- Brush a light coating of egg wash over the risen dough. Keep the coating light across the top surface.
- Bake for 35 to 40 minutes, rotating the pan halfway through. The rotation helps the loaf color more evenly.
- Brush the freshly baked bread lightly with condensed milk glaze immediately after removing it from the oven. The loaf should still be warm when the glaze touches the crust.
- Allow the bread to cool completely to room temperature before serving. The delicate crumb should no longer be warm when you cut or pull it apart.