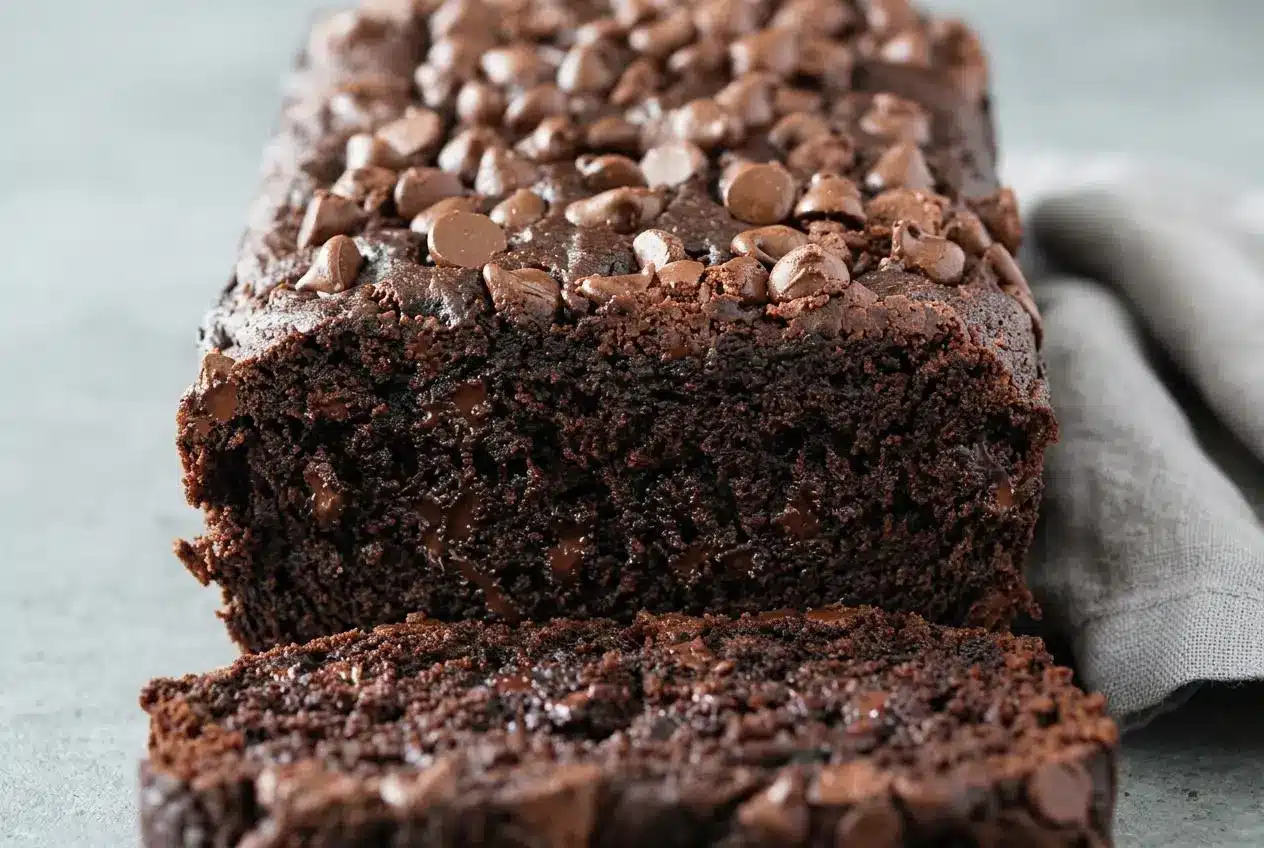
Chocolate banana bread is a rich quick bread made with mashed ripe bananas, Dutch-process cocoa, and chocolate chips for an intensely fudgy, tender loaf.
This chocolate banana bread turns brown, speckled bananas into a dark cocoa loaf with pockets of melted chocolate and a soft crumb.
The kitchen starts smelling like warm chocolate well before the loaf is done. The glossy batter is the first good sign.
Use a light-colored metal 9-by-5-inch loaf pan if possible, since darker pans can brown the edges faster.
Essential Ingredients for Chocolate Banana Bread
Every ingredient contributes to the loaf’s deep cocoa flavor, moist crumb, sturdy rise, and pockets of melted chocolate.
- 1 cup all-purpose flour
- 1/2 cup Dutch process cocoa
- 1 teaspoon baking soda
- 1/2 teaspoon sea salt
- 3 large brown bananas (1 1/2 cups mashed)
- 1/4 cup unsalted butter, (melted and slightly cooled)
- 1/4 cup canola (vegetable oil, or melted coconut oil)
- 3/4 cup packed light brown sugar
- 1 large egg, (at room temperature)
- 1 teaspoon pure vanilla extract
- 1 cup semisweet chocolate chips, (divided)
Flour gives the loaf structure, while cocoa brings the dark color and concentrated chocolate flavor. Baking soda provides lift, and sea salt keeps the sweetness from tasting flat. The egg binds the batter, vanilla rounds out the cocoa, and semisweet chips create the gooey pockets that make each slice feel closer to dessert.
Choose bananas with plenty of brown spots and soft flesh. They mash smoothly, add natural sweetness, and provide the moisture cocoa-heavy batter needs. Packed light brown sugar also holds onto moisture better than white sugar, helping the crumb stay soft.
I mash speckled bananas with a fork until no large firm pieces remain, but I leave a little texture rather than turning them completely liquid.
Dutch-Process vs. Natural Cocoa Powder
Dutch-process cocoa is the best match for this loaf because it creates a darker crumb and a mellow, rounded chocolate flavor. Its lower acidity lets the banana and vanilla notes come through without making the chocolate taste sharp.
- Dutch-process cocoa: Produces deep color, smooth flavor, and a fudgy-looking interior.
- Natural unsweetened cocoa: Has more acidity and a slightly brighter chocolate flavor. It can work with the baking soda in this batter, though the loaf may look lighter and taste a little tangier.
Use the cocoa you have if needed, but expect Dutch-process cocoa to give the most dramatic chocolate color. Cocoa absorbs moisture, which is why accurately measuring the mashed bananas matters so much here.
The Butter and Oil Balance for Lasting Softness
Melted butter brings rich dairy flavor that makes the loaf taste more like a chocolate cake. Canola oil stays fluid after baking, which helps the crumb remain tender instead of firming up too quickly as it cools.
Using both fats gives you the best of each: buttery flavor without sacrificing softness. Melt the butter first, then let it cool slightly so it blends smoothly with the bananas and does not scramble the egg.
Step-by-Step Baking Method and Doneness Cues
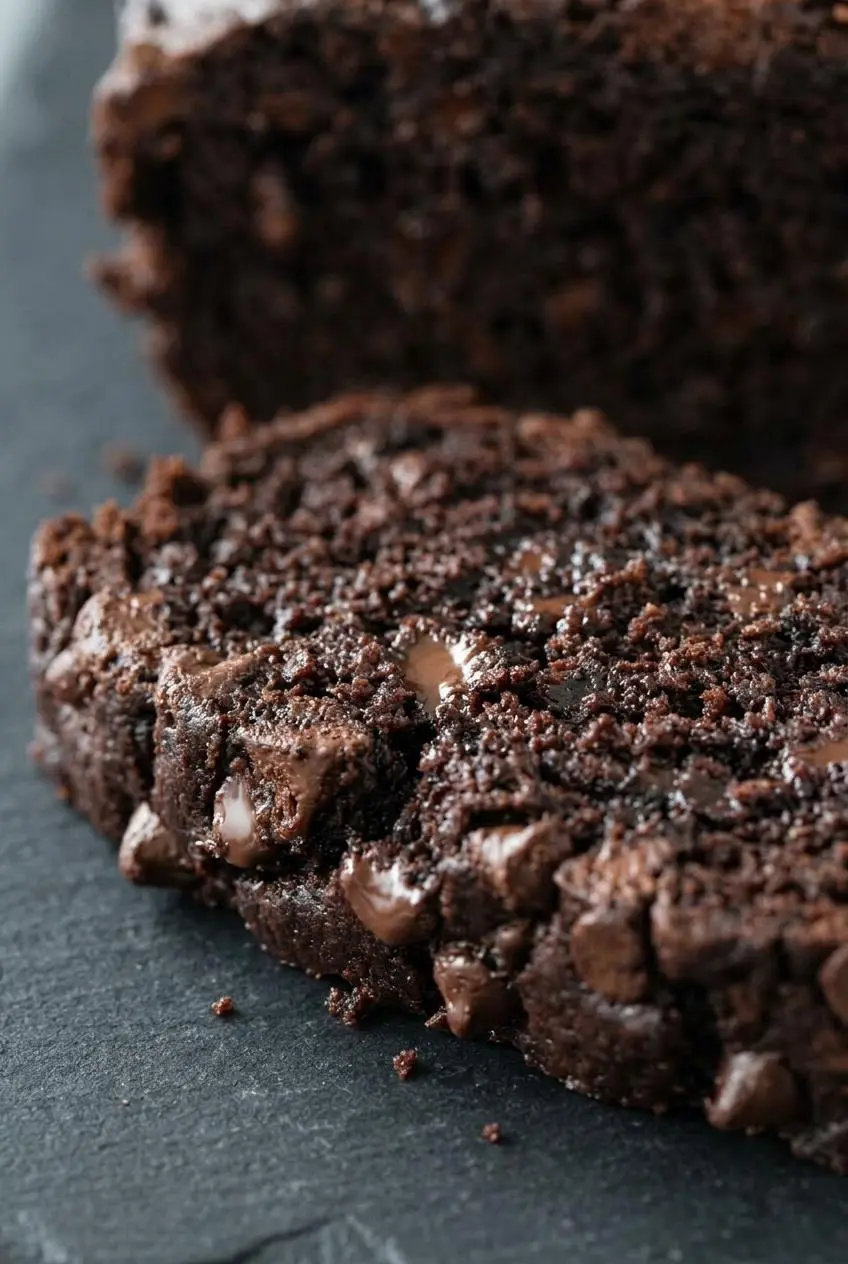
A gentle hand is the difference between a soft chocolate loaf and a dense, rubbery one. Mix the wet ingredients until smooth, then stop stirring as soon as the flour disappears.
- Set the oven to 350°F and coat a 9-by-5-inch loaf pan with nonstick cooking spray.
Prepare the pan before mixing so the batter can go straight into the oven once it is combined. - Whisk the flour, Dutch-process cocoa, baking soda, and sea salt in a medium bowl.
Break up any cocoa lumps so the finished crumb looks evenly dark and smooth. - Mash the bananas in a large bowl, then stir in the melted butter and oil before adding the brown sugar, egg, and vanilla extract.
Keep stirring until the wet mixture looks glossy and falls from the spoon in a thick ribbon. - Add the dry mixture to the banana mixture and fold just until no dry streaks remain, then fold in 3/4 cup of the chocolate chips.
The batter should look thick and scoopable, not thin or heavily beaten. - Scrape the batter into the prepared pan, scatter the remaining 1/4 cup chocolate chips over the surface, and bake for 50 to 65 minutes.
Start checking at 50 minutes, when the top should be set and the chocolate aroma should be especially rich. - Let the loaf rest in the pan on a wire rack for 15 minutes, then loosen the edges with a butter knife and lift it out carefully.
You may feel slight resistance around the pan edges, which is normal before the loaf releases. - Cool the loaf on the wire rack until slightly warm before slicing, then wrap any remaining bread in plastic wrap.
For freezing, cool completely, wrap in plastic wrap and aluminum foil, and defrost before slicing.
If the surface is becoming very dark around the 40-minute mark, lay foil loosely over the pan for the remaining bake. This shields the exposed chips and top crust while the center finishes setting.
Mashing and Whisking Without Overmixing
Whisk the dry ingredients separately so the baking soda and salt distribute evenly. Then work the flour mixture into the wet mixture with slow folding strokes rather than vigorous stirring.
Once flour meets moisture, gluten begins to develop. A few small streaks of flour are better than beating the batter until perfectly silky, because extra mixing can make quick bread tough and compact.
Fold the chips in at the end, when the batter is already thick. Thick batter supports the chips better and helps keep them from dropping to the bottom of the pan.
Mastering the Toothpick Test Around Melty Chips
Test the center cake portion rather than aiming directly for a chocolate chip. A toothpick that comes out with moist crumbs is a good sign, while shiny liquid batter means the middle needs more time.
Melted chocolate leaves brown smears or soft streaks on the toothpick. That is different from raw batter, which looks wet, pasty, and clings in a thick layer. Checking at 50 minutes helps prevent an otherwise perfect loaf from drying out.
Pro Tips for Moisture and Troubleshooting
Most chocolate banana bread problems come down to banana moisture, mixing, or pulling the loaf from the oven too soon. These fixes keep the crumb tender and the center properly set.
- Sunken center: Check that the baking soda is fresh, measure the bananas accurately, and keep baking until the center gives moist crumbs rather than wet batter.
- Dry crumb: Start checking at 50 minutes and tent the top with foil if it is browning too fast. Overbaking is usually the culprit.
- Dense loaf: Fold the flour in gently and stop as soon as the batter comes together. Heavy stirring builds too much gluten.
- Chips at the bottom: Fold them into the thick finished batter rather than adding them while the wet mixture is still loose.
- Loaf breaks while unmolding: Give it the full 15-minute rest in the pan so the crumb can firm up before you run a knife around the edges.
The same moisture balance matters in other produce-based cocoa loaves, including this chocolate zucchini bread. For banana bread, the key is measuring the mash rather than relying only on the number of bananas.
Using Fresh vs. Thawed Frozen Bananas
Fresh very ripe bananas are ideal, but thawed frozen bananas work well when handled carefully. Thaw them completely in a bowl, then pour off excess separated liquid before mashing.
Measure the mashed bananas after draining so you have exactly 1 1/2 cups. Frozen bananas can release much more liquid than fresh fruit, and adding all of it can leave the batter too loose for a clean, tender crumb.
How to Prevent Sunken Centers and Dry Crumb
A properly sized 9-by-5-inch pan gives the batter enough surface area to bake through without forcing the outer edges to overcook. Avoid opening the oven early, since a loaf that has not set can sink in the middle.
At about 40 minutes, check the top through the oven door. If it is deeply browned while the center still needs time, loosely tent with foil. Then cool the baked loaf in the pan for 15 minutes before moving it to the rack, which protects its warm, delicate structure.
Storage, Freezing, and Reheating Guide
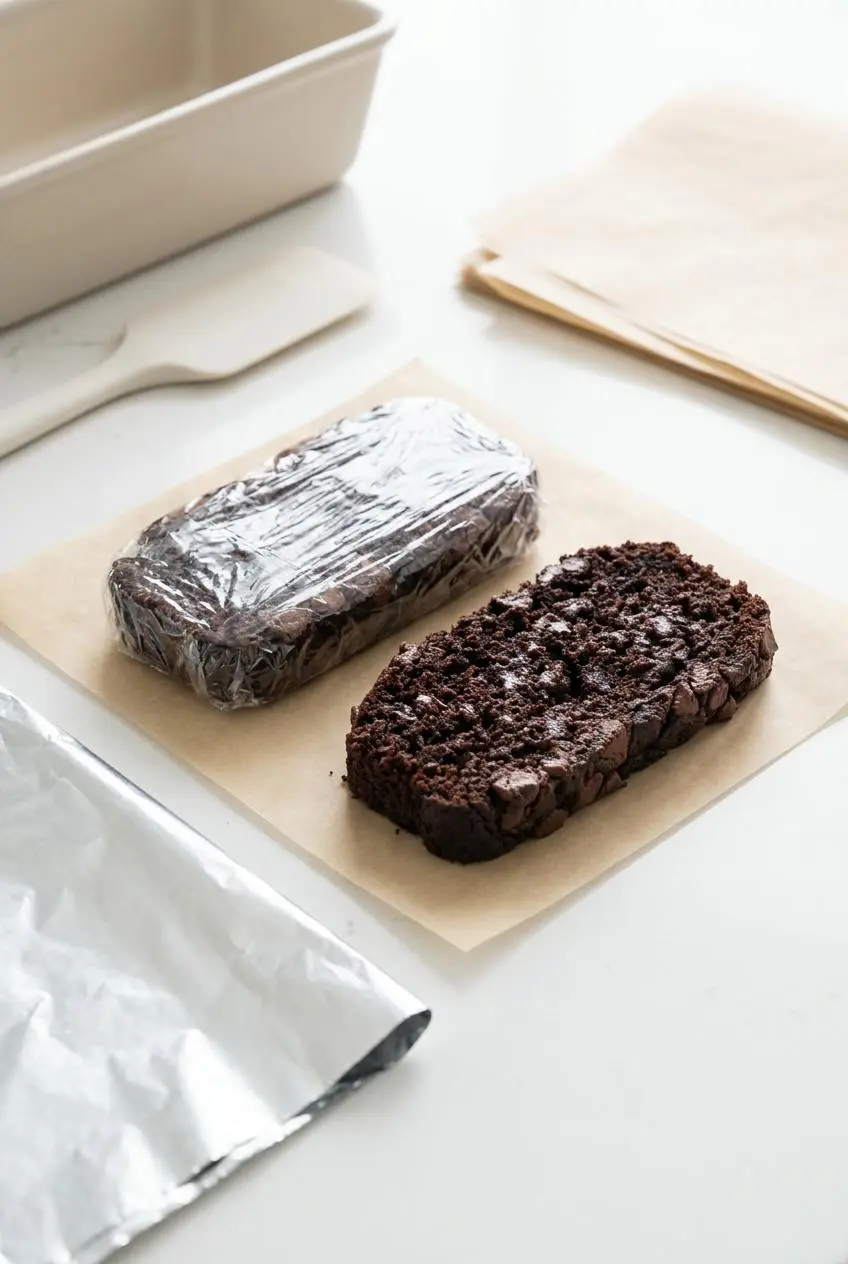
Let the loaf cool completely before wrapping so trapped steam does not soften the crust. Wrap it tightly in plastic wrap and keep it on the counter for up to 4 days.
For longer storage, wrap a completely cooled whole loaf in plastic wrap followed by aluminum foil and freeze for up to 1 month. Individual slices can be wrapped separately before freezing when you want a single serving without thawing the full loaf.
Defrost before slicing. To bring back the soft crumb and melted chocolate pockets, warm a slice gently in an oven or toaster oven until heated through, watching closely so the edges do not dry out.
Delicious Variations and Serving Ideas
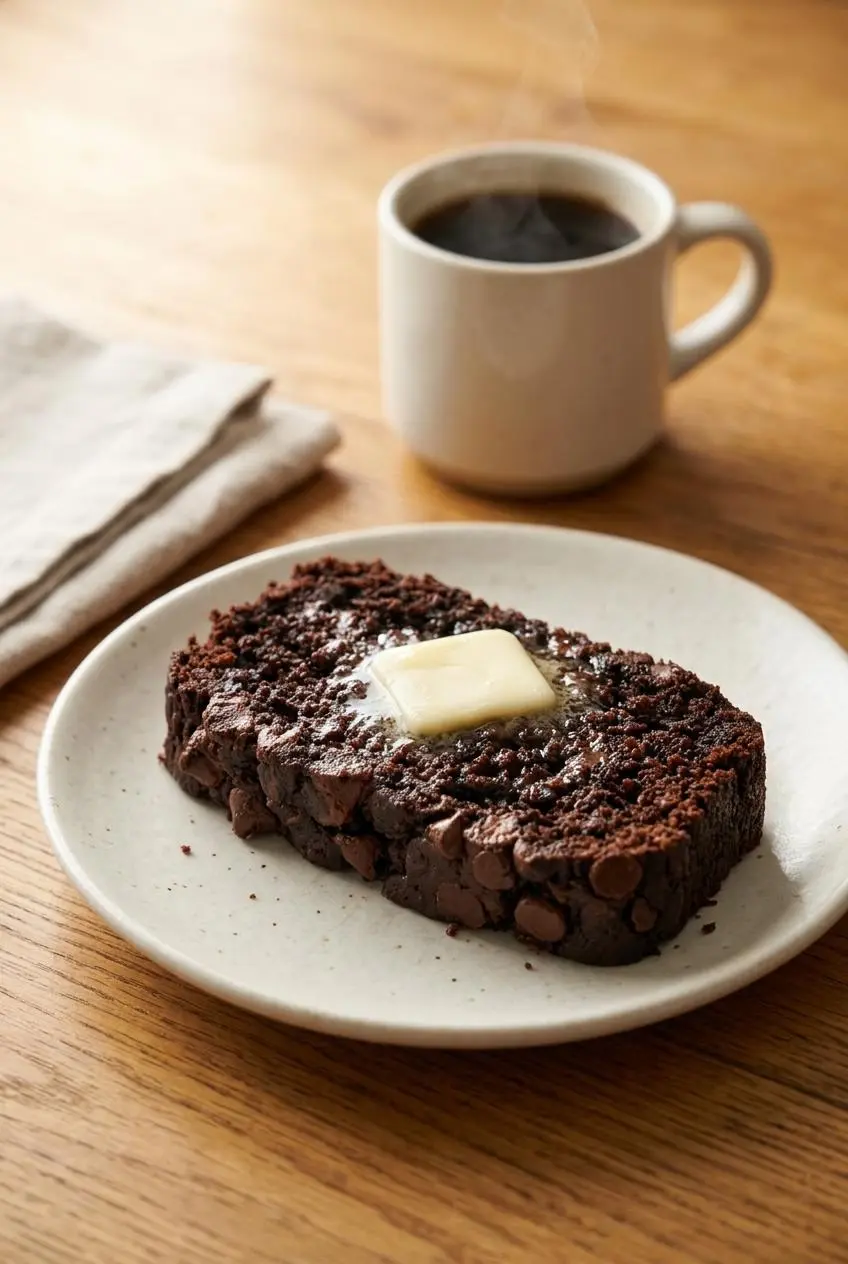
Keep the main loaf exactly as written, then use these optional ideas when you want a different texture, flavor direction, or serving style.
- Toasted nuts: Fold in toasted chopped walnuts or pecans for a nutty crunch that contrasts with the soft chocolate crumb.
- Cinnamon: Add a small pinch for a warmer, bakery-style flavor that plays well with banana.
- Espresso: Bloom the cocoa with two tablespoons of hot coffee or espresso for a deeper chocolate impression. Let it cool before mixing it into the wet ingredients.
- Crunchy top: Sprinkle coarse sugar over the reserved chocolate chips before baking for a crackly surface.
Serve thick warm slices with salted butter or creamy peanut butter for breakfast. For dessert, add vanilla ice cream while the loaf is still slightly warm. If you prefer a golden banana loaf with chips and no cocoa, try chocolate chip banana bread.
Chocolate Banana Muffins Adaptation
Turn the batter into portable muffins by lining a standard muffin tin and filling each cup about three-quarters full. Bake at 350°F for 18 to 22 minutes, checking the center of a muffin with a toothpick for moist crumbs rather than wet batter.
The smaller portions bake faster than a loaf, so begin checking at the earlier end of the range. Let them cool until warm before removing them from the pan to keep the tender centers intact.
Nut Additions and Crunchy Toppings
Toasted walnuts and pecans are especially good here because their roasted flavor stands up to the cocoa. Chop them into bite-size pieces so each slice stays easy to cut and eat.
For a bakery-style finish, reserve the chocolate chips for the top as written and add coarse sugar just before baking. The sugar brings a light crunch without changing the fudgy interior.
Dietary Adjustments and Lower-Sugar Options
Melted coconut oil can replace the vegetable oil already listed in the ingredients, adding a faint coconut aroma. Sugar-free chocolate chips are another optional swap, though their sweetness and melting behavior can vary by brand.
You can reduce the brown sugar slightly if your bananas are very ripe and sweet, but expect a less moist, less caramel-like crumb. For a loaf made specifically without wheat flour, use a dedicated gluten-free banana bread formula rather than swapping flour casually in this batter.
Conclusion
When bananas turn deeply brown, they are ready for this dark, fudgy loaf. Their moisture and sweetness balance the cocoa beautifully without needing extra fuss.
Give the bread its 15-minute rest before slicing so the crumb stays neat and tender. Enjoy a warm piece with butter, peanut butter, or a cup of coffee.
Frequently Asked Questions
What Cocoa Powder Works Best for Chocolate Banana Bread?
Dutch-process cocoa gives the loaf its darkest color and smoothest chocolate flavor. Natural unsweetened cocoa also works with the baking soda, but the crumb may be lighter and the flavor slightly more tangy.
How Can I Tell When Chocolate Banana Bread Is Fully Baked?
Insert a toothpick into the center crumb, avoiding obvious chocolate chips. It should come out clean or with moist crumbs. Ignore thin melted chocolate streaks. Look for wet, thick batter, which means the center needs more baking time.
Can You Make Chocolate Banana Bread With Frozen Bananas?
Yes. Thaw the bananas completely, pour off any standing liquid, then mash them. Measure the drained mash to 1 1/2 cups before mixing so excess moisture does not make the loaf gummy.
How Long Does Homemade Chocolate Banana Bread Stay Fresh?
Wrap the cooled loaf tightly in plastic wrap and keep it on the counter for up to 4 days. For longer storage, wrap it in plastic wrap and aluminum foil, then freeze for up to 1 month.
Why Did My Chocolate Banana Bread Sink in the Center?
A sunken middle usually points to excess banana liquid, expired baking soda, underbaking, or opening the oven too early. Drain thawed bananas, measure the mash, check for moist crumbs in the center, and let the loaf cool in the pan before unmolding.
Chocolate Banana Bread

Equipment
- 9 x 5 Loaf Pan
- Wire cooling rack
Ingredients
- 1 cup all-purpose flour
- 1/2 cup Dutch process cocoa
- 1 teaspoon baking soda
- 1/2 teaspoon sea salt
- 3 large brown bananas (1 1/2 cups mashed)
- 1/4 cup unsalted butter, (melted and slightly cooled)
- 1/4 cup canola (vegetable oil, or melted coconut oil)
- 3/4 cup packed light brown sugar
- 1 large egg, (at room temperature)
- 1 teaspoon pure vanilla extract
- 1 cup semisweet chocolate chips, (divided)
Instructions
- Set the oven to 350°F and coat a 9-by-5-inch loaf pan with nonstick cooking spray. Prepare the pan before mixing so the batter can go straight into the oven once it is combined.
- Whisk the flour, Dutch-process cocoa, baking soda, and sea salt in a medium bowl. Break up any cocoa lumps so the finished crumb looks evenly dark and smooth.
- Mash the bananas in a large bowl, then stir in the melted butter and oil before adding the brown sugar, egg, and vanilla extract. Keep stirring until the wet mixture looks glossy and falls from the spoon in a thick ribbon.
- Add the dry mixture to the banana mixture and fold just until no dry streaks remain, then fold in 3/4 cup of the chocolate chips. The batter should look thick and scoopable, not thin or heavily beaten.
- Scrape the batter into the prepared pan, scatter the remaining 1/4 cup chocolate chips over the surface, and bake for 50 to 65 minutes. Start checking at 50 minutes, when the top should be set and the chocolate aroma should be especially rich.
- Let the loaf rest in the pan on a wire rack for 15 minutes, then loosen the edges with a butter knife and lift it out carefully. You may feel slight resistance around the pan edges, which is normal before the loaf releases.
- Cool the loaf on the wire rack until slightly warm before slicing, then wrap any remaining bread in plastic wrap. For freezing, cool completely, wrap in plastic wrap and aluminum foil, and defrost before slicing.