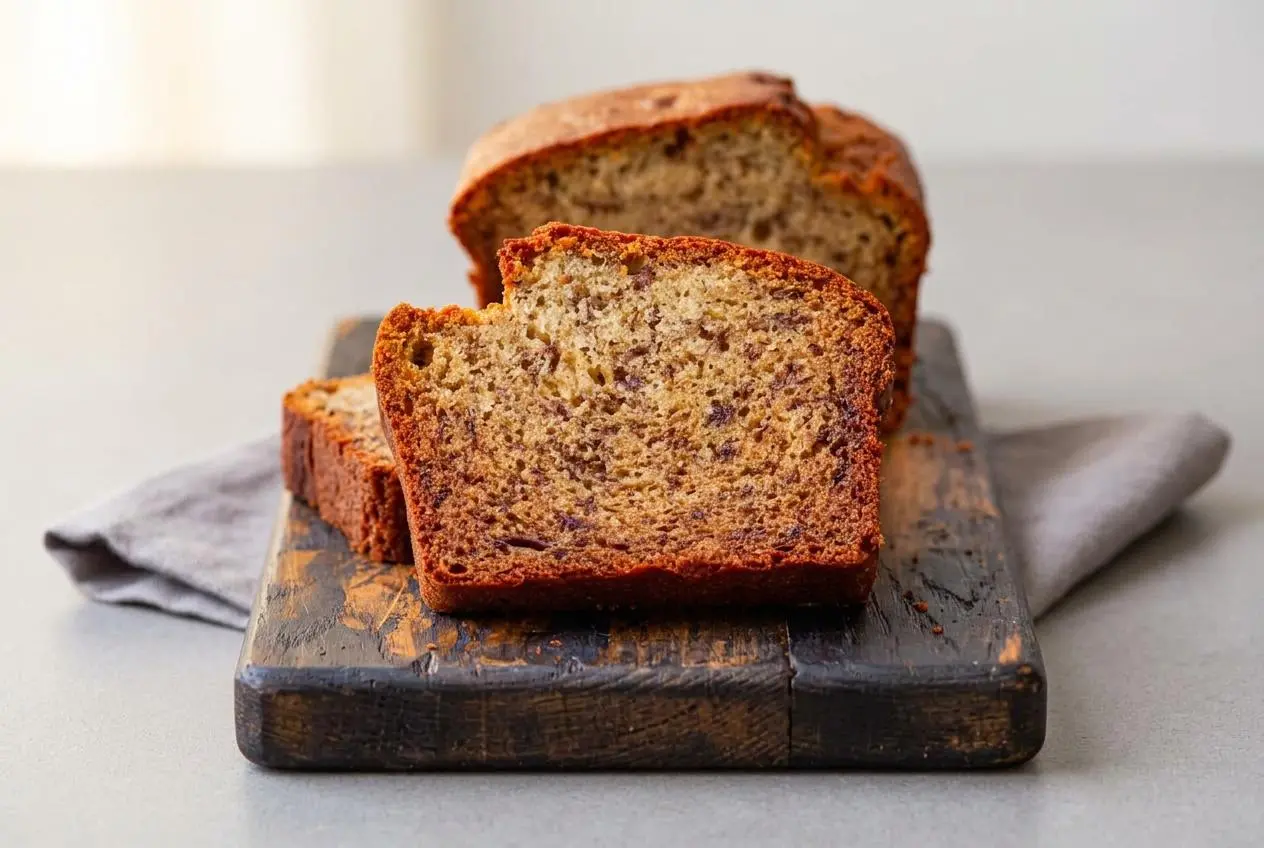
To make the best gluten free banana bread, mash ripe bananas, stir in melted butter, sugar, eggs, and vanilla, then gently mix in a 1-to-1 gluten free flour blend, baking soda, and salt. Bake at 350°F (177°C) for 50 to 60 minutes until a toothpick comes out clean.
Baking a loaf of classic quick bread should fill your kitchen with the rich, comforting scent of caramelized fruit and sweet vanilla. This reliable recipe for gluten free banana bread delivers a moist, tender crumb with a bakery-style golden dome that never sinks or turns gummy.
Whether you follow a dedicated gluten-free lifestyle or simply want to use up speckled fruit sitting on your counter, this method guarantees consistent, sliceable results every single time. The secret lies in balancing the natural moisture of the fruit with the right starch structure for a delicate crumb.
Set your eggs on the counter thirty minutes ahead of time so they incorporate smoothly without solidifying the melted butter during mixing.
Essential Ingredients for Gluten Free Banana Bread
Every ingredient in this recipe provides a specific structural or flavorful purpose, balancing moisture, fat, leavening, and starch hydration to create a stable crumb that holds its shape cleanly.
- 2-3 very ripe bananas (mashed)
- 1 teaspoon baking soda
- 1/3 cup unsalted butter (melted)
- 3/4 cup granulated sugar
- Pinch salt
- 2 large eggs (beaten)
- 1 teaspoon pure vanilla extract
- 1 1/2 cups gluten-free all purpose flour with xanthan gum
- 1/4 teaspoon xanthan gum (leave out if your flour already has it in it)
Mashed bananas provide the primary moisture base and natural aromatic sweetness, softening the interior while lending rich flavor. Baking soda reacts with the mild natural acidity in the fruit to create gentle lift, yielding an airy crumb. Melted butter adds richness and keeps the loaf tender for days, while granulated sugar aids in moisture retention and promotes golden browning on the exterior crust.
Salt sharpens the fruit notes and tempers the sweetness, while pure vanilla extract provides an inviting bakery aroma. The beaten eggs act as an essential binder and emulsifier, giving the batter elasticity that mimics traditional wheat gluten. Xanthan gum works alongside standard gluten free bread flour blends to trap expanding gases during baking, preventing the loaf from collapsing into a dense layer.
In my own baking, I always ensure the beaten eggs are completely at room temperature so they blend seamlessly into the warm melted butter without seizing the fat.
Flour and Binder Selection
Choosing the right flour blend is the most important factor in achieving a tender, bakery-quality crumb. Commercial 1-to-1 measure-for-measure gluten-free flour blends made with white rice flour, brown rice flour, potato starch, and tapioca flour work best. These blends mimic the starch-to-protein ratio of standard all-purpose wheat flour without requiring custom blending at home.
Check the ingredient label of your flour blend before starting. If your store-bought blend already includes xanthan gum, omit the additional quarter teaspoon listed in the recipe to avoid an overly elastic or rubbery crumb. If your blend is gum-free, adding that small amount of xanthan gum is vital to hold the starches together.
Always measure your flour blend using the spoon and level method rather than scooping directly from the bag with a measuring cup. Scooping compresses the fine starches into the cup, adding up to twenty percent extra flour by weight. This unintended excess creates a heavy, dry batter that fails to rise properly in the oven.
Banana Ripeness and Measuring Tips
The ripeness of your fruit directly dictates the natural sweetness and moisture level of the finished loaf. Choose bananas with skins that display heavy brown speckling or deep yellow surfaces with dark patches. As bananas ripen, their complex starches convert into simple fructose and sucrose, which dissolve easily into the batter and keep the crumb exceptionally soft.
Because fruit sizes vary significantly at the grocery store, measuring by volume provides the most dependable results. Two to three medium bananas should yield approximately one level cup of smooth mashed fruit puree. If you have excess puree, set it aside rather than adding it to the bowl, as surplus liquid can overwhelm the flour blend and cause the center of the loaf to remain wet.
Step-by-Step Instructions with Visual Cues
Follow these straightforward steps to prepare and bake your loaf, paying close attention to the sensory milestones at each stage of the process.
- Set your oven to 350°F (177°C) and grease a 4 x 8-inch loaf pan thoroughly with nonstick cooking spray.
Ensure the oven rack sits in the exact center position to encourage even heat distribution around the pan. - Place the peeled ripe bananas into a spacious mixing bowl and crush them thoroughly with a fork or potato masher.
Look for a glossy, speckled puree that retains only tiny, soft pieces of fruit throughout. - Scatter the baking soda directly over the mashed fruit and stir gently to combine.
Watch for a slight foaming action across the surface as the leavening reacts with the natural fruit acids. - Pour the melted unsalted butter into the bowl and stir until fully integrated.
The mixture will turn glossy, smooth, and golden with an even emulsion. - Add the granulated sugar, salt, beaten eggs, and pure vanilla extract, whisking until uniform.
Stir until the sugar begins to dissolve and the liquid takes on a smooth, pale amber sheen. - Fold in the gluten-free all-purpose flour and additional xanthan gum if needed, stirring just until no dry streaks remain.
The final batter should look thick, smooth, and ribbon-like without overworking the starch base. - Transfer the prepared batter into the greased loaf pan, smoothing the top surface gently with a silicone spatula.
Spread the batter evenly into the corners so the loaf rises with a balanced, attractive center crown. - Bake on the center oven rack for 50 to 60 minutes until golden brown and set.
A wooden toothpick inserted into the thickest part of the center dome should emerge clean or with a few dry crumbs. - Transfer the pan to a wire cooling rack for ten minutes, then turn the loaf out onto the rack to cool completely before slicing.
Allowing the loaf to reach room temperature lets the internal starches stabilize for clean, intact slices.
During the mixing stage, combining the baking soda directly with the mashed fruit jumpstarts the leavening process. When the dry flour meets the wet mixture, use a gentle folding motion with a spatula. Gluten-free starches do not develop tough gluten strands, but excessive vigorous beating can introduce unwanted air pockets that collapse during the bake.
As the bread bakes, a fragrant wave of sweet fruit and warm vanilla will fill your kitchen during the final fifteen minutes. Look for a pronounced center split down the golden crown. If your oven tends to run hot on top, check the loaf around the forty-minute mark to ensure the crust develops an even amber hue rather than turning overly dark.
Troubleshooting Common Gluten Free Baking Mistakes
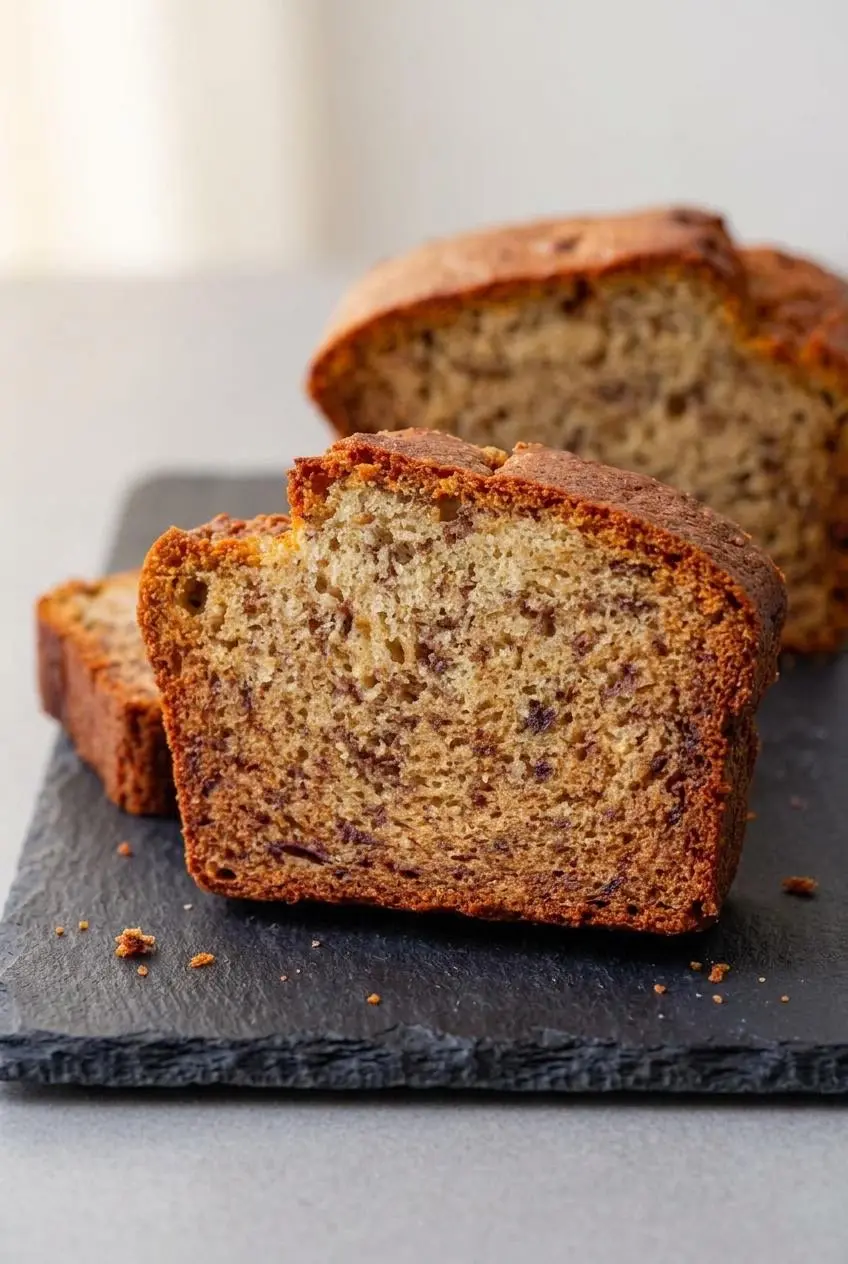
Gluten-free baking relies on precise moisture balance and starch hydration. If your previous loaves have turned out gummy, dense, or unevenly browned, these practical solutions will solve the underlying issues.
- Gummy or wet center: This common problem happens when excess fruit puree adds too much moisture, when the oven runs cooler than the set temperature, or when the loaf is sliced while still warm. Measure your mashed bananas to ensure you do not exceed one cup, verify your oven temperature with an internal hanging thermometer, and always let the loaf cool completely on a wire rack so the starches fully set.
- Overly dark or burnt top crust: Baking pans with dark nonstick coatings absorb heat quickly, browning the top before the interior cooks through. If the top crust reaches a deep golden shade before forty-five minutes of baking, loosely tent the top of the pan with a sheet of aluminum foil for the remainder of the cooking time.
- Dense, crumbly, or heavy texture: A crumbly crumb usually results from scooping flour directly with a measuring cup, which packs too much starch into the batter, or leaving out necessary xanthan gum. Always fluff your flour with a fork, spoon it gently into your measuring cup, sweep off the excess with a flat butter knife, and ensure your blend contains a binder.
- Sinking center dome: Opening the oven door repeatedly during the first thirty minutes releases trapped heat and disrupts the leavening lift. Keep the oven door closed until the final ten minutes of baking, and confirm your baking soda is fresh by testing a pinch in a spoonful of vinegar to ensure active bubbling.
Delicious Variations and Dietary Adaptations
The base recipe provides an adaptable foundation for a wide range of flavor twists, rich add-ins, and alternative baking formats to suit different dietary needs.
- Spiced browned butter twist: Melt the unsalted butter in a small saucepan over medium-low heat until golden brown specks appear and an aromatic nutty fragrance develops. Let it cool slightly, then stir in a pinch of ground cinnamon or ground cardamom before adding to the batter for warm bakery depth.
- Chocolate chip indulgence: Gently fold one-half cup of allergy-friendly semi-sweet chocolate chips into the batter right before filling the loaf pan. If you enjoy a sweeter dessert style loaf, you can also explore making a dedicated chocolate chip banana bread for special morning treats.
- Toasted nut crunch: Fold in one-half cup of chopped toasted walnuts or pecans during the final mixing step. The toasted nuts provide a buttery crunch and rich earthy contrast to the sweet, tender crumb.
Dairy-Free and Nut-Free Options
Adapting this recipe for a dairy-free lifestyle is simple and maintains the original moisture profile. Replace the melted unsalted butter with an equal volume of melted refined coconut oil or your favorite dairy-free plant butter baking stick. Refined coconut oil provides clean fat without imparting any coconut flavor to the bread.
For individuals with tree nut allergies, standard 1-to-1 gluten-free flour blends composed of rice flours and tapioca starches are naturally nut-free. Avoid flour blends that rely on almond meal or coconut flour as their primary base, as these alternative grains absorb significantly different levels of liquid and require distinct liquid-to-egg ratios.
Baking Banana Muffins and Mini Loaves
If you prefer individual grab-and-go portions or quicker baking times, this versatile batter transfers seamlessly into muffin tins or mini loaf pans.
To make standard muffins, line a twelve-cup muffin tin with paper liners and fill each cup roughly three-quarters full. Bake at 350°F (177°C) for 18 to 22 minutes until a toothpick inserted into the center of a muffin comes out clean. For mini loaf pans, divide the batter evenly among three small pans and bake for 30 to 35 minutes.
Storage and Reheating Guide
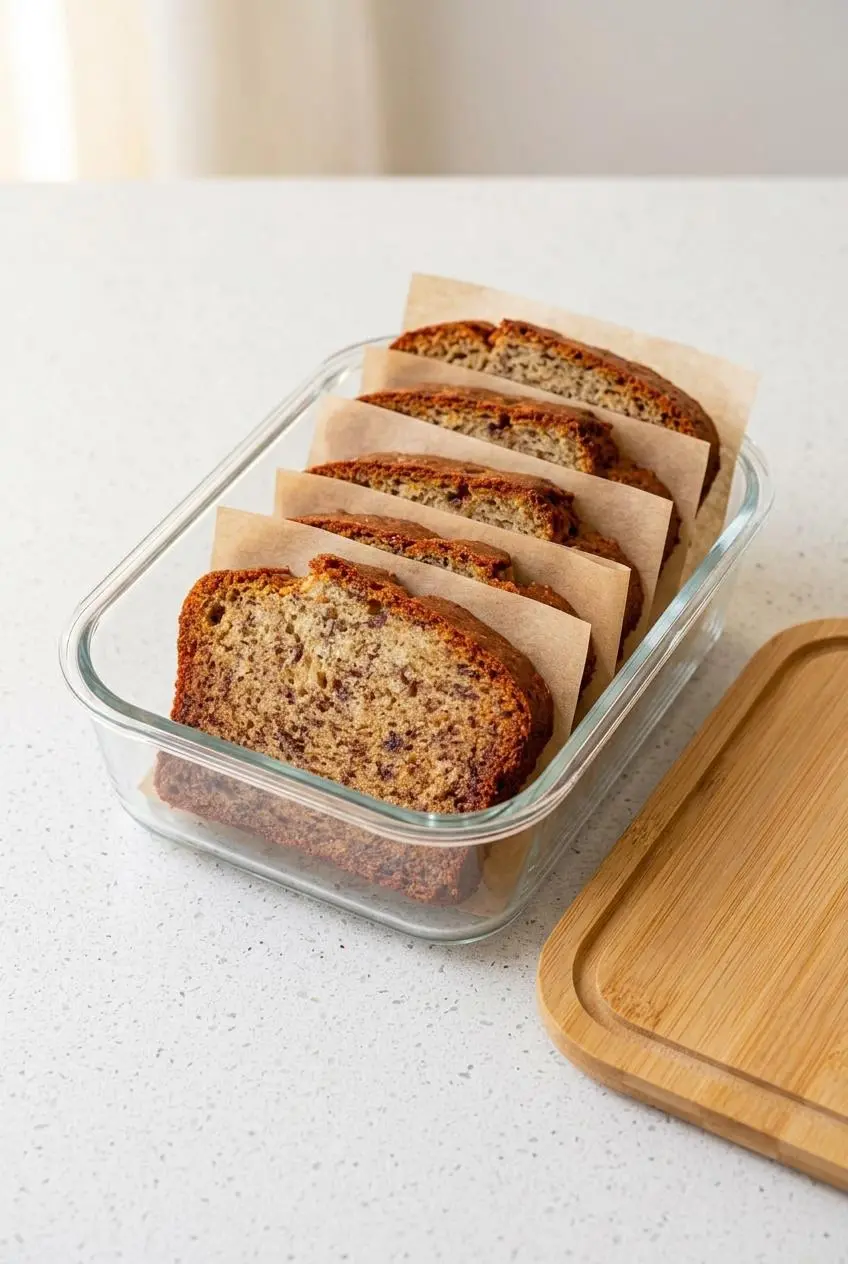
Proper storage prevents gluten-free baked goods from drying out or absorbing unwanted moisture from the surrounding environment.
Keep your completely cooled banana bread at room temperature in an airtight container lined with a single sheet of dry paper towel. The paper towel absorbs excess humidity that naturally escapes from the fruit over time, keeping the top crust from turning sticky. Stored this way, the loaf maintains peak tenderness and rich aroma.
To prepare individual portions for later convenience, cut the cooled loaf into clean slices using a sharp serrated bread knife. Wrap each slice securely in a layer of parchment paper and store them together in an airtight container or freezer-safe bag. When ready to enjoy, place a slice directly into a toaster on a low setting or warm it in a 350°F (177°C) oven for five minutes to restore a fresh-baked, buttery softness.
Serving Suggestions and Delicious Pairings
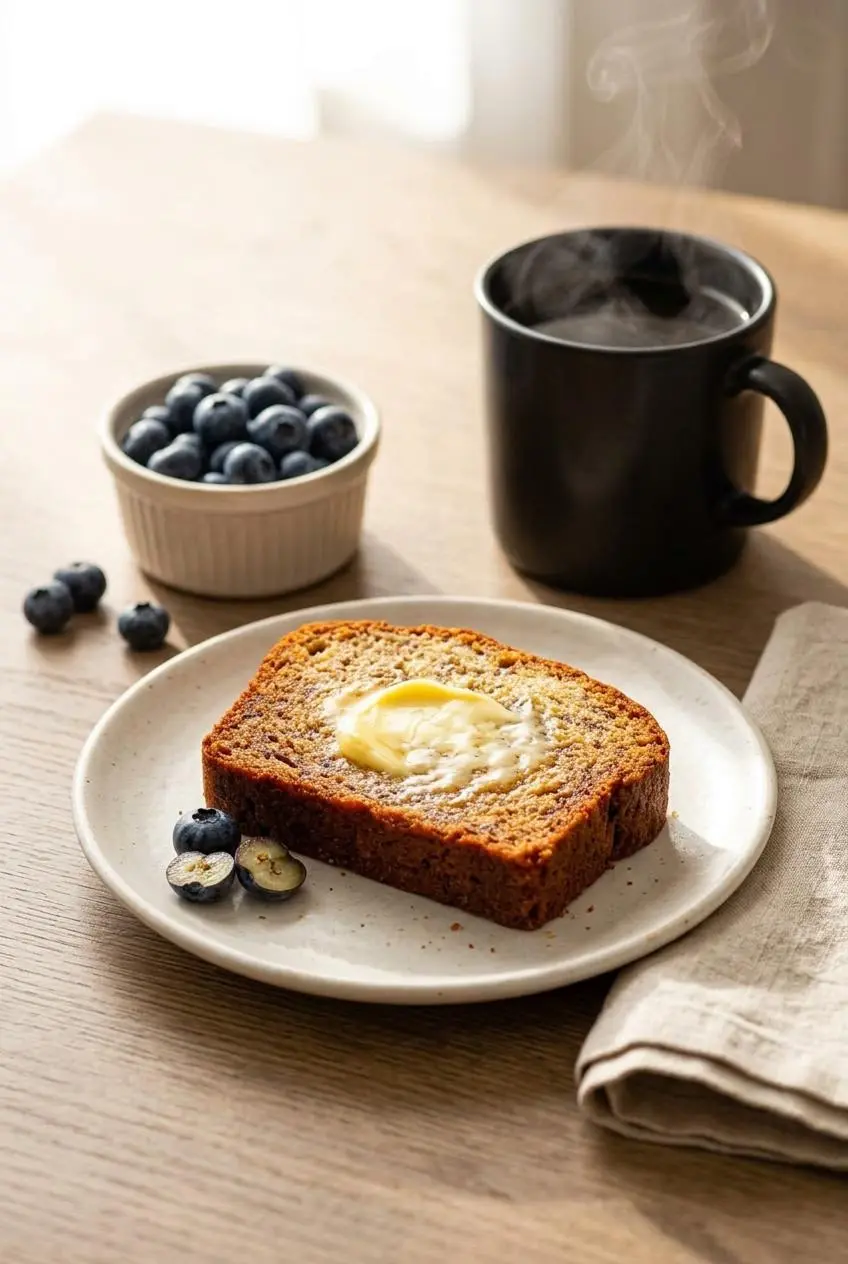
A thick slice of banana bread makes a satisfying addition to any morning routine or afternoon coffee break. Toasting a slice lightly creates a crisp outer edge while keeping the center warm and tender.
Spread a generous layer of salted dairy-free butter or creamy almond butter across a warm slice to balance the natural fruit sweetness. For a wholesome breakfast spread, pair your slice with a bowl of plain Greek yogurt, a handful of fresh blueberries, and a steaming cup of dark roast coffee or black tea.
If you enjoy creative handheld treats that capture the same sweet fruit flavor profile, you might also like preparing soft banana bread cookies for lunchboxes and afternoon snacks.
Conclusion
Mastering gluten free banana bread is simple when you combine properly measured ingredients, ripe speckled fruit, and dependable mixing cues. This reliable recipe yields a bakery-worthy loaf with a golden crust, moist interior, and balanced sweetness that rivals any traditional wheat version.
Remember that allowing your baked loaf to cool thoroughly on a wire rack is the single most important step for clean, effortless slicing. Once rested, slice into your golden loaf, add your favorite toppings, and enjoy the comforting flavors of homemade quick bread.
Frequently Asked Questions
What is the best gluten free flour blend for banana bread?
A commercially prepared 1-to-1 measure-for-measure gluten-free flour blend containing white rice flour, brown rice flour, potato starch, tapioca flour, and xanthan gum produces the most consistent, tender crumb. Look for reliable blends labeled as direct replacements for traditional wheat flour.
Why is my gluten free banana bread gummy or wet in the middle?
A gummy center is typically caused by three common factors: using more than one cup of mashed banana puree, an oven that runs cooler than the indicated temperature, or slicing into the loaf while it is still warm. Always measure your mashed fruit, verify oven heat, and allow the loaf to cool completely before cutting.
Can I make this banana bread dairy free?
Yes, you can easily make this recipe dairy-free by replacing the melted unsalted butter with an equal amount of melted refined coconut oil or vegan plant butter sticks. The crumb remains exceptionally soft and moist with no alteration in baking time.
How do I freeze and reheat gluten free banana bread?
Slice the fully cooled bread and separate individual pieces with parchment paper before sealing them in an airtight container or freezer bag. Reheat individual slices in a toaster or a 350°F (177°C) oven for roughly five minutes until warm and fragrant.
Gluten Free Banana Bread

Equipment
- 4 x 8 loaf pan
- Mixing Bowl
Ingredients
- 2-3 very ripe bananas (mashed)
- 1 teaspoon baking soda
- 1/3 cup unsalted butter (melted)
- 3/4 cup granulated sugar
- Pinch salt
- 2 large eggs (beaten)
- 1 teaspoon pure vanilla extract
- 1 1/2 cups gluten-free all purpose flour with xanthan gum
- 1/4 teaspoon xanthan gum (leave out if your flour already has it in it)
Instructions
- Set your oven to 350°F (177°C) and grease a 4 x 8-inch loaf pan thoroughly with nonstick cooking spray. Ensure the oven rack sits in the exact center position to encourage even heat distribution around the pan.
- Place the peeled ripe bananas into a spacious mixing bowl and crush them thoroughly with a fork or potato masher. Look for a glossy, speckled puree that retains only tiny, soft pieces of fruit throughout.
- Scatter the baking soda directly over the mashed fruit and stir gently to combine. Watch for a slight foaming action across the surface as the leavening reacts with the natural fruit acids.
- Pour the melted unsalted butter into the bowl and stir until fully integrated. The mixture will turn glossy, smooth, and golden with an even emulsion.
- Add the granulated sugar, salt, beaten eggs, and pure vanilla extract, whisking until uniform. Stir until the sugar begins to dissolve and the liquid takes on a smooth, pale amber sheen.
- Fold in the gluten-free all-purpose flour and additional xanthan gum if needed, stirring just until no dry streaks remain. The final batter should look thick, smooth, and ribbon-like without overworking the starch base.
- Transfer the prepared batter into the greased loaf pan, smoothing the top surface gently with a silicone spatula. Spread the batter evenly into the corners so the loaf rises with a balanced, attractive center crown.
- Bake on the center oven rack for 50 to 60 minutes until golden brown and set. A wooden toothpick inserted into the thickest part of the center dome should emerge clean or with a few dry crumbs.
- Transfer the pan to a wire cooling rack for ten minutes, then turn the loaf out onto the rack to cool completely before slicing. Allowing the loaf to reach room temperature lets the internal starches stabilize for clean, intact slices.