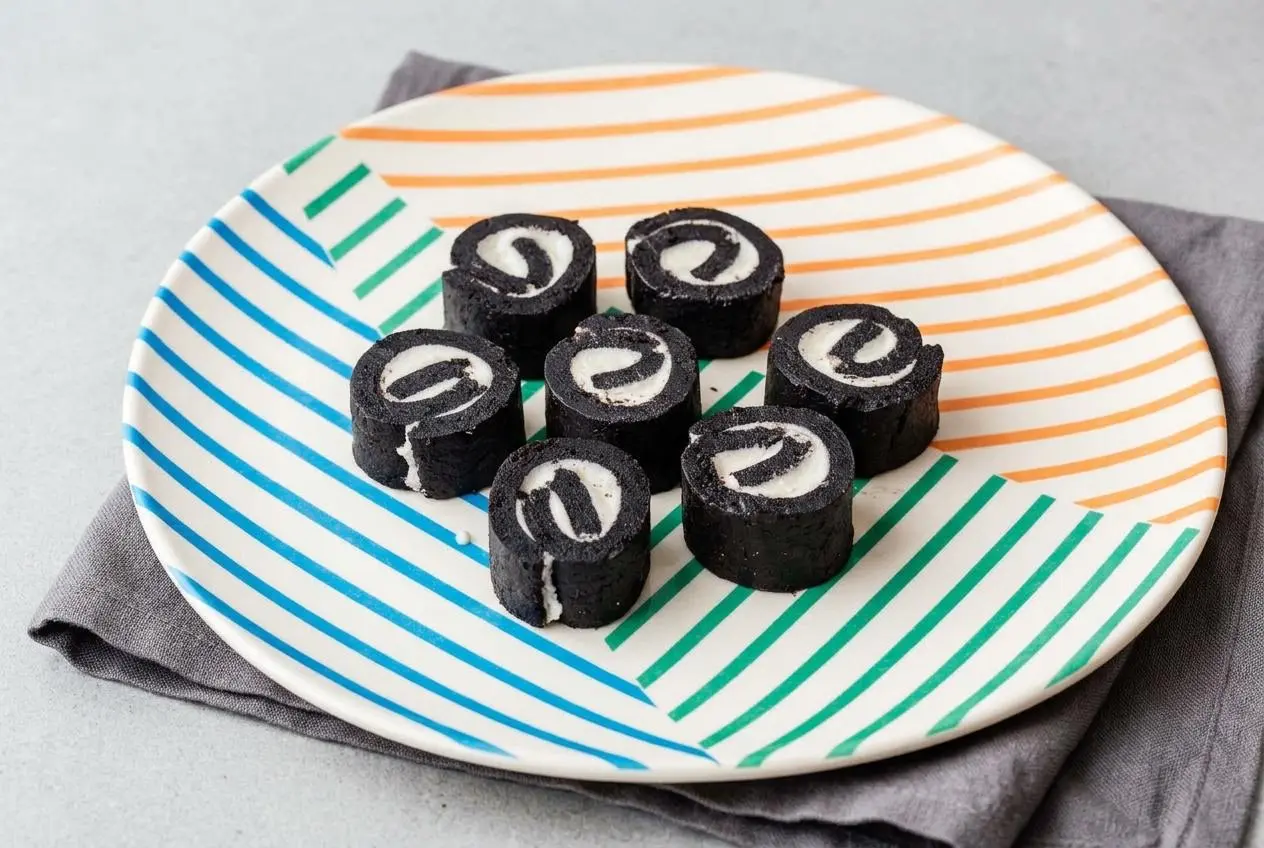
Oreo sushi is a two-ingredient, no-bake dessert made with 24 Oreo cookies and milk. Crush the separated wafers into dough, roll it out, spread with softened cookie filling, and roll into a log before slicing into fudgy, creamy chocolate spirals.
This oreo sushi recipe turns sandwich cookies and a splash of milk into sweet pinwheels, with no rice or sushi mat involved. The dark cookie layer becomes soft and dense, while the pale filling gives each slice its familiar cookies-and-cream flavor.
The trick is controlling the moisture, rather than pouring all the milk into the crumbs. Plastic wrap helps you roll the dough without wrestling it off the counter, and optional chilling makes a soft log easier to cut. Keep that cream layer neat.
Set out separate bowls for the wafers and filling before opening the cookies so neither mixture gets lost in the shuffle.
Ingredients and Why Each One Matters
The chocolate wafers provide flavor and structure, the cookie filling creates a sweet, creamy spiral, and milk supplies the moisture that makes both layers workable. Keeping the wafer dough and filling separate preserves their contrasting colors and textures.
- 24 oreos separated (one package)
- 1/4 cup milk
Use standard Oreos for the intended wafer-to-filling balance. Double Stuf cookies add more filling without adding more chocolate structure, which can make the center thicker and more likely to squeeze out. Count the cookies rather than relying on package size, since packages vary.
Measure 3 tablespoons of milk for the wafer crumbs and 2 teaspoons for the filling. The larger portion moistens the dry crumbs into dough; the smaller portion loosens the stiff cream without making it runny. These amounts leave a little milk from the measured 1/4 cup, so don’t automatically pour the remainder into either mixture.
The optional swaps below change the texture:
- Milk: hydrates the crumbs and loosens the filling while keeping the classic cookie flavor prominent.
- Heavy cream: adds richness and a fuller, fudgier mouthfeel; the finished texture still depends on how much moisture the crumbs absorb.
- Cream cheese: adds tang and body to the filling, but needs softening before it will spread without dragging the dough.
- Unsweetened plant-based milk: replaces dairy milk; check the cookie label as well if you need a vegan or dairy-free dessert.
I’d scrape the wafers clean before crushing them so stray filling doesn’t leave pale streaks in the chocolate dough.
Step-by-Step Instructions: How to Make Oreo Sushi
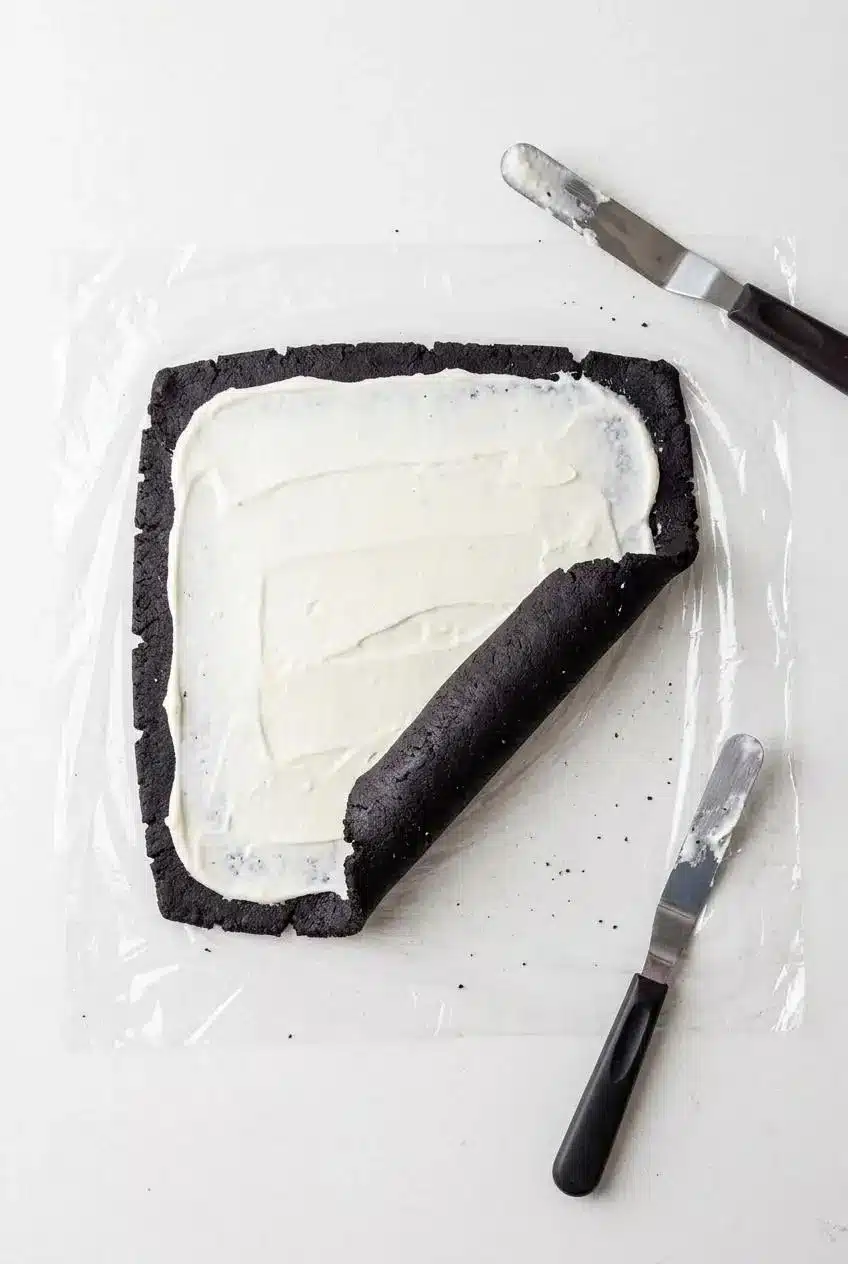
A fine crumb texture and an even layer matter more than rolling quickly. This recipe serves four and takes about 20 minutes to assemble, with extra time if you choose to chill the roll.
- Process the separated chocolate wafers into fine crumbs, then pulse in 3 tablespoons of milk until the mixture gathers into a dough ball.
The crumbs should bind together rather than remain loose, with no large cookie shards poking through. - Place the dough on plastic wrap, gather it with your hands, flatten it into a square, and use a rolling pin to make an even 1/4-inch layer before trimming the edges straight.
Brief hand warmth helps the dough become pliable, and a consistent thickness reduces weak spots that can crack during rolling. - Stir the reserved cookie filling with 2 teaspoons of milk in a bowl until no stiff lumps remain.
A soft frosting texture is the goal, loose enough to spread but thick enough to stay in place. - Cover the chocolate square with an even layer of the prepared filling.
The cream should glide across the surface without pulling up crumbs or tearing the dough underneath. - Lift the plastic wrap to curl one edge inward, continue rolling into a snug log while peeling the wrap away, and optionally wrap and refrigerate it to firm up.
A gently tightened roll holds the layers together without forcing the filling out at the seam. - Remove the plastic wrap and cut the log into rounds with a sharp knife, using a gentle sawing motion and wiping the blade between cuts.
Clean cuts preserve the pale spiral, while downward pressure can flatten the soft chocolate layer.
When spreading, use light strokes with the back of a spoon or an offset spatula. If the filling drags, smooth it further in the bowl rather than pressing harder against the cookie layer.
With a true square, either rolling direction gives the same result. If your dough ends up rectangular, starting along the long edge creates a longer, narrower log and more slices of equal thickness. Starting along the short edge creates a shorter, thicker log with more turns in each spiral.
Expert Tips and Troubleshooting Common Mistakes
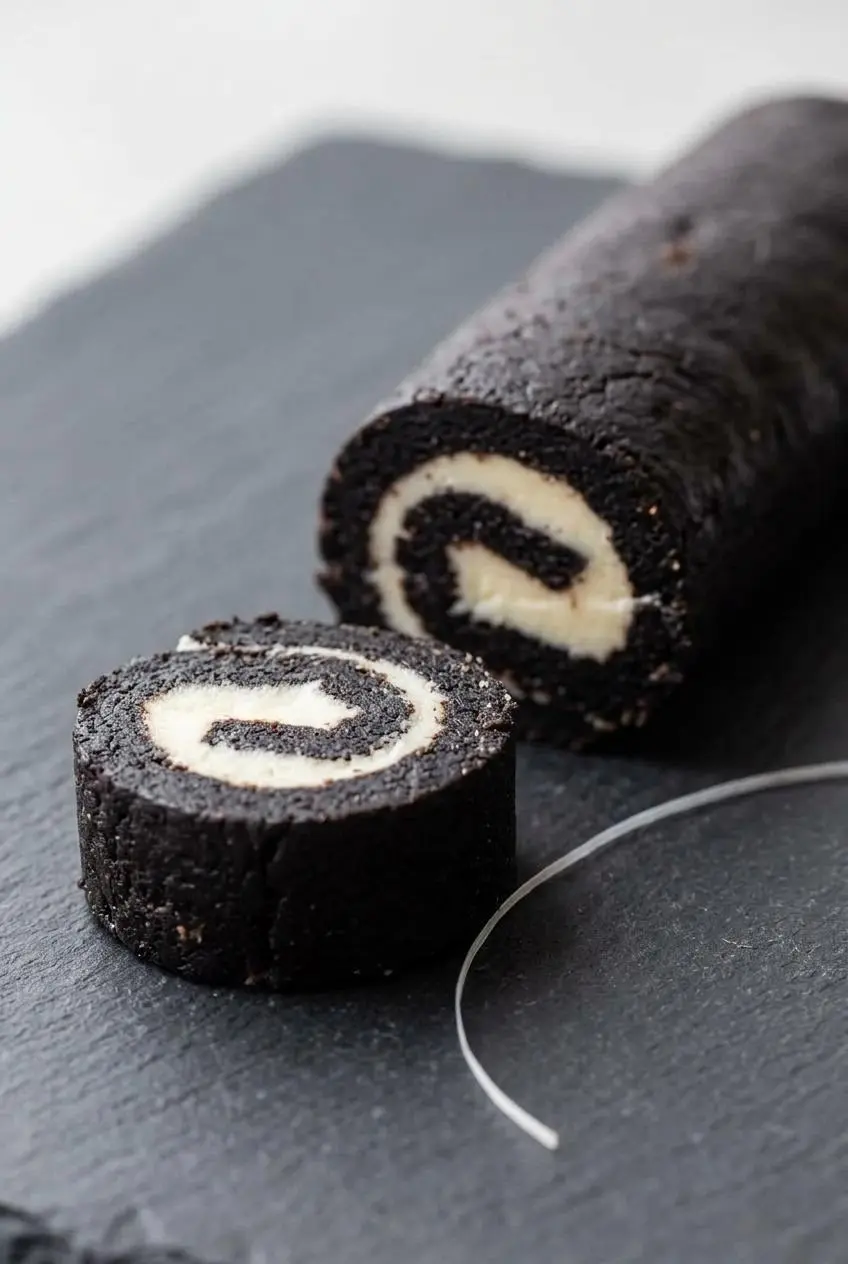
Soft cookie dough needs support, not force. Keep the crumbs fine, the liquid measured, and the cutting pressure light to avoid the most common rolling problems.
How to Keep the Roll Perfectly Round
For an optional chilling cradle, slit a clean cardboard paper towel tube lengthwise and nestle the fully plastic-wrapped log inside. Keep the cardboard outside the wrap. The curved support helps reduce the flat bottom that can develop when a soft log rests directly on a refrigerator shelf.
You can also cut with unflavored dental floss. Slide a strand beneath the unwrapped log, bring the ends over the top, cross them, and pull steadily in opposite directions. This applies pressure around the roll instead of pressing down from above. Avoid flavored floss, which can transfer an unwanted taste.
Making Oreo Sushi Without a Food Processor or Rolling Pin
You can make the dough by hand, but coarse crumbs need extra attention. A sturdy zip-top bag contains the cookies better than thin plastic that may split under pressure.
- Seal the separated wafers in the bag after pressing out excess air, then crush them on a stable counter with a rolling pin or sturdy, flat-bottomed bottle.
- Move the crumbs around and crush again until no jagged pieces remain; large fragments can tear the rolled layer.
- Transfer the crumbs to a bowl and work in the measured milk until they hold together.
- Use a clean, straight-sided bottle in place of a rolling pin, keeping the dough on plastic wrap for easier release.
Fixing Dough That Cracks or Squishes
- Crumbly dough: dry crumbs or uneven crushing can prevent binding. Gather and work the dough briefly with warm hands first; if it still breaks apart, use drops of the reserved milk rather than a splash.
- Sticky dough: adding all the milk to the wafers leaves too much moisture in that layer. Chill the dough until it feels manageable, and keep the filling’s milk portion separate when measuring.
- Squished slices: a warm, soft log or heavy knife pressure can flatten the roll. Chill until firmer, support its shape, and use gentle sawing strokes.
- Smeared cream: a dirty blade carries filling into the chocolate layer. Wipe it between cuts or try the floss method.
Fun Variations and Ingredient Swaps
Keep these changes optional and separate from the classic cookies-and-milk method. Different fillings and cookie flavors can alter moisture and thickness, so use the same dough and spreading cues rather than expecting every swap to behave identically.
Oreo Sushi with Cream Cheese
For a tangy center, work softened cream cheese into the reserved cookie filling instead of thinning it with milk. Add it gradually until the mixture spreads smoothly. The filling will taste less purely sweet and have more body, but cold cream cheese can tug at the chocolate layer.
If that flavor combination appeals to you, Oreo cheesecake bites offer another bite-sized cookies-and-cream dessert.
Rich Heavy Cream Version
Use heavy cream in place of milk for a richer variation, keeping the dough and filling portions separate. Its extra fat gives the rolls a fuller mouthfeel, but it doesn’t remove the need to check consistency. Stop and assess the mixture before adding any reserved liquid.
Vegan Milk and Flavored Cookie Options
Unsweetened plant-based milk avoids adding another layer of sweetness. For a vegan version, choose cookies and milk whose ingredient labels meet your needs; don’t assume every flavored sandwich cookie has the same formulation.
- Golden Oreos: create a vanilla-forward roll with less color contrast.
- Mint cookies: bring a cool mint flavor to the chocolate spiral.
- Birthday Cake cookies: add a sweeter, celebration-style filling.
- Peanut Butter cookies: give the center a nutty flavor; identify this variation clearly when sharing.
Serving Suggestions, Make-Ahead, and Storage
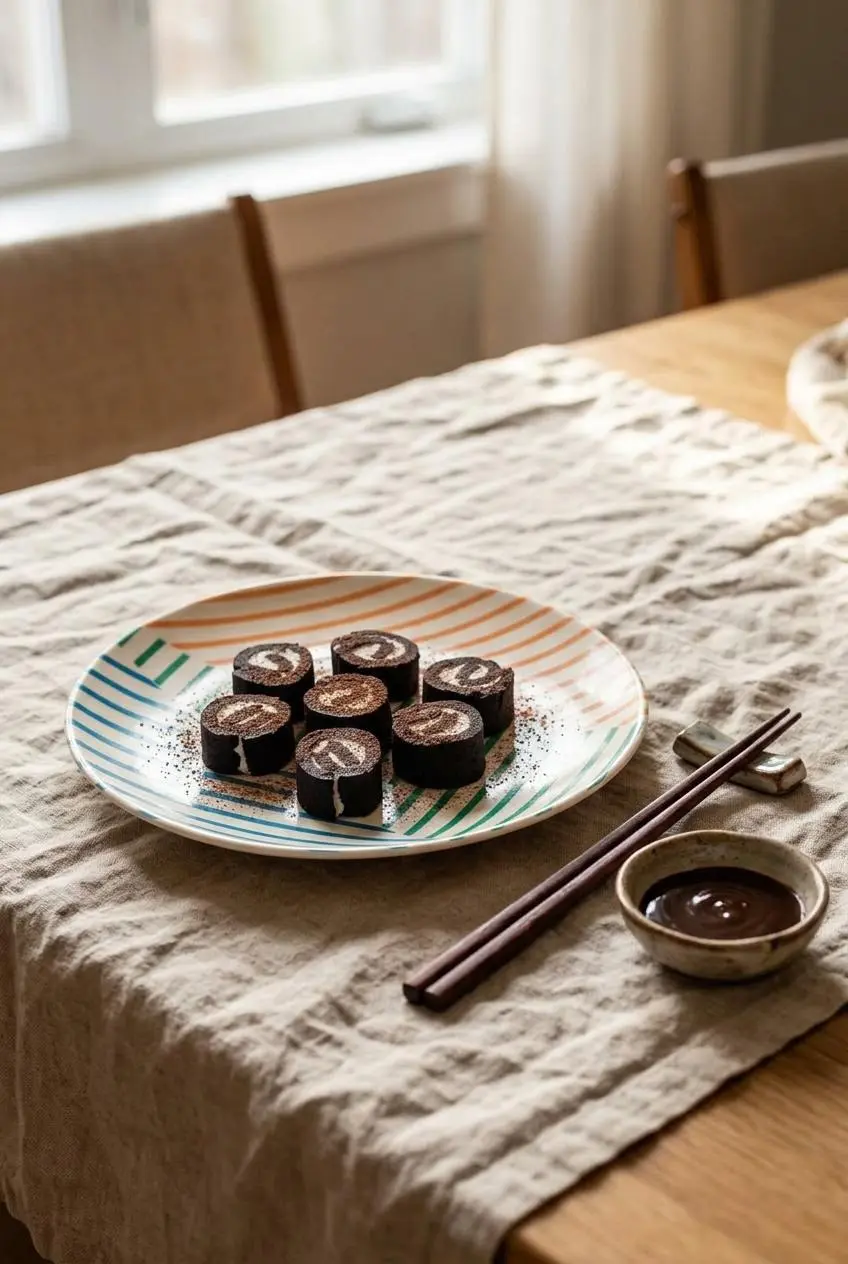
Arrange the rounds on a small serving board with chopsticks for a playful dessert presentation. Keep toppings light so the spirals remain easy to see.
- Offer chocolate fudge, caramel, or berry sauce in small dipping bowls.
- Dust lightly with cocoa powder for a chocolate finish or powdered sugar for contrast.
- Plate the rounds in a single layer to avoid pressing the soft filling against neighboring slices.
The trimmed chocolate edges can go into a creamy Oreo milkshake rather than being discarded.
To prepare the roll before serving, leave it wrapped and refrigerate until it feels firm enough to cut without flattening. There’s no required chilling time here: texture is the useful cue. Slice close to serving to limit exposed edges and preserve the neat spiral.
Keep finished rolls in a covered container in a refrigerator at or below 40°F, and limit room-temperature exposure for perishable foods to two hours. This recipe doesn’t have a verified refrigerator shelf life, so avoid treating a general dairy storage rule as a precise expiration date for these rolls.
Conclusion
Oreo sushi turns cookies and milk into soft chocolate pinwheels without heating the kitchen. Divide the milk carefully, crush the wafers finely, and spread the cream with a light hand.
For tidier party slices, give the wrapped log support while chilling and try floss if a knife keeps flattening it. Let the dough’s texture guide you, and keep those creamy spirals intact.
Frequently Asked Questions
How Long Do You Leave Oreo Sushi in the Fridge Before Slicing?
Chill the wrapped log until it feels firm enough to cut without flattening. No fixed chilling duration is required; if a test slice squishes, return the log to the refrigerator to firm further.
Can I Make Oreo Sushi Without a Food Processor?
Yes. Crush the separated wafers in a sturdy zip-top bag with a rolling pin or bottle. Remove coarse pieces before mixing in the measured milk by hand.
Why Is My Oreo Sushi Squished or Falling Apart?
Warm or overly wet dough squishes; chill it and reduce cutting pressure. Dry dough cracks; work it with warm hands, then add reserved milk drop by drop if needed.
How Do You Store Oreo Sushi and How Long Does It Last?
Keep it covered in the refrigerator, with the log wrapped or the slices in a closed container. A verified storage duration isn’t available for this recipe; prepare it close to serving rather than planning extended storage.
What Are the Ingredients of Oreo Sushi?
The classic version uses 24 Oreo cookies and 1/4 cup milk. Use 3 tablespoons of the milk for the wafers and 2 teaspoons for the filling, reserving the remainder.
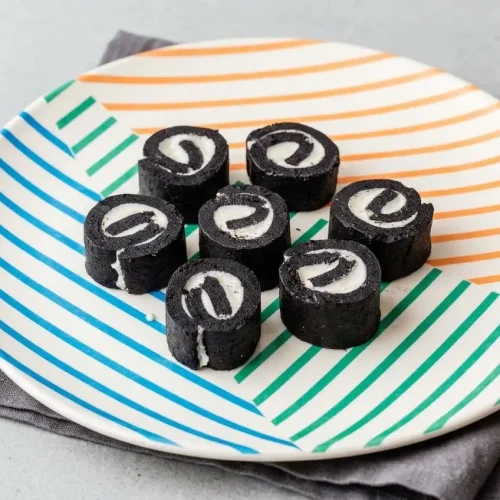
Oreo Sushi Recipe

Equipment
- Food processor
Ingredients
- 24 oreos separated (one package)
- 1/4 cup milk
Instructions
- Process the separated chocolate wafers into fine crumbs, then pulse in 3 tablespoons of milk until the mixture gathers into a dough ball. The crumbs should bind together rather than remain loose, with no large cookie shards poking through.
- Place the dough on plastic wrap, gather it with your hands, flatten it into a square, and use a rolling pin to make an even 1/4-inch layer before trimming the edges straight. Brief hand warmth helps the dough become pliable, and a consistent thickness reduces weak spots that can crack during rolling.
- Stir the reserved cookie filling with 2 teaspoons of milk in a bowl until no stiff lumps remain. A soft frosting texture is the goal, loose enough to spread but thick enough to stay in place.
- Cover the chocolate square with an even layer of the prepared filling. The cream should glide across the surface without pulling up crumbs or tearing the dough underneath.
- Lift the plastic wrap to curl one edge inward, continue rolling into a snug log while peeling the wrap away, and optionally wrap and refrigerate it to firm up. A gently tightened roll holds the layers together without forcing the filling out at the seam.
- Remove the plastic wrap and cut the log into rounds with a sharp knife, using a gentle sawing motion and wiping the blade between cuts. Clean cuts preserve the pale spiral, while downward pressure can flatten the soft chocolate layer.