This brazilian cheese bread recipe uses a blender and mini muffin pan to make pão de queijo with a crisp shell and chewy cheese center. Blend the batter, pulse in the cheese, and bake at 400°F for 15 to 20 minutes.
These little Brazilian cheese rolls get their distinctive bounce from tapioca flour rather than wheat flour. The batter pours into muffin cups, so there’s no kneading or shaping. Mozzarella adds stretch, while cheddar brings a more pronounced cheese flavor.
Plan on 5 minutes of preparation, the baking time, and a brief rest in the pan for a batch of 18 rolls. They’re especially appealing warm, when the shell is crisp and the center stays soft. The batter’s texture might surprise you.
Expect a thin, pourable batter, not a dough you can roll between your hands.
Ingredients You Need and Why Each One Matters
Tapioca flour supplies the elastic structure, milk adds moisture, and egg helps bind the batter. Oil brings richness, salt balances the flavor, and mozzarella and cheddar give the rolls their cheesy character.
- 1 cup Tapioca flour
- 1/2 cup Milk (room temperature)
- 1/4 cup Vegetable oil
- 1 Large egg (room temperature)
- 1/2 tsp Salt
- 1/4 cup Mozzarella cheese
- 1/4 cup Cheddar cheese
There’s no yeast or baking powder here. The moist batter puffs in the hot oven as steam expands, while the starch and egg help the rolls hold their shape. That gives them a texture closer to a cheesy popover than a fluffy wheat dinner roll.
I prefer to bring the measured milk and egg to room temperature before blending so the batter comes together smoothly.
Tapioca Flour vs Tapioca Starch
Products labeled tapioca flour and tapioca starch generally refer to the same starch extracted from cassava root. Either label is appropriate for this batter. Whole cassava flour is a different product and isn’t an equivalent substitute.
Tapioca starch creates the springy, elastic chew that defines pão de queijo. Wheat flour and self-rising flour won’t reproduce that texture, so don’t swap them into this formula.
Sour manioc starch, called polvilho azedo, appears in traditional variations and behaves differently from regular tapioca starch. It isn’t a verified replacement in this particular blender batter. If you need to avoid gluten, check ingredient labels and cross-contact information rather than assuming every packaged product meets your needs.
Best Cheeses for Pao de Queijo
Mozzarella contributes mild flavor and stretch; cheddar adds a sharper savory edge. Low-moisture mozzarella is a practical choice for this batter because it doesn’t bring the extra liquid associated with fresh mozzarella.
Traditional Brazilian versions often feature Queijo Minas or meia cura. Parmesan offers a more concentrated aged-cheese flavor, but its saltiness and moisture differ from mozzarella and cheddar. Treat alternate cheeses as flavor variations, not identical replacements.
Room Temperature Milk, Egg, and Fat Choices
Room-temperature milk and egg blend more readily into the oil and starch. The goal is an evenly mixed batter without dry pockets, not a thick mixture.
As optional alternatives, you can consider an equal volume of mild olive oil or melted unsalted butter in place of the vegetable oil. Olive oil contributes its own flavor; butter adds a buttery aroma. These changes haven’t been verified here, so don’t expect perfectly identical puffing or texture.
This recipe uses US cup and spoon measurements. Verified ingredient-specific gram weights aren’t available, so keep the listed measurements rather than relying on a generic cups-to-grams conversion.
How to Make Brazilian Cheese Bread Step by Step
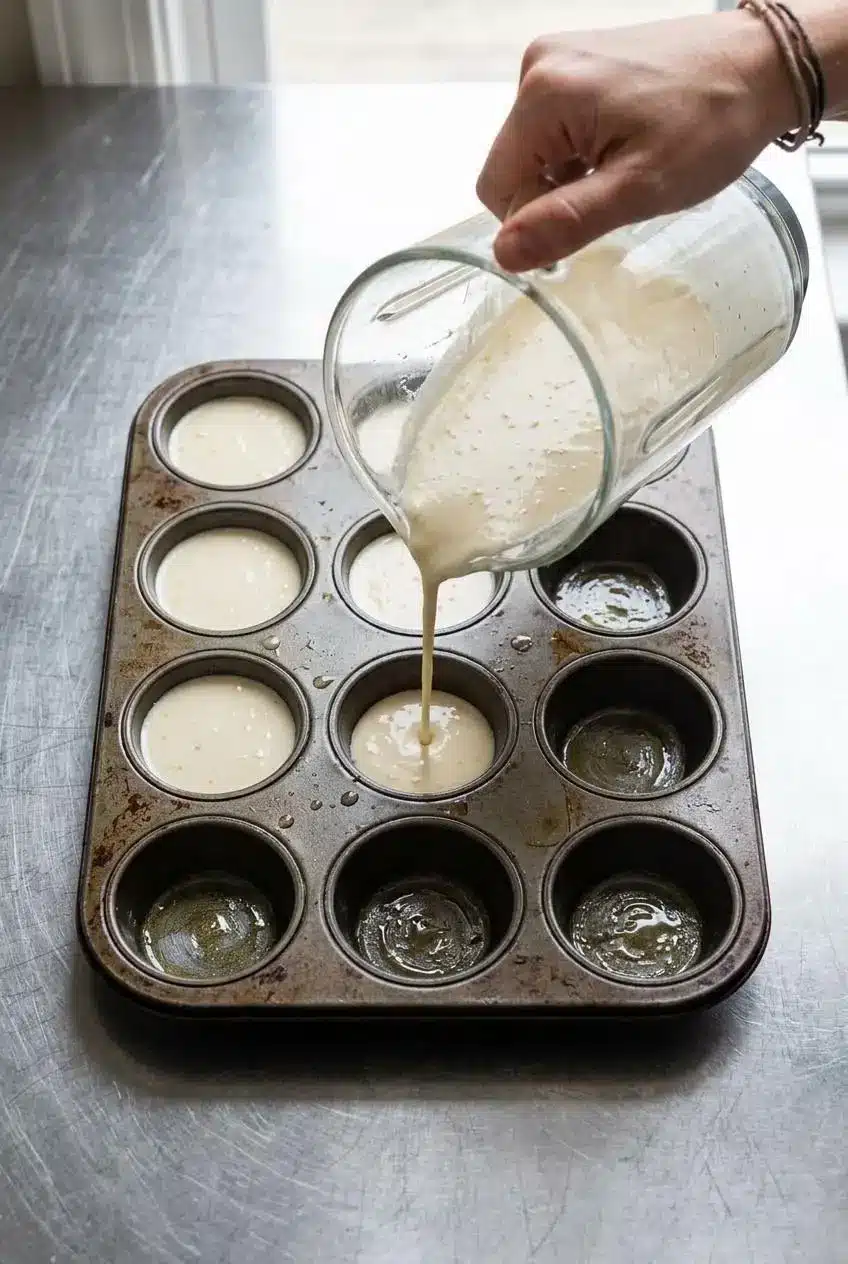
Keep the cheese out of the blender until the liquid and starch mixture is smooth. That lets you blend the batter thoroughly without processing away every small piece of cheese.
Yield: 18 rolls. Preparation: 5 minutes. Baking: 15 to 20 minutes, followed by roughly 2 minutes in the pan. Use a blender or food processor and a mini muffin pan.
- Set the oven to 400°F and allow it to preheat before baking.
The batter needs a hot oven to begin puffing promptly. - Place the tapioca flour, milk, vegetable oil, salt, and egg in a blender jar or food processor bowl.
Leave both cheeses aside until this mixture is smooth. - Use short bursts to combine the ingredients into an even batter.
Look for a smooth, thin consistency that pours easily, similar to a loose pancake batter. - Tip in the mozzarella and cheddar, then incorporate them with a couple of brief pulses.
Small cheese flecks should remain throughout the mixture. - Coat the mini muffin cups generously with grease, covering the bottoms and sides.
An even coating helps the baked crust release from the metal. - Pour batter into each prepared cup until it reaches the halfway point.
The empty space above the batter gives each roll room to expand. - Bake for 15 to 20 minutes, checking for a set crust before removing the pan.
The rolls should look puffed and lightly browned, with a crusty exterior rather than a damp surface. - Let the baked rolls rest in their pan for about 2 minutes, then carefully lift them into a bowl and serve warm.
The brief rest lets the delicate crust firm slightly for easier removal.
Don’t add flour because the mixture looks runny. This is a batter bread, and the muffin cups provide the support that a shaped dough would otherwise supply. Brief final pulses leave little pockets of cheese instead of making the mixture completely uniform.
Expert Tips and Troubleshooting for Better Cheese Puffs
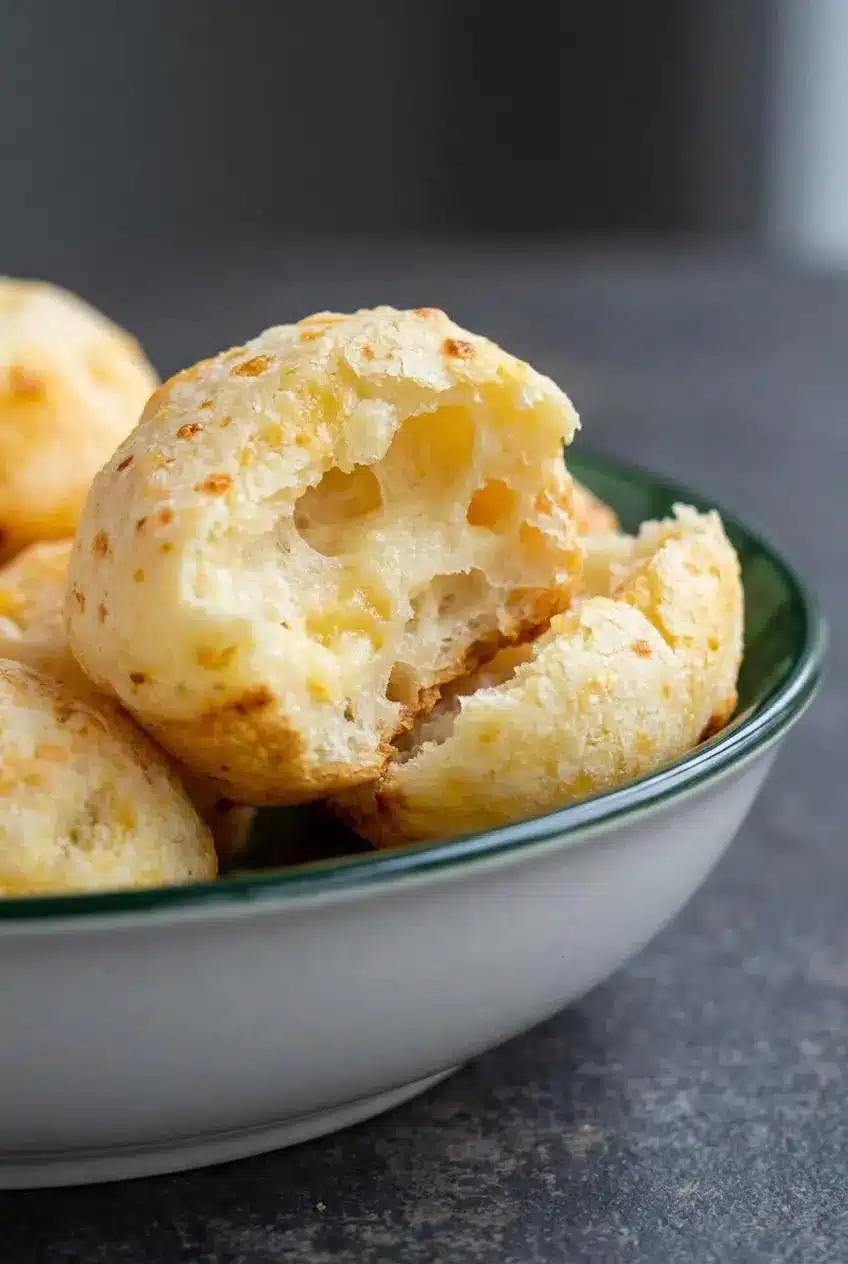
Judge these rolls by both their shell and center. A chewy interior is expected; a wet, paste-like middle underneath an unset crust calls for a closer look at doneness.
Using a Regular Muffin Tin Instead of a Mini Pan
A standard muffin pan is an optional adaptation. Grease it generously and keep the cups halfway full, just as you would with the mini pan.
At 400°F, about 20 to 25 minutes is an approximate guide for larger rolls, not a tested guarantee. Pan material, cup size, and your oven can affect the result. Look for puffed tops, light browning, and a crusty exterior. Larger cups will also change the yield.
Air Fryer Molds and Batter Containment
Don’t pour this batter directly into an air fryer basket. It needs suitable oven-safe molds to contain it, unlike rollable cheese-bread dough that can hold its own shape.
No verified air fryer temperature or cooking time is available for this batter. Appliance clearance and mold size also vary, so the mini muffin pan and oven remain the supported method here.
How to Prevent Flat or Sticky Rolls
- Rolls stick tightly: An uneven or skimpy grease coating can leave the crust attached to the pan. Cover the cup bottoms and sides generously, then allow the brief pan rest before lifting out the rolls.
- Batter spills over: Overfilled cups leave too little room for expansion. Stop at halfway rather than filling them like ordinary muffins.
- The texture seems dense: Prolonged blending after adding cheese can make the mixture overly uniform. Blend the first mixture smooth, then use only brief pulses for the cheese.
- Rolls collapse substantially: The exterior may not have set before removal. Use the crusty surface and light browning as your guide within the baking window, rather than removing them simply because they have risen.
- The middle seems gummy: Distinguish elastic chew from wet batter. Some settling is normal, and every roll won’t have a hollow center, but a wet middle and major collapse suggest insufficient baking.
If the texture is right but you want a stronger savory flavor, try the optional Parmesan and garlic combination below rather than changing the batter’s structure.
Blender Method vs Traditional Rolled Method and Variations
The blender approach and traditional rolled versions produce different mixtures, so their shaping instructions aren’t interchangeable.
- Mixture: This version makes a pourable batter; traditional scalded-liquid methods produce dough that can be shaped.
- Starch preparation: Here, room-temperature ingredients blend together directly; traditional methods use hot liquid to prepare the starch before incorporating the remaining ingredients.
- Shaping: Muffin cups contain this batter as it rises; firmer dough becomes individual balls before baking.
- Handling: The blender version skips hand shaping, while rolled versions require a different dough consistency and more hands-on preparation.
Both approaches belong in the wider family of Brazilian cheese breads. Choose a complete formula for the method you want rather than trying to turn this liquid batter into rollable dough.
Optional Aged Cheese and Savory Herb Flavors
Keep these optional changes separate from the mozzarella-and-cheddar version above. Cheese moisture, saltiness, and added seasonings can change the result.
- Parmesan and garlic: Replace half the cheddar with freshly grated Parmesan and add a pinch of garlic powder before the final pulses for a stronger aged-cheese flavor and savory aroma.
- Gruyère or Queijo Minas: Explore a different cheese character, keeping in mind that melting behavior and moisture won’t necessarily match the listed blend.
- Smoked paprika: Add a smoky accent without turning the rolls into a different style of dough.
- Finely chopped jalapeño: Use it as an optional source of pepper flavor and heat.
If garlic-forward breads are your favorite, garlic bread rolls offer another savory option for a different baking day.
How to Serve, Store, and Reheat Pao de Queijo
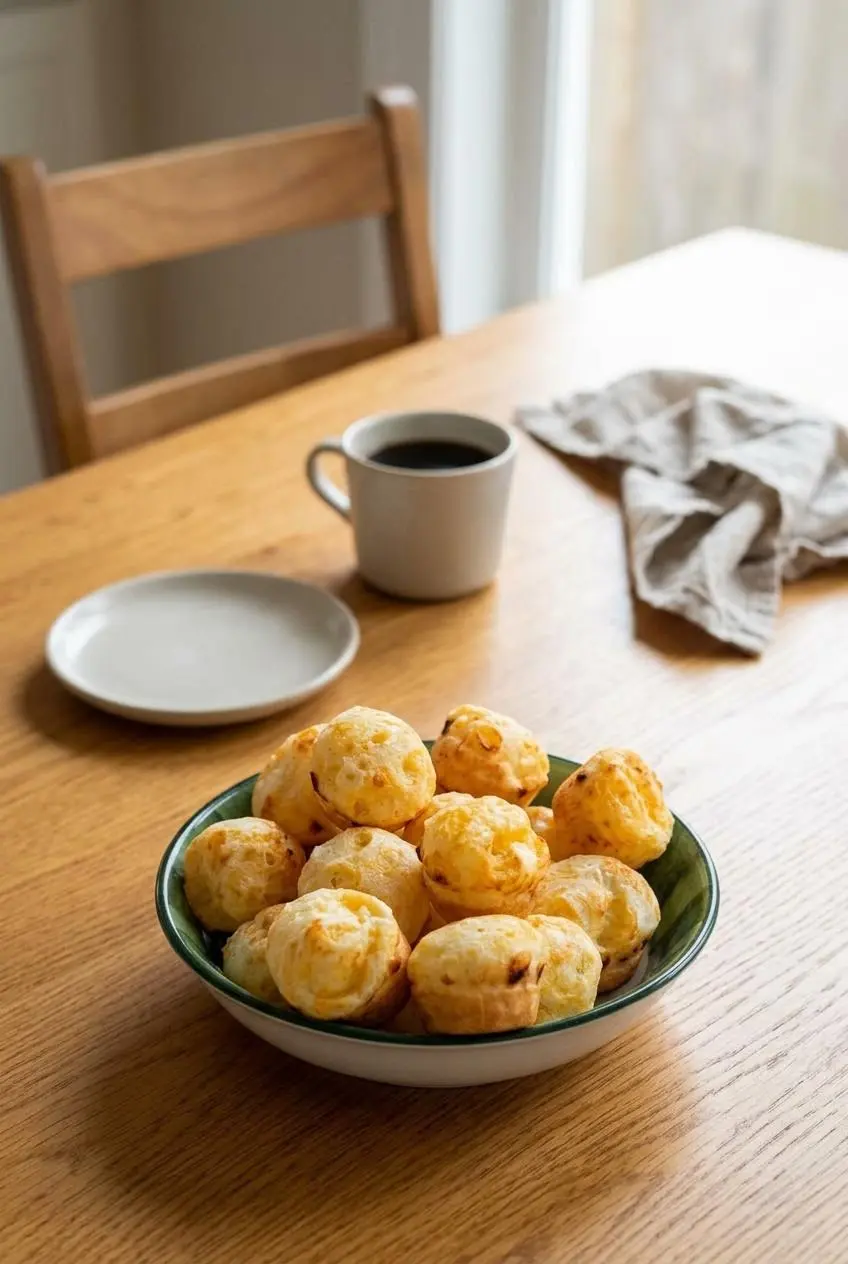
Serve these rolls warm whenever possible. That’s when the contrast between the crisp shell and soft, chewy cheese center is most noticeable.
Warm Rolls for Breakfast, Snacks, and Dinner
- Breakfast: Serve a warm bowl of rolls alongside coffee or hot tea.
- Snack tray: Offer salsa or marinara in separate bowls for dipping so the shells don’t become soggy.
- Dinner: Pair them with soup, Brazilian stews, or grilled meats.
For a lunchbox, let the rolls cool before packing and use appropriate chilled storage and temperature control rather than leaving them unrefrigerated throughout the day.
Keeping Leftovers Covered and Chilled
For leftovers, prioritize refrigeration rather than planning extended counter storage. No verified room-temperature or refrigerator shelf life is established for these rolls here.
- Allow steam to escape before sealing the rolls, so trapped condensation doesn’t soak the crust.
- Pack cooled rolls in an airtight container and refrigerate promptly.
- Keep dipping sauces separate from the bread.
- Reheat the portion you plan to serve instead of repeatedly warming the whole batch.
Bringing Back the Crisp Shell
Use an oven or toaster oven when you want to restore the exterior. Dry heat is better suited to renewing the crust than microwave reheating, which tends to soften it.
Watch for a warmed-through center and a crisp surface. No verified reheating schedule is available for this recipe, so avoid treating a fixed temperature or minute count as a guarantee.
Conclusion
A blender and mini muffin pan turn tapioca batter into warm cheese rolls with a crisp shell and springy center. The method skips kneading while keeping that distinctive pão de queijo chew.
Pulse the cheese briefly, grease the cups well, and fill them only halfway. Then give the crust time to set and enjoy the rolls while they’re warm.
Frequently Asked Questions
What Type of Cheese Is Used for Brazilian Cheese Bread?
Traditional versions often use Queijo Minas or meia cura. This version combines mozzarella for stretch with cheddar for a stronger cheese flavor. Parmesan is an optional aged-cheese variation, not part of the listed blend.
What Can I Use Instead of Tapioca Flour in Brazilian Cheese Bread?
Tapioca starch generally names the same ingredient and is the appropriate label alternative. Whole cassava flour, wheat flour, and self-rising flour aren’t equivalent replacements. Sour manioc starch appears in traditional versions, but it isn’t a verified swap in this exact batter.
Can I Use a Regular Muffin Pan Instead of a Mini Muffin Pan?
Yes, as an optional adaptation. Grease the cups generously, fill halfway, and use about 20 to 25 minutes at 400°F as an approximate guide. Pan size affects baking, so check for puffed rolls with lightly browned, crusty exteriors.
Can I Substitute Butter or Olive Oil for the Vegetable Oil, and How Do I Store Leftovers?
Equal-volume melted unsalted butter or mild olive oil are optional alternatives, though their results haven’t been verified here. For leftovers, let steam escape, pack in an airtight container, and refrigerate promptly. Reheat in an oven or toaster oven to help restore the shell.

Brazilian Cheese Bread Recipe

Equipment
- blender jar
- food processor bowl
- Mini muffin pan
Ingredients
- 1 cup Tapioca flour
- 1/2 cup Milk (room temperature)
- 1/4 cup Vegetable oil
- 1 Large egg (room temperature)
- 1/2 tsp Salt
- 1/4 cup Mozzarella cheese
- 1/4 cup Cheddar cheese
Instructions
- Set the oven to 400°F and allow it to preheat before baking. The batter needs a hot oven to begin puffing promptly.
- Place the tapioca flour, milk, vegetable oil, salt, and egg in a blender jar or food processor bowl. Leave both cheeses aside until this mixture is smooth.
- Use short bursts to combine the ingredients into an even batter. Look for a smooth, thin consistency that pours easily, similar to a loose pancake batter.
- Tip in the mozzarella and cheddar, then incorporate them with a couple of brief pulses. Small cheese flecks should remain throughout the mixture.
- Coat the mini muffin cups generously with grease, covering the bottoms and sides. An even coating helps the baked crust release from the metal.
- Pour batter into each prepared cup until it reaches the halfway point. The empty space above the batter gives each roll room to expand.
- Bake for 15 to 20 minutes, checking for a set crust before removing the pan. The rolls should look puffed and lightly browned, with a crusty exterior rather than a damp surface.
- Let the baked rolls rest in their pan for about 2 minutes, then carefully lift them into a bowl and serve warm. The brief rest lets the delicate crust firm slightly for easier removal.