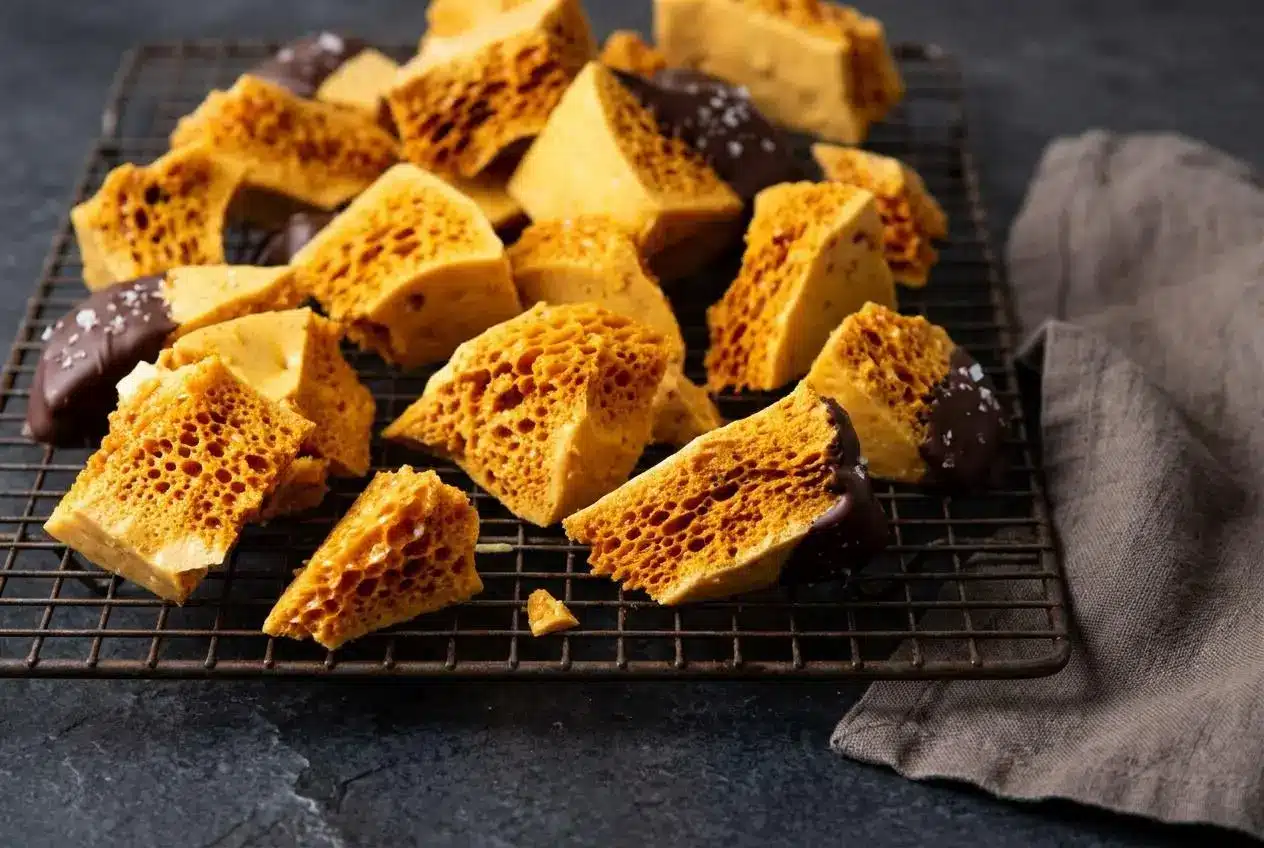
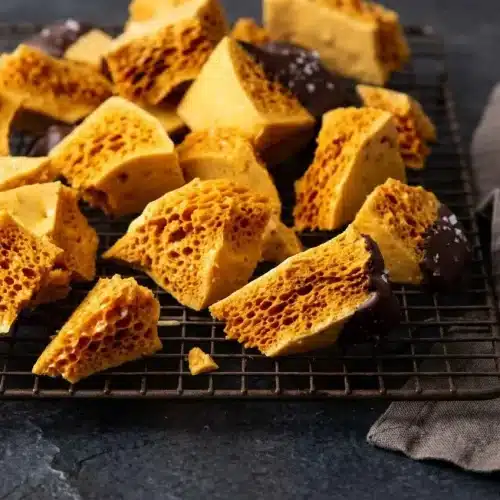
Honeycomb candy is an airy, crunchy sugar confection. Cook sugar, golden syrup or honey, water, and salt to 300°F, then whisk in baking soda and pour the expanding foam into a lined pan to harden.
This honeycomb candy recipe turns bubbling amber syrup into a golden slab filled with delicate air pockets. The baking soda makes the syrup rise like a small volcano, leaving a caramelized crunch once the candy cools. A candy thermometer and a prepared pan make that dramatic moment much easier to manage.
Break it into rustic chunks to enjoy plain, or dip the pieces in bittersweet chocolate for a rich contrast to the sweet, toasted flavor. The optional gelatin mixture gives you another texture to try. The real reward is that first hollow snap.
Line the pan and measure the baking soda before heating the sugar; the foaming stage leaves no time to hunt for supplies.
Ingredients You Will Need and Why Each One Matters
Sugar builds the crisp structure, syrup contributes flavor and helps discourage crystallization, and water helps the sugar dissolve evenly. Salt balances the sweetness, baking soda creates lift, and the gelatin and chocolate finishes offer different textures.
Honeycomb candy base
- 350 g granulated white sugar or brown sugar (1 ¾ cup)
- 160 – 170 g golden syrup or honey. Use corn syrup only if neither is available. (½ cup)
- 120 mL water (½ cup)
- ½ tsp salt (use only ¼ tsp if you don’t want to taste the salt flavor)
- 1 tbsp baking soda
Gelatin mix (optional – for a more dense sponge-like texture)
- 2 tsp water
- ½ tsp gelatin
To coat
- 300 g tempered bittersweet chocolate (approximate weight, you can also use milk chocolate or semisweet chocolate instead)
- Sea salt flakes (I use maldon sea salt flakes)
White sugar gives a cleaner caramel flavor, while brown sugar brings a deeper molasses note and a darker starting color. Either way, use temperature rather than color alone to judge when to stop cooking.
Water helps wet and dissolve the sugar before the syrup concentrates. It belongs in this method even though much of it cooks away. The salt provides a noticeable sweet-salty balance at the full amount; use the listed reduction for a quieter finish.
The gram weights are particularly useful for sticky syrup, which can cling to a measuring cup. Both weights and US cup measurements appear above, so you can work with the equipment you have.
Optional gelatin changes the bubble structure toward a finer, denser sponge texture. Chocolate adds richness and a contrasting shell, while flaky salt gives little bursts of seasoning rather than dissolving throughout the candy.
I prefer to sift the measured baking soda into a dry bowl before cooking so it goes into the syrup without stubborn lumps.
Golden Syrup vs Honey vs Corn Syrup
- Golden syrup: The first choice here for a rounded caramel flavor that suits the toasted sugar.
- Honey: A corn-syrup-free alternative with floral character that varies by variety; watch closely near the target temperature because it can darken quickly.
- Corn syrup: A more neutral fallback when neither golden syrup nor honey is available.
These syrups help interfere with sugar crystallization, but they aren’t identical products. Keep the listed amount and use the thermometer rather than expecting every version to reach the same shade of amber.
Why Baking Soda Freshness Matters
Baking soda creates the foam that becomes honeycomb’s airy interior. Check the expiration date and avoid a box that has picked up moisture or odors. There’s no need to impose an arbitrary opened-box deadline.
Sift out clumps before cooking. Even distribution matters: concentrated pockets can leave a bitter, soapy taste, while adding extra soda won’t compensate for poor mixing.
How to Make Honeycomb Candy Step by Step
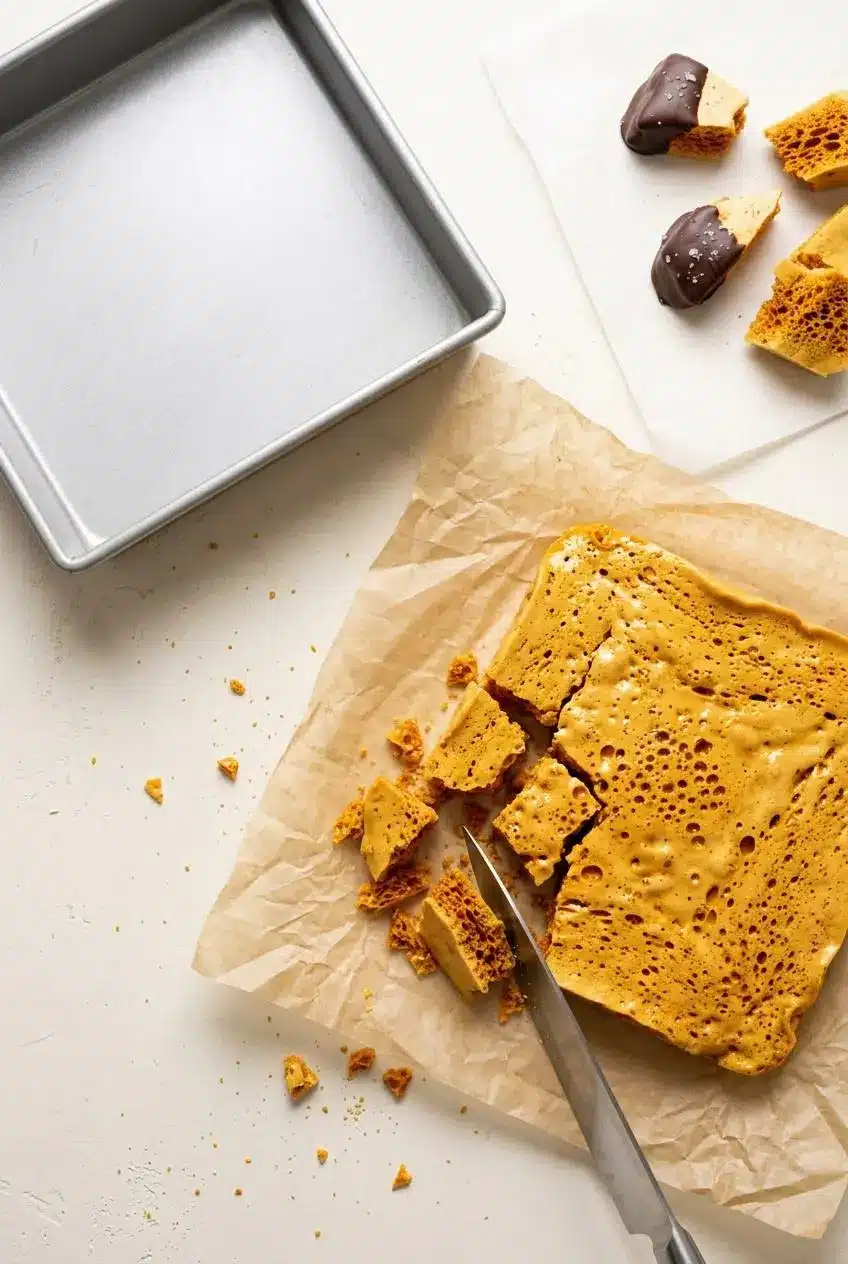
A 9-inch square pan produces thicker chunks; a lined half sheet pan produces a flatter slab. Choose before you start, and keep children away from the cooking area because hot sugar can cause serious burns.
Honeycomb candy
- Fit parchment across the bottom and up the sides of a 9-inch square pan, or line a half sheet pan with parchment or a silicone baking mat for thinner candy.
The lining should cover every surface the hot mixture will touch. - Set a whisk and spatula beside the stove.
Both need to be within reach when the syrup begins foaming. - Combine the sugar, golden syrup or honey, water, and salt in a large saucepan, using corn syrup only as the listed fallback.
Leave generous headroom above the syrup for expansion. - Moisten the sugar with gentle stirring, then place the saucepan over medium-high heat and swirl frequently.
The mixture should lose its grainy appearance as the sugar dissolves. - Wash down crystals on the saucepan walls with a pastry brush dipped in cold water, without stirring the syrup.
The sides should look clear rather than crusted with sugar. - Attach a candy thermometer once the mixture boils and the sugar has dissolved.
Keep the sensing tip in the syrup rather than against the pan bottom. - Continue heating to 300°F / 150°C, swirling for even heat and checking the syrup in several places with the thermometer.
The syrup will become more concentrated, with its color depending on the sugar and syrup used. - Bring the lined pan close as the syrup approaches its target, and have the whisk, spatula, and baking soda ready.
An oven mitt can help protect your whisking hand from the rising heat. - Take the saucepan off the burner at the target temperature and immediately whisk in all the baking soda, reaching around the edges.
Stop once the soda disappears into an evenly foaming mixture. - Transfer the expanded candy promptly into the lined pan, using the spatula to help it out without pressing or spreading the top.
The uneven, bubbly surface should remain undisturbed. - Leave the slab to harden for a few hours.
It should feel firm throughout and sound hollow when gently tapped. - Lift out the firm candy, remove the parchment, and place the slab on a cutting board before breaking it with the tip of a sharp knife.
Expect irregular chunks rather than tidy squares.
For more dense, sponge candy texture
- During syrup cooking, sprinkle the gelatin over its water in a small microwave-safe bowl and leave it to bloom for 10 minutes.
The gelatin should absorb the water and swell. - Warm the bloomed mixture in the microwave for a few seconds, stopping before it boils.
It should become dissolved and fluid. - At the off-heat stage, whisk the warm dissolved gelatin into the cooked syrup before adding the baking soda, then transfer the expanded mixture to the lined pan.
Mix vigorously enough to distribute everything, stopping when the foam looks uniform.
To coat honeycomb with chocolate
- Temper the chosen chocolate before coating the broken candy.
Keep it fluid enough to cover the pieces evenly. - Submerge each piece fully or partly, or apply chocolate with a clean, dry pastry brush.
Let excess chocolate fall away so it doesn’t pool heavily underneath. - Arrange the coated pieces on a parchment-lined baking sheet and add sea salt flakes while the coating is wet.
The flakes should cling to the chocolate surface. - Leave the chocolate to firm at room temperature rather than refrigerating it.
Wait until the coating feels set before handling the pieces.
Cooking the Sugar Syrup to 300°F
Use the recipe’s temperature target for a brittle result instead of judging by amber color alone. Honey and brown sugar can make the syrup look ready before it is. A candy thermometer in good working order removes much of that guesswork.
Swirl rather than stir once the sugar dissolves. Washing down stray crystals helps prevent a grainy batch, while checking more than one spot helps you catch uneven heating.
Whisking in the Baking Soda for Maximum Lift
Work quickly, but don’t chase a fixed whisking count. Reach the corners, incorporate the soda, and transfer the foam as soon as it looks even. The mixture rises dramatically, which is why the saucepan needs plenty of headroom.
Resist smoothing the surface. Pressing or repeatedly stirring the foam can knock out the bubbles you just created.
Coating Honeycomb in Tempered Chocolate
Bittersweet chocolate offers the strongest contrast to the sweet candy; semisweet and milk chocolate give a sweeter finish. Full dipping covers more exposed candy than partial dipping, while brushing works well for awkwardly shaped pieces.
Tempering deserves care, since simply melting chocolate isn’t the same process. Follow the tempering method appropriate to your chosen chocolate, then let the coated candy set at room temperature.
Pro Tips and Troubleshooting Common Honeycomb Mistakes
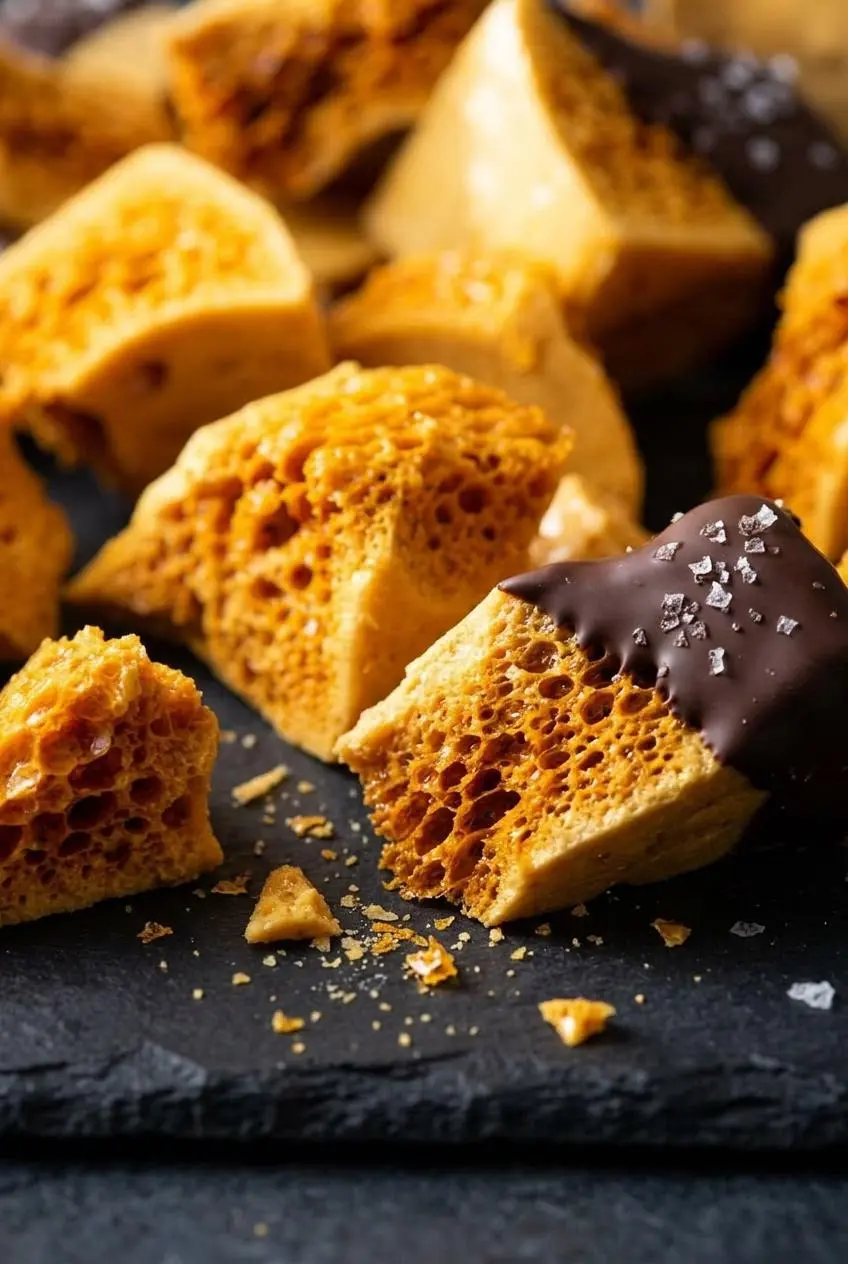
The texture usually tells you where a batch went off track. Check the cooking temperature, mixing, and handling before changing the ingredient amounts.
- Chewy instead of brittle: Removing the syrup before its target can leave a tooth-sticking texture. Check thermometer placement and don’t stop just because the color looks dark enough.
- Flat or dense without gelatin: Damp or expired baking soda, incomplete incorporation, or prolonged whisking can reduce lift. Use sound baking soda, distribute it thoroughly, then stop mixing.
- Soapy or metallic pockets: Baking soda clumps may not have dispersed. Sift the measured amount beforehand rather than increasing it to force more expansion.
- Grainy candy: Crystals on the saucepan walls can encourage crystallization. Brush them down during cooking, and avoid stirring the dissolved syrup.
- Hardened syrup before pouring: Don’t place the saucepan in a cold-water sink bath. Rapid cooling can harden part of the syrup before you incorporate the soda and transfer the foam.
- Burnt flavor: A darker syrup isn’t automatically a better caramel. Watch the thermometer closely toward the end, especially with honey or brown sugar, and remove the pot promptly.
- Sticky after cooling: Exposure to moisture can spoil the crunch. Keep cooled pieces covered rather than leaving the broken slab sitting out.
- Sugar stuck to the saucepan: Let the pan cool enough to handle, then soak it and the utensils in hot water. Give the sugar time to dissolve instead of attacking it with a knife.
Delicious Variations and Substitutions
Keep texture experiments separate from the main method so you know which change produced the result.
Dense Buffalo Sponge Candy Method
The optional gelatin mixture gives a finer, denser sponge-like interior rather than large, open honeycomb cavities. Follow the separate gelatin instructions, inserting the warm dissolved mixture before the baking soda.
This is a Buffalo-style texture variation, not a universal rule for every candy sold as sponge candy. Regional names and formulas overlap.
3-Ingredient Honeycomb Option
Three-ingredient versions use sugar, golden syrup or honey, and baking soda, cooking the sugar-and-syrup mixture before adding the soda off heat. They require a formulation designed for that approach. Don’t simply remove the water and salt from these measurements and assume the handling will stay the same.
For an optional floral gift finish, top chocolate-dipped pieces with food-grade dried edible flowers and flaky sea salt before the coating sets. Keep these decorations outside the candy mixture.
Honeycomb vs Korean Dalgona Candy
Honeycomb, sponge toffee, cinder toffee, and hokey pokey commonly describe this family of aerated sugar candy. Korean dalgona typically starts with melted sugar and baking soda, without the added syrup and water used here, and is often pressed into thin discs.
The broad difference is the finished shape and structure: a thick, irregular slab versus a flatter, more compact candy.
How to Store and Serve Honeycomb Candy
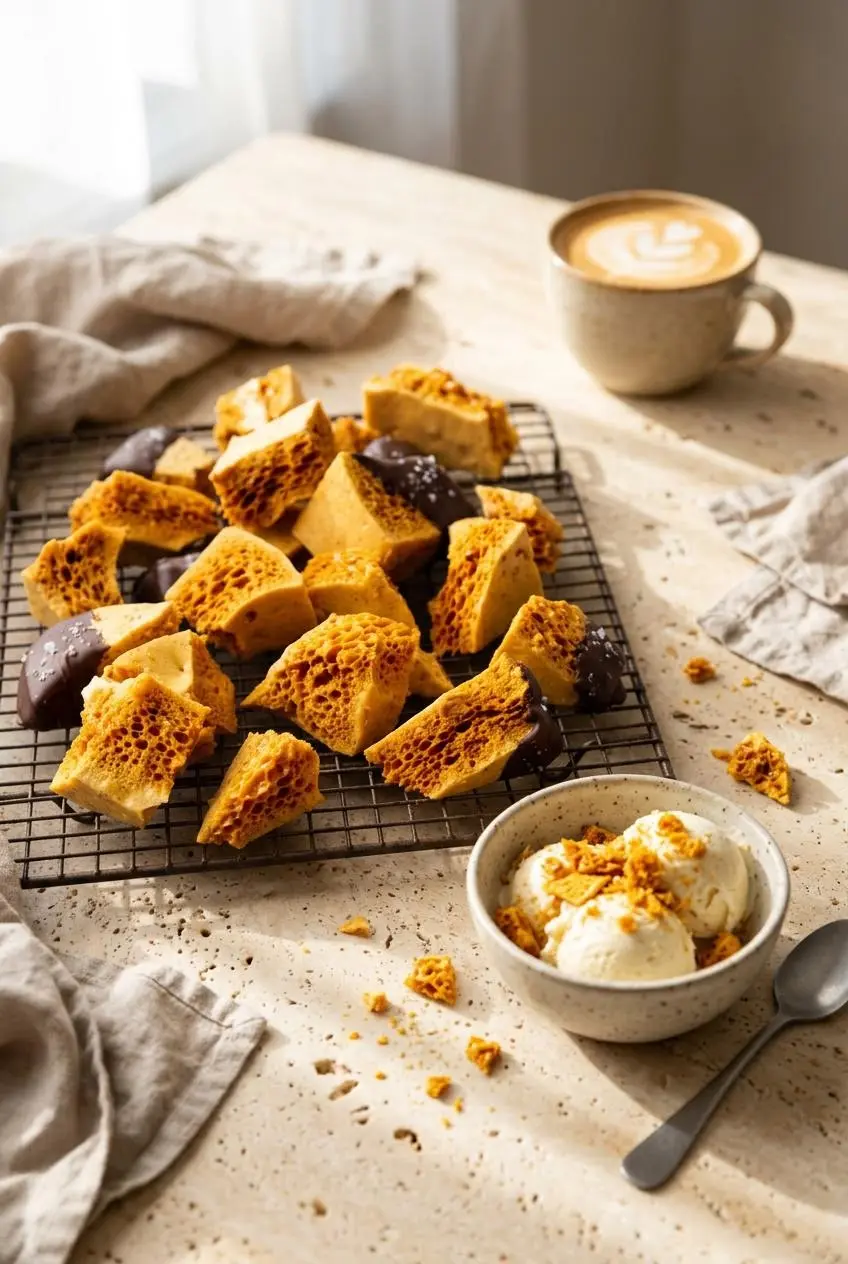
Protect the crunch by letting the candy harden completely before packing it into a dry, airtight container. Separate layers with parchment to reduce sticking and keep the container away from heat and damp conditions.
Room-temperature storage is preferable for this candy. Avoid refrigerating uncoated pieces, and let chocolate-coated pieces set at room temperature as directed. Close the container promptly after taking out a portion, especially in humid weather.
A complete chocolate coating helps limit direct exposure to moisture, but it doesn’t replace an airtight container. Cover broken edges when dipping if texture protection is your main goal.
- For gifts: Pack chocolate-dipped chunks into tightly closing tins alongside homemade chocolate candies, separating delicate pieces with parchment.
- For ice cream or coffee: Crush a portion into small shards and scatter over vanilla ice cream or a latte just before serving.
- For cakes: Add golden chunks to a frosted cake shortly before serving so the candy spends less time against moist frosting.
Conclusion
Crisp honeycomb depends on careful temperature control and a quick, thorough mix when the baking soda goes in. Prepare the pan first, give the foam room to rise, and leave the poured slab alone.
Enjoy the golden chunks plain or finish them with chocolate and flaky salt. A little patience while they harden makes that first crack especially satisfying.
Frequently Asked Questions
Can I Make Honeycomb Candy Without Corn Syrup?
Yes. Golden syrup is the first choice here, and honey is also included in the recipe. Honey brings a more floral flavor, so watch its color and temperature closely near the end of cooking.
Why Did My Honeycomb Candy Turn Sticky or Fail to Puff Up?
Sticky candy may have been undercooked or exposed to moisture after cooling. Poor lift can come from ineffective baking soda, uneven mixing, or whisking too long after the foam forms.
How Do You Store Honeycomb Candy So It Stays Crunchy?
Let it harden completely, then pack it in a dry, airtight container at room temperature with parchment between layers. Keep it away from humidity and avoid refrigerating uncoated pieces.
What Is the Difference Between Honeycomb Candy, Sponge Candy, and Dalgona?
Honeycomb and sponge candy names often overlap, though the gelatin variation here makes a finer, denser interior associated with Buffalo-style sponge candy. Dalgona typically uses melted sugar and baking soda and is pressed into thin discs.
Honeycomb Candy Recipe

Equipment
- 9-inch square pan
- Parchment Paper
- Spatula
- Whisk
- Large saucepan
- Pastry brush
- Candy thermometer
- Cutting board
- Sharp knife
- Small microwave-safe bowl
Ingredients
Honeycomb candy base
- 350 g granulated white sugar or brown sugar (1 ¾ cup)
- 160 – 170 g golden syrup or honey. Use corn syrup only if neither is available. (½ cup)
- 120 mL water (½ cup)
- ½ tsp salt (use only ¼ tsp if you don’t want to taste the salt flavor)
- 1 tbsp baking soda
Gelatin mix (optional – for a more dense sponge-like texture)
- 2 tsp water
- ½ tsp gelatin
To coat
- 300 g tempered bittersweet chocolate (approximate weight, you can also use milk chocolate or semisweet chocolate instead)
- Sea salt flakes (I use maldon sea salt flakes)
Instructions
Honeycomb candy
- Fit parchment across the bottom and up the sides of a 9-inch square pan, or line a half sheet pan with parchment or a silicone baking mat for thinner candy. The lining should cover every surface the hot mixture will touch.
- Set a whisk and spatula beside the stove. Both need to be within reach when the syrup begins foaming.
- Combine the sugar, golden syrup or honey, water, and salt in a large saucepan, using corn syrup only as the listed fallback. Leave generous headroom above the syrup for expansion.
- Moisten the sugar with gentle stirring, then place the saucepan over medium-high heat and swirl frequently. The mixture should lose its grainy appearance as the sugar dissolves.
- Wash down crystals on the saucepan walls with a pastry brush dipped in cold water, without stirring the syrup. The sides should look clear rather than crusted with sugar.
- Attach a candy thermometer once the mixture boils and the sugar has dissolved. Keep the sensing tip in the syrup rather than against the pan bottom.
- Continue heating to 300°F / 150°C, swirling for even heat and checking the syrup in several places with the thermometer. The syrup will become more concentrated, with its color depending on the sugar and syrup used.
- Bring the lined pan close as the syrup approaches its target, and have the whisk, spatula, and baking soda ready. An oven mitt can help protect your whisking hand from the rising heat.
- Take the saucepan off the burner at the target temperature and immediately whisk in all the baking soda, reaching around the edges. Stop once the soda disappears into an evenly foaming mixture.
- Transfer the expanded candy promptly into the lined pan, using the spatula to help it out without pressing or spreading the top. The uneven, bubbly surface should remain undisturbed.
- Leave the slab to harden for a few hours. It should feel firm throughout and sound hollow when gently tapped.
- Lift out the firm candy, remove the parchment, and place the slab on a cutting board before breaking it with the tip of a sharp knife. Expect irregular chunks rather than tidy squares.
For more dense, sponge candy texture
- During syrup cooking, sprinkle the gelatin over its water in a small microwave-safe bowl and leave it to bloom for 10 minutes. The gelatin should absorb the water and swell.
- Warm the bloomed mixture in the microwave for a few seconds, stopping before it boils. It should become dissolved and fluid.
- At the off-heat stage, whisk the warm dissolved gelatin into the cooked syrup before adding the baking soda, then transfer the expanded mixture to the lined pan. Mix vigorously enough to distribute everything, stopping when the foam looks uniform.
To coat honeycomb with chocolate
- Temper the chosen chocolate before coating the broken candy. Keep it fluid enough to cover the pieces evenly.
- Submerge each piece fully or partly, or apply chocolate with a clean, dry pastry brush. Let excess chocolate fall away so it doesn’t pool heavily underneath.
- Arrange the coated pieces on a parchment-lined baking sheet and add sea salt flakes while the coating is wet. The flakes should cling to the chocolate surface.
- Leave the chocolate to firm at room temperature rather than refrigerating it. Wait until the coating feels set before handling the pieces.