Honeycomb Candy Recipe

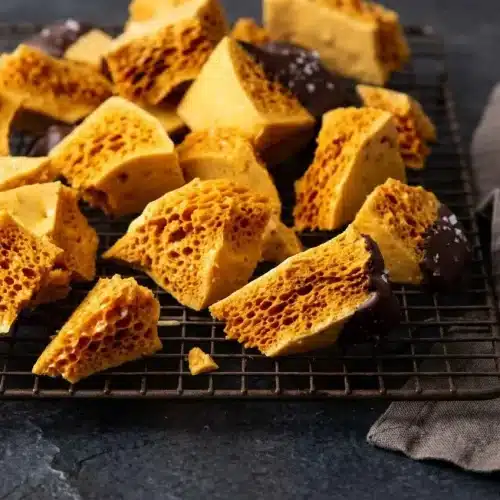
This honeycomb candy recipe cooks sugar and golden syrup or honey to 300°F before whisking in baking soda for a light, caramelized crunch. Enjoy the airy golden chunks plain or dipped in bittersweet chocolate.
Equipment
- 9-inch square pan
- Parchment Paper
- Spatula
- Whisk
- Large saucepan
- Pastry brush
- Candy thermometer
- Cutting board
- Sharp knife
- Small microwave-safe bowl
Ingredients
Honeycomb candy base
- 350 g granulated white sugar or brown sugar (1 ¾ cup)
- 160 – 170 g golden syrup or honey. Use corn syrup only if neither is available. (½ cup)
- 120 mL water (½ cup)
- ½ tsp salt (use only ¼ tsp if you don’t want to taste the salt flavor)
- 1 tbsp baking soda
Gelatin mix (optional – for a more dense sponge-like texture)
- 2 tsp water
- ½ tsp gelatin
To coat
- 300 g tempered bittersweet chocolate (approximate weight, you can also use milk chocolate or semisweet chocolate instead)
- Sea salt flakes (I use maldon sea salt flakes)
Instructions
Honeycomb candy
- Fit parchment across the bottom and up the sides of a 9-inch square pan, or line a half sheet pan with parchment or a silicone baking mat for thinner candy. The lining should cover every surface the hot mixture will touch.
- Set a whisk and spatula beside the stove. Both need to be within reach when the syrup begins foaming.
- Combine the sugar, golden syrup or honey, water, and salt in a large saucepan, using corn syrup only as the listed fallback. Leave generous headroom above the syrup for expansion.
- Moisten the sugar with gentle stirring, then place the saucepan over medium-high heat and swirl frequently. The mixture should lose its grainy appearance as the sugar dissolves.
- Wash down crystals on the saucepan walls with a pastry brush dipped in cold water, without stirring the syrup. The sides should look clear rather than crusted with sugar.
- Attach a candy thermometer once the mixture boils and the sugar has dissolved. Keep the sensing tip in the syrup rather than against the pan bottom.
- Continue heating to 300°F / 150°C, swirling for even heat and checking the syrup in several places with the thermometer. The syrup will become more concentrated, with its color depending on the sugar and syrup used.
- Bring the lined pan close as the syrup approaches its target, and have the whisk, spatula, and baking soda ready. An oven mitt can help protect your whisking hand from the rising heat.
- Take the saucepan off the burner at the target temperature and immediately whisk in all the baking soda, reaching around the edges. Stop once the soda disappears into an evenly foaming mixture.
- Transfer the expanded candy promptly into the lined pan, using the spatula to help it out without pressing or spreading the top. The uneven, bubbly surface should remain undisturbed.
- Leave the slab to harden for a few hours. It should feel firm throughout and sound hollow when gently tapped.
- Lift out the firm candy, remove the parchment, and place the slab on a cutting board before breaking it with the tip of a sharp knife. Expect irregular chunks rather than tidy squares.
For more dense, sponge candy texture
- During syrup cooking, sprinkle the gelatin over its water in a small microwave-safe bowl and leave it to bloom for 10 minutes. The gelatin should absorb the water and swell.
- Warm the bloomed mixture in the microwave for a few seconds, stopping before it boils. It should become dissolved and fluid.
- At the off-heat stage, whisk the warm dissolved gelatin into the cooked syrup before adding the baking soda, then transfer the expanded mixture to the lined pan. Mix vigorously enough to distribute everything, stopping when the foam looks uniform.
To coat honeycomb with chocolate
- Temper the chosen chocolate before coating the broken candy. Keep it fluid enough to cover the pieces evenly.
- Submerge each piece fully or partly, or apply chocolate with a clean, dry pastry brush. Let excess chocolate fall away so it doesn't pool heavily underneath.
- Arrange the coated pieces on a parchment-lined baking sheet and add sea salt flakes while the coating is wet. The flakes should cling to the chocolate surface.
- Leave the chocolate to firm at room temperature rather than refrigerating it. Wait until the coating feels set before handling the pieces.
Notes
Ingredient tip: Sift the measured baking soda into a dry bowl before cooking to remove clumps and prevent bitter, soapy pockets in the finished candy.
Texture tip: Rely on your candy thermometer reaching 300°F / 150°C rather than judging by color alone, especially since honey or brown sugar can darken early. Once poured, do not press or smooth the foaming mixture so the delicate air pockets stay intact.
Cleanup tip: Let the sticky saucepan cool until safe to handle, then soak the pot and utensils in hot water to dissolve the hardened sugar easily.
Storage: Let the candy harden completely, then store it at room temperature in a dry, airtight container with parchment paper between layers. Keep it away from moisture and do not refrigerate uncoated pieces.
Nutrition information is an estimate based on common ingredients and serving sizes. Values may vary depending on brands, portions, and substitutions.