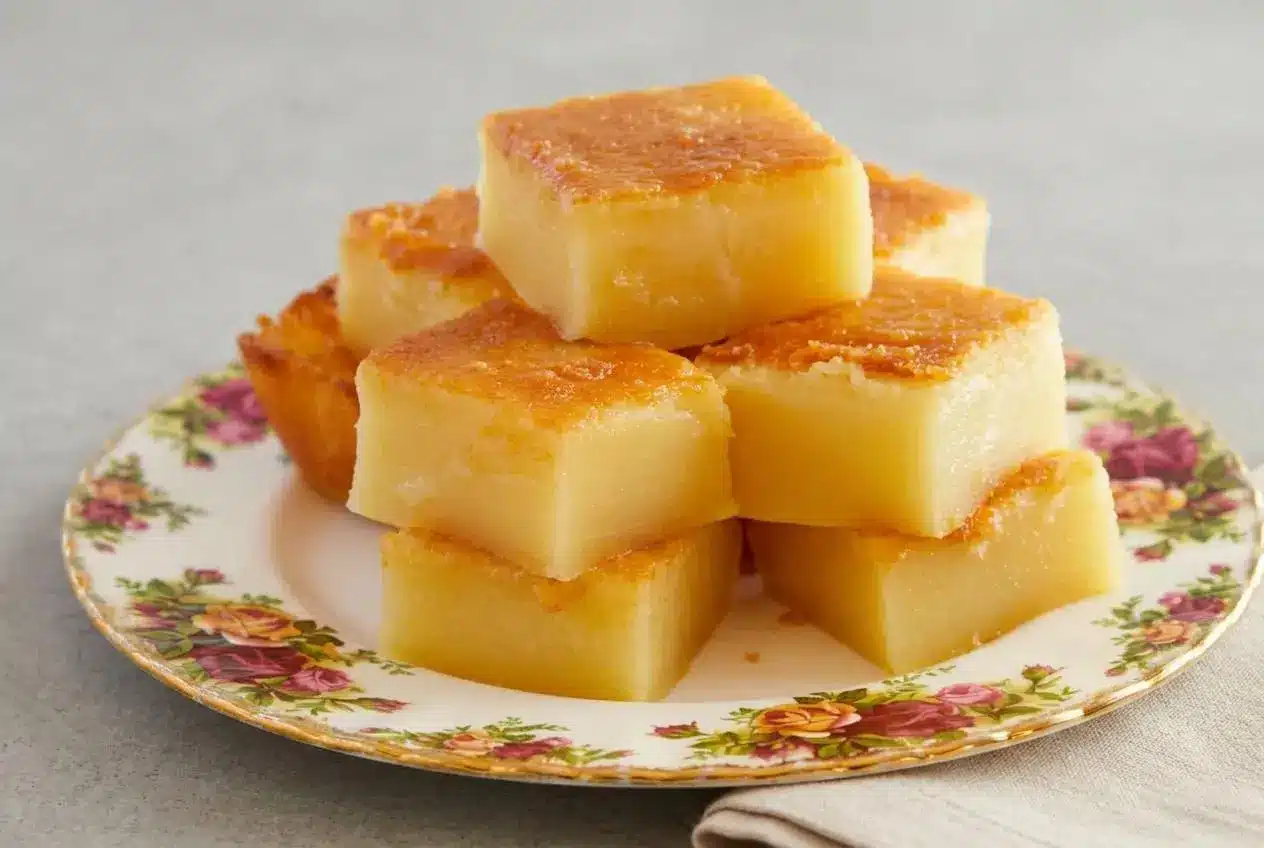
Hawaiian butter mochi is a baked coconut dessert made with sweet rice flour, butter, milk, sugar, and eggs. A golden crust surrounds a soft, elastic center, giving each square a rich cake-like flavor with the distinctive chew of mochi.
The appeal of hawaiian butter mochi starts with buttery edges and the aroma of coconut and vanilla. Unlike a fluffy layer cake, this snack cake has a dense, bouncy bite that makes even a small square satisfying.
This recipe fills a 9×13-inch pan and makes 24 squares for a potluck, dessert platter, or afternoon treat. Whisking brings the batter together, but cooling makes the texture work. Give those golden corners a little patience.
Set a fine mesh sieve beside the prepared pan before mixing so you can strain the batter directly into it.
What Is Hawaiian Butter Mochi?
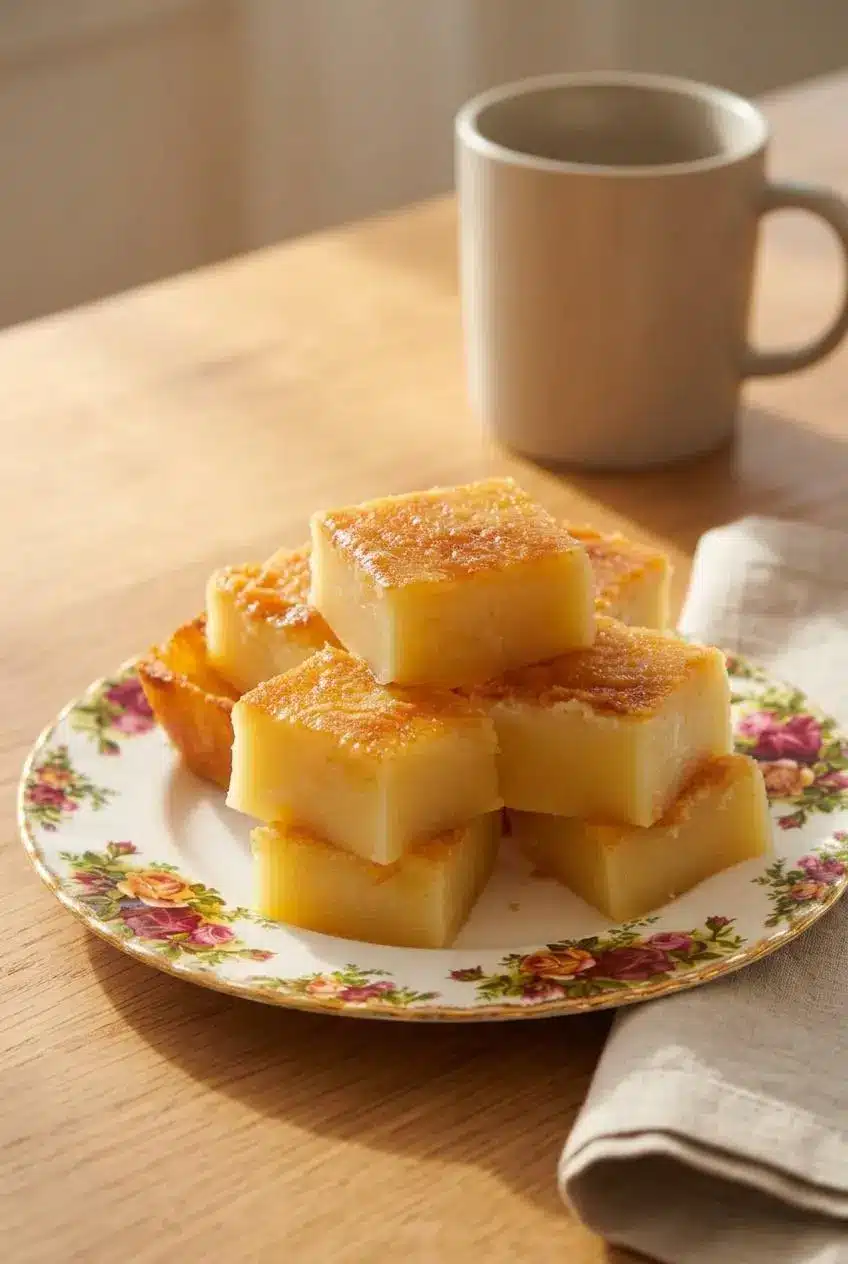
Butter mochi tastes like a rich vanilla cake with mild coconut flavor, a pleasantly chewy center, and browned, buttery edges. The texture is the defining feature: it bends and springs back instead of breaking into fluffy crumbs.
This local Hawaii dessert reflects the meeting of Japanese sweet rice flour traditions and island baking, with connections to Filipino rice cakes such as bibingka. Recipes vary between households, particularly in their milk choices and coconut toppings.
Traditional Japanese mochi starts with steamed glutinous rice that is pounded into a sticky dough. Hawaiian butter mochi uses rice flour in a liquid batter, then bakes it into a slab that you can cut and serve like a snack cake. Butter, eggs, and milk give it a richer flavor and browned crust.
For a casual gathering, serve the squares at room temperature on a dessert platter. A savory tray of Hawaiian roll sliders makes a practical companion for a party menu without competing with the coconut dessert.
Essential Ingredients for Authentic Texture
Mochiko supplies the chew, eggs give the batter structure, and milk keeps the center moist. Coconut milk and butter add richness, while sugar, salt, and vanilla balance the flavor. Baking powder gives this dense dessert a gentle lift.
- 1 box (16 oz/450 g) Mochiko Flour (sweet glutinous rice flour)
- 2 cups (16 oz/454 g) granulated sugar
- 1 ½ teaspoons baking powder
- ½ teaspoon salt
- 4 large eggs, at room temperature
- 2 cups (16 fl oz/450 ml) whole milk, at room temperature
- 1 can (13 fl oz/400 ml) coconut milk
- ½ cup (4 oz/115 g) butter, melted
- 2 teaspoons vanilla extract
Melted butter contributes richness throughout the crumb and helps the edges develop their golden finish. Eggs hold the milk-rich batter together, while baking powder keeps the finished slab from feeling overly compact. Sugar contributes moisture as well as sweetness, so reducing it substantially can change more than the flavor.
I’d stir the canned coconut milk until its cream and liquid come together before measuring it into the batter.
The Crucial Role of Mochiko Sweet Rice Flour
Use mochiko sweet glutinous rice flour, not regular white rice flour. Glutinous rice contains a high proportion of amylopectin, a branched starch that produces the sticky, elastic texture when it absorbs liquid and cooks.
Regular rice flour contains a different starch balance. It cannot produce the same bouncy crumb and may leave the cake gritty or crumbly. All-purpose wheat flour also changes the structure completely.
“Sweet rice flour” names the rice variety; it does not mean the flour contains added sugar. If you find another Asian rice flour, read the label carefully. Some Thai products are glutinous rice flour, while others are ordinary rice flour, and package color alone is not a dependable guide. Even glutinous flours can differ in grind and texture, so mochiko is the most straightforward choice here.
Selecting Coconut Milk and Dairy Liquids
Choose full-fat canned coconut milk for its body and richness. Refrigerated coconut beverages are usually thinner and are not a direct replacement for the canned milk in this batter.
Whole milk supplies liquid with enough richness to complement the coconut milk. Some butter mochi recipes use evaporated milk, but this version uses whole milk in the listed amount. Keep that liquid balance rather than swapping cans by size.
Room-temperature eggs and milk help melted butter blend smoothly. Cold liquid can make the butter form small firm flecks before it disperses. The butter should remain fluid, but avoid adding it while it is piping hot.
How to Make Hawaiian Butter Mochi
Plan on 15 minutes of preparation and 50 to 60 minutes of baking, followed by complete cooling. The listed 75-minute total covers preparation and baking, not the cooling period. Have a large bowl, whisk, parchment paper, sieve, and 9×13-inch pan ready.
- Prepare a 9×13-inch (23×33 cm) pan with butter and parchment, and heat the oven to 350°F (180°C).
The parchment should cover the bottom so the sticky baked slab releases more easily. - Distribute the sugar, baking powder, and salt throughout the mochiko with a whisk in a large bowl.
The dry mixture should look uniform, without concentrated pockets of baking powder. - Work the eggs, whole milk, coconut milk, melted butter, and vanilla into the dry mixture with the whisk.
The combined batter should flow like thick pancake batter, with no visible dry flour. - Position a fine mesh sieve over the prepared pan and pour the batter through it.
The sieve catches stubborn flour clumps while the smooth batter spreads across the pan. - Bake for 50 to 60 minutes, using a golden surface and a set center to judge when to remove the pan.
The finished top should look browned rather than pale, and the middle should no longer move like liquid. - Leave the mochi in the pan until it has cooled completely.
The center firms as it cools and should feel settled rather than soft and hot. - Divide the cooled slab into 24 squares with a sharp knife.
Wipe away sticky residue between cuts to keep the edges neat.
Allow at least two hours for cooling before attempting to slice, and wait longer if the pan or center still feels warm. Cooling is part of developing the texture, not merely a convenience before serving.
Baking Dish Choice: Metal Versus Glass Pans
Pan material changes how quickly the edges brown, so use the baking window as a guide rather than treating every pan identically.
- Light-colored metal: Aluminum responds quickly to oven heat and often develops firmer corner crusts. Check near the earlier end of the baking window.
- Glass: Glass heats differently and retains heat after leaving the oven. The center may need the later end of the baking window, even when the perimeter already looks brown.
- Ceramic: Thickness varies considerably between dishes. Watch the center as well as the surface, and do not assume a thick dish behaves like a thin metal pan.
Keep the listed oven temperature for this recipe. If the perimeter darkens before the center sets, loosely cover the top with foil and continue checking for doneness. Do not press foil against the sticky crust.
Knowing When the Mochi Is Fully Baked
Look for a golden-brown top, slightly receding edges, and a center that feels gently springy rather than fluid. A chewy cake can still feel soft when hot; softness alone does not mean it needs more baking.
Around the 45-minute mark, you may notice bubbling near the edges and a stronger coconut-butter aroma. Those signs show that baking is progressing, but they do not replace checking the center.
Avoid repeatedly opening the oven during the first 40 minutes. Use the oven light when possible, then check more closely toward the end. If you lightly test the center, take care around the hot pan and surface.
Troubleshooting and Texture Tips
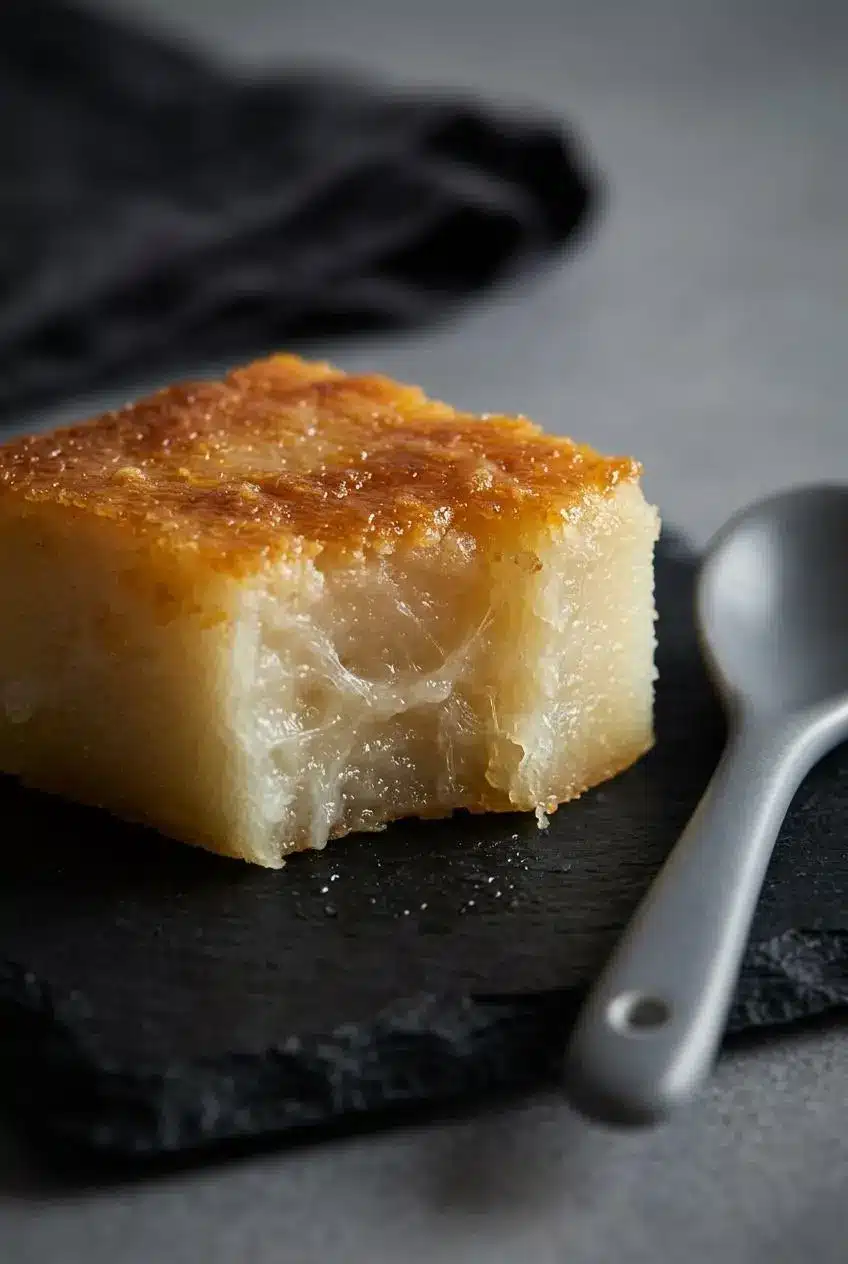
The goal is a resilient chew, not a wet middle or a dry, crumbly cake. Match the problem to its likely cause before changing ingredients.
- Sunken center: An underbaked middle or early heat loss can leave the center without enough structure. Let the bake progress before opening the door, check the middle before removing the pan, and use fresh baking powder.
- Gummy interior: Warm mochi can seem much stickier than fully cooled mochi. Give it the complete cooling rest; if the cooled center still looks wet or pasty, underbaking is the more likely problem.
- Brown edges with a pale center: The outside is cooking faster than the middle. Add a loose foil tent to protect the crust while the center finishes.
- Flour pockets: Incomplete whisking leaves dry clumps that baking will not reliably smooth out. Combine the batter thoroughly and strain it before it reaches the pan.
- Gritty or crumbly texture: Check the flour label. Regular rice flour cannot create the elastic texture expected from mochiko.
Clean Slicing Without Sticking
Start with a completely cooled slab. Cutting warm butter mochi pulls at the soft center and can compress or tear the squares, even with a sharp blade.
- Serrated plastic knife: Use gentle sawing motions with a sturdy blade. This is a useful option when mochi grips a metal knife.
- Lightly oiled chef’s knife: Apply a thin coating of neutral oil or cooking spray, then make deliberate cuts rather than dragging the blade sideways.
- Warm damp cloth: Wipe the knife between cuts to remove the sticky film that builds up on the blade.
Cut straight down and lift the blade cleanly. For 24 portions, divide the slab into six rows and four columns. Keep the corner pieces on the platter too; their extra crust gives them a particularly satisfying bite.
Popular Flavor Variations
These optional additions change the flavor or finish without replacing the mochiko or altering the milk amounts. Choose one direction first so the coconut, butter, and vanilla remain balanced.
- Shredded coconut: Adds a toasted topping and a more pronounced coconut bite.
- Ube extract: Brings purple color and a sweet, fragrant accent.
- Matcha: Adds earthy tea flavor and gentle bitterness.
- Honey butter: Gives the crust a glossy, sweeter finish.
Toasted Shredded Coconut Crust
Sprinkle unsweetened or lightly sweetened shredded coconut over the strained batter just before baking. The exposed shreds toast as the cake cooks, creating a textured top rather than changing the chewy center.
Watch the topping toward the end, especially if you use sweetened coconut. Protect it with loose foil if it colors faster than the cake beneath it.
Vibrant Ube Butter Mochi
For an optional ube version, stir ube extract into the wet ingredients before combining them with the flour. Extract strength varies, so follow the product’s directions rather than assuming every bottle delivers the same color and flavor.
Keep the listed milk amounts unchanged. Ube purée and ube jam add moisture and solids, so they are not interchangeable with extract in this batter.
Matcha Green Tea Addition
Sift culinary matcha into the dry mochiko mixture before adding the liquids. This helps disperse the powder and prevents concentrated tea clumps in the finished squares.
Matcha gives the dessert an earthy counterpoint to its sweetness. Keep the sugar unchanged when trying this variation rather than adjusting several parts of the recipe at once.
Honey Butter Glaze Finish
As an optional finish, combine honey with warm melted butter and brush a thin layer over the nearly finished crust. Handle the hot pan carefully and avoid pooling the glaze, which can soften the surface.
The glaze adds shine and sweetness; it does not guarantee a crisp crackle. For an alternative dessert presentation, serve a gently warmed square with butter pecan ice cream, or use whipped cream or vanilla ice cream.
Storage and Reheating Directions
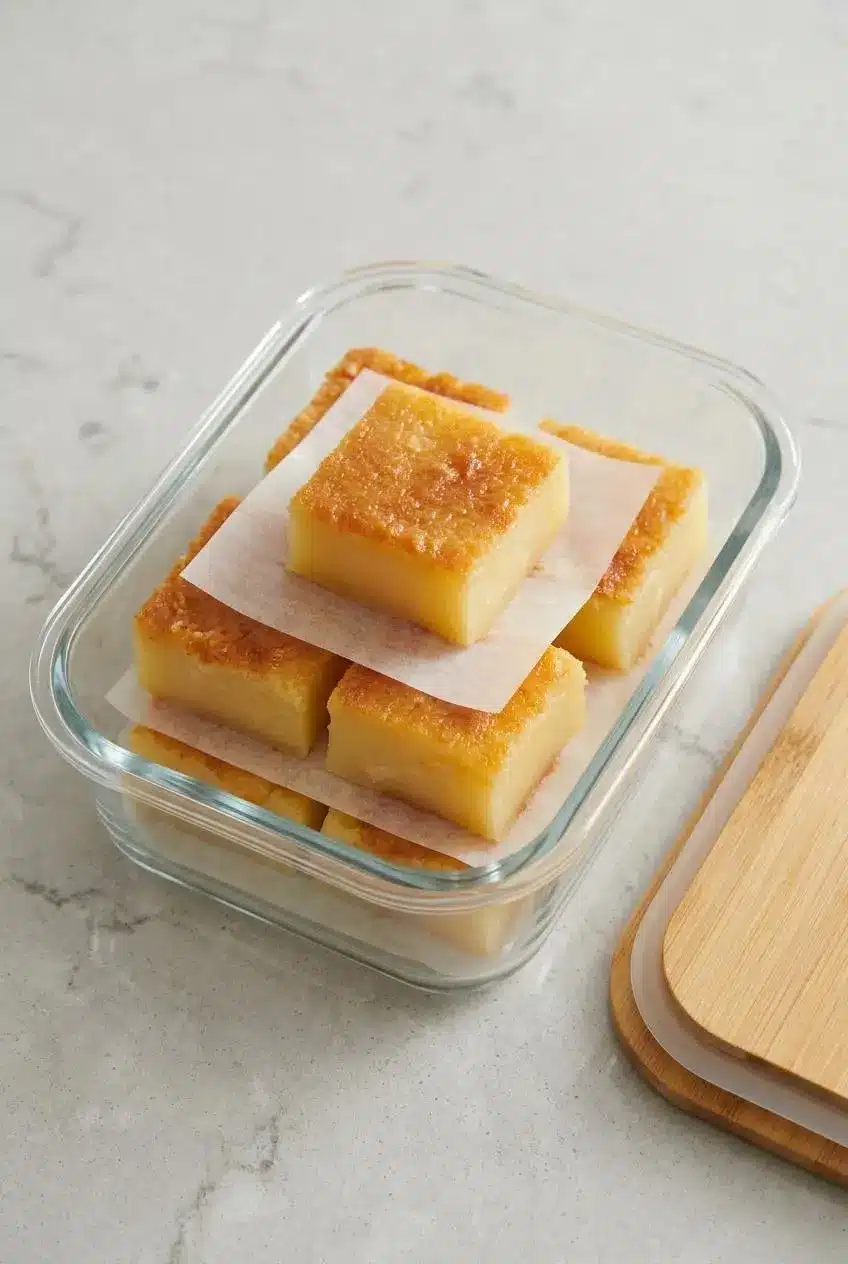
Let the mochi cool completely before closing it in an airtight container. Trapping heat creates condensation, which softens the crust and leaves the surface damp.
Keep the container away from direct sun and heat. Refrigeration can firm the rice starch and reduce its soft chew, but texture should not override proper leftover handling. If you need to hold leftovers rather than serve them promptly, keep them chilled.
Refresh individual squares gently in a microwave for a softer bite or a toaster oven for firmer edges. Check frequently and stop once warmed through; prolonged heating can dry the corners. Add whipped cream or ice cream at serving time rather than storing it on the mochi.
Conclusion
Butter mochi brings together coconut-vanilla richness, golden edges, and a chewy center in a generous pan of snackable squares. Choosing mochiko and straining the batter give it the right foundation.
Let the slab cool completely before cutting. That patient pause makes the difference between sticky, torn pieces and neat squares ready to share.
Frequently Asked Questions
Can I Use Regular Rice Flour Instead of Mochiko Flour?
No. Regular rice flour has a different starch balance and will not produce the same elastic chew. Use mochiko sweet glutinous rice flour for this recipe; ordinary rice flour may make the cake gritty or crumbly.
Why Did My Butter Mochi Sink in the Middle?
An underbaked center or opening the oven too early can contribute to sinking. Check baking powder freshness and confirm that the center has set before removing the pan. A slight settling during cooling differs from a deep dip with a wet middle.
How Do You Cut Butter Mochi Without It Sticking?
Cool the slab completely before cutting. Use a sturdy plastic knife or a sharp chef’s knife with a light coating of oil. Wipe the blade between cuts so sticky residue does not pull at the next square.
Should Butter Mochi Be Refrigerated?
Refrigeration can make the crumb firmer, but do not avoid chilling leftovers solely to preserve texture. Keep cooled squares covered, and chill them when holding leftovers. Gentle warming can soften chilled squares before serving.
Can I Make Butter Mochi Ahead of Time for an Event?
Plan your baking schedule around complete cooling before the event; the slab needs to set before slicing. Keep the cooled mochi covered and follow the storage guidance above if you are holding it before serving. Slice once cool, and add whipped cream or ice cream only when serving.
Hawaiian Butter Mochi

Equipment
- Measuring cups and spoons
- 9×13 inch baking pan
- Parchment Paper
- Fine-Mesh Sieve
- Whisk
- Sharp knife
Ingredients
- 1 box Mochiko Flour (sweet glutinous rice flour) 16 oz/450 g
- 2 cups granulated sugar 16 oz/454 g
- 1 1/2 teaspoons baking powder
- 1/2 teaspoon salt
- 4 large eggs at room temperature
- 2 cups whole milk at room temperature (16 fl oz/450 ml)
- 1 can coconut milk 13 fl oz/400 ml
- 1/2 cup butter melted (4 oz/115 g)
- 2 teaspoons vanilla extract
Instructions
- Prepare a 9×13-inch (23×33 cm) pan with butter and parchment, and heat the oven to 350°F (180°C). The parchment should cover the bottom so the sticky baked slab releases more easily.
- Distribute the sugar, baking powder, and salt throughout the mochiko with a whisk in a large bowl. The dry mixture should look uniform, without concentrated pockets of baking powder.
- Work the eggs, whole milk, coconut milk, melted butter, and vanilla into the dry mixture with the whisk. The combined batter should flow like thick pancake batter, with no visible dry flour.
- Position a fine mesh sieve over the prepared pan and pour the batter through it. The sieve catches stubborn flour clumps while the smooth batter spreads across the pan.
- Bake for 50 to 60 minutes, using a golden surface and a set center to judge when to remove the pan. The finished top should look browned rather than pale, and the middle should no longer move like liquid.
- Leave the mochi in the pan until it has cooled completely. The center firms as it cools and should feel settled rather than soft and hot.
- Divide the cooled slab into 24 squares with a sharp knife. Wipe away sticky residue between cuts to keep the edges neat.