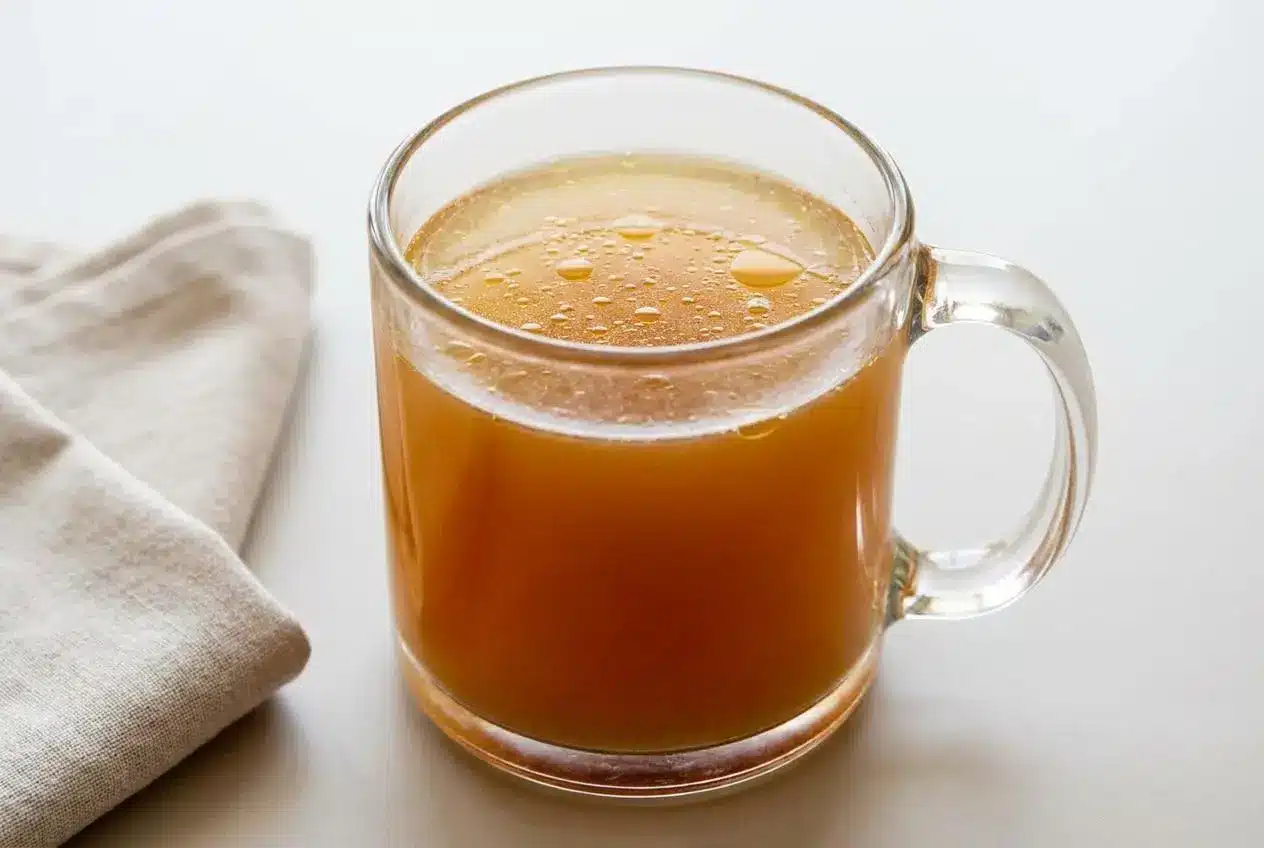
To make bone broth, roast the bones if you want deeper flavor, then simmer collagen-rich bones with apple cider vinegar, vegetables, and water until the broth turns rich, savory, and jiggly when chilled.
A good bone broth is clear enough to look inviting, rich enough to taste savory on its own, and full of gelatin so it sets softly in the fridge. That balance comes from the right bones, gentle heat, and enough time.
This bone broth recipe also works whether you use the stovetop, slow cooker, or Instant Pot, so you can pick the method that fits your kitchen. The lazy bubble is the trick.
If the pot starts boiling hard, turn it down right away because a rough boil can make the broth cloudy and greasy.
Why True Bone Broth Gels: The Science of Collagen
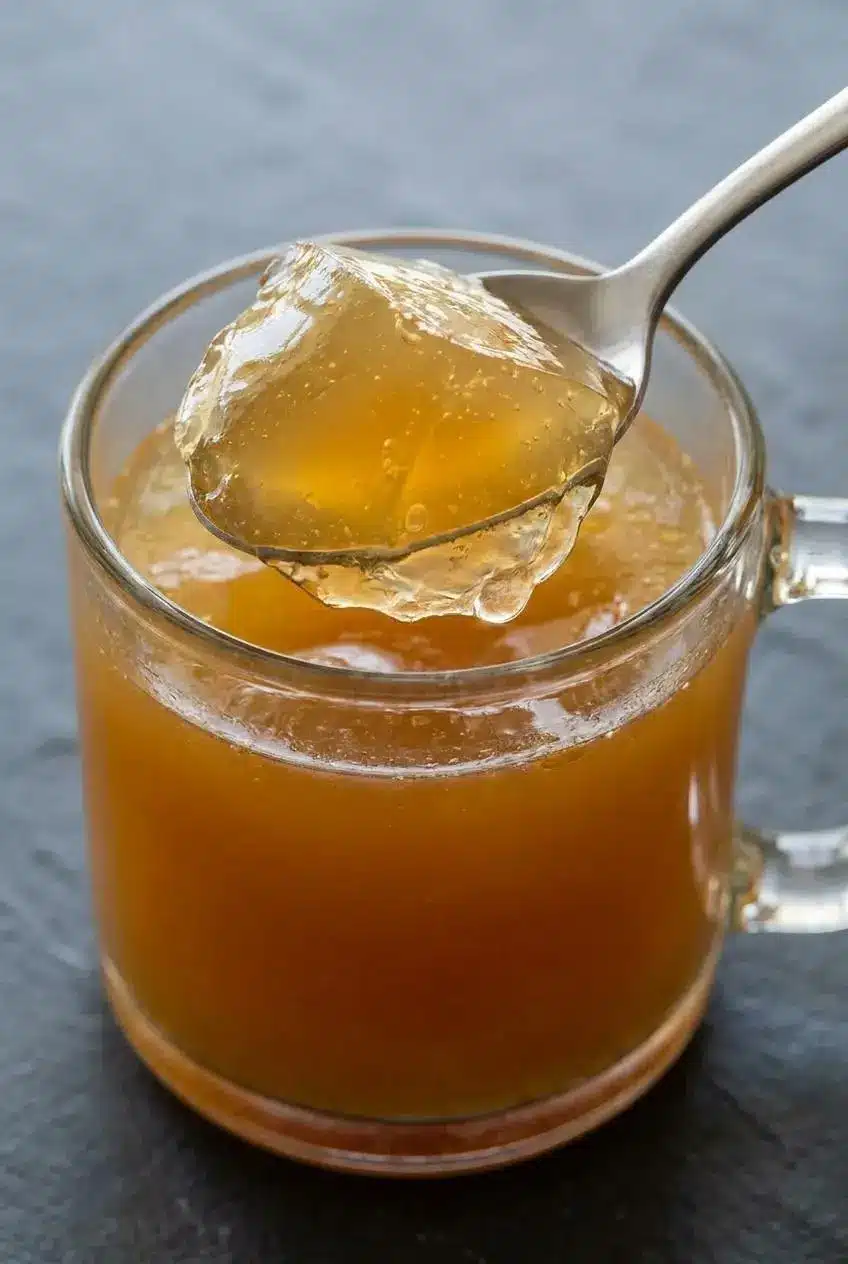
The signature jiggle comes from collagen. As collagen-rich bones and connective tissue cook slowly in water, that collagen breaks down into gelatin, which gives chilled broth its soft, wobbly set.
This is why broth made from joint bones, knuckles, necks, backs, and feet usually gels better than broth made from marrow bones alone. Marrow adds richness and flavor, but connective tissue does the heavy lifting for texture.
Apple cider vinegar helps here too. It is not there to make the broth taste sour. Its main job is to lower the pH of the cooking liquid, which helps break down collagen so more gelatin can be pulled from the bones.
If your finished broth is rich and savory but still pours like water when cold, the usual issue is bone choice, too much water, or heat that stayed too high. A proper long simmer should leave the bones spent and fragile. Many cooked bones will crumble or snap apart much more easily by the end.
The Golden Rule of Bones: What to Ask Your Butcher For
If you want deeply gelatinous broth, ask for bones by anatomy, not just by animal. That one detail makes a huge difference.
- Ask for joint bones, knuckle bones, neck bones, backs, and feet when your goal is a thick gel.
- Ask for marrow bones too when you want a richer, beefier flavor and a fuller mouthfeel.
- For poultry, chicken feet are especially useful because they are packed with connective tissue.
- If available, choose bones from pasture-raised animals for better flavor and a cleaner overall broth.
A good mix often works best. Connective tissue bones build body, while marrow bones round out the flavor. If you use only marrow bones, the broth may taste rich but set weakly. If you use only bony backs or necks, it may gel beautifully but taste lighter.
When talking to a butcher, plain language works well: “I’m making broth and need collagen-rich bones like joints, knuckles, necks, backs, or feet, plus a few marrow bones.” That usually gets you much closer to the right pile.
Essential Preparation: To Roast or to Blanch
Both methods are useful, but they do different jobs. Choose based on the flavor you want.
Blanching is best when raw beef bones smell a little muddy or bloody. A brief blanch in boiling water for 10 to 15 minutes helps loosen surface impurities, which can lead to a cleaner-tasting broth with less murkiness.
Roasting builds deeper flavor. For beef, pork, or lamb bones, roasting at 425F for 25 to 30 minutes develops a darker golden color and a more caramelized, savory taste. It is optional, but it is highly recommended when you want a broth that tastes bold enough to sip on its own.
Chicken bones can go either way. You can skip roasting for a lighter, cleaner broth, or roast if you want more color and a slightly toastier flavor.
Skimming matters too. During early simmering, grayish foam and scum are impurities worth removing. The pale or golden fat that rises later is different. That fat carries flavor, and once chilled it forms a clear layer you can remove and save or discard as you like.
Ingredients for This Rich Bone Broth Recipe
Each ingredient has a clear job here, from building savory depth and aroma to helping the broth gel, balance, and finish with a clean, rounded taste.
- 2-3 pounds chicken, turkey, pork, beef, lamb, or other bones (with lots of connective tissue like feet, knuckles, necks, backs)
- 1 tablespoon apple cider vinegar
- 4 cups roughly chopped carrots, onions, and celery (or scraps)
- 2 bay leaves
- 1/2 teaspoon peppercorns
- 1 teaspoon sea salt
- Filtered water
The bones are the structure of the broth, and the connective tissue is what helps create that jiggly texture once chilled. Apple cider vinegar supports extraction, while carrots, onions, and celery bring sweetness and balance. Bay leaves and peppercorns add background aroma without crowding the broth.
I like keeping a freezer bag of clean onion skins, carrot peels, and celery ends for broth because they add flavor without asking for a special grocery run.
Mastering the Methods: Stovetop, Slow Cooker, and Instant Pot
This recipe keeps the ingredient list the same across all three methods. What changes is the cooking environment, the timing, and how closely you need to watch the heat.
Roasting Optional Step
- Heat the oven to 425F and spread the raw bones in a single layer on a large baking sheet or roasting pan.
Roast for 25 to 30 minutes, until the bones look golden brown and smell deeply savory.
Stovetop Method: The Gentle Simmer
The stovetop gives you the most control, which is great when you want a clear broth with strong gelatin potential. The main goal is a very low simmer, not a rolling boil.
Stovetop Method
- Add the bones, apple cider vinegar, carrots, onions, celery, bay leaves, peppercorns, and salt to a large soup pot or Dutch oven, then pour in filtered water until the bones are covered by 1 inch.
Let the pot stand for 30 minutes so the vinegar can begin working before the heat goes on. - Set the pot over medium-high heat just until the liquid reaches a simmer, then lower the heat as far as needed to keep only a few slow bubbles breaking the surface.
That lazy bubble keeps the broth clearer and prevents the fat from emulsifying into the liquid. - Leave the lid slightly ajar and cook poultry bones for 24 hours or red meat bones for 48 hours.
By the end, the broth should smell deeply savory and the bones should look spent and fragile.
Do not leave an open flame unattended overnight. If you need to pause, cool the pot, refrigerate it, and continue cooking the next day.
Slow Cooker Method: Set and Forget
The slow cooker is convenient, but some models run hotter than expected even on low. Check it early so the broth does not drift into a hard simmer.
Slow Cooker Method
- Place the bones, apple cider vinegar, carrots, onions, celery, bay leaves, peppercorns, and salt in the slow cooker and add filtered water until the bones are covered by 1 inch.
Let everything rest for 30 minutes so the vinegar has time to start loosening collagen from the bones. - Set the slow cooker to low and leave the lid slightly ajar while the broth cooks.
The surface should stay very quiet, with only gentle movement instead of active boiling. - Cook poultry bones for 24 hours or red meat bones for 48 hours.
If your slow cooker bubbles too aggressively on low, crack the lid a bit more or switch methods next time for better control.
Instant Pot Method: Fast and Concentrated
The Instant Pot is the quickest option and often gives you a broth with bold flavor and good body in much less active time. Low pressure works especially well here.
Instant Pot Method
- Add the bones, apple cider vinegar, carrots, onions, celery, bay leaves, peppercorns, and salt to the Instant Pot insert, then pour in filtered water until the bones are covered by 1 inch or the liquid reaches the max fill line.
Let the mixture rest for 30 minutes before sealing the lid. - Seal the pot and cook on low pressure for 3 hours if you are using poultry bones or 4 hours if you are using red meat bones.
Low pressure helps extract collagen efficiently without rough bubbling. - Allow the pressure to release naturally before opening the lid.
The broth should smell rich and savory, and the liquid will often look deeper in color than a quick stock.
Straining and Chilling
- Pour the finished broth through a fine mesh sieve and transfer it to jars or other heat-safe containers.
The strained liquid should look clean and golden, without bits of vegetables or bone. - Chill the broth until cold, then check the texture and the surface.
A successful batch usually turns jiggly and develops a firm layer of fat on top that can be scraped off if desired.
Nourishing Variations and Gelatin Boosters
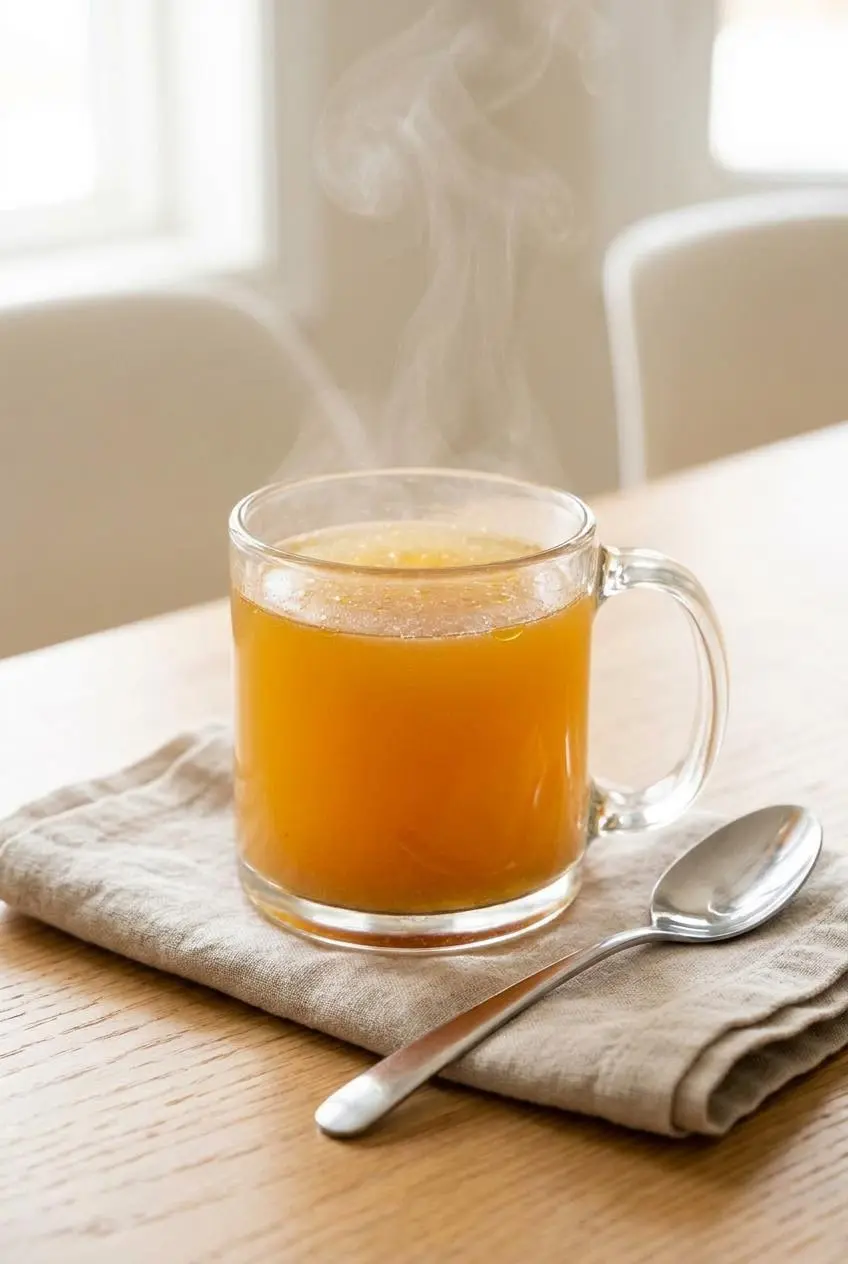
These are all optional tweaks, not changes to the core recipe. Use them when you want a different flavor profile or a stronger gel.
Rich Roasted Beef Bone Broth
For a darker, more robust beef version, roast the bones first and brush them lightly with tomato paste before roasting. You can also add mushrooms to the pot for extra umami depth. The result is especially good when used in gravies, braises, or as the base for a comforting cottage pie.
Why Chicken Feet Are the Ultimate Gelatin Booster
Chicken feet are loaded with connective tissue, so they can dramatically improve the body of poultry broth. If you want a thick, jiggly result, adding chicken feet is one of the most effective optional moves you can make.
They do not contribute much meaty flavor on their own, so pair them with backs, necks, or a carcass for the best balance. If using them, make sure they are clean and trimmed before they go into the pot.
Umami Mushroom and Veggie Scrap Broth
For a deeper savory note without changing the main recipe, add dried shiitake mushrooms and a thin slice of ginger during the final stretch of cooking. That keeps the mushroom flavor pronounced and helps the ginger stay fresh instead of harsh.
Vegetable scraps work well here too, especially onion skins, carrot peels, and celery ends, as long as they are clean and not bitter or spoiled.
How to Safe-Cool and Store Large Batches of Broth
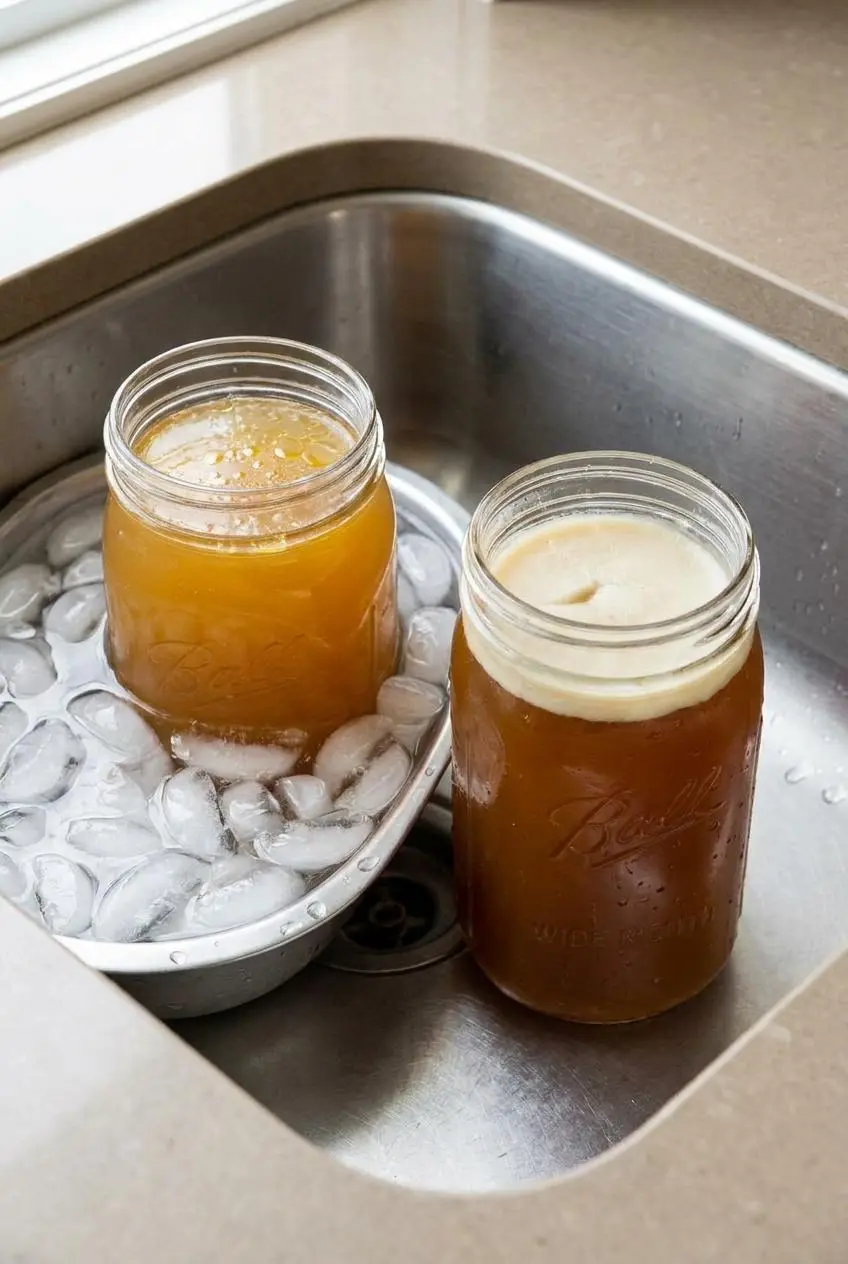
Cooling matters just as much as simmering when you make a big pot of broth. Large volumes stay hot for a long time, so it is better to divide them up rather than move the whole heavy pot straight into the fridge.
- Strain the broth first so the hot liquid cools more evenly.
- Transfer it into smaller containers or shallow pans instead of leaving it in one deep stockpot.
- Set those containers in an ice bath and stir occasionally to help the heat drop faster.
- Once the broth is cool, cover it and refrigerate it promptly.
For large batches, food safety standards recommend pans no more than 3 inches deep and a cooling path from 135°F to 70°F within 2 hours, then down to 41°F within an additional 4 hours, as outlined in cooling guidance for hot liquids.
Wide-mouth jars are handy for the fridge because the fat cap is easy to lift off once chilled. If you portion broth for later cooking, small amounts are convenient for adding quick depth to rice, grains, or a pot of hearty cowboy soup.
Common Bone Broth Mistakes to Avoid
Most bone broth problems come down to heat, bone choice, or timing. These are the ones that trip people up most often.
- The broth did not gel. This usually means there was too much water for the amount of bones, not enough connective tissue, or the broth simmered too hard. Use more joint bones, feet, necks, or backs next time and keep the surface at a gentle lazy bubble.
- The broth turned cloudy and greasy. A rapid boil can emulsify fat and fine particles into the liquid. Lower the heat early and skim surface impurities at the start if needed.
- The flavor tastes muddy. Raw beef bones often benefit from a 10 to 15 minute blanch before roasting or simmering. That simple step can clean up the flavor a lot.
- The broth tastes bitter. Garlic can do this when it cooks for the full 24 to 48 hours. If you want garlic flavor, add it only during the final hour.
- The slow cooker made a harsh broth. Some slow cookers run too hot on low. Check for active bubbling early, because that setting is not always as gentle as the name suggests.
If you chill the broth and see a clean pale layer on top, that is normal fat. If you see gray foam while the broth first heats, that is what you want to skim away.
Conclusion
Homemade bone broth rewards patience with deep savory flavor, a golden color, and that satisfying jiggly set once chilled. The biggest wins come from collagen-rich bones, gentle heat, and enough cooking time.
Choose the method that fits your kitchen, keep the simmer calm, and aim for that soft wobble in the fridge. That is when you know the pot really worked.
Frequently Asked Questions
Why Did My Bone Broth Not Gel?
Usually it comes down to one of three things. There was too much water compared to the amount of bones. The broth boiled too hard instead of staying at a low simmer. The bones did not have enough connective tissue, so there was not much collagen to convert into gelatin.
Do I Have to Roast the Bones First?
No. Roasting is optional. Roast beef and pork bones when you want a deeper, caramelized flavor and darker color. Chicken bones can skip roasting if you prefer a lighter broth. If the raw beef bones smell strong or muddy, blanching first can help clean up the flavor.
Can I Leave My Stovetop Simmering Overnight?
It is better not to leave an open stove flame unattended. Pause the process if needed. Cool the broth, refrigerate it, and resume cooking later. This is safer and still lets you finish a long-simmered batch successfully.
What Is the Layer of Fat on Top and Should I Throw It Away?
That top layer is normal. It is the fat that rose and solidified as the broth chilled. It can help shield the broth underneath while stored in the fridge. Scrape it off once cold, then discard it or use it as flavorful cooking fat.

Bone Broth Recipe

Equipment
- Wide Mouth 24oz Mason Jars
- Instant Pot DUO 6 Qt
- Fine Mesh Strainers
- Souper Cubes
Ingredients
- 2-3 pounds chicken, turkey, pork, beef, lamb, or other bones (with lots of connective tissue like feet, knuckles, necks, backs)
- 1 tablespoon apple cider vinegar
- 4 cups roughly chopped carrots, onions, and celery (or scraps)
- 2 bay leaves
- 1/2 teaspoon peppercorns
- 1 teaspoon sea salt
- Filtered water
Instructions
Roasting Optional Step
- Heat the oven to 425F and spread the raw bones in a single layer on a large baking sheet or roasting pan. Roast for 25 to 30 minutes, until the bones look golden brown and smell deeply savory.
Stovetop Method
- Add the bones, apple cider vinegar, carrots, onions, celery, bay leaves, peppercorns, and salt to a large soup pot or Dutch oven, then pour in filtered water until the bones are covered by 1 inch. Let the pot stand for 30 minutes so the vinegar can begin working before the heat goes on.
- Set the pot over medium-high heat just until the liquid reaches a simmer, then lower the heat as far as needed to keep only a few slow bubbles breaking the surface. That lazy bubble keeps the broth clearer and prevents the fat from emulsifying into the liquid.
- Leave the lid slightly ajar and cook poultry bones for 24 hours or red meat bones for 48 hours. By the end, the broth should smell deeply savory and the bones should look spent and fragile.
Slow Cooker Method
- Place the bones, apple cider vinegar, carrots, onions, celery, bay leaves, peppercorns, and salt in the slow cooker and add filtered water until the bones are covered by 1 inch. Let everything rest for 30 minutes so the vinegar has time to start loosening collagen from the bones.
- Set the slow cooker to low and leave the lid slightly ajar while the broth cooks. The surface should stay very quiet, with only gentle movement instead of active boiling.
- Cook poultry bones for 24 hours or red meat bones for 48 hours. If your slow cooker bubbles too aggressively on low, crack the lid a bit more or switch methods next time for better control.
Instant Pot Method
- Add the bones, apple cider vinegar, carrots, onions, celery, bay leaves, peppercorns, and salt to the Instant Pot insert, then pour in filtered water until the bones are covered by 1 inch or the liquid reaches the max fill line. Let the mixture rest for 30 minutes before sealing the lid.
- Seal the pot and cook on low pressure for 3 hours if you are using poultry bones or 4 hours if you are using red meat bones. Low pressure helps extract collagen efficiently without rough bubbling.
- Allow the pressure to release naturally before opening the lid. The broth should smell rich and savory, and the liquid will often look deeper in color than a quick stock.
Straining and Chilling
- Pour the finished broth through a fine mesh sieve and transfer it to jars or other heat-safe containers. The strained liquid should look clean and golden, without bits of vegetables or bone.
- Chill the broth until cold, then check the texture and the surface. A successful batch usually turns jiggly and develops a firm layer of fat on top that can be scraped off if desired.