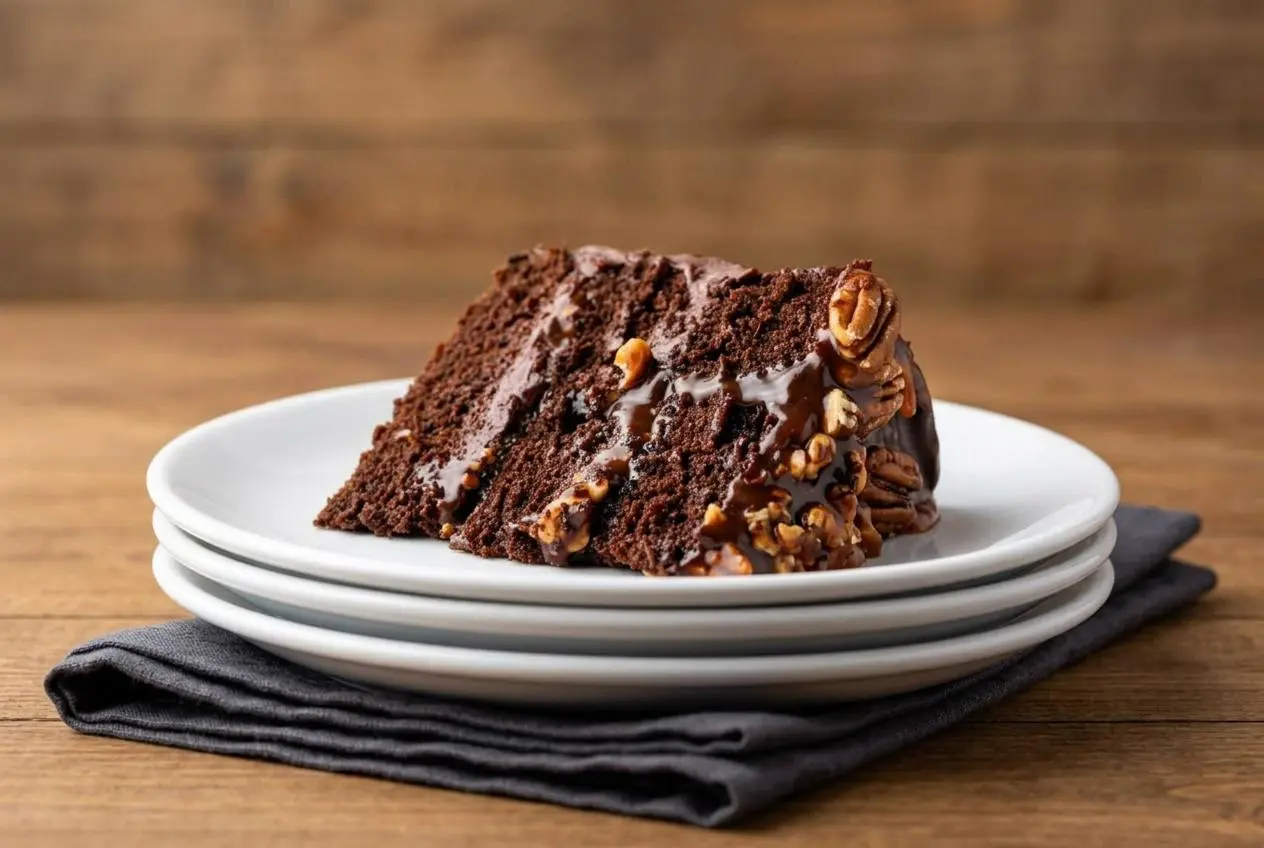
A classic turtle cake is a rich chocolate layer cake filled with caramel and toasted pecans, then covered with glossy fudge frosting for that candy-like turtle flavor in cake form.
Turtle Caramel Cake tastes like the dessert version of turtle candies, with deep chocolate, buttery caramel, and plenty of pecan crunch. It’s rich, gooey, and structured enough to slice cleanly when built the right way.
The best part is the smell while it comes together: toasted pecans, warm cocoa, and sugar turning amber on the stove. The frosting dam is the little trick that keeps it all neat.
Toast the pecans before you start the caramel so they’re cool, crisp, and ready when it’s time to assemble.
Understanding Turtle Caramel Cake
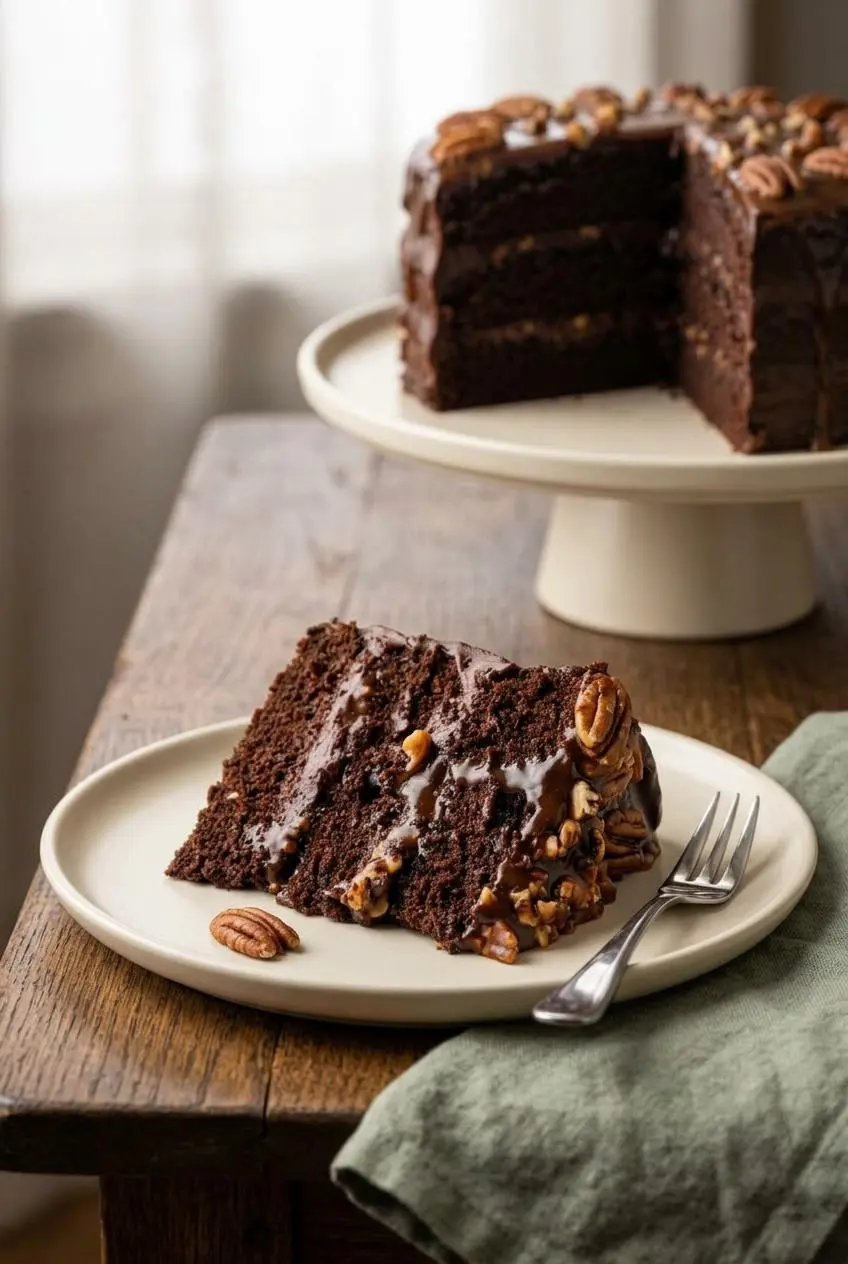
If you love the flavor of classic turtle candies, this cake hits every note. You get moist chocolate layers, a sweet salty caramel sauce, crunchy pecans, and a dark, tangy fudge frosting that keeps the whole thing from tasting flat.
The texture matters just as much as the flavor. The cake is soft and plush, the caramel stays thick and glossy instead of soaking in, and the pecans add a real snap between layers. That contrast is what makes each bite feel like more than just chocolate cake with sauce.
It also sits in the same indulgent lane as a layered chocolate cheesecake cake, but this one is lighter on the fork and easier to slice for a crowd.
Ingredients That Make a Perfect Turtle Cake
Each ingredient earns its spot here by building chocolate depth, caramel balance, fudgy richness, tender crumb, and that signature pecan crunch.
Cake
- 2 large eggs
- 3/4 cup sour cream (room temperature)
- 2/3 cup vegetable oil
- 2 cups (282g) all-purpose flour
- 1 cup (200g) granulated sugar
- 3/4 cup (100g) light brown sugar
- 2/3 cup (56g) unsweetened cocoa powder
- 1 teaspoon baking powder
- 1 teaspoon baking soda
- 3/4 teaspoon salt
- 1 cup (240ml) hot water (or hot coffee)
- 1 teaspoon pure vanilla extract
Frosting
- 1 cup heavy cream
- 3 Tablespoons corn syrup
- 2 Tablespoons salted butter
- 12 ounces dark chocolate (chopped)
- 3 Tablespoons cocoa powder
- 1/2 cup sour cream
Caramel
- 1 cup (200g) granulated sugar
- 6 Tablespoons salted butter
- 1/2 cup heavy cream
- 1 teaspoon pure vanilla extract
- 1/2 to 1 teaspoon fine sea salt
Assembly
- 1 1/2 cups whole pecan halves (toasted)
Sour cream is one of the quiet heroes here. In the cake, it adds moisture and tenderness without making the crumb loose. In the frosting, it cuts the sweetness and gives the chocolate a slightly tangy finish that tastes more grown-up and much less sticky sweet.
The two sugars do different jobs. Granulated sugar gives the cake clean sweetness and structure, while light brown sugar brings moisture and a mild molasses note that naturally leans toward caramel. That’s why the chocolate base tastes especially good with the filling instead of fighting it.
Hot water works, but hot coffee is especially good in a chocolate cake because it helps bloom the cocoa powder. That means the cocoa hydrates more fully and tastes darker, rounder, and richer. If you enjoy that chocolate and coffee pairing, a coffee caramel cake is another delicious route.
Toasted pecans are worth the extra step. Raw pecans can taste soft and slightly waxy in a layer cake, but toasted pecans smell warm and buttery and stay crunchier against the caramel. When they’re ready, the kitchen smells nutty and sweet, almost like pie crust.
The frosting uses dark chocolate, cocoa powder, cream, butter, corn syrup, and sour cream to land somewhere between ganache and fudge frosting. Even without extra add-ins, it already has enough bitterness and shine to balance the caramel well.
I like to let the caramel cool until it feels slightly warm and thickly pourable, almost like a loose spoon caramel. If it’s hot, it sneaks into the frosting and turns the layers into a slip-and-slide.
Choosing Your Cocoa Powder
Unsweetened cocoa powder gives this cake its chocolate backbone, but different styles of cocoa change the final result.
- Natural cocoa usually gives a lighter color and a sharper chocolate flavor. It also works well with the baking soda in the batter.
- Dutch-process cocoa tends to taste smoother and darker, with a deeper brown color and a slightly softer acidity.
- Black cocoa creates the darkest color of all, but it can taste drier and more dramatic than classic turtle cake usually needs.
If you want the most classic result, stick with a standard unsweetened cocoa powder. It gives you a moist crumb, clear chocolate flavor, and a color that still looks rich once the caramel and fudge frosting go on.
Step-by-Step Guide to Baking and Assembly
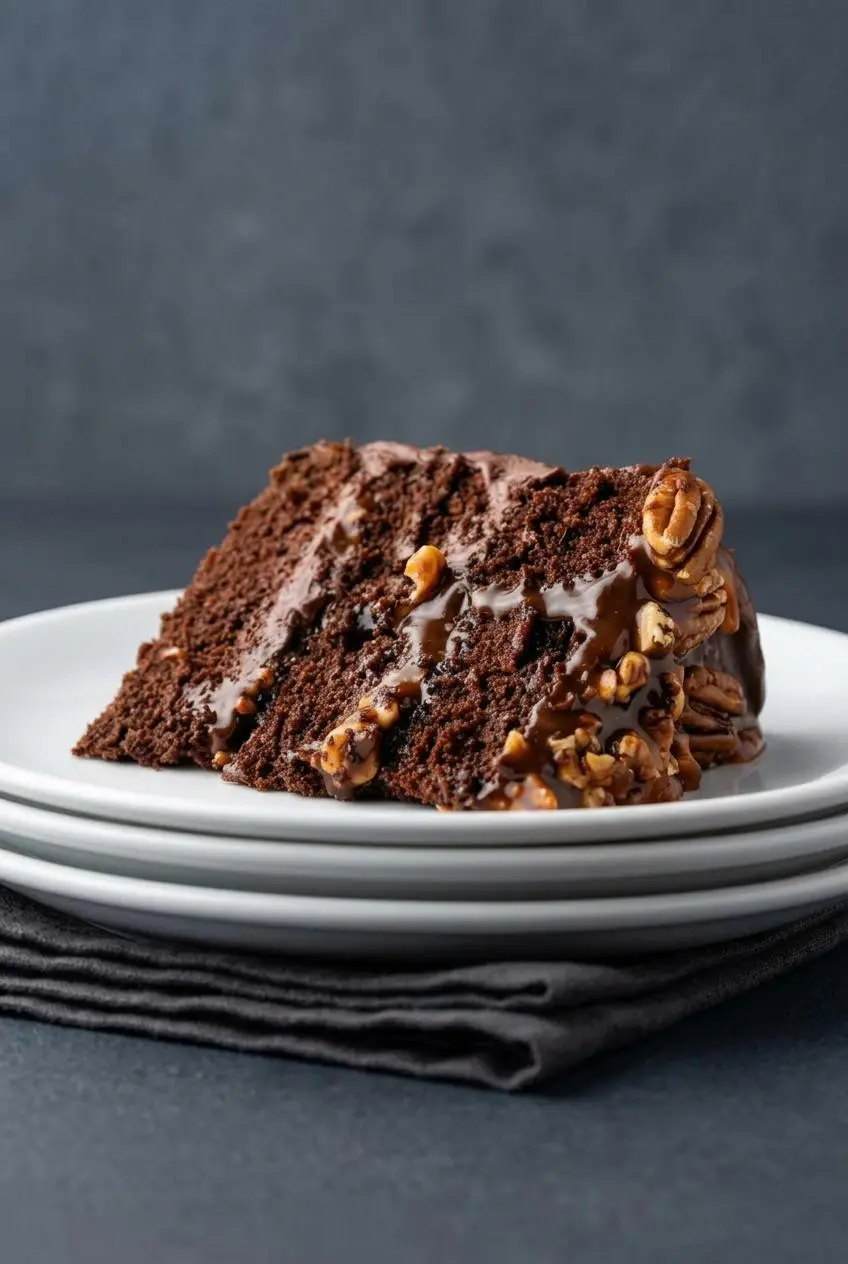
This is where the cake goes from separate parts to a sturdy, sliceable layer cake. The key is to watch texture as closely as time, especially with the caramel and frosting.
Cake, Caramel, Frosting, and Assembly
- Heat the oven to 350 °F, line two or three 8-inch round cake pans with parchment, and coat the pans with baking spray or butter and cocoa powder.
The parchment and cocoa coating help the layers release cleanly without leaving a pale floury edge. - Whisk the flour, granulated sugar, brown sugar, cocoa powder, baking powder, baking soda, and salt in a large bowl until evenly combined.
The mixture should look uniform in color with no dark cocoa pockets or brown sugar lumps. - In a separate bowl, whisk the eggs, sour cream, oil, and vanilla, then add that mixture to the dry ingredients and stir just until combined before mixing in the hot water or hot coffee.
The batter will loosen noticeably and become smooth and glossy, which is exactly what you want. - Divide the batter evenly among the prepared pans and bake for 25 to 30 minutes, or 30 to 35 minutes if using 2 layers, then cool in the pans for 10 minutes before turning out onto racks to cool completely.
The tops should feel slightly tacky but not wet, and a toothpick inserted in the center should come out clean. - Place the sugar in a dry medium saucepan over medium heat and stir constantly until it melts completely, then add the butter and stir it in before adding the heavy cream and boiling the caramel for 1 minute without stirring.
The sugar will first clump, then turn into a smooth light amber liquid, and the mixture will bubble hard when the butter and cream go in. - Take the caramel off the heat and stir in the vanilla extract and salt, then let it cool until thick but still pourable, reheating gently if it firms too much.
Fresh caramel looks quite thin at first, but it should become glossier and slightly heavier as it cools. - Warm the cream, corn syrup, and butter in a medium saucepan over medium-low heat until small bubbles form around the edges, pour over the chopped chocolate and cocoa powder, let stand for 5 minutes, whisk smooth, then stir in the sour cream and cool until spreadable.
The frosting will change from a shiny glaze to a thicker, softer fudge texture that holds swirls instead of running off the spoon. - Set one cake layer on a plate, spread on about 1/3 of the frosting, drizzle over about 1/3 of the caramel, scatter with 1/3 cup chopped pecans, then repeat with the remaining layers and finish the outside with frosting, whole pecans, and a caramel drip if desired.
For the cleanest finish, the frosting should hold its shape and the caramel should settle slowly instead of racing toward the edges.
The caramel stage can make people nervous, but it follows a clear pattern. First the sugar looks dry and stubborn, then it forms clumps, and then suddenly those clumps melt into a smooth amber syrup. Once you hit a light amber color, move forward promptly so it doesn’t tip into bitterness.
If your sugar starts to crystallize around the sides of the pan, keep the heat steady and continue stirring gently rather than turning the burner up. A dry pan helps, and once the sugar is fully melted, avoid extra agitation during that one-minute boil after the cream goes in.
The cake layers bake up best when the batter is split between separate pans, not piled into one very deep pan. You want even heat, level layers, and centers that finish baking at the same pace as the edges.
If the frosting ever looks separated or greasy while cooling, whisk gently until it comes back together. If it chills too much and turns stiff, let it sit at room temperature briefly and stir again until it spreads smoothly.
Understanding the Split-Baking Technique
Baking this batter in two or three separate pans gives you cleaner layers and a better crumb. A deep single pan would take longer to cook through, which can leave the middle too soft while the edges get overbaked and dry.
Separate layers also make the cake more stable once the caramel goes in. Thin, evenly baked rounds stack more predictably than a thick cake that has to be split after baking, especially when the filling is soft and gooey.
The Perfect Chocolate Ganache Drip
A good drip should move slowly down the sides and stop on its own before pooling at the base. That happens when the topping is warm enough to flow but thick enough to cling.
For caramel, wait until it is slightly warm and pourable, not hot and loose. For the chocolate side of things, the frosting should be closer to a soft ganache than a warm sauce if you want a controlled finish. Test one small drip near the back of the cake before going all in. It’s a tiny move that saves a lot of cleanup.
How to Prevent Slipped Layers and Leaking Caramel
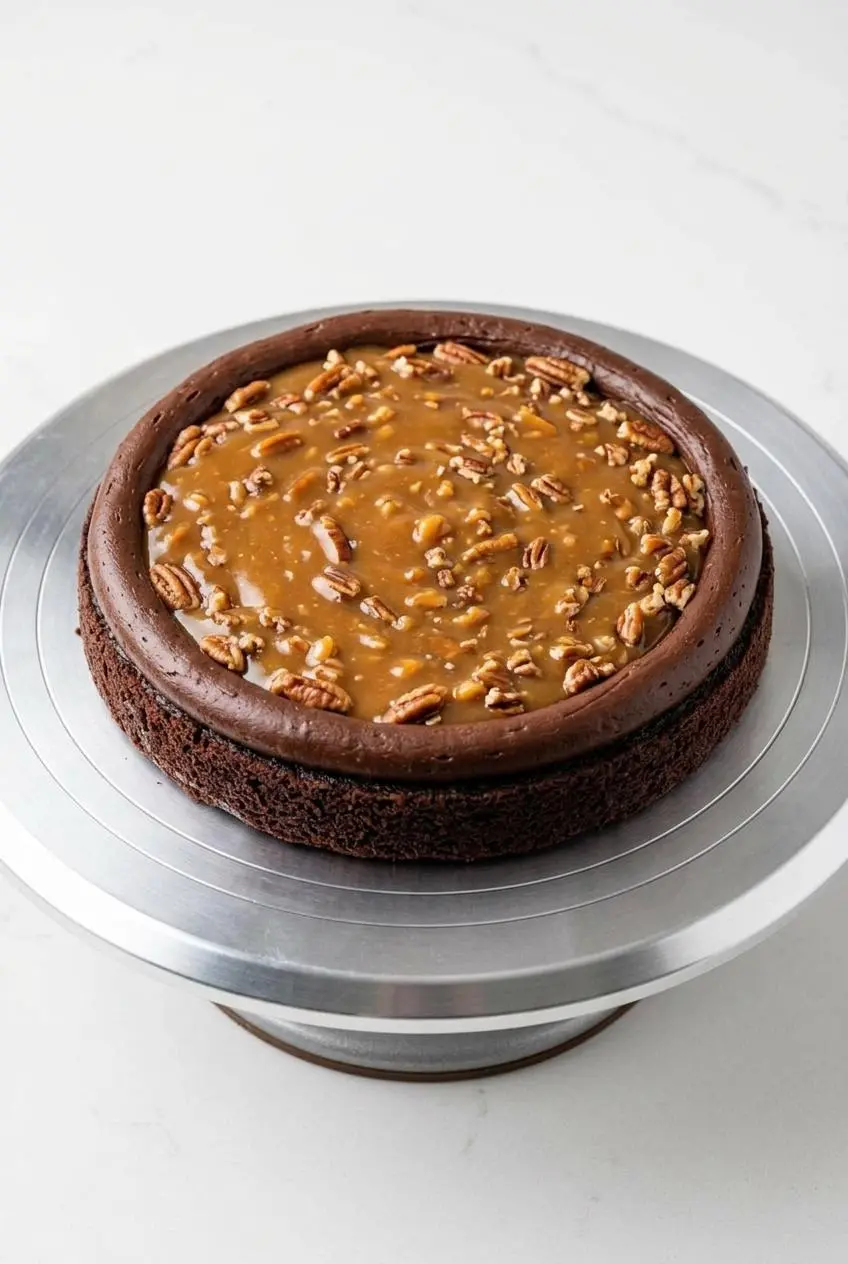
This cake is much easier to assemble when you think like a builder for five minutes. Caramel is delicious, but it will absolutely try to escape if the layers and frosting are too warm or too loose.
- Pipe or spread a thick ring of frosting around the outer edge of each cake layer before adding caramel. That border acts like a wall and keeps the filling from pushing out the sides.
- Cool the caramel until it is slightly warm and thick. If it pours like syrup, wait longer. If it sits in a blob, warm it gently until it loosens.
- Make sure the cake layers are fully cool before stacking. Warm cake softens the frosting and speeds up sliding.
- Let the frosting cool to a spreadable consistency before assembly. If it behaves like glaze, it’s too loose to support the weight of the upper layers.
- Press down lightly as you stack. Too much pressure pushes filling outward and creates a tilt.
- Chill the finished cake to help the layers set firmly. Because this cake contains cream and sour cream, keep it refrigerated for food safety and texture; perishable dairy products should be kept at or below 40 °F.
Secret to Stacking Caramel Cake Layers
The frosting dam is the whole game here. Before you add any caramel, use frosting to create a thick border around the edge of the cake layer, then fill the center. That border supports the next layer and keeps the caramel from reaching the rim, where it can act like a lubricant.
If the cake dome is prominent, level it first so the layers sit flat. A flat layer plus a thick frosting ring gives you a cake that stacks straighter, chills faster, and slices much more cleanly.
Sensational Variations to Try
The main cake is the classic scratch version, but you’ve got options if you want the same flavor profile with less assembly or a different flour and sugar approach.
The Easy Poke Cake Method
If you want the turtle flavor without building a layer cake, turn it into a poke cake. Bake a boxed chocolate cake in a 9×13 pan, poke holes once it has cooled a bit, spoon thick store-bought caramel over the top so it sinks in, then finish with a quick chocolate topping and toasted pecans.
Use a thick jarred caramel topping, not a thin squeeze-bottle syrup, or the cake can turn soggy instead of luscious. For another low-fuss version with the same chocolate, caramel, and pecan spirit, a Texas turtle sheet cake is a great crowd dessert.
Gluten-Free and Refined Sugar-Free Turtle Cake
You can make the flavor profile work for different needs, but keep these changes optional because they do alter the texture a bit.
- For gluten-free layers, use a good gluten-free flour blend or an almond flour based chocolate cake formula that is designed for layer cakes. Expect a slightly more delicate crumb.
- For a less refined caramel approach, coconut sugar and coconut cream can be used in a separate caramel recipe. The flavor will be deeper and toastier, with a different finish than classic caramel.
- If you go this route, build the cake only after both the frosting and caramel have thickened enough to hold shape. Alternative ingredients often set differently.
Make-Ahead Instructions and Proper Storage
You can break this recipe into stages, which makes it much easier for holidays, birthdays, or any day when you’d rather not juggle cake, caramel, and frosting all at once.
Bake the cake layers, cool them completely, and keep them wrapped so they don’t dry out while you prepare the fillings. You can also make the caramel and frosting in advance, then bring each back to a workable texture before assembly. The caramel should be thick and pourable, and the frosting should be spreadable, not cold and stiff.
Once assembled, keep the cake covered in the refrigerator because it contains cream and sour cream. If you need to hold slices for later, chill them in an airtight container and let them lose a bit of refrigerator chill before serving so the cake softens and the caramel relaxes.
If you want to freeze it, do that only after the cake is fully chilled and the caramel is set, so the topping does not smear in the wrapping. Wrap individual slices or the whole cake tightly in plastic wrap and aluminum foil, then freeze for up to 2 months. Thaw in the refrigerator before serving.
Conclusion
This cake is rich in the best way, with soft chocolate layers, buttery caramel, and toasted pecans in every slice. Once you understand the texture cues, it feels much more approachable than it looks.
If you remember two things, let the caramel cool to a thick pour and build that sturdy frosting dam before stacking. Do that, and your Turtle Caramel Cake will cut cleanly and taste every bit as dramatic as it sounds.
Frequently Asked Questions
Can I Use Store-Bought Caramel Sauce?
Yes, you can. Choose a thick, jarred caramel topping rather than a thin caramel syrup. If the caramel runs easily off a spoon, it is too loose for stable layers.
Do I Have to Use Hot Coffee in the Cake Batter?
No. Hot water works well too. Hot coffee helps bloom the cocoa powder, which deepens the chocolate flavor. The cake will not taste strongly like coffee when used here.
How Do I Prevent My Cake Layers from Sliding?
Pipe or spread a thick frosting ring around the edge of each layer first. Keep the caramel slightly warm and thick, never hot and runny. Assemble only when the cake layers are cool and the frosting is spreadable.
Can This Turtle Cake Be Frozen?
Yes. Freeze it only after the cake is fully chilled and stable. Wrap the whole cake or individual slices tightly in plastic wrap and aluminum foil. It can be frozen for up to 2 months and thawed in the refrigerator before serving.
Turtle Caramel Cake

Equipment
- 8-inch Round Cake Pans
- Medium saucepan
- Parchment Paper
- Wire Cooling Racks
Ingredients
Cake
- 2 large eggs
- 3/4 cup sour cream room temperature
- 2/3 cup vegetable oil
- 2 cups all-purpose flour 282g
- 1 cup granulated sugar 200g
- 3/4 cup light brown sugar 100g
- 2/3 cup unsweetened cocoa powder 56g
- 1 teaspoon baking powder
- 1 teaspoon baking soda
- 3/4 teaspoon salt
- 1 cup hot water or hot coffee, 240ml
- 1 teaspoon pure vanilla extract
Frosting
- 1 cup heavy cream
- 3 Tablespoons corn syrup
- 2 Tablespoons salted butter
- 12 ounces dark chocolate chopped
- 3 Tablespoons cocoa powder
- 1/2 cup sour cream
Caramel
- 1 cup granulated sugar 200g
- 6 Tablespoons salted butter
- 1/2 cup heavy cream
- 1 teaspoon pure vanilla extract
- 1/2 to 1 teaspoon fine sea salt
Assembly
- 1 1/2 cups whole pecan halves toasted
Instructions
Cake, Caramel, Frosting, and Assembly
- Heat the oven to 350 °F, line two or three 8-inch round cake pans with parchment, and coat the pans with baking spray or butter and cocoa powder. The parchment and cocoa coating help the layers release cleanly without leaving a pale floury edge.
- Whisk the flour, granulated sugar, brown sugar, cocoa powder, baking powder, baking soda, and salt in a large bowl until evenly combined. The mixture should look uniform in color with no dark cocoa pockets or brown sugar lumps.
- In a separate bowl, whisk the eggs, sour cream, oil, and vanilla, then add that mixture to the dry ingredients and stir just until combined before mixing in the hot water or hot coffee. The batter will loosen noticeably and become smooth and glossy, which is exactly what you want.
- Divide the batter evenly among the prepared pans and bake for 25 to 30 minutes, or 30 to 35 minutes if using 2 layers, then cool in the pans for 10 minutes before turning out onto racks to cool completely. The tops should feel slightly tacky but not wet, and a toothpick inserted in the center should come out clean.
- Place the sugar in a dry medium saucepan over medium heat and stir constantly until it melts completely, then add the butter and stir it in before adding the heavy cream and boiling the caramel for 1 minute without stirring. The sugar will first clump, then turn into a smooth light amber liquid, and the mixture will bubble hard when the butter and cream go in.
- Take the caramel off the heat and stir in the vanilla extract and salt, then let it cool until thick but still pourable, reheating gently if it firms too much. Fresh caramel looks quite thin at first, but it should become glossier and slightly heavier as it cools.
- Warm the cream, corn syrup, and butter in a medium saucepan over medium-low heat until small bubbles form around the edges, pour over the chopped chocolate and cocoa powder, let stand for 5 minutes, whisk smooth, then stir in the sour cream and cool until spreadable. The frosting will change from a shiny glaze to a thicker, softer fudge texture that holds swirls instead of running off the spoon.
- Set one cake layer on a plate, spread on about 1/3 of the frosting, drizzle over about 1/3 of the caramel, scatter with 1/3 cup chopped pecans, then repeat with the remaining layers and finish the outside with frosting, whole pecans, and a caramel drip if desired. For the cleanest finish, the frosting should hold its shape and the caramel should settle slowly instead of racing toward the edges.