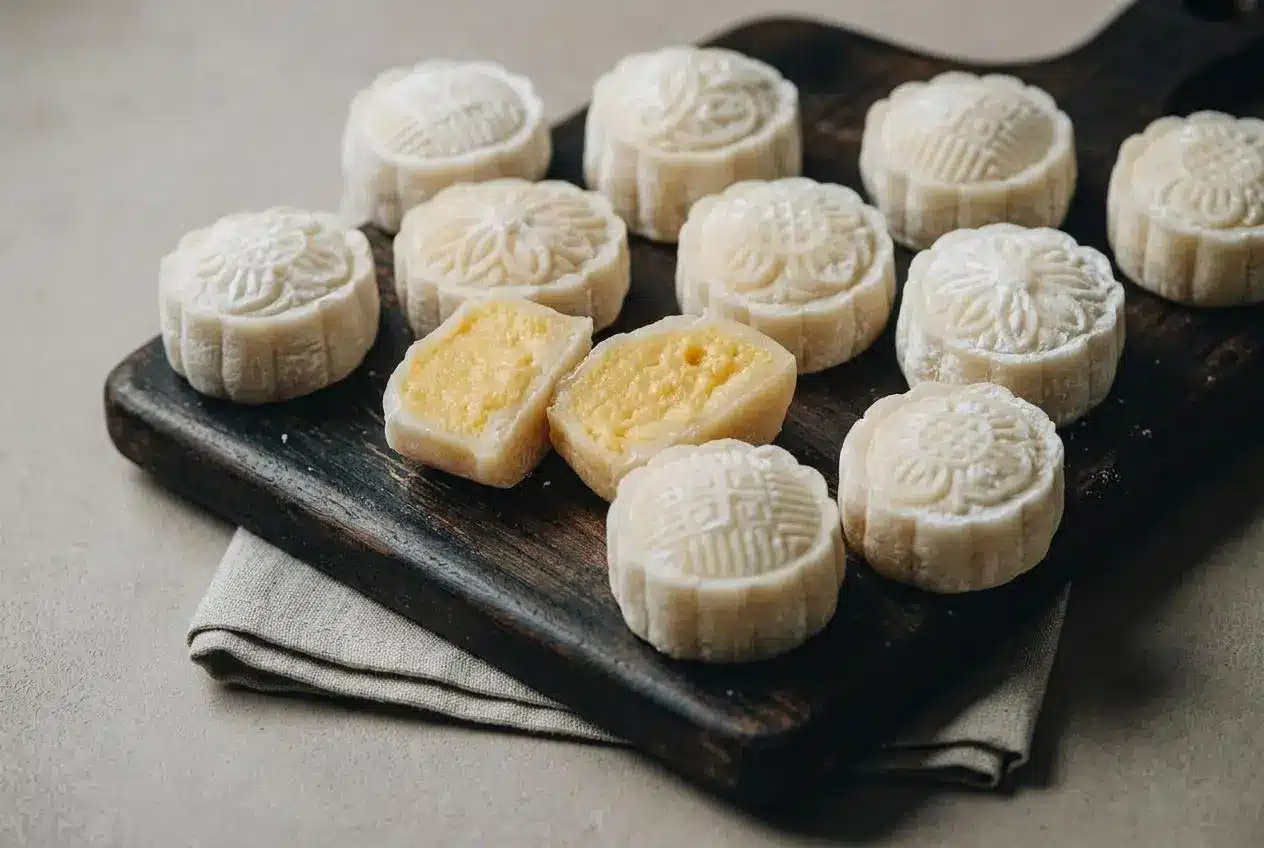
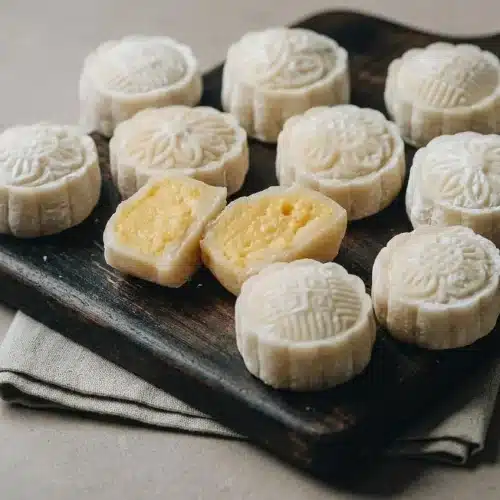
Snow skin mooncakes are no-bake Chinese Mid-Autumn Festival pastries with a cooked glutinous rice flour wrapper and sweet filling. Pressed in decorative molds and served chilled, these have a cool, pillowy bite around a creamy egg custard center.
Homemade snow skin mooncakes bring together two lovely textures: a gently chewy shell and a rich filling that holds its shape when cut. The wrapper needs cooking, but you won’t need to turn on the oven.
Exact gram weights and clear texture cues make the process manageable, even if this is your first batch. Give yourself time for cooking, chilling, and shaping rather than rushing the filling. The reward is in that creamy center.
Set out a digital scale, food-safe disposable gloves, and a 50-gram mooncake mold before you begin.
Key Ingredients and Why Each Flour Matters
The flours balance chewiness with structure, milk supplies moisture, and oil keeps the wrapper supple. Egg yolks, butter, and vanilla give the custard richness and aroma, while starch helps it become firm enough to wrap.
Custard
- 40 grams (6 tablespoons) cornstarch
- 5 grams (2 teaspoons) all-purpose flour
- 112 grams (1/2 cup) granulated sugar
- 5 large egg yolks
- 480 grams (2 cups) whole milk
- 30 grams (2 tablespoons) butter
- 1/2 teaspoon vanilla extract
Wrapper
- 120 grams (1 cup) glutinous rice flour
- 120 grams (1 cup) rice flour
- 120 grams (1 cup) cornstarch, and extra for coating the mooncakes
- 100 grams (3/4 cup) confectioners sugar
- 350 grams (1 1/2 cup) whole milk
- 55 grams (1/3 cup) vegetable oil
- 1/2 teaspoon vanilla extract
Glutinous rice flour supplies the chew. Also sold as sweet rice flour, it becomes sticky and elastic when cooked. “Glutinous” describes that sticky quality, not an ingredient containing gluten. Don’t confuse it with the regular rice flour listed separately.
Regular rice flour gives the wrapper structure. It moderates the stretchiness of sweet rice flour, making the dough easier to shape around a filling and helping it support a stamped design. Swapping one rice flour for the other changes the texture substantially.
Cornstarch makes the bite more tender. The wrapper uses equal weights of the three flours, so starch is an important part of its texture rather than a small thickening addition. It helps create the pale, snowy appearance. Other snow skin formulas sometimes use wheat starch, but this recipe uses cornstarch.
Whole milk adds body and moisture, while vegetable oil helps the cooked dough feel supple rather than dry. Confectioners sugar blends into the batter smoothly when sifted. Vanilla connects the flavor of the wrapper with the creamy filling.
In the custard, egg yolks provide richness and color. Cornstarch and all-purpose flour thicken the milk into a filling that can hold a ball shape after cooking and chilling. Butter rounds out the texture; it cannot compensate for an undercooked starch mixture.
For molding, use the extra cornstarch as a light coating, not a thick blanket. Cooked sweet rice flour, often called Gao Fen, is another coating option. If preparing a pan-toasted alternative, stir sweet rice flour in a dry skillet until cooked and lightly off-white, then cool it before use. Raw flour is not a useful substitute for either coating.
I’d weigh the three flours on a digital scale and sift the confectioners sugar to keep flour clumps out of the batter.
How to Make Snow Skin Mooncakes Step by Step
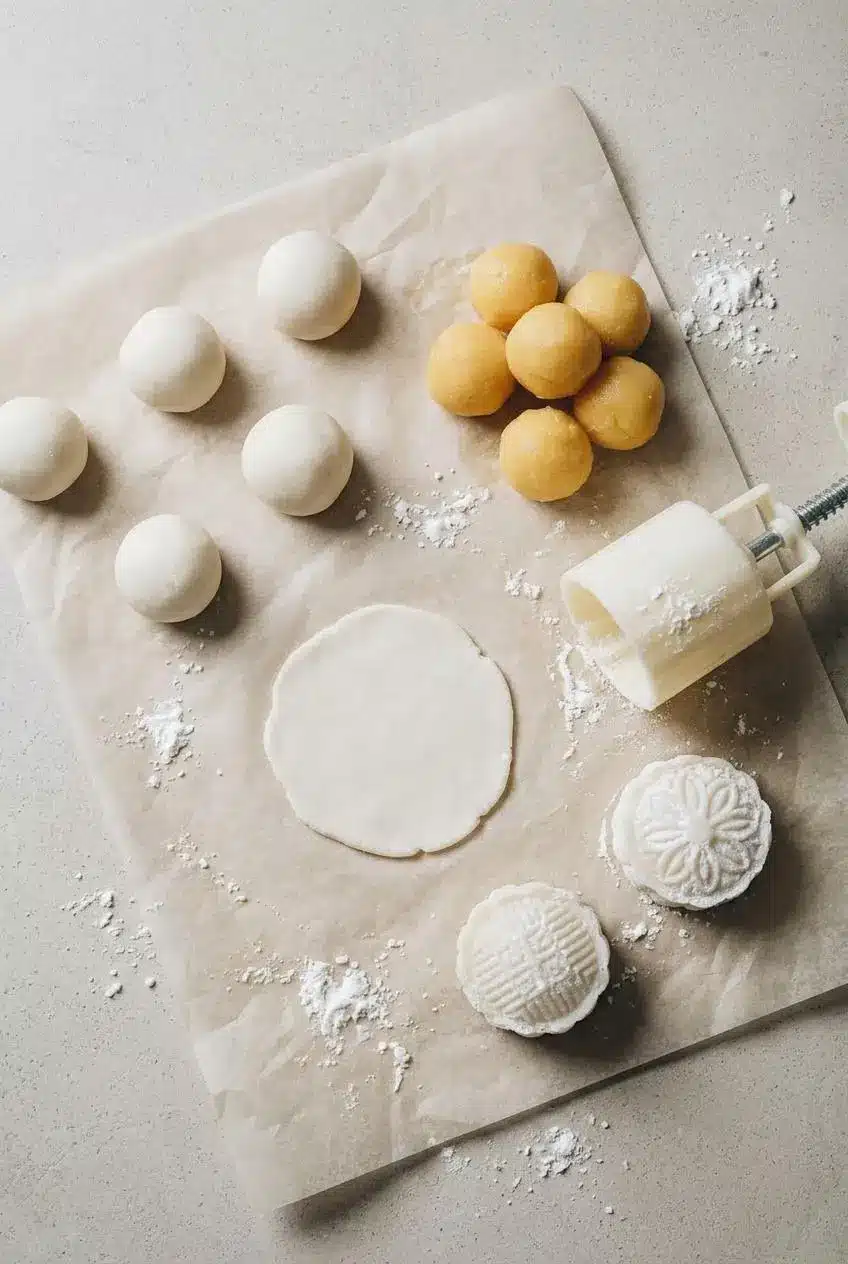
Start with the custard so it can chill while you prepare the wrapper. This batch yields about 25 mooncakes, approximately 45 grams each after trimming, and takes about 5 hours 30 minutes including chilling.
Cooking and Chilling the Thick Custard Filling
Tempering gradually warms the yolks before they return to the stove. The milk temperature below is a mixing cue, not the finished custard’s doneness temperature.
Make the custard
- Combine the cornstarch, all-purpose flour, and half the granulated sugar in a small bowl, then briefly stir the yolks in a separate large bowl.
The dry mixture should look evenly blended and the yolks should lose their separate outlines. - Warm the milk and remaining sugar in a small saucepan over medium heat, stirring occasionally, to about 120°F / 49°C without exceeding 150°F / 65°C.
The sugar should dissolve completely while the milk remains below a simmer. - Whisk the dry mixture into the yolks while the milk heats.
A uniform paste with no dry pockets is ready for tempering. - Whisk warm milk into the yolk paste in additions of about 1/4 cup until all the milk is incorporated.
The thick paste should gradually loosen into a smooth, pourable mixture. - Cook the mixture in the saucepan over medium heat, scraping the bottom continuously, then maintain a bubbling boil for one full minute while stirring.
Briefly pause to check for bubbles in the center before starting the timer, since thickening alone does not mean the custard has finished cooking. - Take the saucepan off the heat and work in the butter and vanilla.
The butter should disappear into the custard, leaving a glossy mixture. - Set a large mesh strainer over a deep plate lined with plastic wrap and pass the custard through it.
The strained filling should have an even texture without firm egg or flour lumps. - Lay plastic wrap directly against the custard and refrigerate for 2 hours, or use the freezer for a 30-minute quick chill.
The surface covering prevents a skin, and the chilled filling should feel thick rather than flowing.
Mixing sugar with the starch before adding it to the yolks helps distribute it evenly. Avoid leaving sugar sitting directly on yolks, where it can create stubborn little lumps.
Steaming and Kneading the Smooth Snow Skin Dough
Strain before steaming and knead thoroughly afterward. Straining removes flour clumps; kneading turns the cooked mass into a smooth wrapper.
Prepare the mooncake dough
- Choose a heatproof bowl that fits inside the steamer, set a strainer over it, and combine all three wrapper flours in another bowl.
The flour mixture should have a consistent white appearance. - Sift the confectioners sugar into the combined flours.
Break up any sugar lumps so they cannot leave dry specks in the batter. - Stir the milk, vegetable oil, and vanilla together in a small bowl.
The oil may separate slightly, so stir again as needed while adding it. - Make a well in the dry mixture, stir in the liquid 2 to 3 tablespoons at a time, and strain the finished batter into the heatproof bowl.
The batter should run easily through the strainer rather than fall in thick dollops. - Bring 1 inch (2.5 cm) of water to a boil in the steamer pot, then steam the bowl with the steamer covered over medium-high heat for 25 to 30 minutes.
A spoon pressed into the center should meet stiff dough with no remaining milky liquid. - Let the bowl cool for a few minutes, then scrape and work the dough with a spoon for 5 minutes.
The cooked mixture should gather into a cohesive ball. - Knead the dough by hand on a clean, un-floured counter for 5 minutes, then portion into 25-gram balls, cover, and chill until needed.
Use food-safe gloves once the dough is comfortable to handle and aim for a satin-smooth, slightly oily surface.
Wrapping and Stamping With a 50-Gram Mooncake Mold
Use 25 grams of dough around 25 grams of filling for a 50-gram mold. Pinching away excess wrapper brings the finished weight closer to 45 grams; keep the remaining skin even rather than stretching one spot paper-thin.
Assemble the mooncakes
- Use a spatula to smooth the chilled custard, roll it into 25-gram balls with disposable gloves, and refrigerate the portions for another 30 minutes.
The filling should retain a rounded shape instead of slumping. - Flatten each dough portion into a thin round about 4 inches (9 to 10 cm) across, using parchment sheets if it sticks.
Keep the thickness even so the wrapper can surround the filling without weak patches. - Center a custard ball on each round, bring the dough around it, pinch away excess at the closure, and set it seam-side down under a loose cover.
The filling should be fully enclosed with a smooth, unbroken top.
To mold the mooncakes
- Fit the decorative plate into the mold and give the wrapped ball a light cornstarch coating.
The surface should feel lightly dusted, with no thick white patches. - Position the smooth side against the pattern plate, press the mold firmly onto a flat surface, and hold for at least 30 seconds before releasing.
Keep the plunger steady so the design forms without a doubled outline.
Troubleshooting and Practical Tips for Perfect Patterns
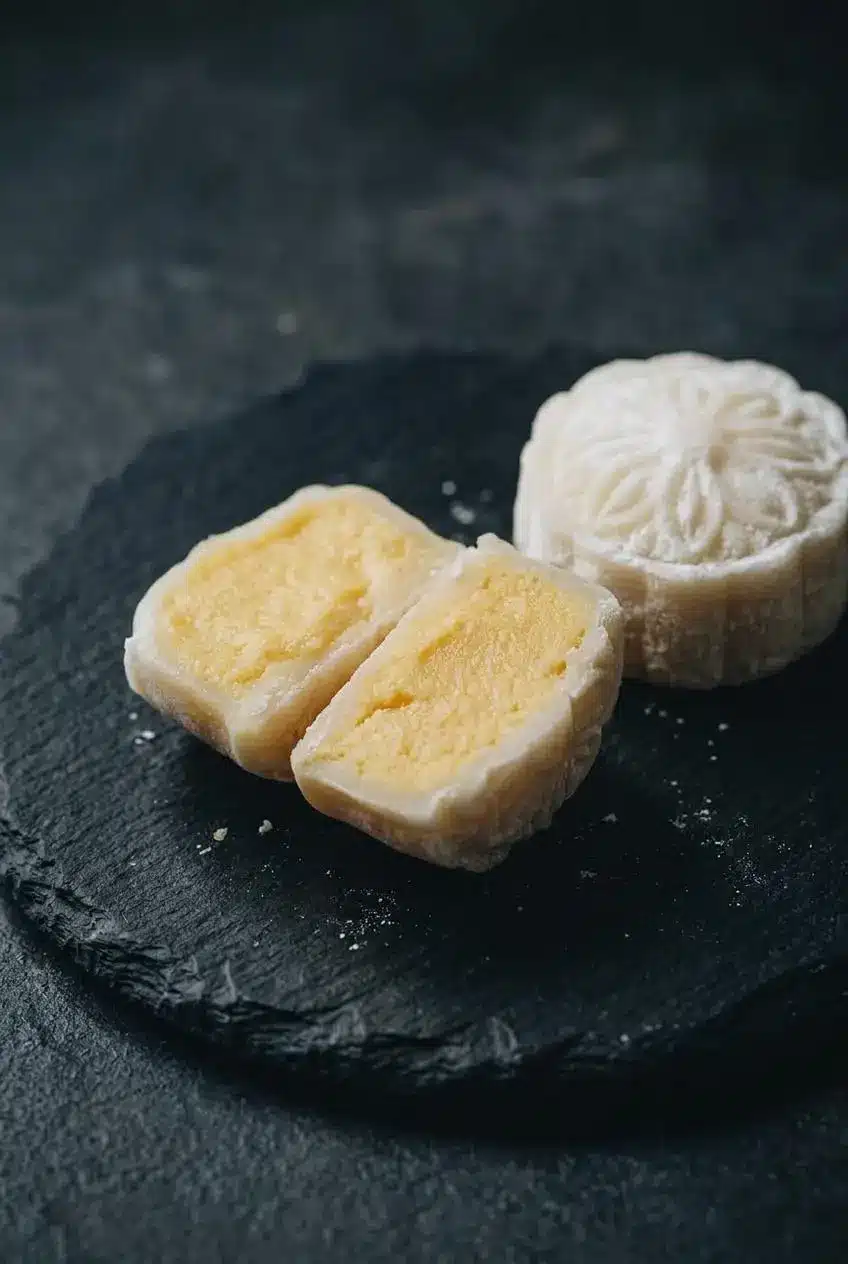
Most shaping problems begin with the filling’s firmness or the wrapper’s texture, so check those before reaching for more dusting starch.
- Custard won’t hold a ball: It likely stopped cooking as soon as it thickened, before the starch mixture finished setting. Return it to the saucepan, bring it back to visible bubbling while stirring, complete the full boil described above, and chill again before shaping.
- Dough sticks and tears during rolling: Use food-safe gloves and roll between parchment sheets. Adding raw flour to the counter dries the surface without fixing the sticky interior and can leave a chalky taste.
- The wrapper looks bumpy or cracks at the edges: Uneven, under-kneaded dough stretches poorly. Complete the warm kneading stages and look for a uniform surface before portioning; a smooth outside should not hide lumpy patches inside.
- The filling breaks through: Check that the custard is chilled and that the wrapper has an even thickness. Ease the dough upward around the filling rather than pulling hard on a single edge.
- The stamped pattern looks blurry: Excess cornstarch can collect in the plate’s fine grooves. Clear the plate, dust more lightly, and press straight down without rocking the mold.
- The design softens after storage: Protect the mooncakes from drying and unnecessary moisture. Delaying stamping until closer to serving may help preserve definition, but it cannot guarantee that every fine line stays unchanged.
- A different mold overfills: Keep the dough and filling at equal weights and size their combined weight to the mold. For a 75-gram mold, preserve that 1:1 balance rather than enlarging only the filling.
Flavor Variations and Quick Microwave Method
The steamed custard version is the main recipe. Treat these alternatives as optional changes, especially when switching equipment or choosing a filling with a different moisture level.
The 4-Minute Covered Microwave Dough Shortcut
For an optional microwave approach, place strained wrapper batter in a microwave-safe bowl. Cover with microwave-safe plastic wrap, following its package directions, and leave small steam vents. The shortcut takes about 3 1/2 to 4 minutes, but wattage, bowl shape, and batter depth affect the result.
Check for stiff, cooked dough with no milky center rather than relying on the clock alone. A full batch may need longer. Handle the hot bowl and escaping steam carefully, then follow the spoon-working and hand-kneading stages.
- Steaming: Offers steady, even heat and is the main method for this full batch.
- Microwaving: Avoids setting up a large steamer, but needs closer attention to center doneness and uneven heating.
Earthy Black Sesame, Red Bean, and Matcha Variations
- Black sesame filling: Combine finely ground toasted black sesame with cooked sweet rice flour, coconut oil, and honey or powdered sugar for a nutty alternative. Aim for a cohesive paste that rolls cleanly, not a loose spread.
- Red bean, lotus seed, or taro: Choose a smooth, firm paste and portion it like the custard. Loose or watery pastes make wrapping harder.
- Matcha or pastel wrappers: Sift matcha, ube powder, or freeze-dried strawberry powder into the dry wrapper mixture for optional color and flavor. Avoid heavy additions that noticeably alter the dough’s balance.
- Pandan or coconut: Infuse the wrapper milk with pandan, or replace part of it with coconut milk for a fragrant variation. Keep these changes separate from the main recipe measurements.
Make-Ahead, Storage, and Serving Guide
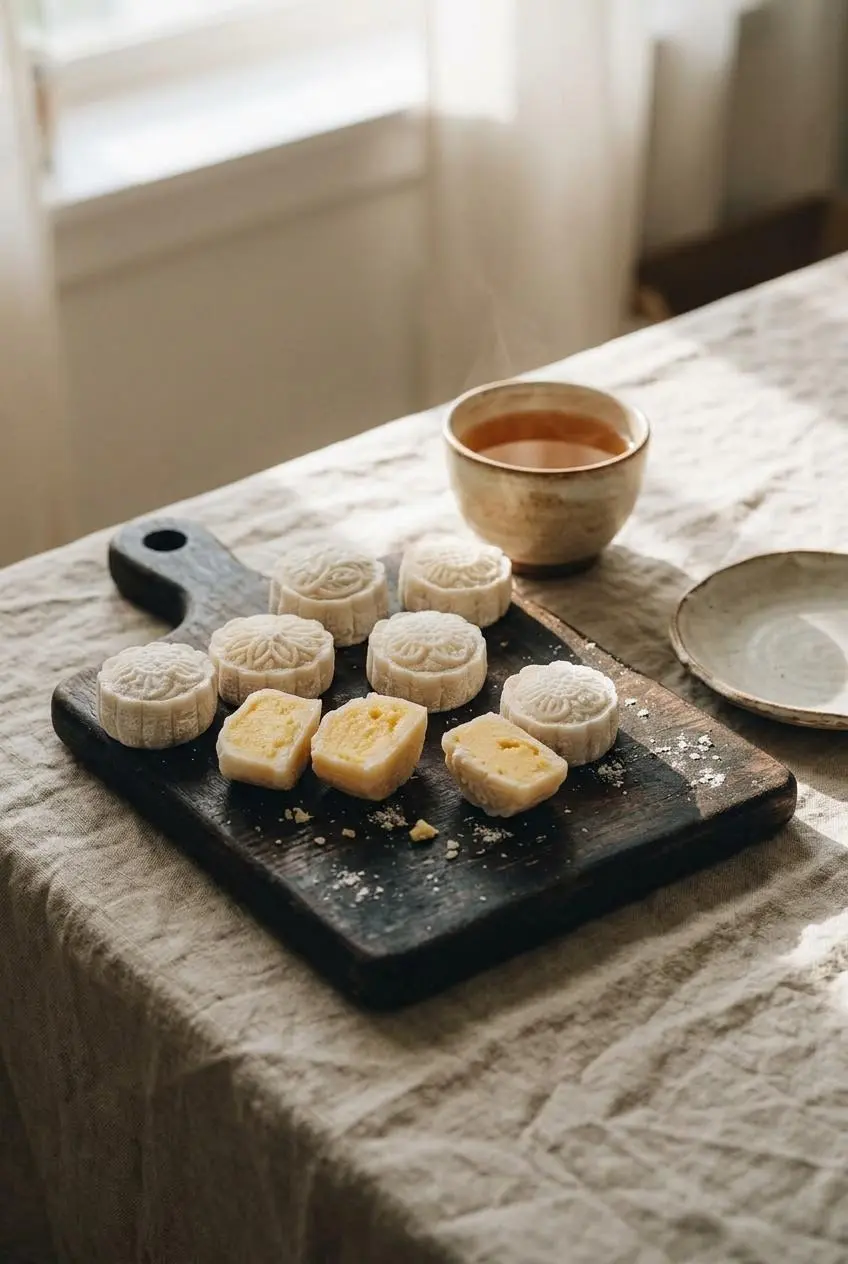
Keep the wrappers covered and the custard chilled as you work. The separate chilling stages let you prepare the components before assembly without leaving exposed dough to dry out.
If you want to stamp closer to serving, refrigerate the wrapped, unmolded balls in a tightly covered container. Mold them when the dough is pliable enough to accept the pattern without cracking. This approach may help with definition, though condensation and dough texture still affect the result.
Store finished mooncakes in an airtight container in the refrigerator, with parchment separating surfaces that might stick together. Keep egg-containing foods properly chilled and practice careful egg handling and refrigerated storage to reduce foodborne illness risk.
Before eating, let the chilled wrapper lose its refrigerator stiffness and become soft to the bite. Take out the portions you plan to serve rather than warming the whole container repeatedly.
Hot unsweetened oolong or jasmine green tea balances the sweet custard beautifully. For a Mid-Autumn Festival platter, arrange the mooncakes with space between them so their soft sides don’t stick together.
Conclusion
Soft wrappers, creamy custard, and a detailed stamp make these mooncakes satisfying to prepare without any baking. Let the custard finish its bubbling cook, then give the warm dough its full kneading time.
Once you’re comfortable wrapping and molding, try a fragrant pandan variation or an earthy black sesame center. Keep the filling firm and the dough supple, and enjoy that first cool, chewy bite.
Frequently Asked Questions
What Is the Main Difference Between Snow Skin Mooncakes and Traditional Mooncakes?
Traditional Cantonese mooncakes have a baked, golden pastry crust, commonly made with golden syrup and lye water. Snow skin versions use a cooked rice-flour wrapper that needs no baking and has a pale, chewy texture. They’re served chilled rather than like a room-temperature baked pastry.
Is Snow Skin Mooncake Just Mochi?
No, although the textures are related. Both use glutinous rice flour, but this wrapper also contains regular rice flour, cornstarch, milk, and oil. That blend moderates stretchiness and gives the dough enough structure to hold a decorative stamp.
Why Does My Custard Turn Out Too Soft to Shape After Chilling?
The likely cause is insufficient cooking after the custard thickens. Look for true bubbling in the center, then boil for one full minute while stirring continuously. Chilling firms properly cooked custard; it won’t reliably turn an undercooked mixture into a shapeable filling.
Why Does the Mooncake Skin Harden Overnight in the Fridge?
Rice starches firm as they cool, and exposure to refrigerator air can dry the wrapper further. Use an airtight container and let the portions you’re serving soften outside the refrigerator before eating. Cold firmness alone doesn’t mean the dough needed more oil.
Snow Skin Mooncakes

Equipment
- A 50-gram Mooncake mold
Ingredients
Custard
- 40 grams cornstarch (6 tablespoons)
- 5 grams all-purpose flour (2 teaspoons)
- 112 grams granulated sugar (1/2 cup)
- 5 large egg yolks
- 480 grams whole milk (2 cups)
- 30 grams butter (2 tablespoons)
- 1/2 teaspoon vanilla extract
Wrapper
- 120 grams glutinous rice flour (1 cup)
- 120 grams rice flour (1 cup)
- 120 grams cornstarch (1 cup), and extra for coating the mooncakes
- 100 grams confectioners sugar (3/4 cup)
- 350 grams whole milk (1 1/2 cup)
- 55 grams vegetable oil (1/3 cup)
- 1/2 teaspoon vanilla extract
Instructions
Make the custard
- Combine the cornstarch, all-purpose flour, and half the granulated sugar in a small bowl, then briefly stir the yolks in a separate large bowl. The dry mixture should look evenly blended and the yolks should lose their separate outlines.
- Warm the milk and remaining sugar in a small saucepan over medium heat, stirring occasionally, to about 120°F / 49°C without exceeding 150°F / 65°C. The sugar should dissolve completely while the milk remains below a simmer.
- Whisk the dry mixture into the yolks while the milk heats. A uniform paste with no dry pockets is ready for tempering.
- Whisk warm milk into the yolk paste in additions of about 1/4 cup until all the milk is incorporated. The thick paste should gradually loosen into a smooth, pourable mixture.
- Cook the mixture in the saucepan over medium heat, scraping the bottom continuously, then maintain a bubbling boil for one full minute while stirring. Briefly pause to check for bubbles in the center before starting the timer, since thickening alone does not mean the custard has finished cooking.
- Take the saucepan off the heat and work in the butter and vanilla. The butter should disappear into the custard, leaving a glossy mixture.
- Set a large mesh strainer over a deep plate lined with plastic wrap and pass the custard through it. The strained filling should have an even texture without firm egg or flour lumps.
- Lay plastic wrap directly against the custard and refrigerate for 2 hours, or use the freezer for a 30-minute quick chill. The surface covering prevents a skin, and the chilled filling should feel thick rather than flowing.
Prepare the mooncake dough
- Choose a heatproof bowl that fits inside the steamer, set a strainer over it, and combine all three wrapper flours in another bowl. The flour mixture should have a consistent white appearance.
- Sift the confectioners sugar into the combined flours. Break up any sugar lumps so they cannot leave dry specks in the batter.
- Stir the milk, vegetable oil, and vanilla together in a small bowl. The oil may separate slightly, so stir again as needed while adding it.
- Make a well in the dry mixture, stir in the liquid 2 to 3 tablespoons at a time, and strain the finished batter into the heatproof bowl. The batter should run easily through the strainer rather than fall in thick dollops.
- Bring 1 inch (2.5 cm) of water to a boil in the steamer pot, then steam the bowl with the steamer covered over medium-high heat for 25 to 30 minutes. A spoon pressed into the center should meet stiff dough with no remaining milky liquid.
- Let the bowl cool for a few minutes, then scrape and work the dough with a spoon for 5 minutes. The cooked mixture should gather into a cohesive ball.
- Knead the dough by hand on a clean, un-floured counter for 5 minutes, then portion into 25-gram balls, cover, and chill until needed. Use food-safe gloves once the dough is comfortable to handle and aim for a satin-smooth, slightly oily surface.
Assemble the mooncakes
- Use a spatula to smooth the chilled custard, roll it into 25-gram balls with disposable gloves, and refrigerate the portions for another 30 minutes. The filling should retain a rounded shape instead of slumping.
- Flatten each dough portion into a thin round about 4 inches (9 to 10 cm) across, using parchment sheets if it sticks. Keep the thickness even so the wrapper can surround the filling without weak patches.
- Center a custard ball on each round, bring the dough around it, pinch away excess at the closure, and set it seam-side down under a loose cover. The filling should be fully enclosed with a smooth, unbroken top.
To mold the mooncakes
- Fit the decorative plate into the mold and give the wrapped ball a light cornstarch coating. The surface should feel lightly dusted, with no thick white patches.
- Position the smooth side against the pattern plate, press the mold firmly onto a flat surface, and hold for at least 30 seconds before releasing. Keep the plunger steady so the design forms without a doubled outline.