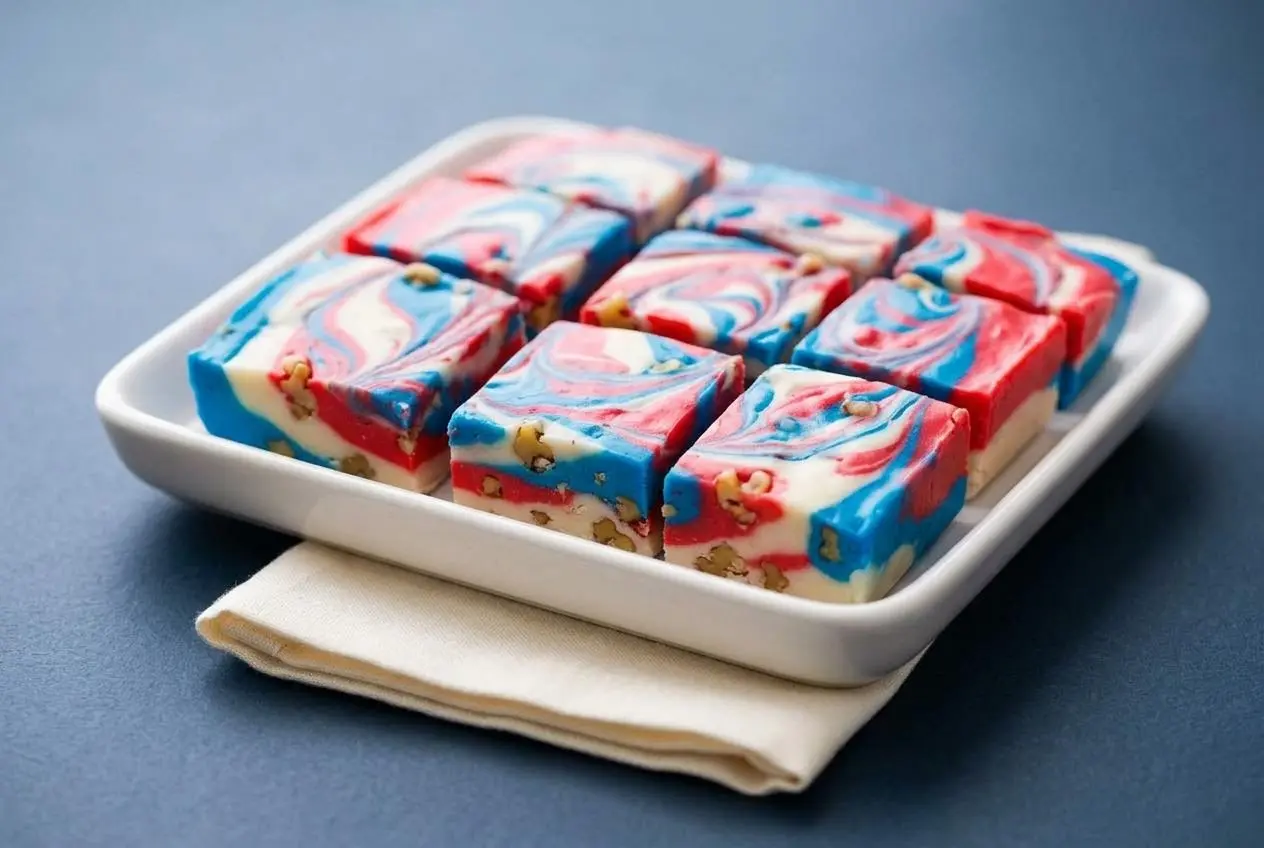
To make Red White and Blue Fudge, melt white chocolate chips with sweetened condensed milk, tint two portions with gel food coloring, and layer them in a parchment-lined 8×8 pan, chilling briefly between layers for neat stripes.
Red White and Blue Fudge is a quick microwave dessert with creamy white chocolate layers and bright patriotic color. It gives you that sweet, smooth vanilla bite without a candy thermometer or stovetop fuss.
It’s especially handy for summer holidays because it looks festive, travels well once chilled, and feels a little special with very little active work. The clean-layer trick is the part worth knowing.
Leave enough parchment hanging over two sides so you can lift the whole slab out without tugging at the corners.
Ingredients Explained: Why Sweetened Condensed Milk Matters
Each ingredient here has a job, from giving the fudge its smooth set to creating clean color and a creamy bite instead of a chalky one.
- 4 1/2 cups white chocolate chips
- 21 ounces condensed milk
- food coloring: red and blue
- mix ins: walnuts
White chocolate chips bring the sweetness, cocoa butter, and body that turn firm once chilled. Condensed milk adds both sugar and moisture, so the melted chocolate stays creamy and sets into sliceable fudge instead of turning dry or crumbly. The food coloring gives the red and blue layers their bold look, and walnuts add contrast if you want a little crunch against all that smoothness.
I always keep the gel coloring right beside the bowls before melting the chocolate, because once the mixture is smooth you want to tint it quickly and spread it before it starts to thicken.
The Evaporated Milk Pitfall
This is the most important ingredient swap to avoid. Sweetened condensed milk and evaporated milk are not interchangeable here.
Condensed milk is much sweeter, much thicker, and far denser in sugar than evaporated milk. That matters because quick microwave fudge depends on that sugar-rich, syrupy consistency to bind with melted white chocolate and firm up as it chills.
Evaporated milk is unsweetened and noticeably thinner. If you use it, the mixture will not behave the same way and can stay loose instead of setting into proper fudge. You’re much more likely to end up with something closer to a runny glaze than neat squares.
Selecting the Best White Chocolate
White chocolate is the backbone of this recipe, so quality matters more than it seems. Chips or bars made with real cocoa butter usually melt more smoothly and taste richer than lower-cost white baking pieces with more stabilizers.
Those stabilizers help chips hold their shape in cookies, but they can also make them slower to melt and easier to overheat. That is one reason white chocolate sometimes goes from soft to clumpy so fast in the microwave.
When you want the cleanest melt, look for a brand with real cocoa butter in the ingredient list. It gives you a smoother finish and a better creamy texture in desserts like white chocolate raspberry cake too.
Use gel food coloring, not liquid drops. Liquid coloring introduces water, and even a small amount can make melted white chocolate seize into a thick, grainy mass.
How to Melt White Chocolate in the Microwave Without Burning It
White chocolate needs a gentle hand. It melts before it looks fully melted, and that is where many batches go sideways.
For the safest microwave method, combine the white chocolate chips with the condensed milk before heating. Don’t microwave the chips dry. The milk cushions the chocolate and helps it warm more evenly.
Use medium power, about 70 percent if your microwave allows it, and heat in short 20-second intervals when you need a careful approach. The official method here uses two 30-second bursts per bowl, which works well, but the same rule still applies: stop and stir between rounds so residual heat can finish the job.
Watch the texture closely. At first the mixture will look stiff and only partly melted. After stirring, it should loosen, look glossy, and feel smoother under the spatula. If a few soft lumps remain after heating, stir before adding more microwave time. White chocolate often melts completely from its own retained heat.
If you keep microwaving until it looks fully liquid before stirring, it can scorch fast. Once burned, the flavor turns flat and the texture goes grainy.
How to Make Red White and Blue Fudge: Step-by-Step Color Layering Technique
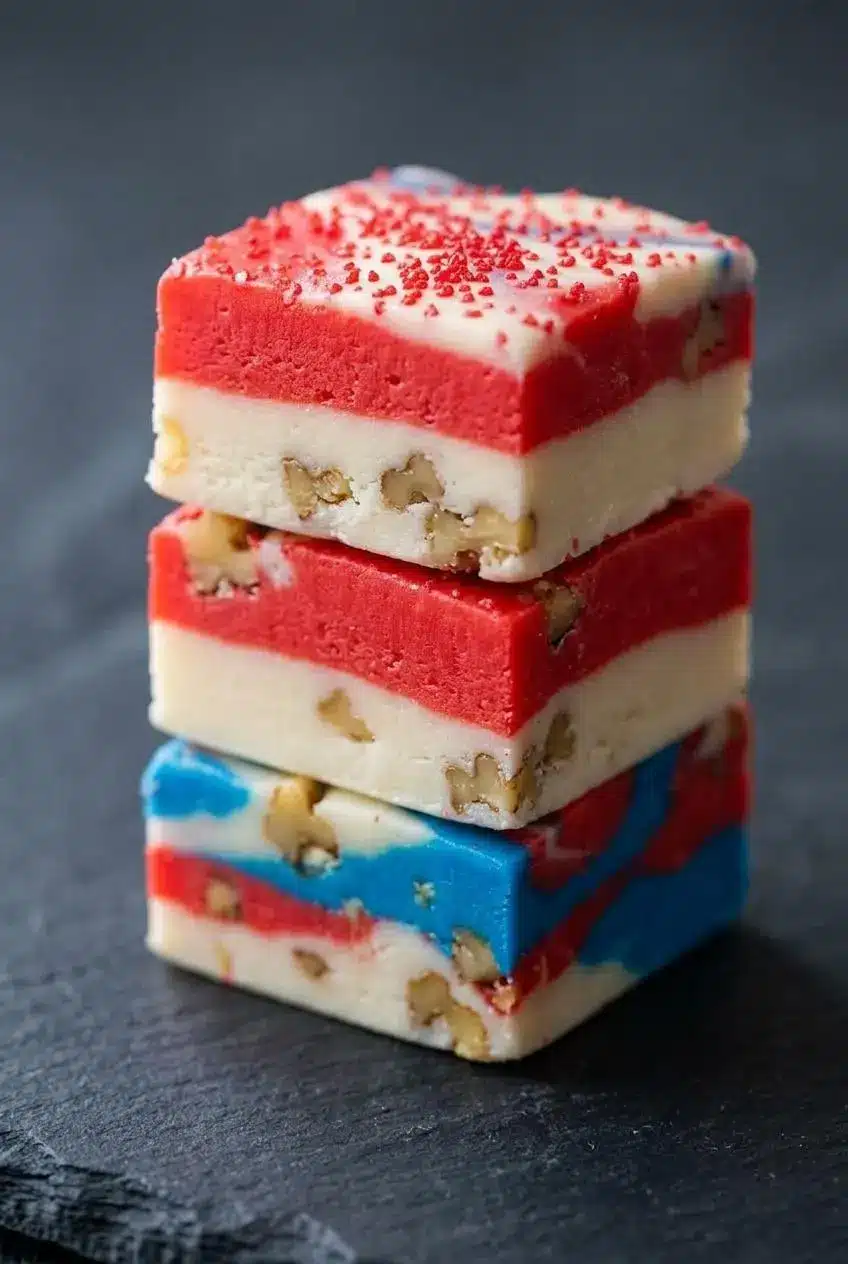
- Divide the white chocolate chips evenly among 3 microwave-safe bowls, using 1 1/2 cups in each, then add one-third of the condensed milk to every bowl.
The portions should look evenly split so the colored layers stack at the same height. - Line an 8×8 baking dish with parchment paper and leave some overhang on the sides.
The paper should sit flat in the pan with enough extra at the edges to lift the chilled fudge out cleanly later. - Heat the first bowl for 30 seconds, stir well, then microwave it for another 30 seconds and mix until smooth before stirring in eight drops or more of blue gel food color.
When it is ready, the mixture will look glossy and spreadable with an even blue color and no dry streaks. - Spread the blue mixture into the lined dish and smooth the top with a spatula, then refrigerate it for 10 minutes.
The layer should look level and lightly firmed so the next layer sits on top instead of sinking in. - Microwave the second bowl for 30 seconds, stir, then heat it for another 30 seconds and stir until smooth before spreading it over the chilled blue layer.
The white layer should glide across the surface without dragging too much blue into it, then chill it for 10 minutes. - Warm the third bowl for 30 seconds, stir, then microwave it for another 30 seconds and mix until smooth before adding eight drops or more of red gel food color.
The finished mixture should be creamy, evenly tinted, and easy to spread without looking oily or curdled. - Spread the red layer over the white layer, level the top, add red sprinkles, and refrigerate for 10 minutes.
The top should set just enough to hold the sprinkles and keep the red layer distinct. - Take the pan from the refrigerator, let the fudge stand briefly at room temperature, then cut it into squares with a very sharp knife.
The slab should feel firm but not rock hard, which helps the knife pass through the layers without cracking them.
The main trick is chilling each layer just enough to keep the colors from bleeding together, but not so long that the next layer won’t bond. Those 10-minute breaks are useful because they firm the surface while it is still slightly tacky underneath.
If you pour the next layer onto a base that is too warm, the colors smear. If the base gets too cold and hard, the layers can separate when cut. A smooth spatula and gentle spreading make a big difference here.
Walnuts are listed as a mix-in, but keep them optional and fold them into a colored layer only if you want texture. For the cleanest striped look, many people prefer to leave the layers plain.
Troubleshooting: How to Fix Seized or Grainy Fudge
Most problems with this fudge come down to moisture, overheating, or rushing the layers. The good news is that a batch can often be saved.
- If the chocolate turns thick and chalky, it likely seized from moisture or overly hot spots in the microwave. Try stirring in a tiny splash of warm milk to loosen it, then stir gently until it smooths out as much as possible.
- If the mixture looks grainy, the white chocolate probably overheated. Heat more gently next time and stop before every chip is visibly melted, because stirring often finishes the job.
- If the fudge feels too soft after chilling, the usual cause is the wrong milk. Evaporated milk will not set this recipe the same way sweetened condensed milk will.
- If the layers bleed into one another, the lower layer was still too warm. Chill each layer for the full 10 minutes so the colors stay sharp.
- If the top looks rough instead of smooth, the mixture started firming before you spread it. Work quickly once each bowl is melted and tinted.
- If the chocolate seizes again and again, check your tools. Even a few water droplets in the bowl or on the spoon can trigger clumping.
Liquid food coloring is another frequent troublemaker. It seems harmless, but water and white chocolate are bad roommates.
Graininess can also come from sugar crystallization around the sides of a hot bowl. Stir thoroughly and scrape the bowl well so the texture stays even all the way through.
Storage, Chilling, and Slicing Guidelines
This section is where the neat finish happens. A little patience gives you sharper stripes and cleaner squares.
During assembly, refrigerate each layer for exactly 10 minutes before adding the next one. That pause keeps the colors separate without letting the layers become too firm to hold together nicely.
For storage after the fudge is fully made, keep it in an airtight container in the refrigerator for up to 1 week. For best quality and good dairy storage habits, keep your refrigerator at 40 °F or below as explained here on safe refrigeration for dairy foods.
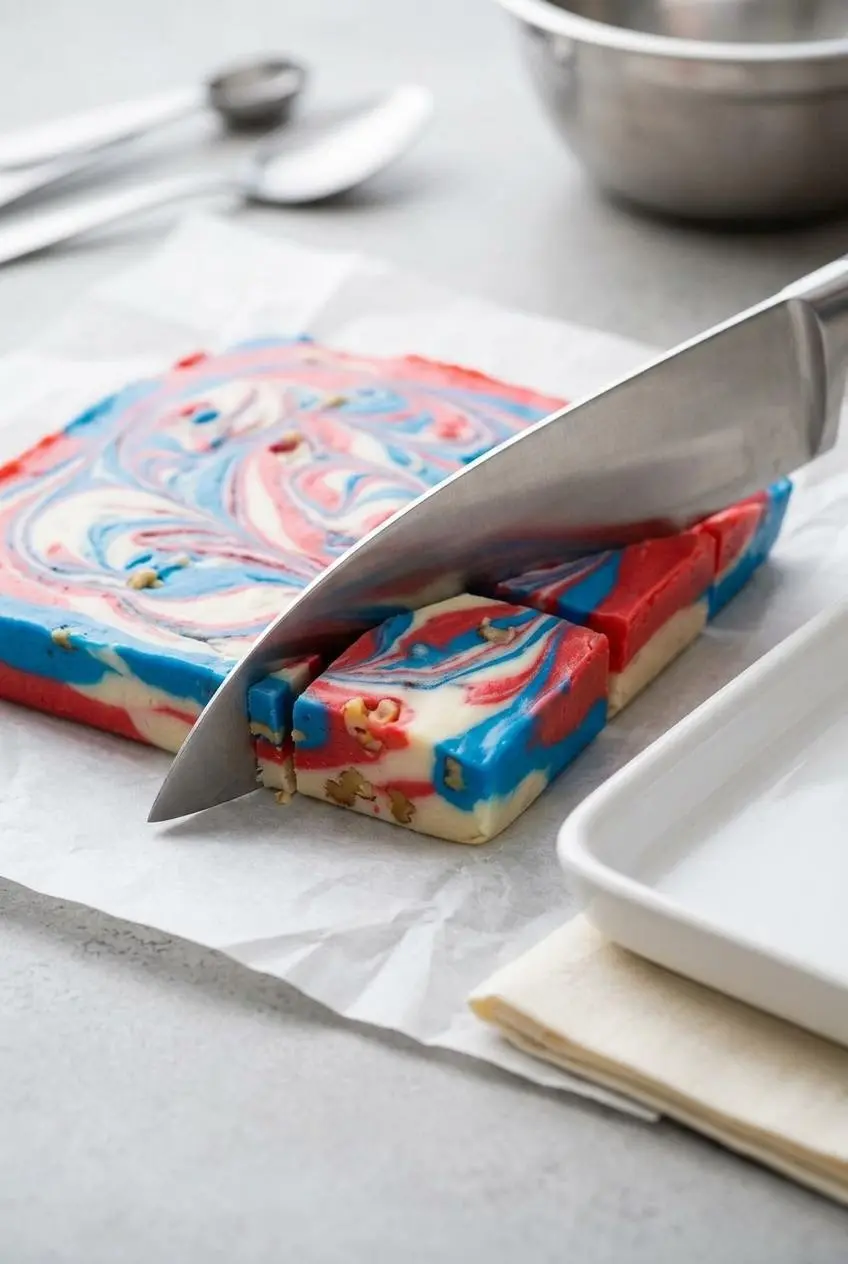
To slice clean layers, chill the fudge until firm, then lift it out using the parchment overhang. Dip a long sharp knife in hot water, wipe it completely dry, and press straight down in one motion instead of sawing back and forth.
Wipe the knife clean between cuts, then repeat the hot-water step as needed. That keeps blue and red smears from dragging across the white center. Cutting it cold gives the cleanest edges, but letting it stand briefly first can reduce cracking.
For serving, small squares or rectangles look especially tidy on a summer dessert tray. If it’s a hot day, keep the platter chilled until close to serving time.
Variations to Try
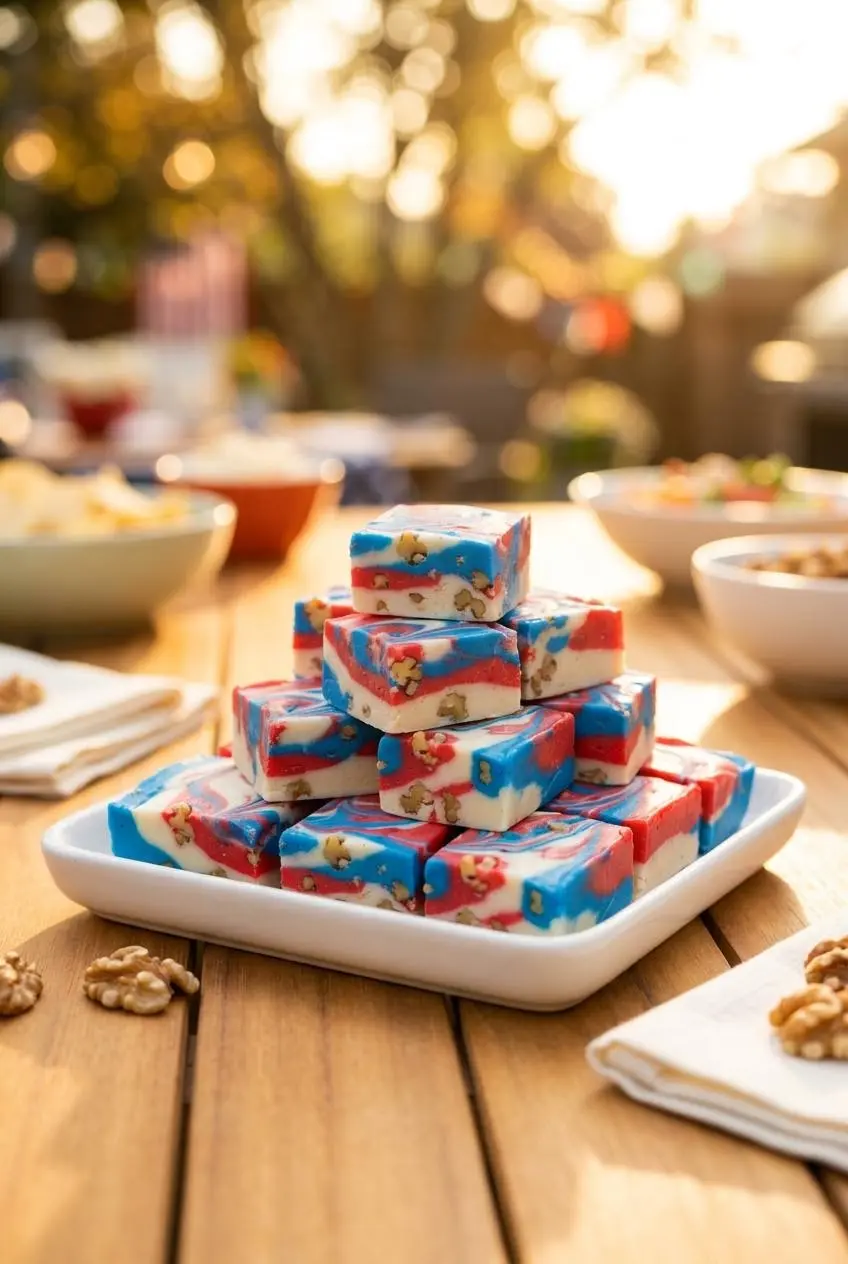
The core recipe works beautifully as written, and these are just optional ways to change the look or flavor without changing the main method.
Swirled Toothpick Fudge
If you want a softer marbled look instead of flat stripes, add the colors and then drag a toothpick gently through the top before the layers fully set. Use a light hand so the red, white, and blue ripple together rather than blending into one muddy shade.
This version feels a little more playful and hides tiny spreading imperfections nicely. It is especially useful if you’re less interested in ruler-straight layers and more interested in a festive finish.
Flavored Extract Adjustments
Vanilla bean paste, almond extract, or mint extract can all work with white chocolate, but keep the additions modest so the mixture stays smooth. Strong extracts can quickly overpower the mellow vanilla flavor of the base.
Stir the extract into the melted mixture only after the chocolate is smooth. If you add too much liquid flavoring, the texture can tighten, so start small and mix well before deciding if it needs more.
If you want another chilled chocolate dessert for a summer gathering, homemade fudge popsicles fit the same party mood in a colder form.
Cake Batter Patriotic Fudge
This optional version gives the fudge more of a birthday-cake flavor. The safest way to do it is to use heat-treated white cake mix before stirring any into the melted chocolate mixture.
Do not use raw cake mix straight from the box. If you want that cake batter flavor, heat-treat the mix first, let it cool, and then add it as an optional variation so you keep the flavor idea without the raw flour concern.
This variation is richer and a little sweeter than the classic version, so it works best if that frosting-like cake batter note is exactly what you want.
Conclusion
This fudge is fast, festive, and much easier than traditional cooked fudge, especially when you want clean patriotic layers without dragging out a candy thermometer.
Use gel food coloring, melt the white chocolate gently, and give each layer its full chill time. That small bit of patience is what makes the slices look party-ready.
Frequently Asked Questions
Why is gel food coloring required for white chocolate fudge?
Gel coloring is concentrated, so you get bold color without thinning the chocolate. Liquid food coloring contains water, and water can make melted white chocolate seize and turn clumpy. It also helps the layers stay thicker and easier to spread neatly.
Can I substitute evaporated milk for condensed milk in this recipe?
No. Evaporated milk is too thin for this style of fudge. Sweetened condensed milk supplies the sugar density and body that help the mixture set. If you swap it, the fudge can stay loose instead of slicing cleanly.
How do I prevent my white chocolate from seizing?
Melt it with the condensed milk instead of heating the chips dry. Use short, gentle microwave bursts and stir between them so residual heat can finish the melting. Keep bowls, spatulas, and spoons completely dry, and use gel coloring instead of liquid drops.
What is the best way to slice clean layers of fudge?
Chill the fudge until it is firm, then lift it out with the parchment. Dip a sharp knife in hot water, wipe it fully dry, and cut with one straight downward press. Clean the blade between slices so the colors stay crisp instead of smearing.
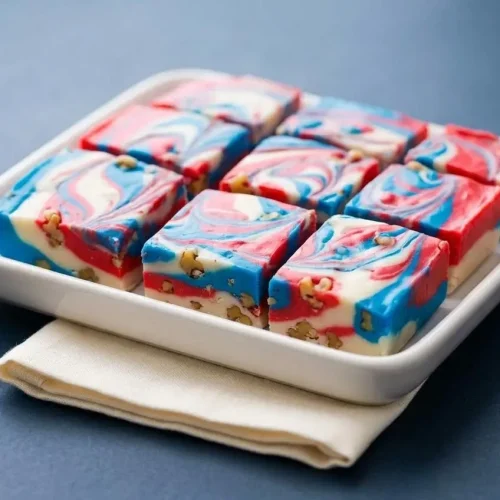
Red White and Blue Fudge

Equipment
- 8×8 baking dish
- Microwave-safe bowls
- Rubber spatula
- Sharp knife
- Parchment Paper
Ingredients
- 4 1/2 cups white chocolate chips
- 21 ounces condensed milk
- food coloring: red and blue
- mix ins: walnuts
Instructions
- Divide the white chocolate chips evenly among 3 microwave-safe bowls, using 1 1/2 cups in each, then add one-third of the condensed milk to every bowl. The portions should look evenly split so the colored layers stack at the same height.
- Line an 8×8 baking dish with parchment paper and leave some overhang on the sides. The paper should sit flat in the pan with enough extra at the edges to lift the chilled fudge out cleanly later.
- Heat the first bowl for 30 seconds, stir well, then microwave it for another 30 seconds and mix until smooth before stirring in eight drops or more of blue gel food color. When it is ready, the mixture will look glossy and spreadable with an even blue color and no dry streaks.
- Spread the blue mixture into the lined dish and smooth the top with a spatula, then refrigerate it for 10 minutes. The layer should look level and lightly firmed so the next layer sits on top instead of sinking in.
- Microwave the second bowl for 30 seconds, stir, then heat it for another 30 seconds and stir until smooth before spreading it over the chilled blue layer. The white layer should glide across the surface without dragging too much blue into it, then chill it for 10 minutes.
- Warm the third bowl for 30 seconds, stir, then microwave it for another 30 seconds and mix until smooth before adding eight drops or more of red gel food color. The finished mixture should be creamy, evenly tinted, and easy to spread without looking oily or curdled.
- Spread the red layer over the white layer, level the top, add red sprinkles, and refrigerate for 10 minutes. The top should set just enough to hold the sprinkles and keep the red layer distinct.
- Take the pan from the refrigerator, let the fudge stand briefly at room temperature, then cut it into squares with a very sharp knife. The slab should feel firm but not rock hard, which helps the knife pass through the layers without cracking them.