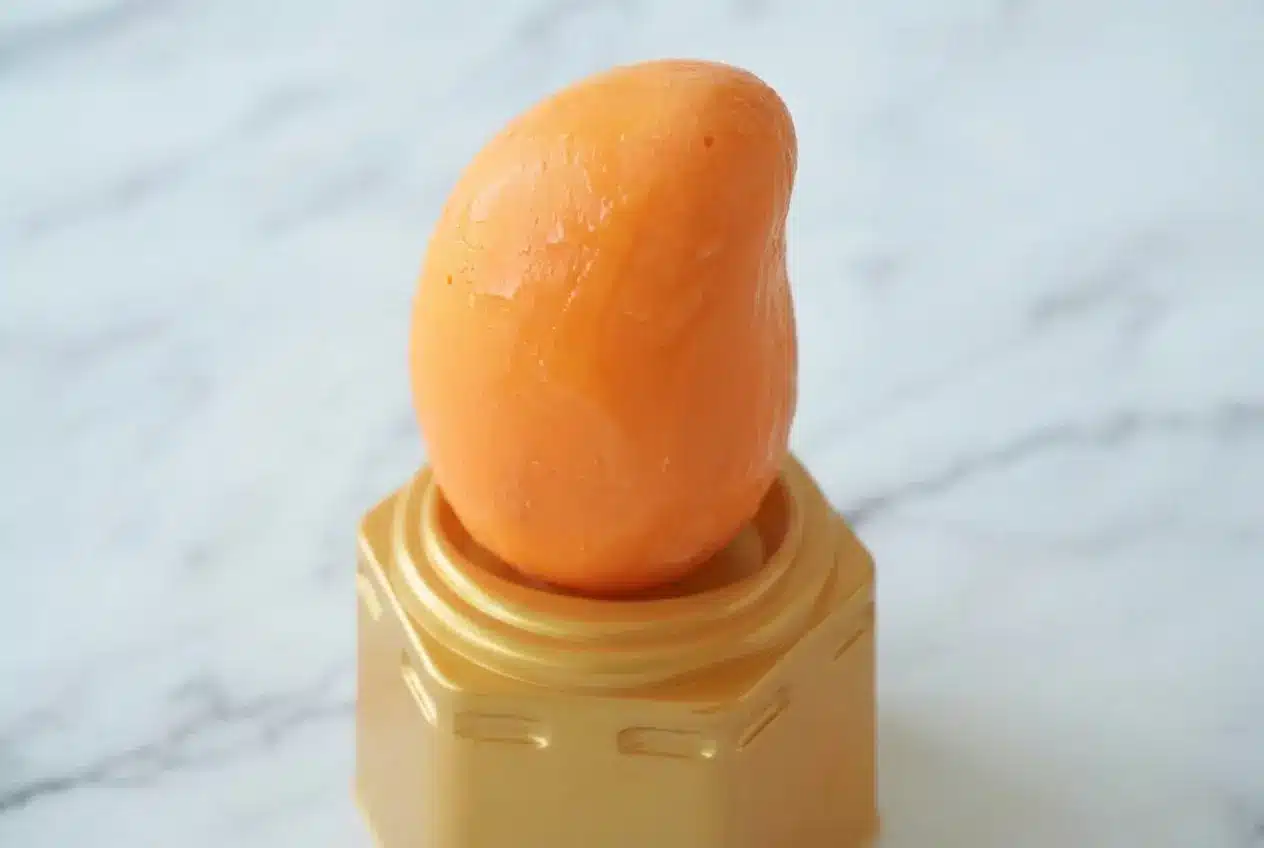
The first time I saw this Chinese frozen treat all over TikTok, I knew it was more than a passing scroll-stop. That glossy mango shape, the creamy center, the crackly shell, it had all the charm of a TikTok viral dessert with the kind of detail that makes you want to clear freezer space immediately.
This Propitious Mango Ice Cream Recipe is my home-kitchen answer to the trend, with a smarter, more luxurious twist. If you want a foolproof no-churn ice cream that looks dramatic, tastes genuinely delicious, and feels a little special for summer gatherings, this one is absolutely worth making.
Why You’ll Love This Recipe
Roasted fruit magic: I discovered that lightly roasting the mango before blending changes everything. It pulls off extra moisture, deepens the fruit flavor, and gives the mango puree a richer, more concentrated taste.
Creamier no-churn texture: In my kitchen, that little roasting step helps reduce ice crystal formation, so the finished no-churn ice cream stays smoother and more plush. The result is almost gelatinous in the best way, soft on the bite and intensely fruity.
A better shell: Swapping waxy candy melts for real white chocolate with cocoa butter gives you a white chocolate shell with true flavor and a clean snap. It is the same kind of upgrade that makes a simple trend feel truly special, much like our date snickers recipe turns an internet favorite into something you would proudly serve to guests.
Looks viral, tastes gourmet: Propitious mango ice cream is gorgeous on camera, but this version is built for real dessert lovers. Every bite brings creamy fruit, cold whipped richness, and that delicate chocolate finish instead of a sugary, artificial coating.
Ingredients and Substitutions
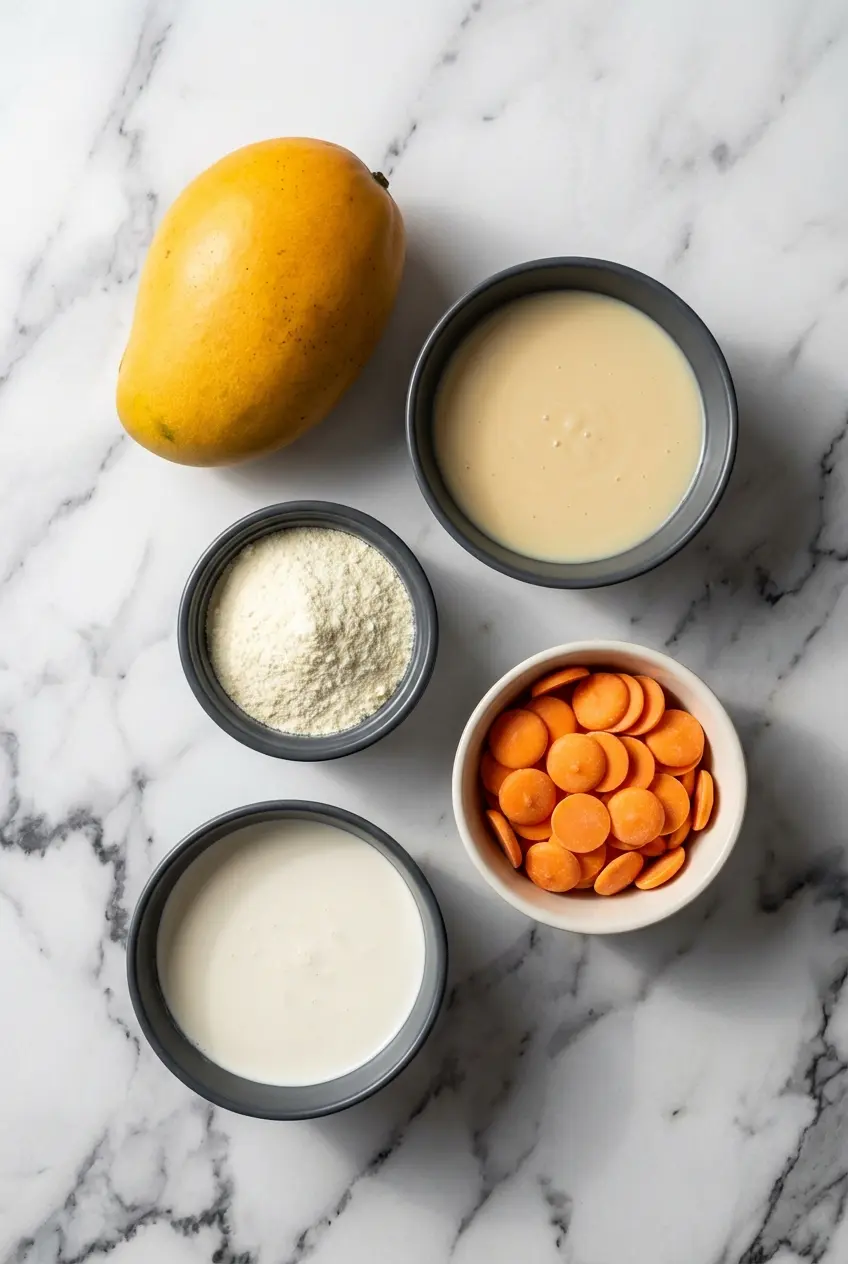
These few ingredients do a lot of heavy lifting, building a silky mango base and the signature outer coating that gives this frozen treat its beautiful finish.
Ingredients
- 1 Large Mango (about 1 Cup / 250 g)
- 2/3 Cup (7 oz / 200 g) Sweetened Condensed Milk
- 1 1/2 Tbsp (12 g) Instant Dry Whole Milk
- 3/4 Cup (6 oz / 175 g) Heavy Cream, Cold
- 1 Bag (12 oz / 340g) Orange Candy Melts
Ingredient Notes & Substitutions
Mango: Choose a ripe, fragrant mango that gives slightly when pressed. Ataulfo and Alphonso style mangoes are especially lovely here because they are buttery, sweet, and less fibrous, though any flavorful ripe mango can work once blended and strained.
Candy Melts: For the gourmet version, I strongly recommend swapping the 1 Bag (12 oz / 340g) Orange Candy Melts for an equal weight, 12 oz, of high-quality white chocolate tempered with cocoa butter. The flavor is cleaner, the finish is less waxy, and the shell snaps beautifully when you bite in.
Heavy Cream: Cold heavy whipping cream is what gives the base its airy body. For a dairy-free tropical version, use chilled coconut cream and replace the regular sweetened condensed milk with sweetened condensed coconut milk for a flavor that still feels lush and scoop-shop worthy.
Flavor Variations: A pinch of chili powder or Tajin folded into the mango puree gives the dessert a sweet-hot edge that is fantastic in summer. If you want to play with the concept, roasted peach puree also works beautifully, and a lemon posset base can be stunning in a different fruit-shaped silicone mold.
Dry Milk Powder: Do not skip this if you can help it. It quietly improves the body of the ice cream by helping absorb moisture, which is one of the reasons the final texture feels creamier and less icy.
How to Make Propitious Mango Ice Cream Recipe
Prepare the Mango Base
- Peel and chop the mango, then roast the pieces lightly just until some of the surface moisture cooks off and the fruit smells extra fragrant. Let it cool slightly, blend it into a smooth mango puree, then press it through a fine-mesh sieve so none of the stringy fibers end up in the final ice cream.
- Scoop out 1/4 cup of the strained puree into a microwave-safe bowl and warm it in the microwave for about 30 seconds. Keep it warm, not boiling, then stir in the instant dry whole milk until it dissolves completely and the mixture feels smooth, with no sandy texture left behind. Leave it uncovered until it cools to room temperature.
Whip and Fold the Cream
- Pour the cold heavy cream into a chilled mixing bowl and whip on high speed until medium-stiff peaks form. You want the cream to look billowy and thick, holding its shape but still appearing silky rather than dry.
- In a separate bowl, stir together the remaining mango puree, the sweetened condensed milk, and the cooled milk-powder mixture until the color is even and the base is completely smooth.
- Fold the whipped cream into the mango mixture gently and slowly so you keep as much air in the mixture as possible. Stop as soon as it looks mostly uniform, with only a few faint streaks remaining, because overmixing can knock out that lovely lightness.
Fill the Molds and Freeze
- Spoon or pipe the mixture into a 3D mango silicone mold, then tap the mold gently on the counter to bring trapped air bubbles to the top. Set the lid in place and fill any remaining empty spaces through the openings so the shape comes out full and neat.
- If your mold has built-in holders, slide in the popsicle sticks now. If it does not, leave them out for the moment and move straight to freezing.
- Freeze the filled molds for at least 6 hours, though overnight is even better, until the pops are completely solid all the way through.
- If your mold did not hold the sticks earlier, dip each popsicle stick in warm water, dry it off, and press it carefully into the center of each frozen pop. It should slip in without forcing, then the pops need to go back into the freezer for 20 mins to 1 hour until firmly set again.
Coat and Assemble
- Melt the candy melts, or your white chocolate, in a microwave-safe bowl or tall cup according to package directions, stirring until the coating is glossy and smooth. At this stage it should smell sweet and warm, with no lumps left at all.
- Carefully unmold the frozen pops and wipe the mold clean. Brush or spread a thin coating inside each mold cavity and let it harden, then nestle an ice cream pop into one shell, top it with the second shell, and seal the edges with the back of a warm spoon for a tidy, realistic finish.
Secrets for Perfection
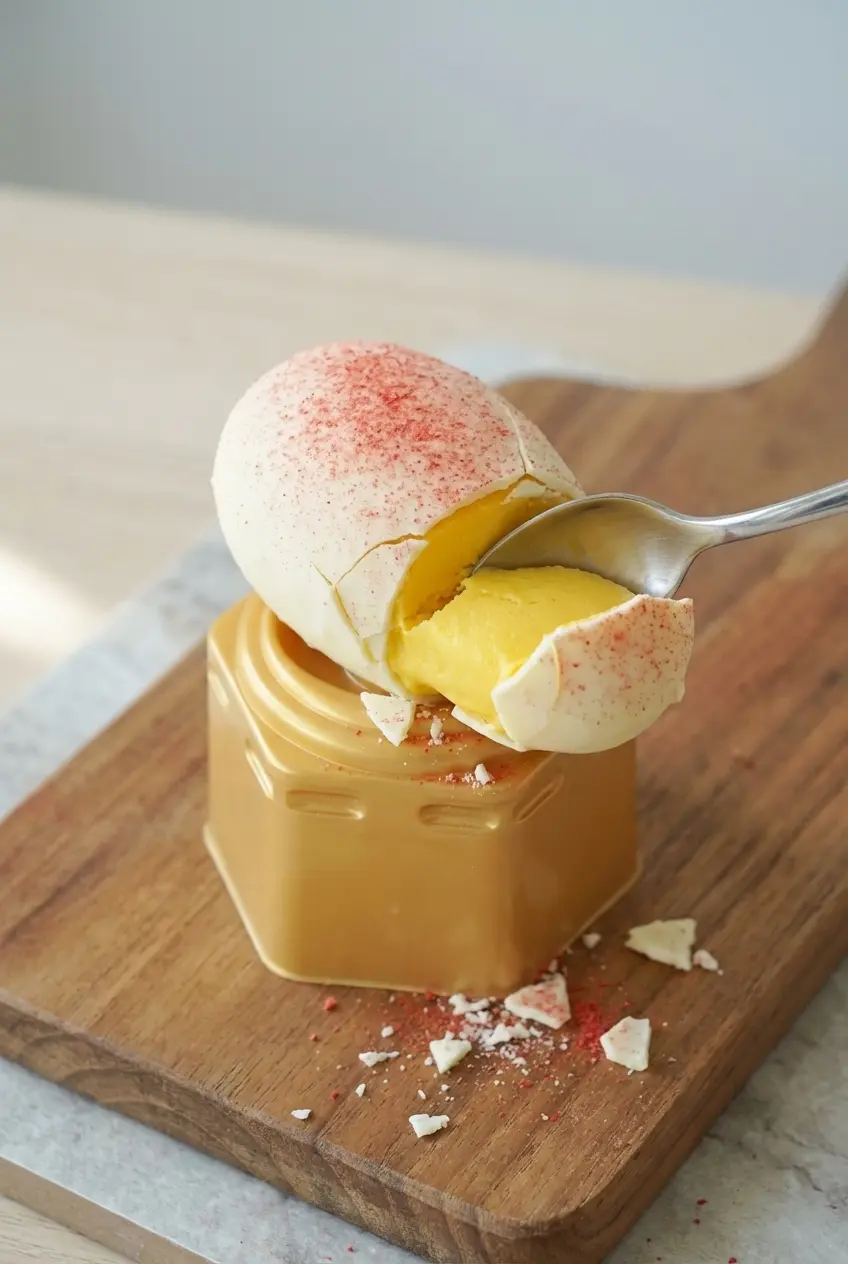
The shell works best when the timing feels almost theatrical. The ice cream should be deeply frozen, truly bone-cold, while the chocolate coating should be warm and fluid but never scorching, because that contrast gives you a thin shell that sets quickly instead of a thick layer that drags and clumps.
One of my favorite little tricks is adding exactly 1 tablespoon of coconut oil to the melted white chocolate. In pastry kitchens this kind of adjustment is a classic way to improve flow, and adding exactly 1 tablespoon of coconut oil to the melted white chocolate thins it out perfectly so the coating glides on in a finer layer and keeps that crisp, delicate bite.
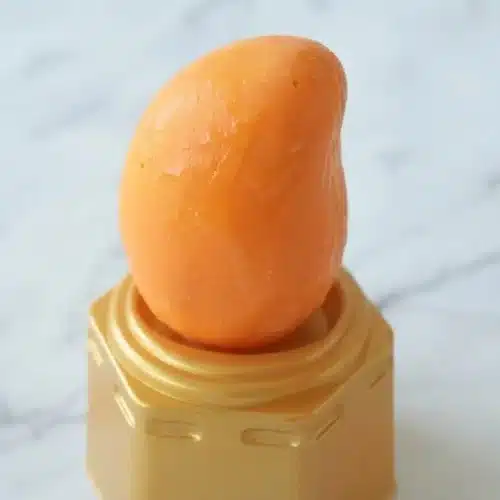
If you want the finished pop to look more like a real propitious mango, dust the shell lightly with freeze-dried strawberry powder. That soft red-orange blush makes the shape look startlingly realistic, especially against a creamy white chocolate shell.
The Cultural Meaning Behind Propitious Ice Cream
The word propitious means auspicious, favorable, and linked with good fortune, which is why the name carries so much charm. In Chinese culture, fruit is often tied to symbolism, celebration, and well-wishing, so this dessert is not just cute, it borrows from a deeper language of abundance and blessing.
That symbolism helps explain why the trend took off so powerfully online. The hyper-realistic shape feels modern and playful, but it sits on top of older meanings, and discussions of traditional Chinese culture where mangoes and specific fruits are symbols of prosperity give helpful context for why mango imagery carries such warmth and fascination.
What I love most is how this dessert bridges old and new. It has the polished visual drama of Instagram and TikTok, but it also belongs to the same wider conversation about Asian sweets and edible artistry that you can see in delicately textured desserts like our yokan jelly recipe, where beauty and texture matter just as much as sweetness.
Essential Equipment For Realistic 3D Ice Cream
The mold matters more than most people expect. Look for a food-grade silicone mold that feels flexible but not flimsy, with a lid that fits cleanly and creates tidy seams, because a poor mold leaves you with warped edges and uneven surfaces that are hard to coat neatly.
A tall cup for melting the coating can also make life easier, especially if you ever move from brushing shells to dipping other frozen desserts. I also like having a piping bag or injector syringe nearby, since they help fill every corner of the silicone mold without leaving hidden pockets of air.
When it comes to coloring real white chocolate, only oil-based food coloring is safe to use. Water-based color can make the cocoa butter seize almost instantly, turning your silky coating into a thick paste, so brands labeled specifically for chocolate or candy work are the ones to seek out if you want that vivid mango tone without ruining the batch.
Pro Tips & Troubleshooting
Pro Tips
- Chill the mixing bowl and whisk attachment in the freezer for 15 minutes before whipping the heavy cream. That extra-cold start helps the cream whip up with better volume and a lighter texture.
- Use an injector syringe or piping bag to fill the silicone mold fully and neatly. It is the easiest way to avoid hollow spots and uneven corners.
- Add 1 tablespoon of fresh lemon juice to the mango puree if you want a brighter tropical flavor. It also helps keep the fruit from dulling in color.
- If you are using real white chocolate for the shell, keep the coating warm and fluid, but not hot, while the pops stay fully frozen. That balance is just as important for smooth texture here as it is in a classic vanilla ice cream, where temperature control determines whether the final dessert feels silky or icy.
- Dust the coated pops with freeze-dried strawberry powder for a realistic blush. It is a tiny touch, but visually it makes the finished dessert look much closer to an actual ripe mango.
Common Mistakes to Avoid
- Overwhipping the heavy cream until it turns grainy or clumpy. Once that happens, the ice cream base loses its smooth, mousse-like quality.
- Skipping the straining step for the mango puree. Fibers that seem harmless at first become very noticeable once frozen.
- Not tapping the filled molds firmly enough on the counter. Trapped air bubbles can leave pits and craters that spoil the clean mango shape.
- Using water-based food coloring in real white chocolate. That splash of moisture can seize the chocolate almost immediately.
- Bringing deeply frozen pops straight into a hot, humid kitchen for too long. That sudden temperature shock can cause condensation, sweating, or even cracking in the shell, so I like to unmold and work in small batches while keeping the rest in the freezer.
Serving & Storage
Serving Ideas
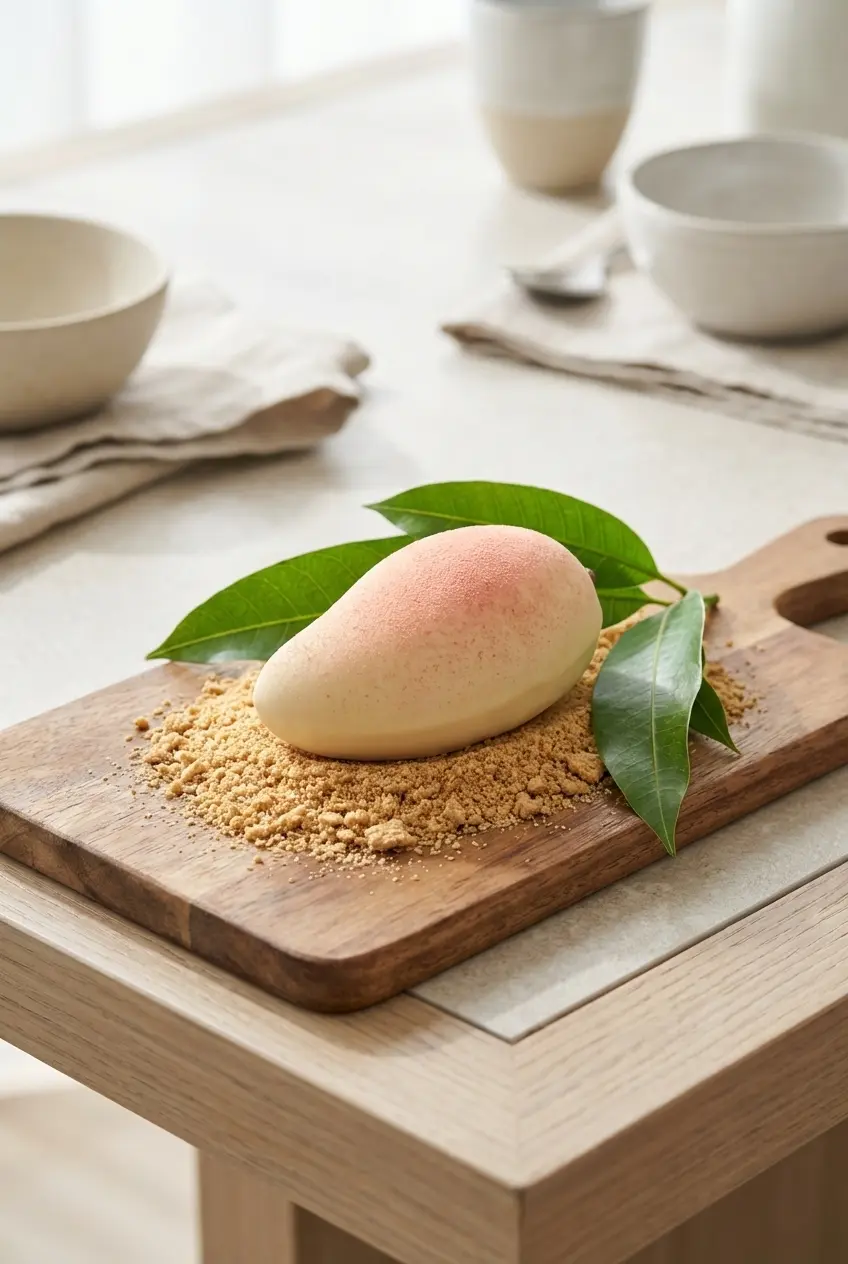
For the prettiest presentation, I like to set these on a bed of crushed graham crackers or Biscoff cookies so they look like little mangoes resting on edible sand. A wooden board lined with real mango leaves gives the whole platter that polished TikTok look without feeling fussy.
Because the shell is crisp and the center is creamy, these are best served straight from the freezer after just a minute or two on the counter. That short pause softens the no-churn ice cream slightly, so the bite feels creamy rather than rock hard.
Storage & Make-Ahead
Once the pops are fully coated and set, wrap each one individually in parchment paper before placing them in an airtight, freezer-safe container. This keeps the shells from sticking to one another and helps block out stray freezer odors that can dull the fresh mango flavor.
They are perfect for making ahead because the shape and shell hold beautifully when stored properly. I also find that careful wrapping prevents surface frost, which is especially helpful when you have taken the time to create that smooth, realistic finish.
Propitious Mango Ice Cream Recipe

Equipment
- 3D mango silicone mold
- Fine-Mesh Sieve
- Electric hand mixer
- Popsicle sticks
Ingredients
- 1 Large Mango (about 1 Cup / 250 g)
- 2/3 Cup (7 oz / 200 g) Sweetened Condensed Milk
- 1 1/2 Tbsp (12 g) Instant Dry Whole Milk
- 3/4 Cup (6 oz / 175 g) Heavy Cream, Cold
- 1 Bag (12 oz / 340g) Orange Candy Melts
Instructions
Prepare the Mango Base
- Peel and chop the mango, then roast the pieces lightly just until some of the surface moisture cooks off and the fruit smells extra fragrant. Let it cool slightly, blend it into a smooth mango puree, then press it through a fine-mesh sieve so no stringy fibers end up in the final ice cream.
- Scoop out 1/4 cup of the strained puree into a microwave-safe bowl and warm it in the microwave for about 30 seconds. Keep it warm, not boiling, then stir in the instant dry whole milk until it dissolves completely and the mixture is smooth. Leave it uncovered until it cools to room temperature.
Whip and Fold the Cream
- Pour the cold heavy cream into a chilled mixing bowl and whip on high speed until medium-stiff peaks form. The cream should look billowy and hold its shape while remaining silky.
- In a separate bowl, stir together the remaining mango puree, the sweetened condensed milk, and the cooled milk-powder mixture until the color is even and the base is completely smooth.
- Fold the whipped cream into the mango mixture gently and slowly to keep as much air in the base as possible. Stop mixing as soon as it looks mostly uniform to maintain a light, airy texture.
Fill the Molds and Freeze
- Spoon or pipe the mixture into a 3D mango silicone mold, then tap the mold gently on the counter to bring trapped air bubbles to the top. Set the lid in place and fill any remaining empty spaces through the openings so the shape comes out neat.
- If your mold has built-in holders, slide in the popsicle sticks now. If it does not, leave them out for the moment.
- Freeze the filled molds for at least 6 hours, or ideally overnight, until the pops are completely solid all the way through.
- If your mold did not hold the sticks earlier, dip each popsicle stick in warm water, dry it off, and press it carefully into the center of each frozen pop. Return the pops to the freezer for 20 minutes to 1 hour until firmly set again.
Coat and Assemble
- Melt the candy melts or white chocolate in a microwave-safe bowl according to package directions, stirring until the coating is glossy and completely smooth.
- Carefully unmold the frozen pops and wipe the mold clean. Brush or spread a thin chocolate coating inside each mold cavity and let it harden. Nestle an ice cream pop into one half of the shell, top it with the second shell, and seal the edges with the back of a warm spoon for a realistic finish.
Notes
Conclusion
This recipe turns a viral internet sensation into something genuinely delicious, with a creamier center, brighter fruit flavor, and a shell that tastes as good as it looks. Roasting the mango and using real white chocolate are small steps, but they make a world of difference.
Once you make your first batch, the process feels surprisingly easy. From there, it is simple to play with little variations and make this propitious mango idea your own.